
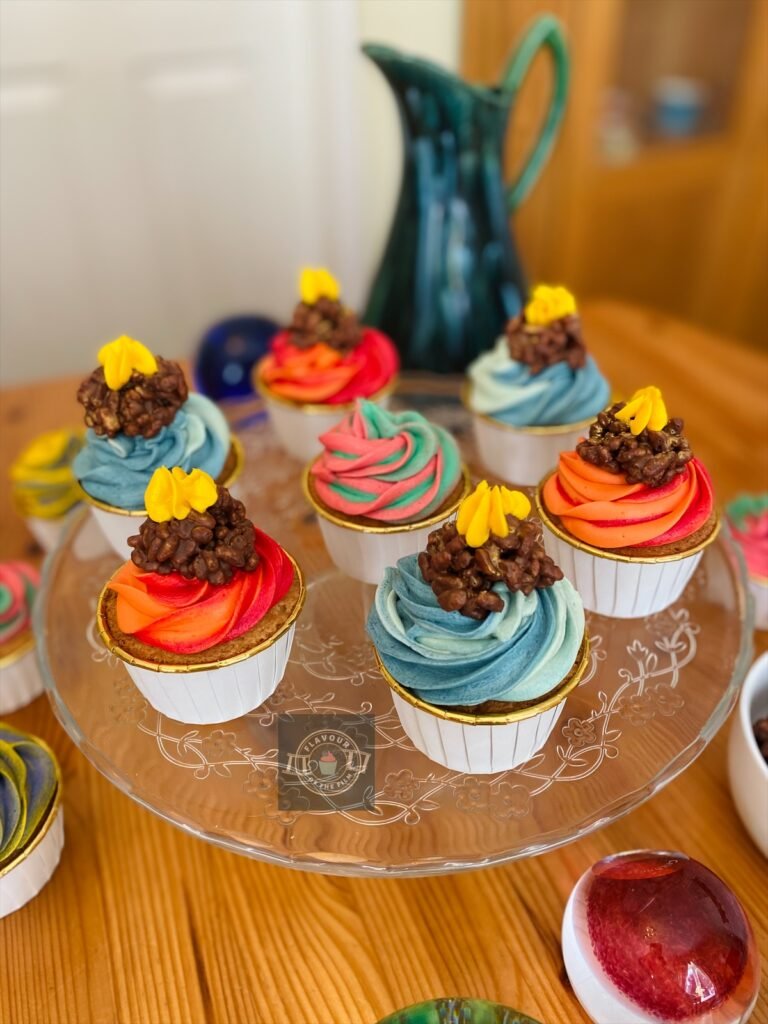
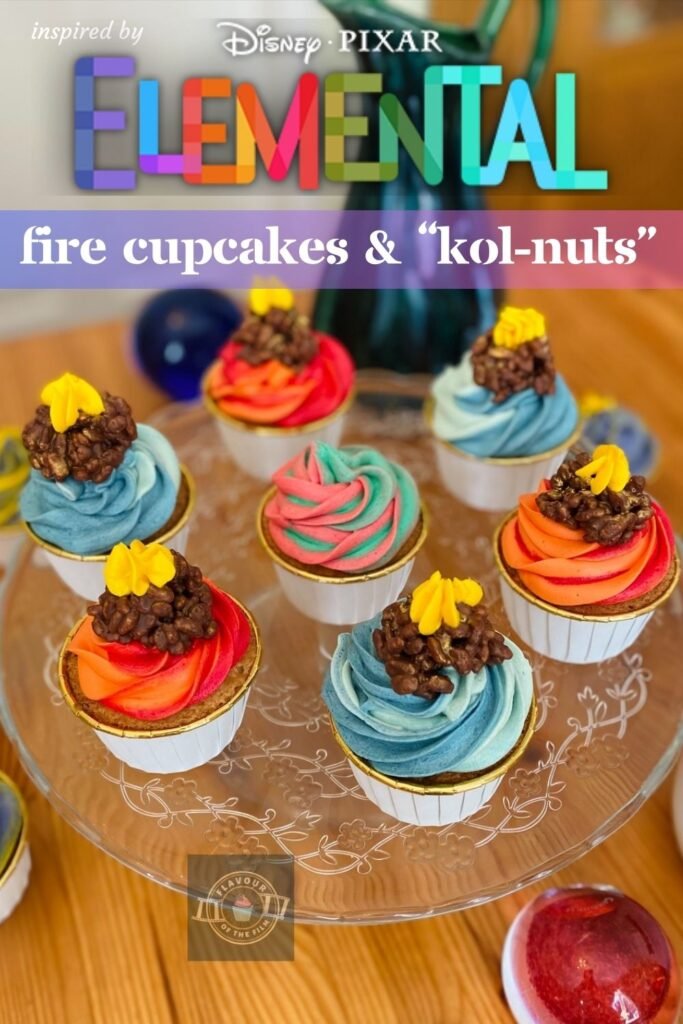
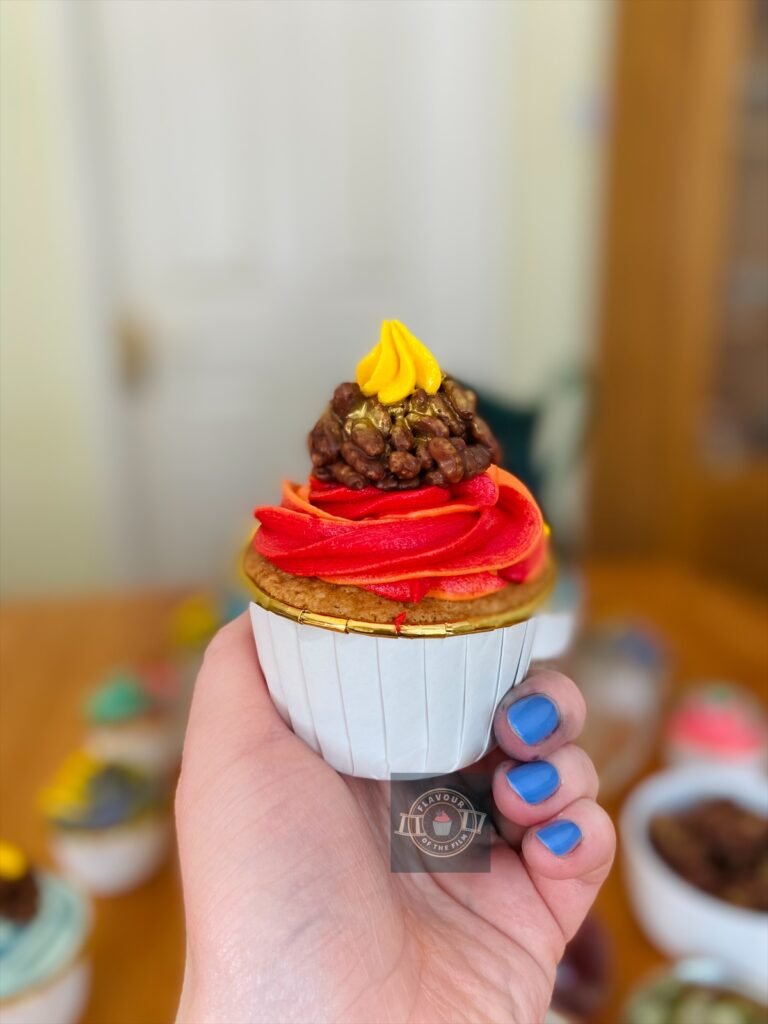
Sweet treats for a very sweet film. My Elemental birthday cakes are topped with varying mineral crystal light inspired buttercream swirls and “kol-nuts” (chocolate coated Rice Krispie bites). The perfect treat for an Elemental themed party or movie night! Glass blowers at the ready, let’s shape some cupcakes.
Contents
The Bake
As I discussed in my Barbie celebration cake recipe and my Living inspired Knickerbocker Glory recipe, I love a film with varying layers.
Much like Shrek, a film with multiple interconnecting layers will take the cake for me (see what I did there?).
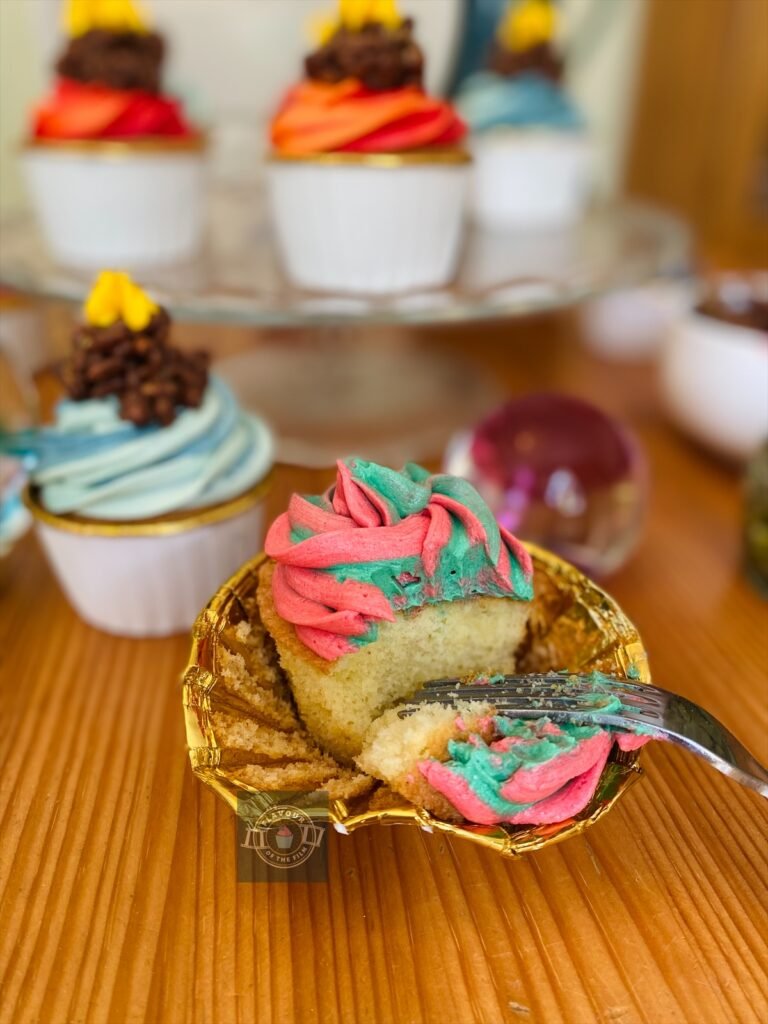
Seeing as Elemental is a sweet, well layered film full of colour, I created a recipe using those same elements in honour of this lovely film. These Elemental inspired cupcakes are perfect if you’re looking for alternatives to Elemental themed cake ideas!
It’s a nice and easy one, which we all love.

My Elemental birthday cakes celebrate a particular scene, as well as the two lead characters.
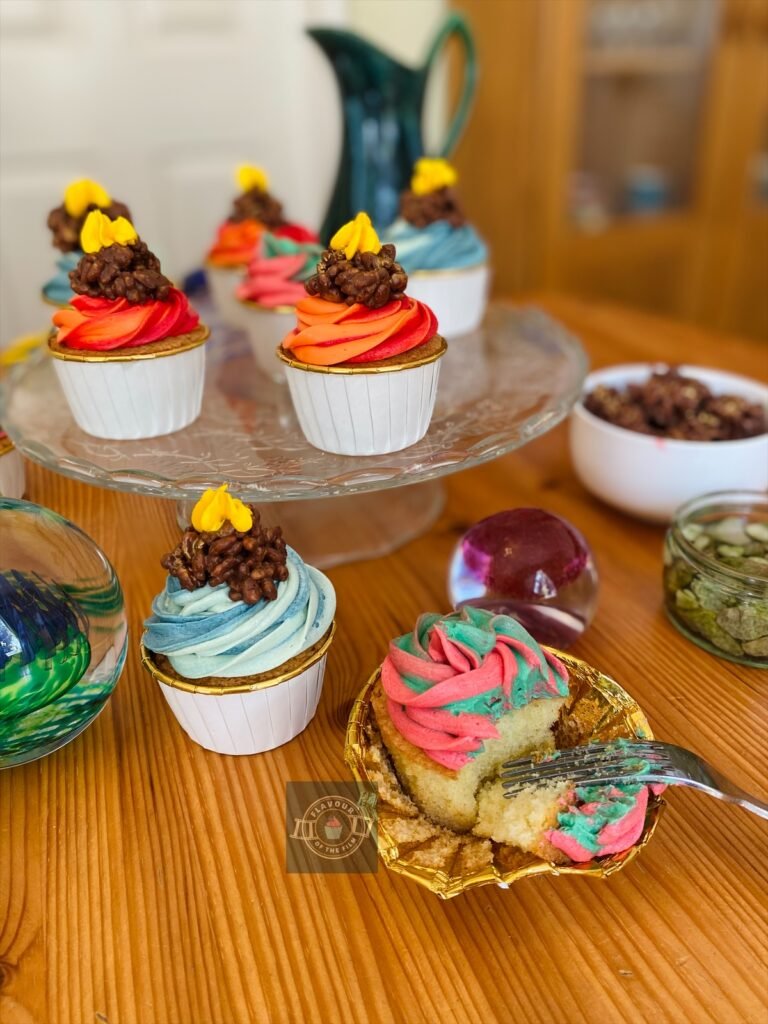
Using various colours, I created a recipe that celebrates Ember (with a little extra surprise on the top) and Wade AND the scene where they discover the crystals around the lake change Ember’s colour when she touches them.
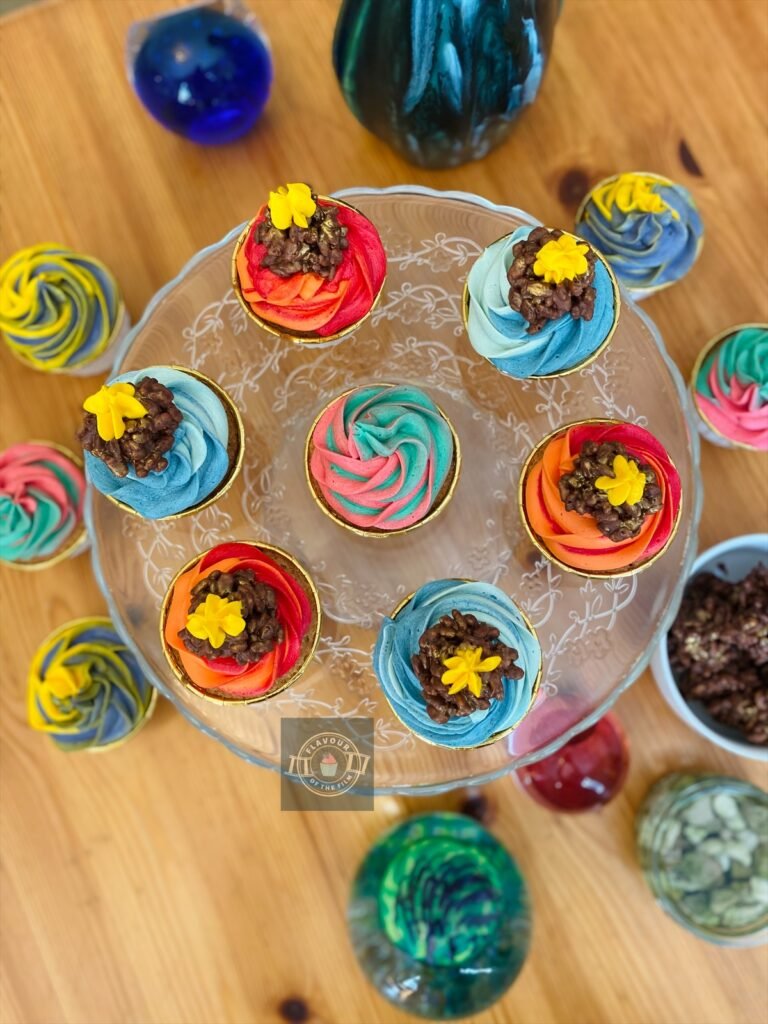
Thanks to the minerals in the crystals, Ember turns a variety of different colours when she stands on them. Colours like blue, pink, purple, yellow and green and pink together.
It’s a really beautiful scene; the colours just burst into life through Ember, and through Wade when he shows off his colourful water skills.
Thus, the frosting on my Elemental cupcakes reflect this particular scene. I really love a multi-coloured swirl on a cupcake: it’s so satisfying to look at (and eat)!
That extra little surprise I just mentioned?
Chocolate covered Rice Krispie clusters. I wanted to get in a little something else that features in the film to go with my Elemental birthday cakes.
Ember’s family shop sells little fire treats called “kol-nuts” which look both delicious and dangerous at the same time. They’re used by Ember’s father to test Wade at one point, so they feature in the film during important scenes, making them the ideal food to recreate within my Elemental inspired cupcakes recipe.
Kol-nuts still glow after they’ve been made, like the embers of a former fire still giving light. To achieve this effect, I used both edible gold glitter and buttercream frosting to emanate the heat element.

In terms of flavours for these Elemental birthday cakes, your word is law.
That’s right, friends. These cupcakes are completely customisable. You choose the flavour you want for the sponge, and you choose the flavour – or flavours – that you want in the frosting. Whether that be zest, extract or chocolate, it’s your choice.
Heck, you could even choose multiple flavours for the frosting to match the colours. Or not match the colours. Go wild! It makes creating these delicious fire cupcakes all the more fun.
I personally chose orange for my Elemental birthday cupcake flavours this time. Mostly because I know it’s a hit in this house, but also because I liked the idea of tasting orange when eating the fire cupcakes that are topped with orange and red frosting and the fire treats.
Top Tips
- As always, avoid overmixing the cake batter. That way you can achieve the lightest and fluffiest sponges possible.
- Weigh out your eggs and get as close to 150g as possible, then weigh out the rest of your ingredients to that exact weight for the ultimate sponge.
- Choose whatever flavours you fancy on the day: zest, extract or chocolate. Avoid adding melted chocolate to the sponges, but add cocoa powder to them instead if chocolate cupcakes are desired. 25g cocoa powder with 125g self-raising flour should provide a delicious chocolate flavour.
- Feel free to add melted chocolate to the buttercream instead, just be aware that it’ll change the colours of the frosting depending on the type of chocolate you use. White chocolate won’t alter the colours drastically, but milk and dark chocolate are likely to.
- Chocolate flavoured extracts are available online and they won’t alter the colour of your frosting – they also last for ages so are an ideal alternative should you be looking for one.
- You can choose different flavours for the different coloured frosting to make delicious flavour combos! Lemon and lime; orange and almond, and chocolate and hazelnut are all delicious examples. Get creative!
- To alter the batch size, simply half, double or even triple the recipe depending on your needs.
- Like my Harry Potter cupcakes and my The Powerpuff Girls jam filled cupcakes, I used a closed 2D piping tip to achieve the swirl of the buttercream frosting on my fire cupcakes.
- Cupcake cases that hold their shape without a 12-hole tray are ideal – but not essential – and can be bought online from various shops.
I love making cupcakes and these were a joy to both create and eat. My Elemental birthday cakes with mineral crystal light inspired frosting and “kol-nuts” really are the perfect sweet treat to make for a Disney’s Elemental themed party or movie night. They’re so easy, so fun and pretty quick to whip up. A lot of fun to make with loved ones, too! Enjoy!
Happy baking, happy eating!
The Recipe
Ingredients
Elemental birthday cakes:
- 150g [5.25 oz] unsalted butter room temperature or slightly softened
- 150g [¾ cup] caster sugar
- 150g eggs [2 large]
- 150g [¾ cup + 3 tbsp] self-raising flour
- Zest of 1 orange/citrus fruit of your choice unwaxed
- 2 tsp orange extract/citrus fruit extract of your choice
- – OR 1-2 tsp your choice of extract/flavouring
Chocolate Rice Krispie “kol-nuts”:
- 100g [3.5 oz] milk or dark chocolate
- 40g [roughly ¾ cup] Rice Krispies
- Edible gold glitter
Decoration:
- 200g [7 oz] unsalted butter room temperature or slightly softened
- 400g [2¾ cups] icing [confectioners] sugar
- Juice of 1 orange/citrus fruit of your choice
- – OR melted chocolate to taste
- – OR 1-2 tsp extract of your choice
- Red food colouring oil based
- Orange food colouring oil based
- Pink food colouring oil based
- Light blue food colouring oil based
- Green food colouring oil based
- Purple food colouring oil based
- Yellow food colouring oil based
Serves: 12
Preparation time: 25 minutes
Baking time: 15 – 20 minutes
Decorating time: 30 minutes
Method
Elemental birthday cakes:
- Preheat your oven to 180°C [350°C] or 160°C fan. Either fill a 12-hole tray with muffin cases or lay out 12 shape-holding cupcake cases on a baking tray. Line the baking tray with a sheet of greaseproof paper/baking parchment if it’s a little old.
- Weigh out your eggs and get as close to 150g as possible. Then, measure out the rest of your ingredients to the exact weight of your eggs.
- In a large mixing bowl, cream together the butter and sugar until pale and fluffy.
- One at a time, add the eggs and beat in until fully incorporated.
- Add the zest and/or flavouring/extract that you are using and beat in until fully incorporated.
- Sieve in the flour and beat in just until the flour is no longer visible. Avoid over mixing here.
- Using a tablespoon or ice cream scoop, split the mixture evenly into all of your cake cases.
- Bake your cupcakes on the middle shelf for 15 – 20 minutes until bakes. Your cupcakes will be baked through when a cocktail stick comes out clean when tested (a few crumbs is fine); the surfaces of the cupcakes bounce back when gently pressed on, and you hear little to no crackling/bubbling when you listen to them.
- Once baked, leave to cool in or on the tray for around 10 minutes before transferring to a wire rack to cool completely.
Chocolate Rice Krispie “kol-nuts”:
- While your Elemental birthday cakes are cooling, make your “kol-nuts”.
- Either using the tray your cupcakes sat on, or using a fresh one, line a baking tray with greaseproof paper/baking parchment. Set aside.
- In a heatproof bowl, melt your chocolate in the microwave in 30 second bursts, stirring in between until completely melted.
- Pour the Rice Krispies into the melted chocolate and stir in gently until all of the Rice Krispies are covered. You want the mix to be chocolatey for the colour!
- Using wet hands and/or a spoon, shape the Rice Krispie chocolate mix into small clusters and set them on the lined baking tray. The size is up to you, but I would recommend making them no bigger than the size of a ping pong ball.
- Chill your “kol-nut” treats in the fridge while you decorate your fire cupcakes.
Buttercream:
- In a large mixing bowl, beat the butter to loosen and smoothen it.
- Add ½ the icing sugar and beat in until light and fluffy.
- Do the same with the other ½ of the icing sugar.
- If using just one kind of flavouring, add in the juice or extract now. Skip this step for now if using multiple flavours.
- Sprinkle in a little more icing sugar if the juice has made your buttercream quite loose. Do this until it has thickened a little more.
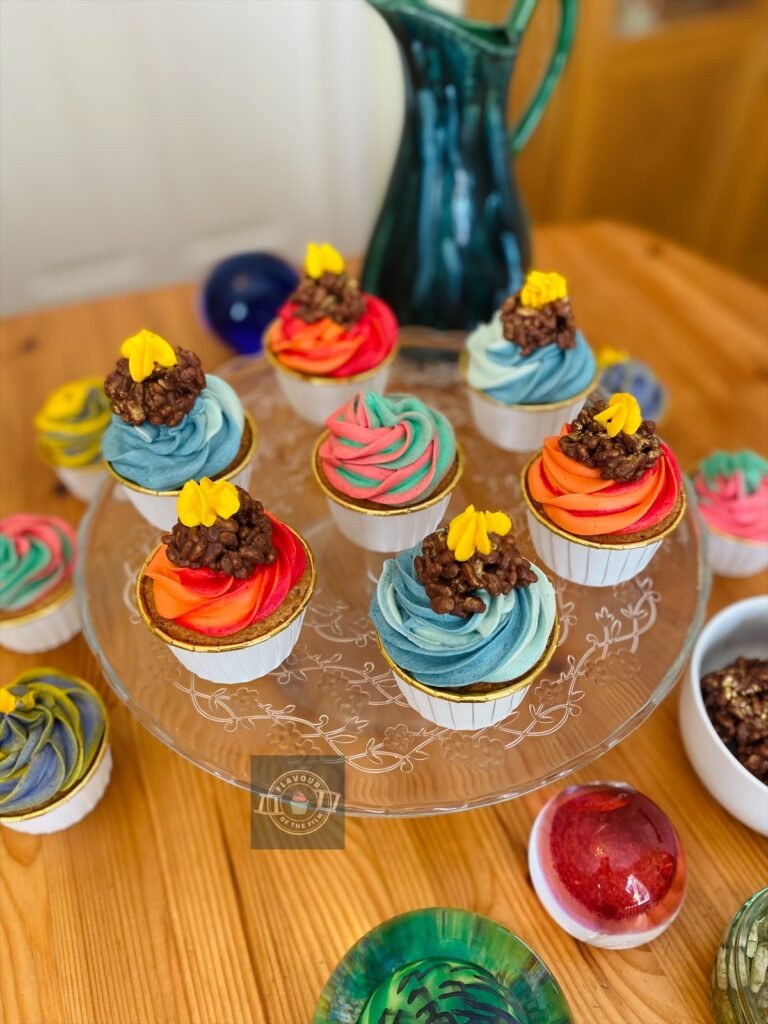
- Divide the buttercream equally into smaller bowls. One bowl for each colour you have chosen. I did 8 colours in total, but you can pick and choose! Pink & green, red & orange and the two shades of blue are key for an Elemental feel.
- Add the colours into the individual bowls of buttercream. One colour per bowl to make it easier. Start with a little amount of food colouring, mix in and then add to it if needed.
- If using multiple flavourings, add them to the associated colours and mix in. Start with a little amount, like ¼ tsp, then add more to taste if desired. Extracts and flavourings are concentrated amounts of flavour so be mindful of that during this stage.
Decoration preparation:
- Prepare a sandwich bag or piping bag for the amount of colour combinations that you are going for. I used four piping bags for the colour combinations, then another one for the extra yellow decoration at the end.
- Cut the ends off the piping/sandwich bags. Slide your 2D closed star piping tip into the end of the first one.
- Choose your first colour combination to pipe i.e. red & orange. Spoon the red buttercream into one side of the piping bag, pushing it further down with the spoon. Avoid touching the other side with the red buttercream as much as possible.
- Spoon the orange into the other side, using the spoon to edge it down as close to the bottom as possible. Don’t worry if the colours touch now, just try not to let them completely mix together.
- Squeeze the buttercream down to the tip of your piping bag and push it out of the tip, back into the bowl that had the red buttercream into it. Do this until you see the orange coming through, then stop.
Decoration:
- Pipe the buttercream in swirls onto at least 3 of your cupcakes – depending on how many colour combinations you have chosen. If you are only going with two combinations i.e. red & orange and the two blues, pipe the red & orange combination onto 6 of your fire cupcakes. The more colour combinations you have chosen, the less cupcakes will have those colours on.
- Repeat steps 3 to 6 with the rest of your colour combinations, until all of your cupcakes are frosted. Be sure to remove your 2D closed star piping tip from each used bag and rinse it fully with warm water before attaching it to the next bag. Keep roughly 1 tbsp of yellow buttercream to the side for the last touch of flames.
- Retrieve your “kol-nuts” from the fridge. Spray them with the edible gold glitter in concentrated areas to create glowing spots. Top the cupcakes with one “kol-nut” each.
- Pipe the remaining yellow frosting in little stars on the “kol-nuts” to represent the top of a flame.
- If using the shape-holding cupcake cases, be sure to pull the concertina apart before trying to peel the case away from the cake to eat.
These Elemental birthday cakes are so light and fluffy, you’ll want to eat multiple during your Pixar’s Elemental movie night or themed party! Any spare “kol-nuts” make a great alternative for a picky eater. These cupcakes will last around 4+ days in an airtight container/cake case/cake box. Avoid refrigerating as they are prone to drying out. Enjoy!
The Film
Elemental is one of Disney Pixar’s more recent film releases. I watched it pretty much as soon as it came out and thoroughly enjoyed it. To be honest, it feels really underrated!
It’s such a sweet story with multiple layers and multiple lessons for audiences of all ages to soak up.
There are a lot of elements of Elemental (I know) that I really enjoy: the beautiful colour palette, the gorgeous styles of animation, the enchanting music, the base arc with the added layers of storytelling that build as the film progresses.
It’s also full of clever quips and puns, which I love to see in a family film. Something for everyone.
Most of all, I love the character development that features in Elemental.
I’m a sucker for well rounded character development. Regular readers here will know how much of an advocate for decent character development I am, whether that be in films that are part of a series like Harry Potter…
Or, in stand alone films like Disney’s Big Hero 6. I certainly gush about character development in my Big Hero 6 melon pan recipe post.

Disney Pixar’s Elemental (2023) is the creative brainchild of filmmaker Peter Sohn.
Sohn both directed and wrote Elemental, having co-written it with a team made up by John Hoberg; Kat Likkel and Brenda Hsueh.
Having watched the Making Of documentary on Elemental, I know that Sohn drew inspiration from his own family history and experiences, which just adds even more authenticity to an already lovely story.
A story set in a world where residents of all four main elements; fire, water, earth and air, all live together.
Ember and Wade; a fire person and a water person, are practically thrown together when an accident occurs, setting Ember on the path to save her father’s shop from being shut down. They find a beautiful harmony in their differences and begin to navigate the beginning of a relationship between them, figuring out how that would work (if at all).
Element City is the setting for the film, which we discover early on wasn’t built with fire people in mind.
Looking to start a new life in Element City, Ember’s parents build a part of town to suit them and a fire community grows within it, separate from the centre of the city.
Themes of race, belonging, diaspora and the crossing of varying cultures underline the entire film, raising questions about equal treatment and the mixing of cultures. Ember says early on in the film something we realise she has been taught by her parents and by the society she lives in: “elements don’t mix”.
This is a main theme throughout the film; both in the sense of addressing such a notion as existing in the first place, as well as defying it altogether.
A world where different cultures and different people all blend in harmony is a world I want to be a part of. This kind of respect and love for one another just makes this adventure that is life a much richer and far more rewarding experience. We’ll get there, friends.
Fresh talent led the cast for this film, which I love to see!
Talent like Leah Lewis and Mamoudou Athie gave voices to the lead characters: Ember and Wade.
Alongside them were Shila Ommi; Catherine O’Hara, Ronnie Del Carmen, Wendi McLendon-Covey, Ronobir Lahiri, Mason Wertheimer, Wilma Bonet, Joe Pera, Innocent Ekakitie, Matthew Yang King and more.
Disney’s Elemental is a film that I have stored under my comfort films category, and is one that I have revisited more than once since its release. I recommend it for a wholesome watch which is incredibly visually satisfying.
Recipe Card

Disney Pixar’s Elemental Birthday Cupcakes
Ingredients
Fire cupcakes:
- 150 g [5.25 oz] unsalted butter room temperature or slightly softened
- 150 g [¾ cup] caster sugar
- 150 g eggs [2 large]
- 150 g [¾ cup + 3 tbsp] self-raising flour
- Zest of 1 orange/citrus fruit of your choice unwaxed
- 2 tsp orange extract/citrus fruit extract of your choice
- – OR 1-2 tsp your choice of extract/flavouring
Chocolate Rice Krispie “kol-nuts”:
- 100 g [3.5 oz] milk or dark chocolate
- 40 g [roughly ¾ cup] Rice Krispies
- Edible gold glitter
Decoration:
- 200 g [7 oz] unsalted butter room temperature or slightly softened
- 400 g [2¾ cups] icing [confectioners] sugar
- Juice of 1 orange/citrus fruit of your choice
- – OR melted chocolate to taste
- – OR 1-2 tsp extract of your choice
- Red food colouring oil based
- Orange food colouring oil based
- Pink food colouring oil based
- Light blue food colouring oil based
- Green food colouring oil based
- Purple food colouring oil based
- Yellow food colouring oil based
Instructions
Fire cupcakes:
- Preheat your oven to 180°C [350°C] or 160°C fan. Either fill a 12-hole tray with muffin cases or lay out 12 shape-holding cupcake cases on a baking tray. Line the baking tray with a sheet of greaseproof paper/baking parchment if it’s a little old.
- Weigh out your eggs and get as close to 150g as possible. Then, measure out the rest of your ingredients to the exact weight of your eggs.
- In a large mixing bowl, cream together the butter and sugar until pale and fluffy.
- One at a time, add the eggs and beat in until fully incorporated.
- Add the zest and/or flavouring/extract that you are using and beat in until fully incorporated.
- Sieve in the flour and beat in just until the flour is no longer visible. Avoid over mixing here.
- Using a tablespoon or ice cream scoop, split the mixture evenly into all of your cake cases.
- Bake your cupcakes on the middle shelf for 15 – 20 minutes until bakes. Your cupcakes will be baked through when a cocktail stick comes out clean when tested (a few crumbs is fine); the surfaces of the cupcakes bounce back when gently pressed on, and you hear little to no crackling/bubbling when you listen to them.
- Once baked, leave to cool in or on the tray for around 10 minutes before transferring to a wire rack to cool completely.
Chocolate Rice Krispie “kol-nuts”:
- While your fire cupcakes are cooling, make your “kol-nuts”.
- Either using the tray your cupcakes sat on, or using a fresh one, line a baking tray with greaseproof paper/baking parchment. Set aside.
- In a heatproof bowl, melt your chocolate in the microwave in 30 second bursts, stirring in between until completely melted.
- Pour the Rice Krispies into the melted chocolate and stir in gently until all of the Rice Krispies are covered. You want the mix to be chocolatey for the colour!
- Using wet hands and/or a spoon, shape the Rice Krispie chocolate mix into small clusters and set them on the lined baking tray. The size is up to you, but I would recommend making them no bigger than the size of a ping pong ball.
- Chill your “kol-nut” treats in the fridge while you decorate your fire cupcakes.
Buttercream:
- In a large mixing bowl, beat the butter to loosen and smoothen it.
- Add ½ the icing sugar and beat in until light and fluffy.
- Do the same with the other ½ of the icing sugar.
- If using just one kind of flavouring, add in the juice or extract now. Skip this step for now if using multiple flavours.
- Sprinkle in a little more icing sugar if the juice has made your buttercream quite loose. Do this until it has thickened a little more.
- Divide the buttercream equally into smaller bowls. One bowl for each colour you have chosen. I did 8 colours in total, but you can pick and choose! Pink & green, red & orange and the two shades of blue are key for an Elemental feel.
- Add the colours into the individual bowls of buttercream. One colour per bowl to make it easier. Start with a little amount of food colouring, mix in and then add to it if needed.
- If using multiple flavourings, add them to the associated colours and mix in. Start with a little amount, like ¼ tsp, then add more to taste if desired. Extracts and flavourings are concentrated amounts of flavour so be mindful of that during this stage.
Decoration preparation:
- Prepare a sandwich bag or piping bag for the amount of colour combinations that you are going for. I used four piping bags for the colour combinations, then another one for the extra yellow decoration at the end.
- Cut the ends off the piping/sandwich bags. Slide your 2D closed star piping tip into the end of the first one.
- Choose your first colour combination to pipe i.e. red & orange. Spoon the red buttercream into one side of the piping bag, pushing it further down with the spoon. Avoid touching the other side with the red buttercream as much as possible.
- Spoon the orange into the other side, using the spoon to edge it down as close to the bottom as possible. Don’t worry if the colours touch now, just try not to let them completely mix together.
- Squeeze the buttercream down to the tip of your piping bag and push it out of the tip, back into the bowl that had the red buttercream into it. Do this until you see the orange coming through, then stop.
Decoration:
- Pipe the buttercream in swirls onto at least 3 of your cupcakes – depending on how many colour combinations you have chosen. If you are only going with two combinations i.e. red & orange and the two blues, pipe the red & orange combination onto 6 of your fire cupcakes. The more colour combinations you have chosen, the less cupcakes will have those colours on.
- Repeat steps 3 to 6 with the rest of your colour combinations, until all of your cupcakes are frosted. Be sure to remove your 2D closed star piping tip from each used bag and rinse it fully with warm water before attaching it to the next bag. Keep roughly 1 tbsp of yellow buttercream to the side for the last touch of flames.
- Retrieve your “kol-nuts” from the fridge. Spray them with the edible gold glitter in concentrated areas to create glowing spots. Top the cupcakes with one “kol-nut” each.
- Pipe the remaining yellow frosting in little stars on the “kol-nuts” to represent the top of a flame.
- If using the shape-holding cupcake cases, be sure to pull the concertina apart before trying to peel the case away from the cake to eat.
Notes
© Flavour of the Film. All content and imagery is copyright protected. Please do not use any of my images or written content without prior permission. If you would like to share any of the recipes or images on Flavour of the Film, please link back to the recipe in question and rewrite it in your own words, crediting Flavour of the Film as the original source.

One Comment
Comments are closed.