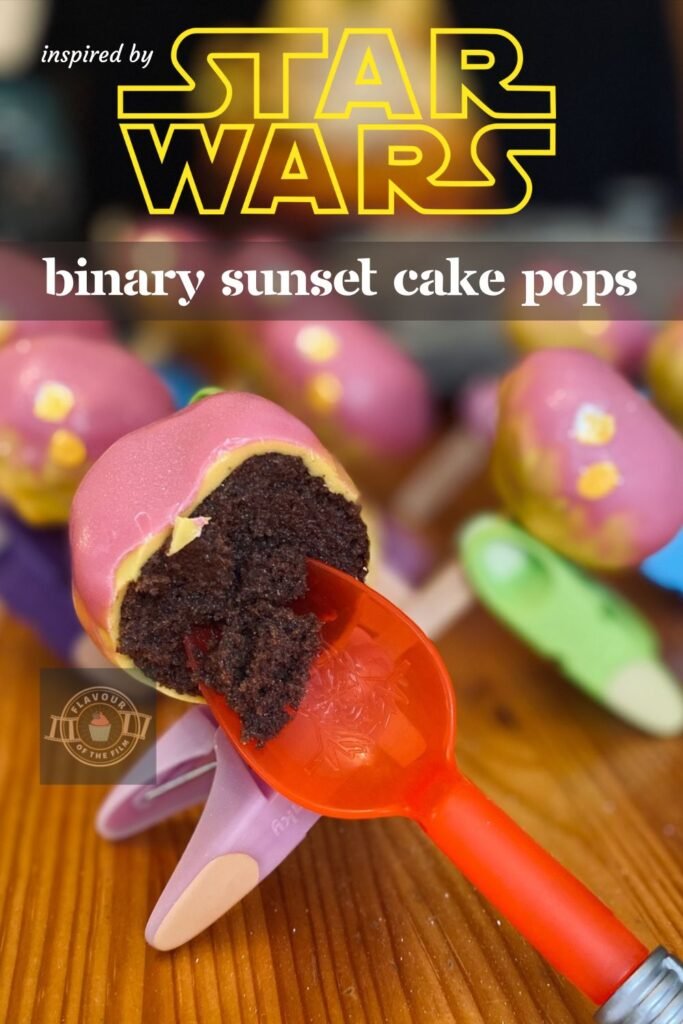
May 4th a.k.a Star Wars day is this weekend so it feels only natural to create a Star Wars inspired recipe in honour of it. My binary sunset Star Wars cake pops are entirely customisable and utterly moreish. Delicious little bites of indulgence. The perfect treat for a Star Wars movie night or party! Let’s get baking, my fellow Jedis.
Contents
The Bake
In my experience, there are few things better to eat than cake when you’re craving something sweet. Especially the soft, fluffy, indulgent kind.
I wanted to create something Star Wars inspired that could be whipped up pretty quickly, but is also something incredibly fun.

My Star Wars cake pops are the perfect little treat to level up your Star Wars game.
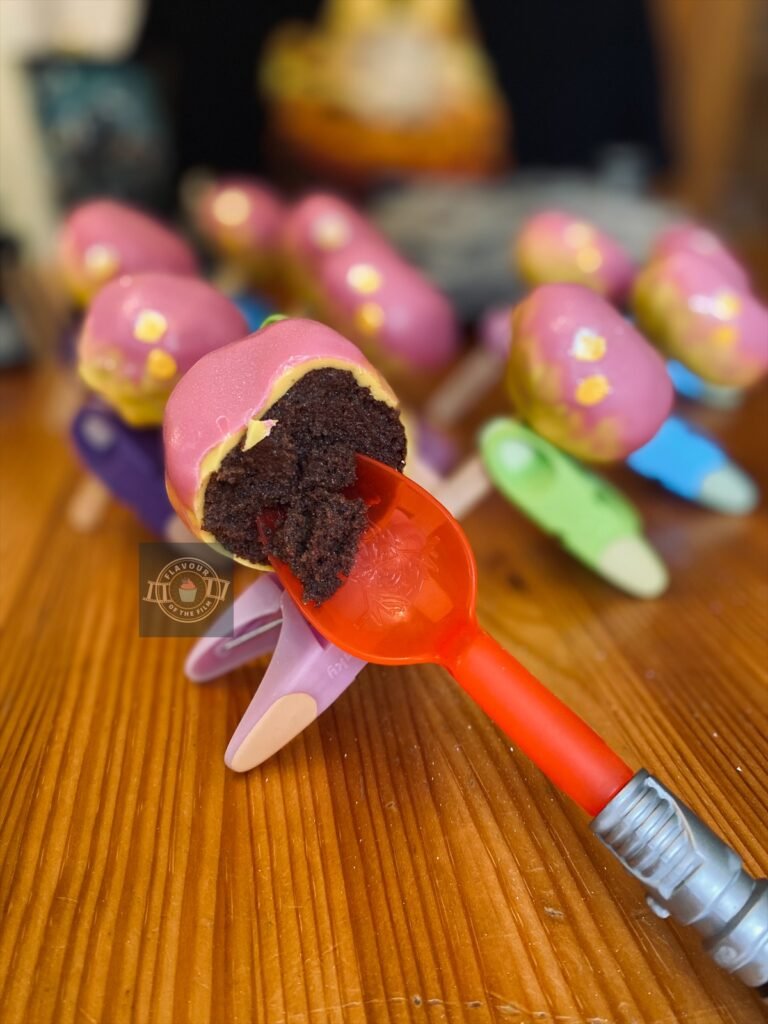
I chose chocolate cake because I just really wanted some, but this bake is completely customisable. You can change the flavour of the cake to suit your flavour of the day (see what I did there?). See my Top Tips section below for information on how to create different flavours using this same recipe.
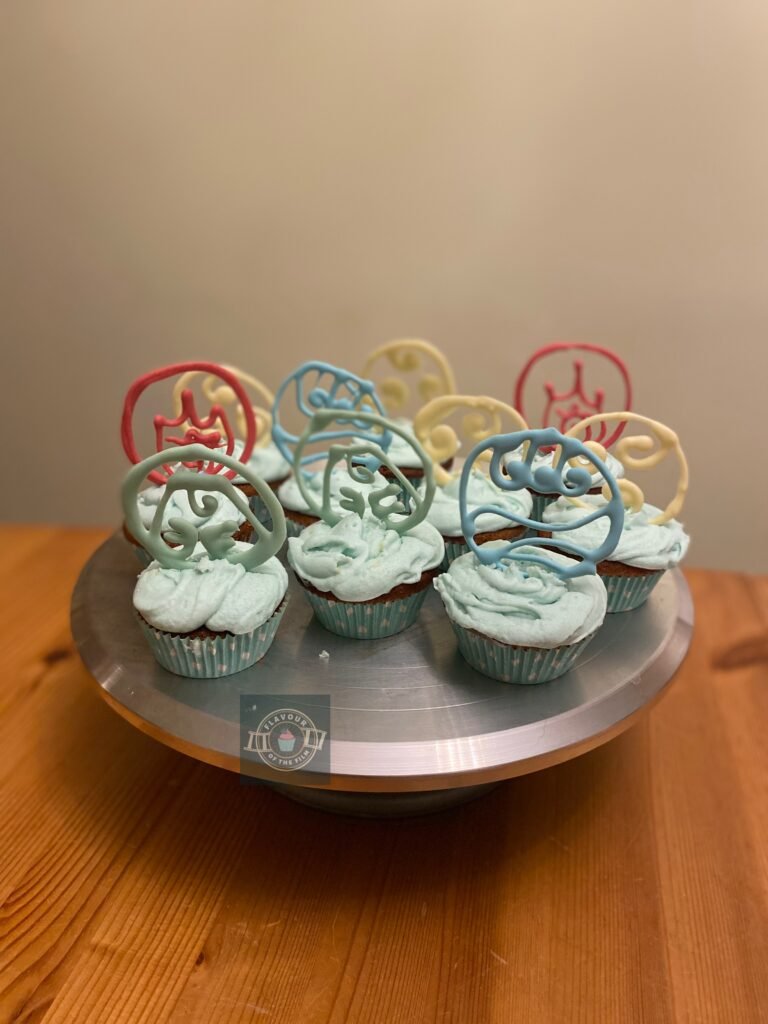
This is such an easy recipe and is especially good if you aren’t super confident when decorating cake. I used candy melts to bring a pop of colour to my Star Wars inspired cake pops. Candy melts are white chocolate flavoured pieces that are already tinted with a colour.
They are readily available online and, when it comes to price, aren’t much different to the price it would cost to buy white chocolate from the shop and add food colouring to it.
Depending on the food colouring you usually buy, you will likely find that buying a couple of bags of candy melts is actually more cost effective. Plus, they set really quickly once applied and stay solid at room temperature.
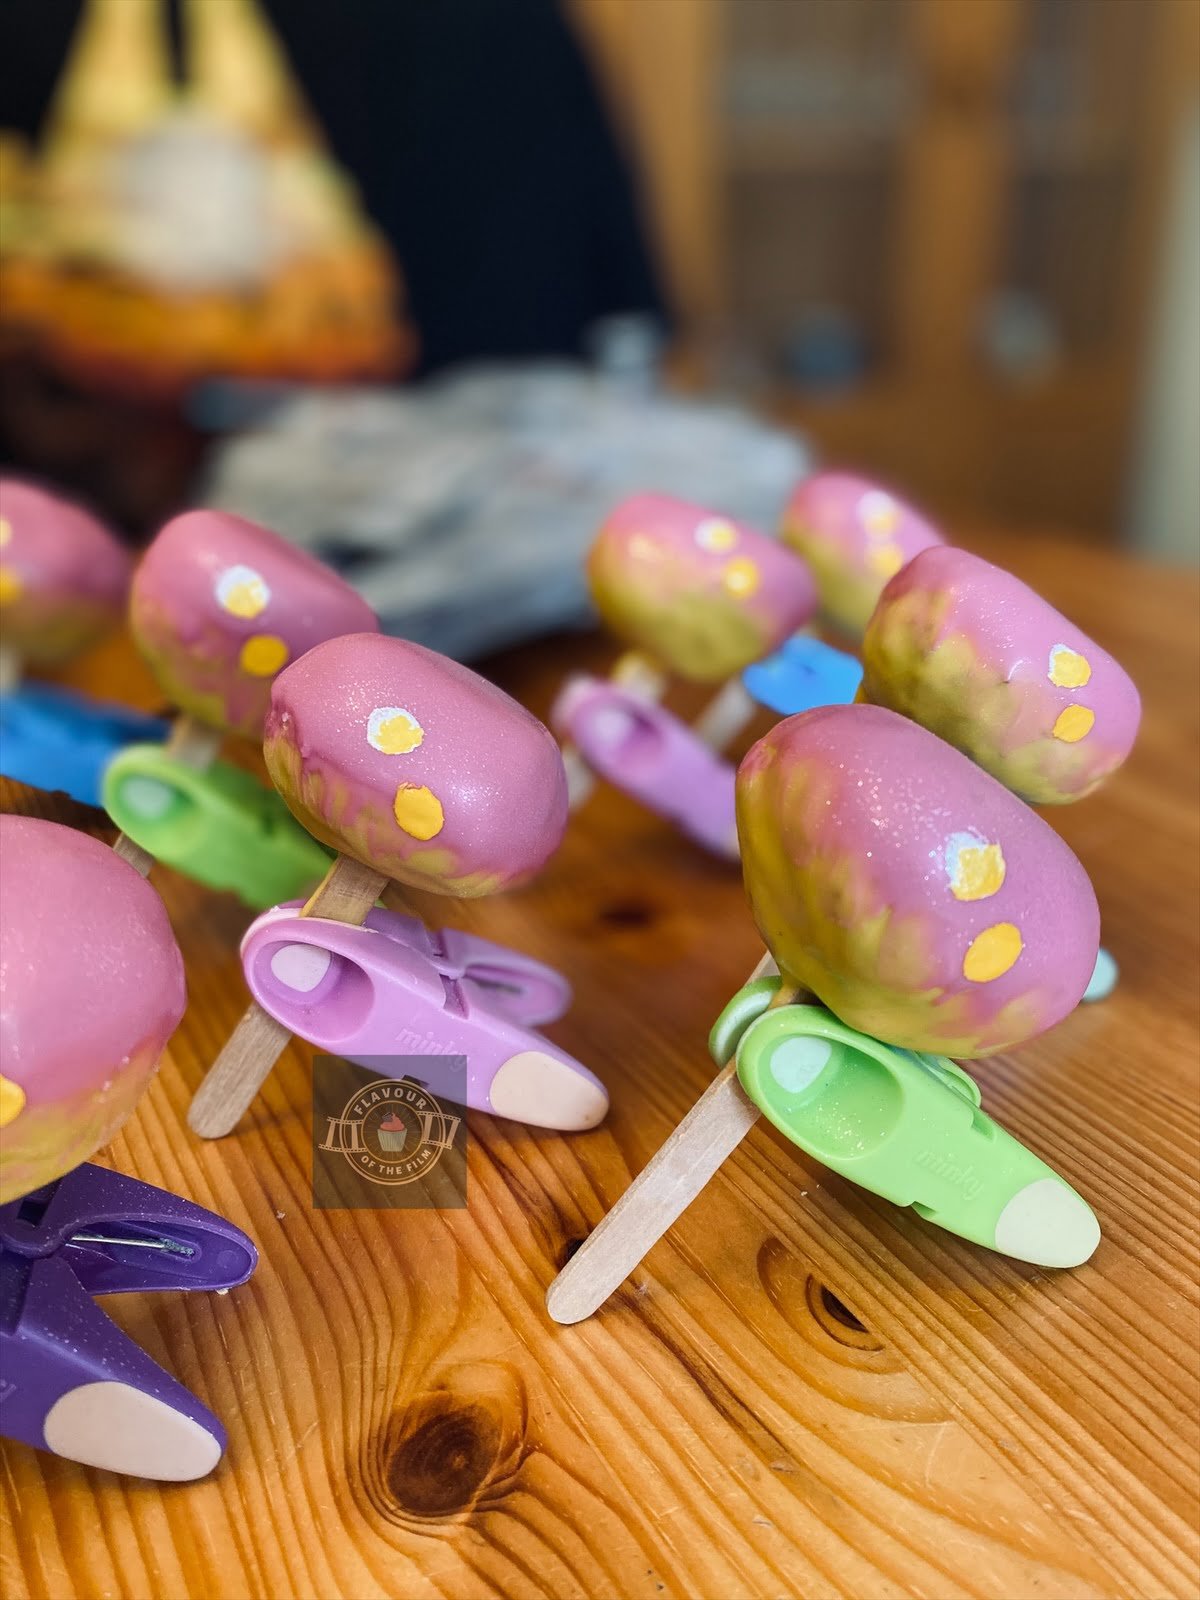
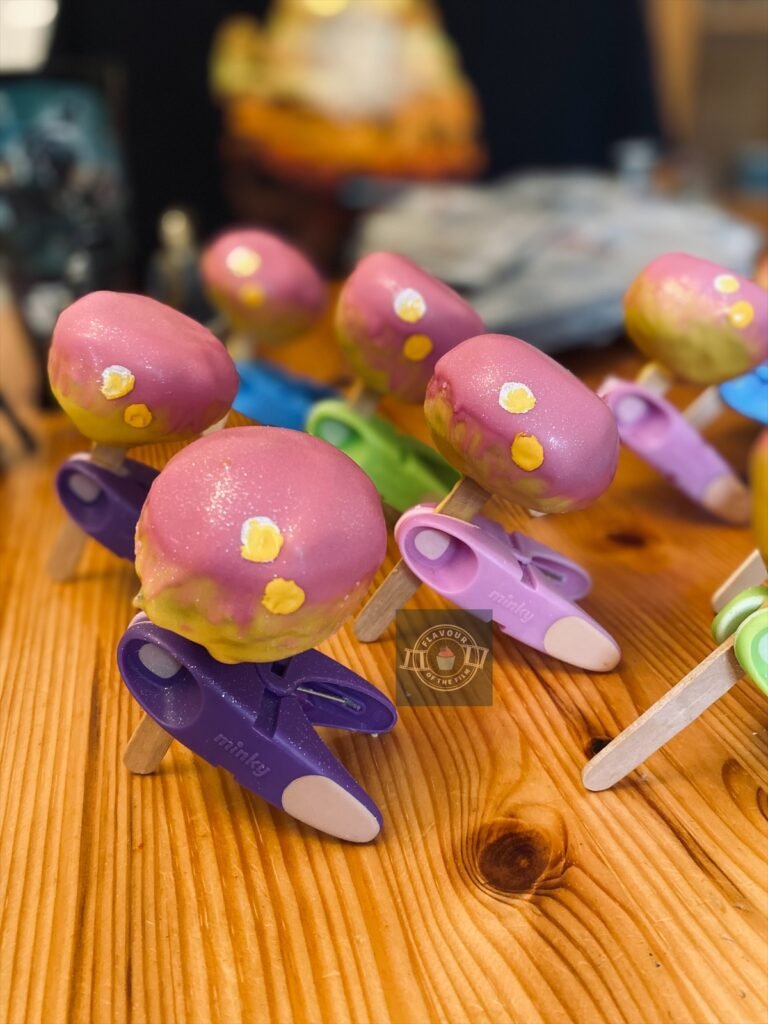
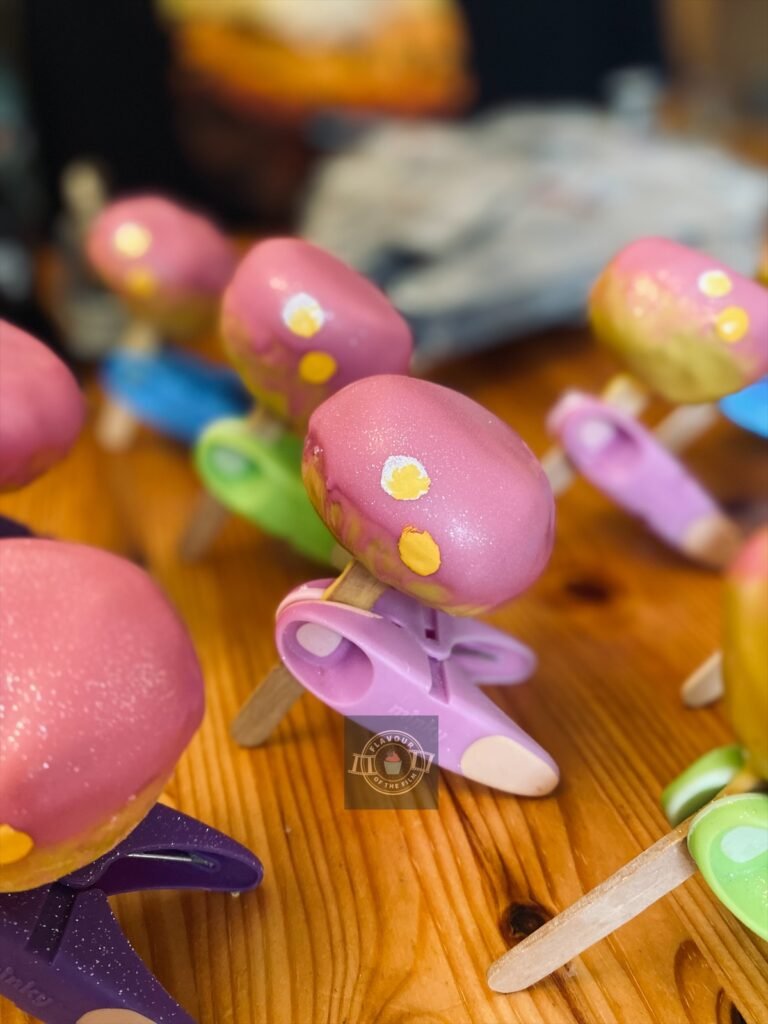
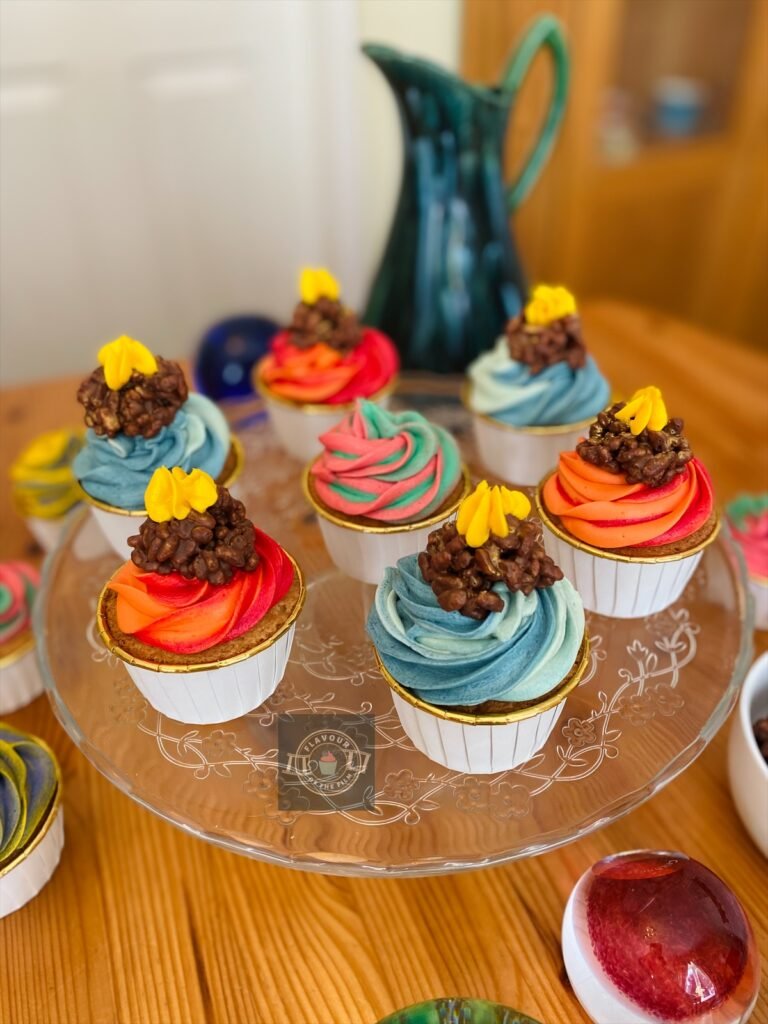
The inspiration behind the aesthetic of my Star Wars cake pops was the binary sunset on Tatooine from A New Hope.
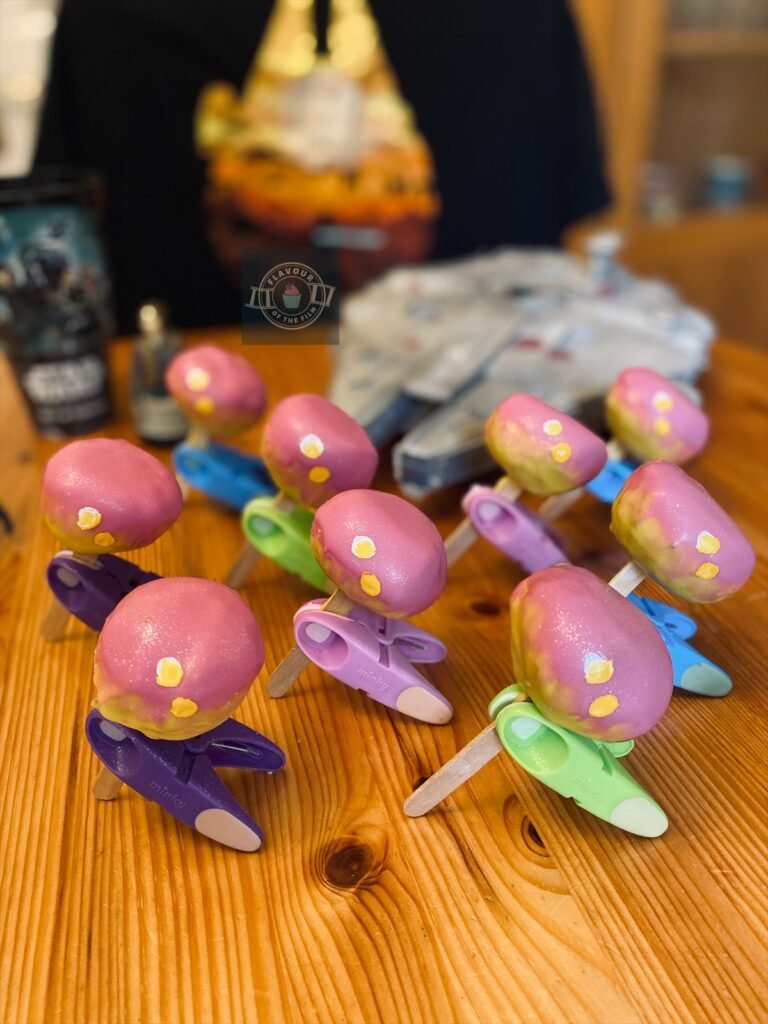
I hand painted the suns using a white or pale yellow food paint/colouring. It’s a little more fiddly than my suggested alternative, which is using round flat sprinkles that you often find in a sprinkle selection from a local supermarket.
Using individual sprinkles for the two suns on each of your Star Wars movie cake pops means you can stick them on as the candy melt mixture is setting. It does dry quickly, though, so either method works.
When it came to the shape, I liked the slightly flatter look of my Star Wars cake balls. The shape feels more sci-fi, and it made them look more like little horizons, which I love. You can go spherical if you prefer, though.
Last touch? You guessed it… edible glitter for the stars that are just starting to appear. As usual, this is completely optional. Regulars here will know that I am a sucker for edible glitter!

Top Tips
- Weigh out your eggs beforehand and get as close to 150g as you can. Then, measure out the remaining cake ingredients to that exact weight for the ultimate cake sponge.
- If wanting to change the flavour: omit the cocoa powder and go for the full 150g self-raising flour. Swap out the light brown sugar for caster sugar, then add 1-2 tsp of your chosen extract i.e. vanilla or peppermint. Alternatively, you can mix in the zest of 2 of your chosen citrus fruit instead of the extract. Replace the cocoa powder in the buttercream with extract or juice to taste.
- You can bake the cake in any shaped tin, so long as it’s deep enough for the mixture to rise. I used a deep 8 inch round tin, but you can just as easily use a loaf tin or square tin. Just be sure to adjust the baking time depending on the depth of the tin: shallow tin = less baking time, deep but small tin = more baking time.
- If you find that the amount of buttercream you make isn’t quite enough, beat together another 50g unsalted butter and 100g icing sugar. Cake pops are supposed to be creamier than straight up cake so don’t be stingy with the buttercream!
- The size of the cake pops is up to you. I made 22 decent sized ones, but they can be made smaller and make a double batch using the same recipe.
- I shaped my cake bites slightly flatter because the shape feels more sci-fi, and I like that it made them look more like mini horizons. But, you can make them spherical if preferred.
- Chill the cake pops in the fridge with the popsicle sticks in them. That way the buttercream clings to the sticks as they chill and you get a more secure hold.
- The candy melts melt easily in the microwave and they set fast once the mixture hits something cool. Work at a decent pace as the mixture will solidify in your bowl after a while! Don’t rush, just be aware that this will happen. If it does, just re-melt the candy melts.
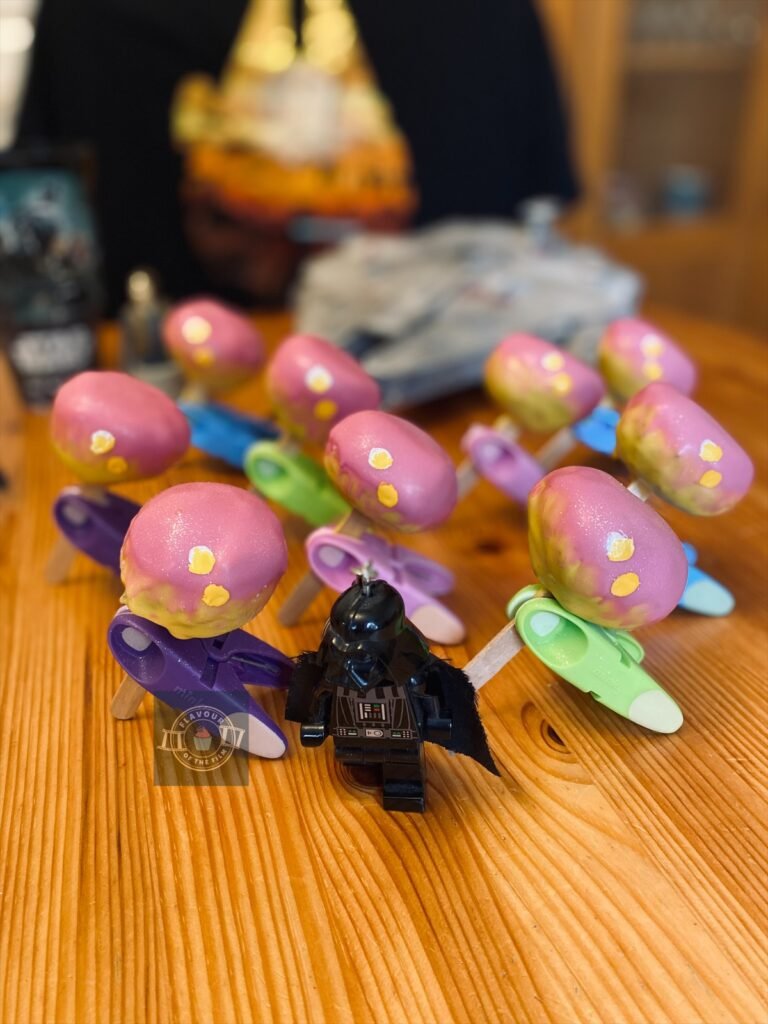
- This is my favourite tip: clothes pegs! I personally don’t have some fancy cake pop stand, so I needed something to hold them more upright as they set. I reached for my clothes pegs to test my weird – yet innovative idea – and they worked like a charm. So much so that I even used them to display my Star Wars inspired cake bites for the pictures! They kind of look like little spaceships, which is even better.
These Star Wars inspired cake pops really are so fun and so easy to make. They are the perfect addition to your Star Wars movie night or themed celebration. Go wild with your flavour and make them really personal to you. I hope you love making them as much as I did. Enjoy!
Happy baking, happy eating!
The Recipe
Ingredients
Star Wars cake pops:
- 150g [5.25 oz] unsalted butter room temperature or softened
- 150g [¾ cup] light brown sugar
- 150g eggs (around 2 large)
- 125g [¾ cup] self-raising flour
- 25g [3 tbsp + 2 tsp] cocoa powder
Cake pop decoration:
- 150g [5.25 oz] unsalted butter room temperature or softened
- 300g [2 cups + 1 tbsp] icing [confectioners] sugar
- 2 tbsp cocoa powder
- Splash of milk
- 250g [8.75 oz] yellow candy melts
- 250g [8.75 oz] pink candy melts
- Small and round white sprinkles OR
- White food paint/colouring
- Yellow food paint/colouring
- Edible glitter optional
Makes: 22 generously sized cake pops or 40+ small cake pops
Preparation time: 15 minutes
Baking time: 25 – 30 minutes
Decorating time: 25 minutes
Method
Star Wars cake pops:
- Preheat your oven to 180°C [350°F] or 160°C fan. Grease and line a deep tin; the shape isn’t important, just make sure that it’s deep enough for the mixture to rise. I used a deep 8 inch round tin.
- In a large mixing bowl, cream together the butter and sugar until light and fluffy.
- Add the eggs, one at a time, beating in until fully incorporated.
- Sieve in the flour and cocoa powder and mix in until no flour is visible.
- Spoon the cake batter into the lined tin. Bake on the middle shelf for 25 – 30 minutes. This can take less time or more time, depending on the depth and size of your cake tin. If your tin is shallow and wide, it’ll take less time. Check after around 15 minutes. If your tin is deep and small, it’ll take longer. Check after around 35 minutes.
- Your sponge will be ready when a skewer/cocktail stick comes out clean when tested; the surface of the cake springs back when gently pressed on, and you hear little to no crackling/bubbling sound when you listen to your cake sponge.
- Once baked, leave to cool in the tin for around 10 minutes before transferring to a wire rack to cool completely.
Shaping:
- While your cake is cooling, make your buttercream.
- Beat the butter to loosen it, then add ½ the icing sugar. Beat the two together until light and fluffy, then add the remaining icing sugar and beat in.
- Add the cocoa powder and beat in. If needed add a splash of milk to loosen the mixture a little. It needs to be soft enough to mix in well with the cake crumbs.
- Line a baking tray with greaseproof paper/baking parchment. Set aside.
- Once your cake is completely cool, break it up in a large mixing bowl. You can use a food processor, or use the tips of your fingers to rub the cake into crumbs, as if you were making scones.
- Pour ⅓ of the cake crumbs into the buttercream and fold in. Repeat this with the remaining cake crumbs until you have combined it all with the buttercream.
- Using damp hands and a tablespoon or ice cream scoop, spoon and roll the mixture into individual cake pop shapes and place them on the lined baking tray.
- If using them, stick your popsicle sticks into the top of each cake pop, so that they stick up in the air.
- Chill the bare cake pops while you prepare the candy melts.
Decorating:
- Pour the yellow candy melts into a heatproof bowl. Do the same with the pink but set the bowl of pink candy melts aside for now.
- Melt the yellow candy melts in the microwave in 30 second bursts, stirring in between, until completely melted.
- Make sure you have a stand or collection of clothes pegs (highly recommended!) prepared to hold your cake pops as they set.
- Retrieve your tray of cake pops from the fridge. One at a time, dip the cake pops into the melted yellow candy melts to cover them completely. Use a spoon to help spoon the mixture over the cake pops if needed. Lift the covered cake pop from the mixture and hold it over the bowl, turning it to release the drips. Avoid turning it upside down or right way up to keep the cake pop secure.
- When the cake pop has stopped dripping, place it in your stand or clip a clothes beg to the popsicle stick.
- Repeat steps 4 and 5 until all of your cake pops are covered. They set quickly so when you know one is completely dry, you can place it back on the lined baking tray if needed.
- Melt the pink candy melts in the microwave as you did with the yellow.
- Dip the top half area of your cake pops into the melted pink candy melts, one at a time. Hold over the bowl again, twisting until your cake pop has stopped dripping.
- If using sprinkles for the suns, apply them now while the candy melt mixture on the cake pop is still setting.
- Using your little finger, gently drag the bottom line of the pink candy melts mixture to blend it into the yellow to create a sunset vibe. Repeat until all of your cake pops are both yellow and pink.
- If hand painting the suns, do so once you know that your cake pops have set.
- Finish with edible glitter if using.
These Star Wars cake pops are perfect for movie nights and themed celebrations. They will last for around 4+ days. The cake sponges can be wrapped and frozen before shaping into cake pops and kept in the freezer for up to 3 months. Defrost fully before shaping. Enjoy!
The Films
I LOVE Star Wars.
The films really are everything you’d want in a good sci-fi movie. The entire universe of Star Wars feels so infinite, you never really think it’ll end.
I mean, it technically hasn’t ended as the Star Wars creators at Disney+ keep producing some brilliant TV within the universe. One of my first recipes for Flavour of the Film celebrated The Mandalorian. The animated series are next level, too.

Originally from the brilliant mind of George Lucas, the first trilogy of the Star Wars saga was made up of episodes IV, V and VI (4, 5 and 6).
Star Wars: A New Hope was released in 1977, with The Empire Strikes Back out in 1980, and Return of the Jedi finishing the run of the original trilogy in 1983.
A New Hope smashed box office records and propelled George Lucas into filmmaker stardom. It also happened to come out on my birthday, just twenty years prior. I like to joke that I was literally born a Star Wars fan!
George Lucas has remained a well respected name in the industry ever since.
If you check the credits of films over the past thirty plus years using visual effects, you’ll more often than not see his company, Industrial Light and Magic, credited as the creators of such effects.
A New Hope also shot a certain few names into the limelight: Carrie Fisher, Mark Hamill and Harrison Ford.
As the trilogy progressed, already established actors also graced the Star Wars film universe. Names including Alec Guinnes; Kenny Baker, James Earl Jones, Peter Mayhew, Anthony Daniels and more.

Star Wars legends turned motion picture icons.
Carrie Fisher is someone I deeply respect and admire. What a powerhouse of a woman she was. Princess Leia still remains a strong character that ALL can look up to, which is an achievement in its own right.
In a universe where the Empire reigns, Luke Skywalker – a secret jedi in training – joins forces with arrogant space pilot Han Solo and his Wookie pal, rebel Princess Leia Organa and two droids by the names of C-3PO and R2-D2 to rid the universe of the Empire’s rule and Darth Vader’s wrath once and for all.
Jedi are few and far between thanks to the Empire, but Luke finds a master in Obi Wan Kenobi and secretly begins his training after Princess Leia sends a plea for help in her fight against Darth Vader. From there, we are taken through the world of Empire vs Rebels until one comes out on top.
Does anyone remember those flannels/face cloths that you used to buy as a solid block, and before you could use it, you had to hydrate it in water and it would unravel itself?
I had a Queen Amadala one growing up. It was so cool. Oh, and my Animal Crossing: New Horizons island theme is the iconic band song from the bar scene. Just some fun facts for you there, friends.
In 1999, a trilogy of Star Wars prequels began.
The Phantom Menace was the first of the three, titled Episode I. Attack of the Clones (Episode II) followed in 2002, with Revenge of the Sith (Episode III) bringing the trilogy to a close in 2005.
The likes of Ewan McGregor; Natalie Portman, Hayden Christensen, Liam Neeson, Hughie Quarshie, Ian McDiarmid, Ahmed Best, Frank Oz, Brian Blessed, Ray Park, Pernilla August, Warwick Davis and more all took on roles for the prequels.
There are a lot of mixed opinions of the prequels, but I have to say… I like them! Maybe not as much as the original trilogy, but I grew up with the prequels, so I have a soft spot for them.
Fast forward to 2015 and the Star Wars universe expands with a trilogy of sequels.
This time, sci-fi extraordinaire J.J. Abrams is at the director’s helm. Episode VII: The Force Awakens brings us life after Darth Vader… but not everything is in the light. Episode VII is followed by Episode VIII: The Last Jedi in 2017 and finally, by Episode IX: The Rise of Skywalker in 2019.
I got to see The Rise of Skywalker in a cinema in Tokyo… a dream that I didn’t know I had, coming true.
This particular trilogy presents one heck of a stellar cast.
Daisy Ridley was chosen out of thousands who took part in the open auditions (including yours truly), with John Boyega, Oscar Isaac and Adam Driver giving us all the feels.
What made these films even more special were the return of Carrie, Harrison and Mark. Plus, the excellent Domhnall Gleeson; Lupita Nyong’o, Andy Serkis, Simon Pegg, Gwendoline Christie and Kiran Shah among many others giving performances.
That’s not even mentioning the Star Wars spin offs!
I plan on making multiple more Star Wars recipes, so I’ll keep further detail for those posts. Let’s get to the numnums…
Recipe Card

Star Wars Cake Pops
Ingredients
Star Wars cake pops:
- 150 g [5.25 oz] unsalted butter room temperature or softened
- 150 g [¾ cup] light brown sugar
- 150 g eggs around 2 large
- 125 g [¾ cup] self-raising flour
- 25 g [3 tbsp + 2 tsp] cocoa powder
Star Wars cake pops decoration:
- 150 g [5.25 oz] unsalted butter room temperature or softened
- 300 g [2 cups + 1 tbsp] icing [confectioners] sugar
- 2 tbsp cocoa powder
- Splash of milk
- 250 g [8.75 oz] yellow candy melts
- 250 g [8.75 oz] pink candy melts
- Small and round white sprinkles OR
- White food paint/colouring
- Yellow food paint/colouring
- Edible glitter optional
Instructions
Star Wars cake pops:
- Preheat your oven to 180°C [350°F] or 160°C fan. Grease and line a deep tin; the shape isn’t important, just make sure that it’s deep enough for the mixture to rise. I used a deep 8 inch round tin.
- In a large mixing bowl, cream together the butter and sugar until light and fluffy.
- Add the eggs, one at a time, beating in until fully incorporated.
- Sieve in the flour and cocoa powder and mix in until no flour is visible.
- Spoon the cake batter into the lined tin. Bake on the middle shelf for 25 – 30 minutes. This can take less time or more time, depending on the depth and size of your cake tin. If your tin is shallow and wide, it’ll take less time. Check after around 15 minutes. If your tin is deep and small, it’ll take longer. Check after around 35 minutes.
- Your sponge will be ready when a skewer/cocktail stick comes out clean when tested; the surface of the cake springs back when gently pressed on, and you hear little to no crackling/bubbling sound when you listen to your cake sponge.
- Once baked, leave to cool in the tin for around 10 minutes before transferring to a wire rack to cool completely.
Shaping:
- While your cake is cooling, make your buttercream.
- Beat the butter to loosen it, then add ½ the icing sugar. Beat the two together until light and fluffy, then add the remaining icing sugar and beat in.
- Add the cocoa powder and beat in. If needed add a splash of milk to loosen the mixture a little. It needs to be soft enough to mix in well with the cake crumbs.
- Line a baking tray with greaseproof paper/baking parchment. Set aside.
- Once your cake is completely cool, break it up in a large mixing bowl. You can use a food processor, or use the tips of your fingers to rub the cake into crumbs, as if you were making scones.
- Pour ⅓ of the cake crumbs into the buttercream and fold in. Repeat this with the remaining cake crumbs until you have combined it all with the buttercream.
- Using damp hands and a tablespoon or ice cream scoop, spoon and roll the mixture into individual cake pop shapes and place them on the lined baking tray.
- If using them, stick your popsicle sticks into the top of each cake pop, so that they stick up in the air.
- Chill the bare cake pops while you prepare the candy melts.
Decorating:
- Pour the yellow candy melts into a heatproof bowl. Do the same with the pink but set the bowl of pink candy melts aside for now.
- Melt the yellow candy melts in the microwave in 30 second bursts, stirring in between, until completely melted.
- Make sure you have a stand or collection of clothes pegs (highly recommended!) prepared to hold your cake pops as they set.
- Retrieve your tray of cake pops from the fridge. One at a time, dip the cake pops into the melted yellow candy melts to cover them completely. Use a spoon to help spoon the mixture over the cake pops if needed. Lift the covered cake pop from the mixture and hold it over the bowl, turning it to release the drips. Avoid turning it upside down or right way up to keep the cake pop secure.
- When the cake pop has stopped dripping, place it in your stand or clip a clothes beg to the popsicle stick.
- Repeat steps 4 and 5 until all of your cake pops are covered. They set quickly so when you know one is completely dry, you can place it back on the lined baking tray if needed.
- Melt the pink candy melts in the microwave as you did with the yellow.
- Dip the top half area of your cake pops into the melted pink candy melts, one at a time. Hold over the bowl again, twisting until your cake pop has stopped dripping.
- If using sprinkles for the suns, apply them now while the candy melt mixture on the cake pop is still setting.
- Using your little finger, gently drag the bottom line of the pink candy melts mixture to blend it into the yellow to create a sunset vibe. Repeat until all of your cake pops are both yellow and pink.
- If hand painting the suns, do so once you know that your cake pops have set.
- Finish with edible glitter if using.
Notes
© Flavour of the Film. All content and imagery is copyright protected. Please do not use any of my images or written content without prior permission. If you would like to share any of the recipes or images on Flavour of the Film, please link back to the recipe in question and rewrite it in your own words, crediting Flavour of the Film as the original source.


One Comment
Comments are closed.