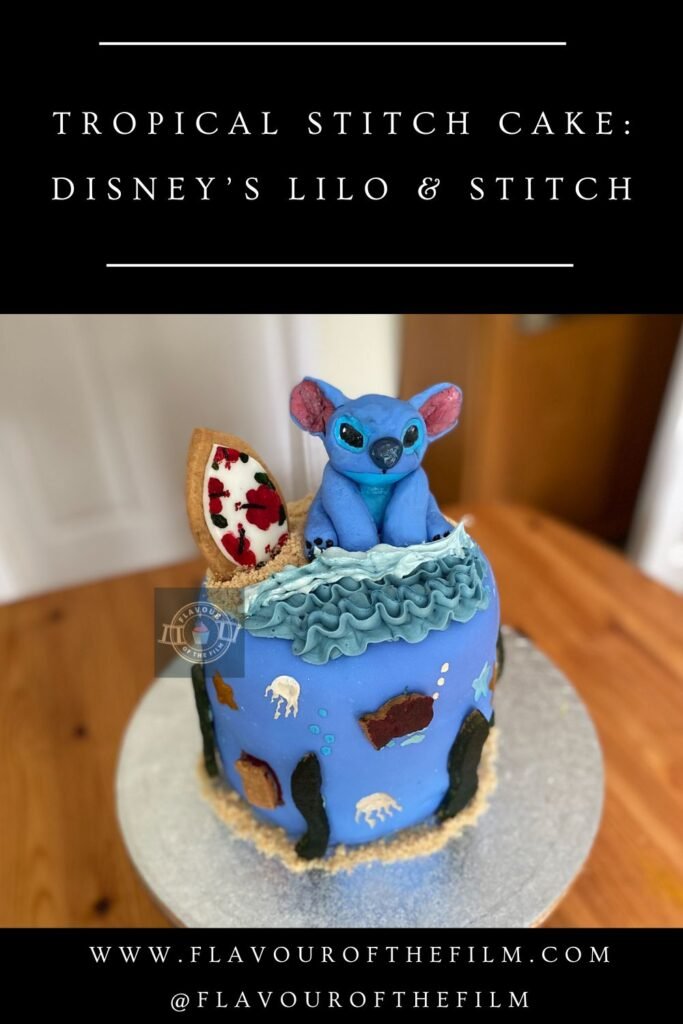
On the lookout for Stitch cake ideas? I have already created a Lilo & Stitch inspired recipe… but Stitch is such an iconic character. When a character is this popular – even after over two decades after the film’s release – they deserve a special bake. My Stitch cake brings fluffy sponges and tropical flavours together and is a great option for any Lilo & Stitch themed party. Ready to hang ten?
Contents
The Bake
This particular cake was commissioned for a birthday. Similarly with my Spider-Man celebration cake, I was given full creative freedom. So long as the final product was a Stitch cake… and also as blue as possible. Including the sponges (which is entirely optional in this recipe).
Obviously, I was more than happy to do this.
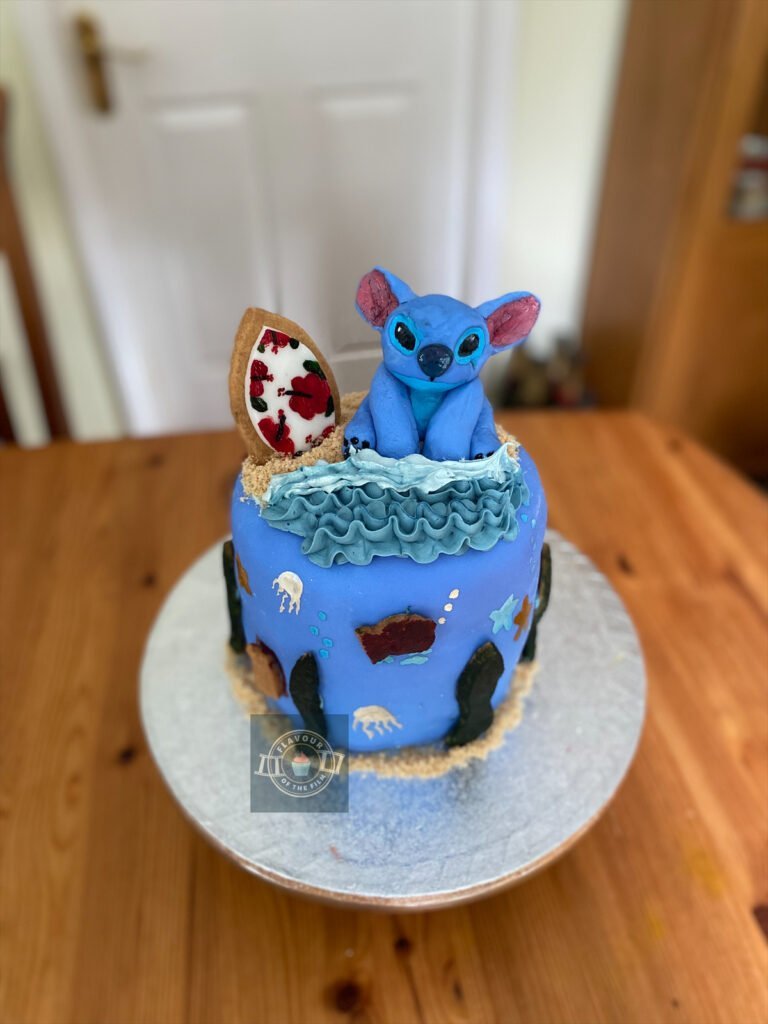
When it came to the inspiration, I immediately knew that I wanted to top the cake with an edible version of Stitch. If you aren’t super confident when it comes to modelling with fondant, by all means buy a cake topper that isn’t edible or is made of wafer paper!
There are no rules when it comes to creativity so don’t feel like you have to stick to the books exactly.
I will say… if you do decide to mould the character using fondant (I would advise against modelling chocolate in this case – too much painting and drying involved), I hope you have as much fun as I did.
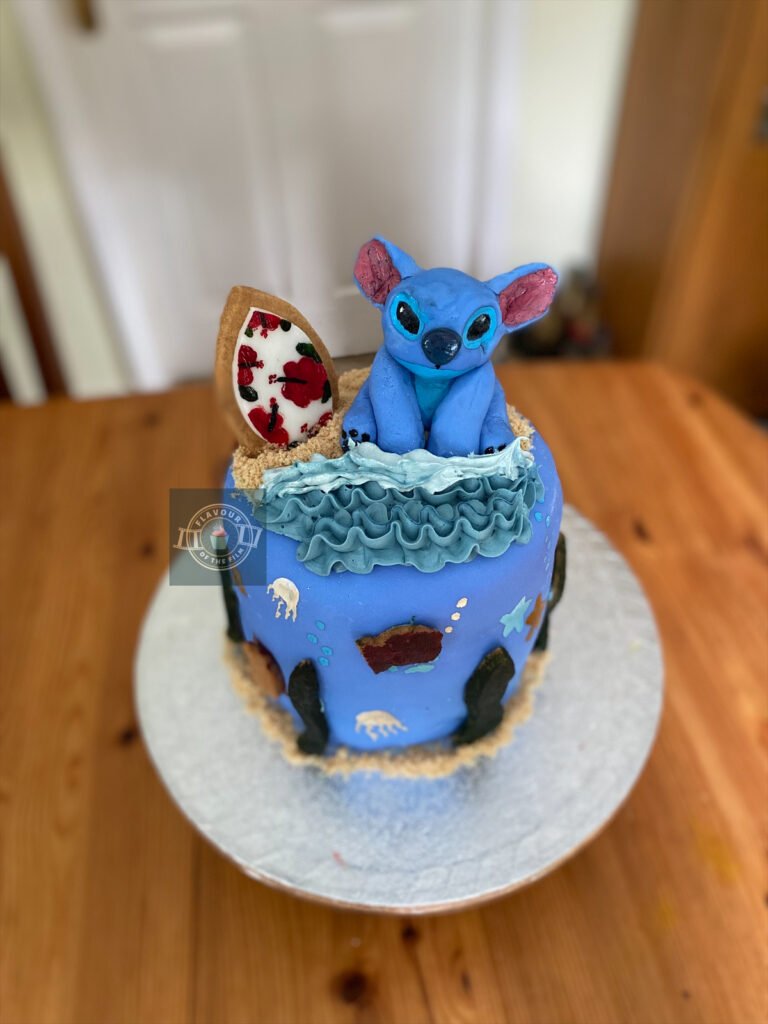
The great thing about moulding Stitch yourself is that you get to choose his facial expression. I opted for the initial angry, sort of snarling face he pulls when Lilo first adopts him. I just thought that was such an iconic face of his and it felt right to recreate that immortal moment.
For the entire look of my Stitch cake, I wanted to nod to the scene where Stitch first goes surfing with the family.
It’s the first real moment we get to see some character development begin. Regular readers here will likely know that I am an avid fan of great character development! I also love how heartwarming the scene is as a whole.
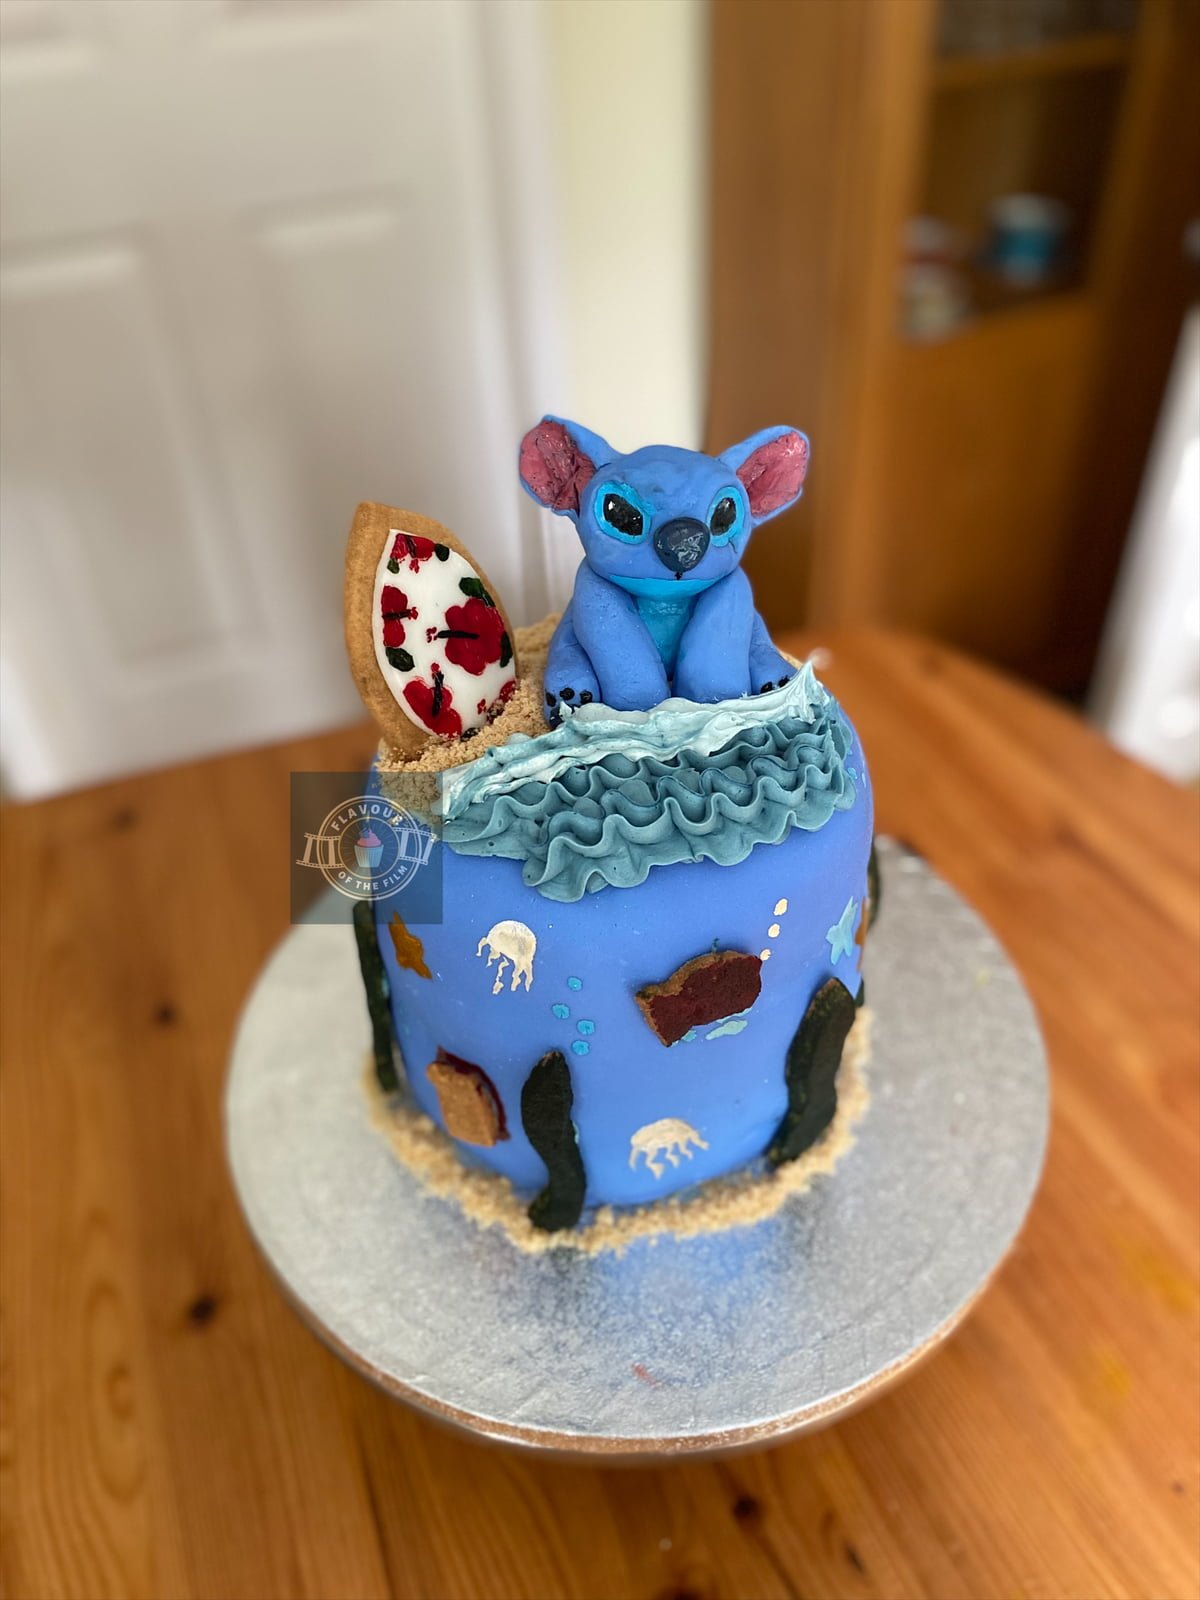
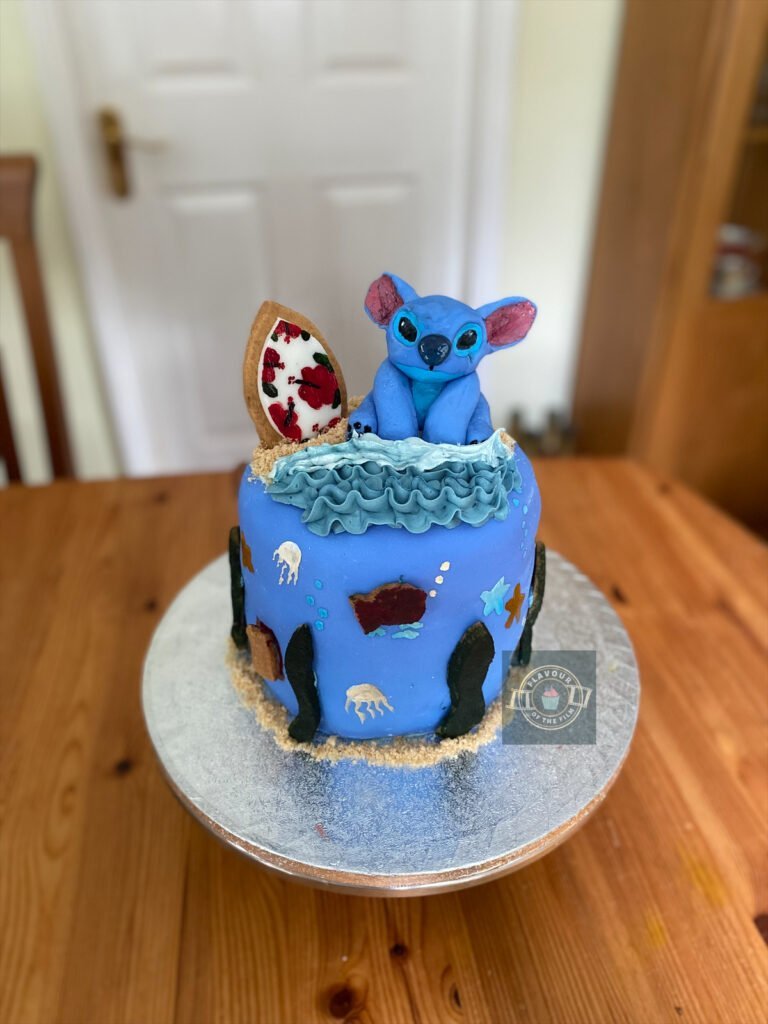
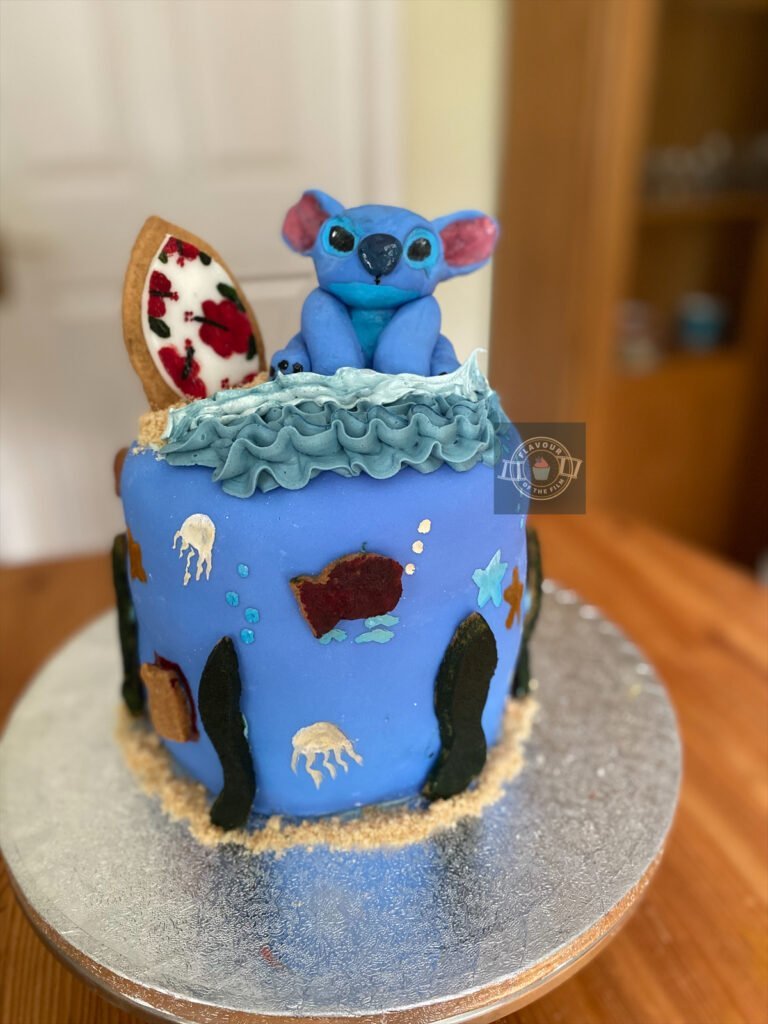
Essentially, the entire cake represents the ocean and the surface represents the beach.
The design is complete with shortbread biscuit decorations, but these can be made with pure fondant if preferred. I like the rustic feel the biscuit elements provided and it made the surfboard much sturdier. Each added element is hand painted with food colouring.
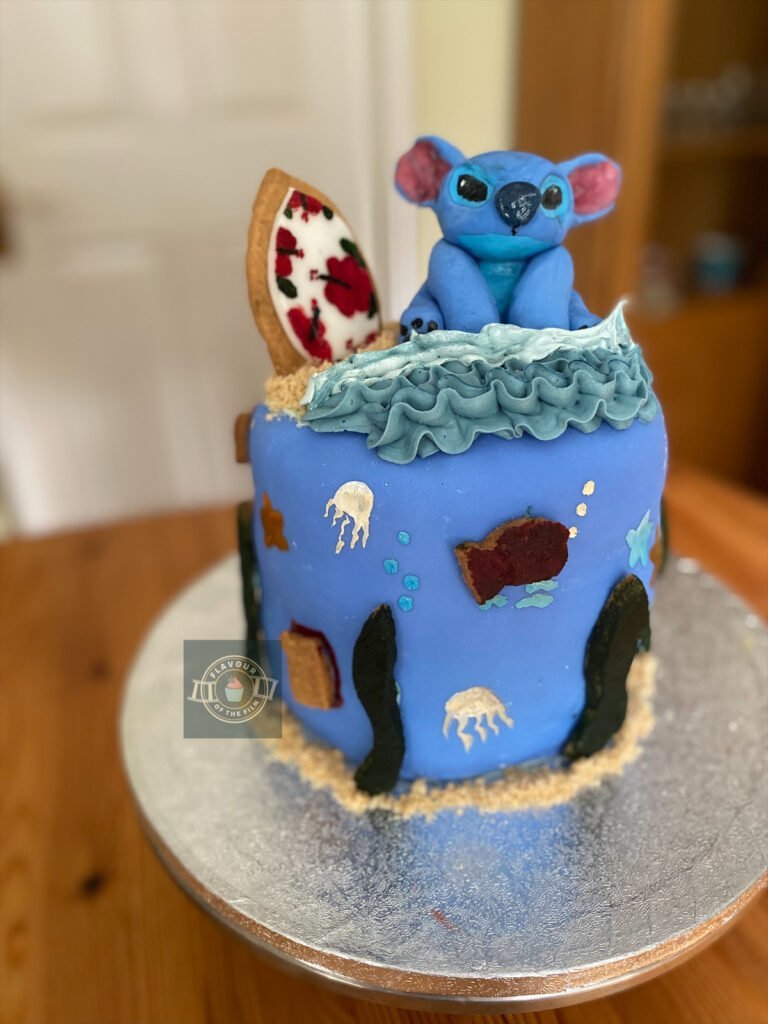
I even included the usual sandwich for Pudge the fish (see the left side of the cake in the photos). The surfboard is also hand painted. I chose a hibiscus design but you can go for anything that takes your fancy.

If this cake is for a birthday, you could paint on something related to the person whose birthday it is.
For example, the first letter of their name or the age they are turning.
As working with fondant icing or sugar paste is not my preferred method, I chose to wrap the cake in it and leave the very top of the cake bare of fondant icing. Doing this meant that I could more easily add on the toppings straight to the exposed buttercream crumb coat and reduce the risk of the fondant tearing.

For the ‘sand’ effect, I crushed biscuits over the exposed buttercream top.
This can be done using shop-bought biscuits or any remaining shortbread that you aren’t using for the other elements. Doing the same around the base of the cake also gives a great effect.
I made sure to secure Stitch into the sand on my Stitch cake using cocktail sticks. This is also a good tip if his ears aren’t playing ball: rather than using edible glue, push a cocktail stick through his ears and into his head to secure them.
A little barbaric, one might say, but I bet you anything my fondant Stitch was completely devoured anyway.
The ocean waves crashing onto my Stitch inspired cake beach are simply piped on with blue pineapple flavoured buttercream.
That’s right, friends.

Buttercream flavoured with pineapple juice. It’s next level.
The sponges are a light vanilla flavour, purely because I wanted the pineapple flavour to stand out above all else. This was especially important considering the amount of fondant icing that was involved in the creation of this Stitch character cake.
The sharpness of the pineapple cut through the sweetness of the rest of the cake. Honestly, it’s divine.
Top Tips
- To create a bigger three layer cake (8 inch), simply increase the ingredients in equal measures: 400g of each ingredient for the cake (extract remaining the same) with 300g unsalted butter and 600g icing sugar for the buttercream. I recommend at least 1kg blue fondant to cover. Bake the cake at the same temperature written below for 30 – 35 minutes or until baked.
- Avoid over mixing the cake batter. An over mixed cake batter can result in a sponge that isn’t as soft and fluffy as it could be.
- If pineapple is an issue allergy wise, feel free to swap it out for another tropical flavour. For example, Mango juice would be a delicious alternative. Coconut water could also provide a great flavour.
- As usual, with any basic sponge cakes, I recommend weighing out your eggs in their shells first. Get as close to the guide weight of the rest of the ingredients, allowing 20g either way. Then match the rest of the ingredients to the exact weight of your eggs. This is my favourite tip for achieving the ultimate sponge cake.
- If the fondant rips or stretches anywhere as you wrap it around the cake, don’t stress. You can cover any issues with the biscuits/fondant.
- Make sure to shape and paint Stitch first and let him air dry while you make the cake. Stitch gotta relax while you whip up this delicious celebration cake.
Well, there we are, friends. My Stitch cake is the ideal bake for any Stitch fan. Soft sponges, pineapple frosting and biscuit decorations. Delightful. I hope you enjoy making this cake – it’s a winner.
Happy baking, happy eating!
The Recipe
Ingredients
Biscuit elements (optional):
- 50g [1.75 oz] unsalted butter room temperature
- 25g [2 tbsp] caster sugar
- 75g [¼ cup + 3 tbsp] plain [all-purpose] flour
- Food colouring/paint in primary colours to hand paint
- 1 tbsp white fondant icing/sugar paste for the surfboard
Stitch cake:
- 300g [10.5 oz] unsalted butter room temperature
- 300g [1½ cups] caster sugar
- 300g eggs (as close as you can get)
- 300g [1¾ cups + 2 tbsp] self-raising flour
- 2 tsp vanilla extract
- Blue food colouring oil based (optional)
Buttercream:
- 200g [7 oz] unsalted butter
- 500g [3¼ cups + 3 tbsp] icing [confectioners] sugar
- 2 – 3 tbsp pineapple juice (from a carton is fine)
- Blue food colouring oil based
Decoration:
- 750g [around 26.5 oz] blue fondant icing/sugar paste
- 250g [around 8.75 oz] blue fondant/sugar paste for Stitch
- Pink food colouring/paint
- Black food colouring/paint
- Light blue food colouring/paint
- Dark blue food colouring/paint
- 5 biscuits or leftover shortbread crushed
- Edible glitter (optional)
Serves: 10+
Preparation time: 45 minutes
Baking time: 50 minutes total
Decorating time: 1 hour
Method
Shortbread decorations:
- Make your shortbread biscuit first if doing so.
- Prepare a baking tray by lining it with greaseproof paper/baking parchment. Set aside.
- Cream together the butter and sugar until smooth.
- Sieve in the flour and mix together with a spoon until a dough is formed.
- On a clean and lightly floured surface, tip out your biscuit dough and roll with a rolling pin until about ½ cm in thickness.
- Using a sharp knife, cut out your desired elements: the surfboard, seaweed, underwater animals, the sandwich for Pudge the fish etc.
- Place your biscuit shapes onto the lined baking tray and chill in the fridge while you make your cakes.
Stitch cake sponges:
- Preheat your oven to 180°C [350°F] or 160°C fan. Grease and line 3 deep 6 inch cake tins. Set aside.
- Weigh out your eggs in their shells. Get as close to 300g as possible, allowing 20g either way. Make a note of the exact weight and be sure to weigh out your remaining ingredients to that exact number.
- In a large mixing bowl, cream together the butter and sugar until light and fluffy.
- Add the eggs, one at a time, beating in between until completely incorporated.
- Add the vanilla and blue food colouring if using and beat again.
- Sieve in the flour and mix in just until you can no longer see any flour.
- Split the cake mix into the 3 lined tins evenly.
- Bake in the oven for 30 – 40 minutes. This will depend on how hot your oven runs. Check after 30 minutes.
- Your sponges will be baked when a cocktail stick or skewer comes out clean; the surface of the sponges bounce back when gently pressed on, and you hear little to no bubbling/crackling sound when you listen to them.
- Allow to cool for 10 or so minutes in the tins, then transfer upside down to a wire rack to cool completely.
Biscuits and moulding:
- While your cakes are cooling, bake your shortbread biscuits.
- Retrieve your tray of biscuits from the fridge and bake at the same temperature as the cakes for around 10 minutes. This will depend on the size and thickness of your biscuits.
- They will be ready when they are golden and look ever so slightly dry on the surface.
- Once baked, allow your biscuits to cool on the tray.
- While your cakes are cooling, mould your Stitch figure if doing so.
- Mould his body – arms, legs and tail – from one large portion of the designated fondant icing. Use the rest to mould his head and ears separately.
- Make indents for his eyes and attach his nose separately.
- To attach his head, secure a cocktail stick into his body with one end poking out. Then, sit his head on the top of the body and the end of the cocktail stick.
- To secure his ears, do the same thing with a cocktail stick by pushing it through his ears and head at the same time. Use 2 cocktail sticks here if needed – just be sure to make sure there is no evidence of the cocktail sticks showing.
- Paint his features using the different colours of food colouring/paint and a couple of small paint brushes.
- Set Stitch aside to dry.
Construction:
- Make your buttercream.
- Beat together the butter and icing sugar until fluffy.
- Add the pineapple juice and beat in – this should help loosen it slightly. If it is still quite stiff, add a splash of water and beat in.
- Beat in the blue food colouring. I went for a pale blue as the base.
- When your sponges are completely cool, begin to decorate your cake.
- Place the first sponge on a cake stand/cake board/plate and spread the top generously with buttercream.
- Lay the next sponge over the base one and spread on a generous amount of buttercream.
- Place your last sponge upside down on the top.
- Spoon some buttercream into two separate smaller bowls. These bowlfuls will make your waves. Set aside.
- Using the remaining buttercream, create a crumb coat all over your cake.
- Chill in the fridge while you prepare the fondant icing.
Decoration:
- Lightly dust a clean surface with icing sugar.
- Knead your remaining blue fondant icing to make it malleable.
- Roll it out into a long rectangle, roughly the height of your cake and the length equal to the circumference of your cake.
- Retrieve your cake from the fridge.
- Using the rolling pin, carefully lift and roll the fondant loosely around the rolling pin.
- Lift it up against the side of the cake and carefully spin the cake and unroll the fondant as you go. Make sure to press it to the buttercream on the cake as you unroll.
- Trim any excess around the bottom and top with a sharp knife.
- Press any rough edges around the top down onto the surface of the cake. Make sure there is a good amount of buttercream still exposed.
- Sprinkle the crushed biscuits on one half of the surface of the cake to create the ‘sand’.
- Do the same with the crushed biscuit around the base of the cake if desired.
- Carefully push 2 cocktail sticks into the bottom of Stitch, leaving at least half of each one sticking out.
- Lift and gently sit Stitch into one side of the sand. Make sure he is secure – he is surprisingly heavy!
- Using a few small paint brushes and the appropriate food colourings/paints, paint your biscuit elements.
- Roll out and trim the white fondant in the shape of the surfboard, only slightly smaller. Attach it to the surfboard biscuit using a little leftover buttercream and paint your desired design.
- Attach the biscuit elements using a dab of buttercream on each one.
Finishing touches:
- Paint any other design elements straight onto the fondant i.e. bubbles, the jam around Pudge’s sandwich and underwater creatures.
- Use a sharp knife to cut a deep indent into the top of the cake where the surfboard will go. This will reduce chances of breakage.
- Gently sit your biscuit surfboard into the cake and press it into the cake to secure it.
- Finish your cake with the ocean waves.
- Add a little more food colouring into one of the bowls of buttercream to achieve a darker blue.
- Add this to a piping bag or sandwich bag with the end cut off and your chosen piping tip.
- Pipe the fuller waves going towards the ‘sand’.
- Add the pale blue to the bag and pipe this buttercream on to create the froth that is crashing onto the sand.
- Finally, marvel at your Stitch cake!
This tropically sweet Stitch cake will last around 4+ days in an airtight container/cake box. It does not need to be stored in the fridge, even in warm weather. The sponges can be made ahead and frozen (wrapped) for up to 3 months. Always remember to check the fondant icing packaging for nut allergy information. Enjoy!
The Film
Right, so I won’t go into too much detail as I have already delved into the first Lilo & Stitch film in my Lilo & Stitch Lūʻau dessert cake recipe.
I will, however, use this space to talk about how loved Stitch as a character is.
As an adorable, incredibly lovable under(alien)dog, Stitch has been loved since his first appearance in 2002. He’s one of those characters that just stands the test of time. Decades later and he’s still one of Disney’s top cartoon creations.
That’s obvious from the amount of Stitch inspired and Stitch themed merchandise that is available on the market.
I have at least two Stitch plushies – one of which is a half my size! I used it as a prop in my Lilo & Stitch recipe (if you’re curious).
My niece loves Stitch and she wasn’t even born when the film was out.
This cake was a commissioned bake for a ninth birthday; the birthday girl in question is genuinely infatuated with this character. The last time I saw her, she was wearing an entire outfit with Stitch plastered across it.
Her drawings of him are all over the family kitchen and they even have an official Lilo & Stitch poster hanging in the living room.

The love for Stitch is real and I’m here for it.
Besides the fact that Stitch is undeniably funny, he also gives the energy of a character craving social connections. As humans, we relate to this on varying levels. The fact that he is blue and fluffy and is an alien just makes audiences feel more understood. Deep, right?
Essentially an outcast: a creation that isn’t wanted, Stitch defies expectations. He finds friendship and love. He finds ohana. Lilo finds her own truth as a result of Stitch’s arrival. All in all, Stitch goes against his programmed nature and proves that love always wins.
That’s why audiences love him. Still to this day. Plus, Disney made him a destructive wrecking machine that is also too cute to poot.
Stitch dancing with Lilo never fails to make me smile.
The Ugly Duckling scene never fails to make me SOB. What a (Hawaiian) roller coaster ride this film is.
Recipe Card

Stitch Cake | Lilo & Stitch Tropical Celebration Cake
Ingredients
Biscuit elements (optional):
- 50 g [1.75 oz] unsalted butter room temperature
- 25 g [2 tbsp] caster sugar
- 75 g [¼ cup + 3 tbsp] plain [all-purpose] flour
- Food colouring/paint in primary colours to hand paint
- 1 tbsp white fondant icing/sugar paste for the surfboard
Stitch cake:
- 300 g [10.5 oz] unsalted butter room temperature
- 300 g [1½ cups] caster sugar
- 300 g eggs as close as you can get
- 300 g [1¾ cups + 2 tbsp] self-raising flour
- 2 tsp vanilla extract
- Blue food colouring oil based (optional)
Buttercream:
- 200 g [7 oz] unsalted butter
- 500 g [3¼ cups + 3 tbsp] icing [confectioners] sugar
- 2 – 3 tbsp pineapple juice from a carton is fine
- Blue food colouring oil based
Decoration:
- 750 g [around 26.5 oz] blue fondant icing/sugar paste
- 250 g [around 8.75 oz] blue fondant/sugar paste for Stitch
- Pink food colouring/paint
- Black food colouring/paint
- Light blue food colouring/paint
- Dark blue food colouring/paint
- 5 biscuits or leftover shortbread crushed
- Edible glitter optional
Instructions
- Make your shortbread biscuit first if doing so.
- Prepare a baking tray by lining it with greaseproof paper/baking parchment. Set aside.
- Cream together the butter and sugar until smooth.
- Sieve in the flour and mix together with a spoon until a dough is formed.
- On a clean and lightly floured surface, tip out your biscuit dough and roll with a rolling pin until about ½ cm in thickness.
- Using a sharp knife, cut out your desired elements: the surfboard, seaweed, underwater animals, the sandwich for Pudge the fish etc.
- Place your biscuit shapes onto the lined baking tray and chill in the fridge while you make your cakes.
- Preheat your oven to 170°C [350°F] or 160°C fan. Grease and line 3 deep 6 inch cake tins. Set aside.
- Weigh out your eggs in their shells. Get as close to 300g as possible, allowing 20g either way. Make a note of the exact weight and be sure to weigh out your remaining ingredients to that exact number.
- In a large mixing bowl, cream together the butter and sugar until light and fluffy.
- Add the eggs, one at a time, beating in between until completely incorporated.
- Add the vanilla and blue food colouring if using and beat again.
- Sieve in the flour and mix in just until you can no longer see any flour.
- Split the cake mix into the 3 lined tins evenly.
- Bake in the oven for 30 – 40 minutes. This will depend on how hot your oven runs. Check after 30 minutes.
- Your sponges will be baked when a cocktail stick or skewer comes out clean; the surface of the sponges bounce back when gently pressed on, and you hear little to no bubbling/crackling sound when you listen to them.
- Allow to cool for 10 or so minutes in the tins, then transfer upside down to a wire rack to cool completely.
- While your cakes are cooling, bake your shortbread biscuits.
- Retrieve your tray of biscuits from the fridge and bake at the same temperature as the cakes for around 10 minutes. This will depend on the size and thickness of your biscuits.
- They will be ready when they are golden and look ever so slightly dry on the surface.
- Once baked, allow your biscuits to cool on the tray.
- While your cakes are cooling, mould your Stitch figure if doing so.
- Mould his body – arms, legs and tail – from one large portion of the designated fondant icing. Use the rest to mould his head and ears separately.
- Make indents for his eyes and attach his nose separately.
- To attach his head, secure a cocktail stick into his body with one end poking out. Then, sit his head on the top of the body and the end of the cocktail stick.
- To secure his ears, do the same thing with a cocktail stick by pushing it through his ears and head at the same time. Use 2 cocktail sticks here if needed – just be sure to make sure there is no evidence of the cocktail sticks showing.
- Paint his features using the different colours of food colouring/paint and a couple of small paint brushes.
- Set Stitch aside to dry.
- Make your buttercream.
- Beat together the butter and icing sugar until fluffy.
- Add the pineapple juice and beat in – this should help loosen it slightly. If it is still quite stiff, add a splash of water and beat in.
- Beat in the blue food colouring. I went for a pale blue as the base.
- When your sponges are completely cool, begin to decorate your cake.
- Place the first sponge on a cake stand/cake board/plate and spread the top generously with buttercream.
- Lay the next sponge over the base one and spread on a generous amount of buttercream.
- Place your last sponge upside down on the top.
- Spoon some buttercream into two separate smaller bowls. These bowlfuls will make your waves. Set aside.
- Using the remaining buttercream, create a crumb coat all over your cake.
- Chill in the fridge while you prepare the fondant icing.
- Lightly dust a clean surface with icing sugar.
- Knead your remaining blue fondant icing to make it malleable.
- Roll it out into a long rectangle, roughly the height of your cake and the length equal to the circumference of your cake.
- Retrieve your cake from the fridge.
- Using the rolling pin, carefully lift and roll the fondant loosely around the rolling pin.
- Lift it up against the side of the cake and carefully spin the cake and unroll the fondant as you go. Make sure to press it to the buttercream on the cake as you unroll.
- Trim any excess around the bottom and top with a sharp knife.
- Press any rough edges around the top down onto the surface of the cake. Make sure there is a good amount of buttercream still exposed.
- Sprinkle the crushed biscuits on one half of the surface of the cake to create the ‘sand’.
- Do the same with the crushed biscuit around the base of the cake if desired.
- Carefully push 2 cocktail sticks into the bottom of Stitch, leaving at least half of each one sticking out.
- Lift and gently sit Stitch into one side of the sand. Make sure he is secure – he is surprisingly heavy!
- Using a few small paint brushes and the appropriate food colourings/paints, paint your biscuit elements.
- Roll out and trim the white fondant in the shape of the surfboard, only slightly smaller. Attach it to the surfboard biscuit using a little leftover buttercream and paint your desired design.
- Attach the biscuit elements using a dab of buttercream on each one.
- Paint any other design elements straight onto the fondant i.e. bubbles, the jam around Pudge’s sandwich and underwater creatures.
- Use a sharp knife to cut a deep indent into the top of the cake where the surfboard will go. This will reduce chances of breakage.
- Gently sit your biscuit surfboard into the cake and press it into the cake to secure it.
- Finish your cake with the ocean waves.
- Add a little more food colouring into one of the bowls of buttercream to achieve a darker blue.
- Add this to a piping bag or sandwich bag with the end cut off and your chosen piping tip.
- Pipe the fuller waves going towards the ‘sand’.
- Add the pale blue to the bag and pipe this buttercream on to create the froth that is crashing onto the sand.
- Marvel at your Stitch cake!
Notes
© Flavour of the Film. All content and imagery is copyright protected. Please do not use any of my images or written content without prior permission. If you would like to share any of the recipes or images on Flavour of the Film, please link back to the recipe in question and rewrite it in your own words, crediting Flavour of the Film as the original source.

One Comment
Comments are closed.