
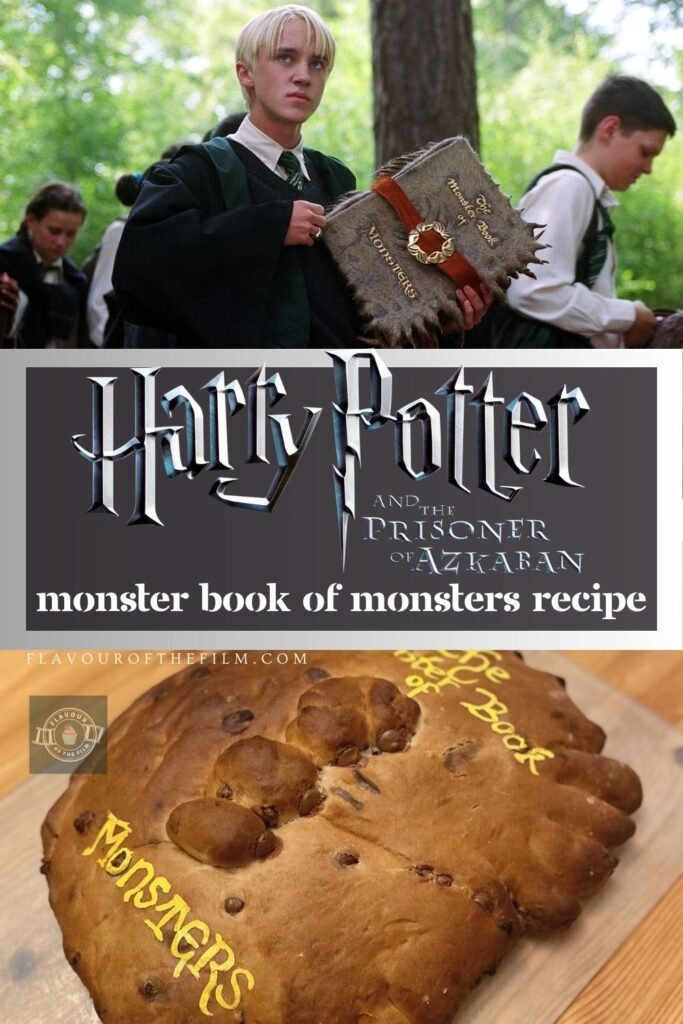
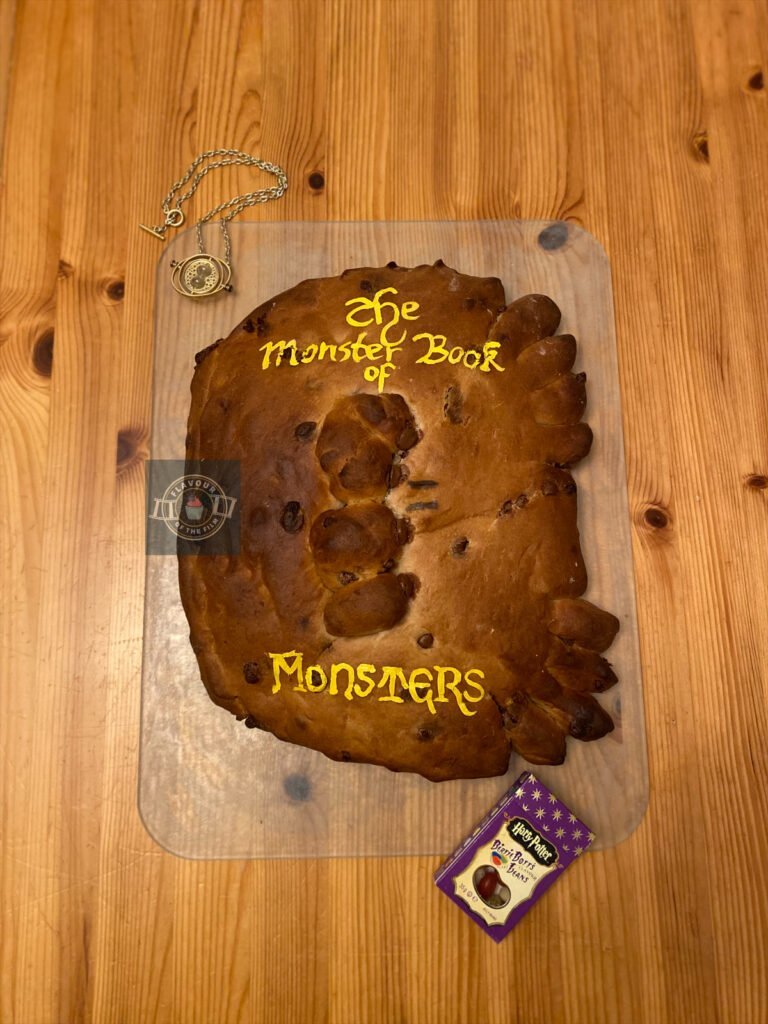
Yes, friends. We’re on instalment three of my Harry Potter series of bakes! You got it, this bake is celebrating Harry Potter and the Prisoner of Azkaban. My Monster Book of Monsters chocolate and honey sweet bread brings together a unique combo of flavours, all tied together in a book. Literally. Don’t forget to stroke the spine!
Contents

The Bake
Now, I did aim to bake through the Harry Potter series by recreating food from the films. But, when it came to Harry Potter and the Prisoner of Azkaban, I couldn’t pinpoint a specific dish that I wanted to recreate. I considered writing a recipe on a few different types of sweets and candy from Honeydukes, but my heart wasn’t in it.
So, I came up with something different. A bread, to be precise. It had been a while since I’d baked a bread for Flavour of the Film so it felt right.
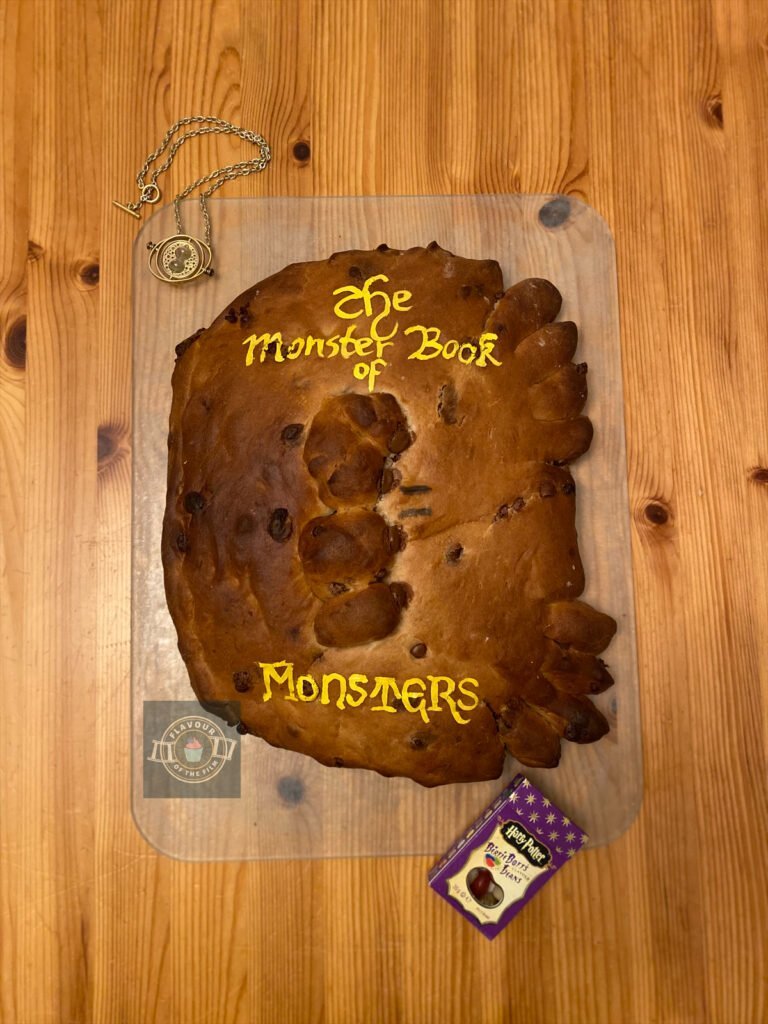
There were a few magical items that I was deliberating about when it came to the shape of this chocolate and honey sweet bread. I decided on The Monster Book of Monsters because, in bread form, it was easy to mould and decorate.
I had considered creating a loaf of bread in the shape of the Marauders Map, but the painting time it would have needed was just too long. So, it was an unlocked version of The Monster Book of Monsters that my bread became.

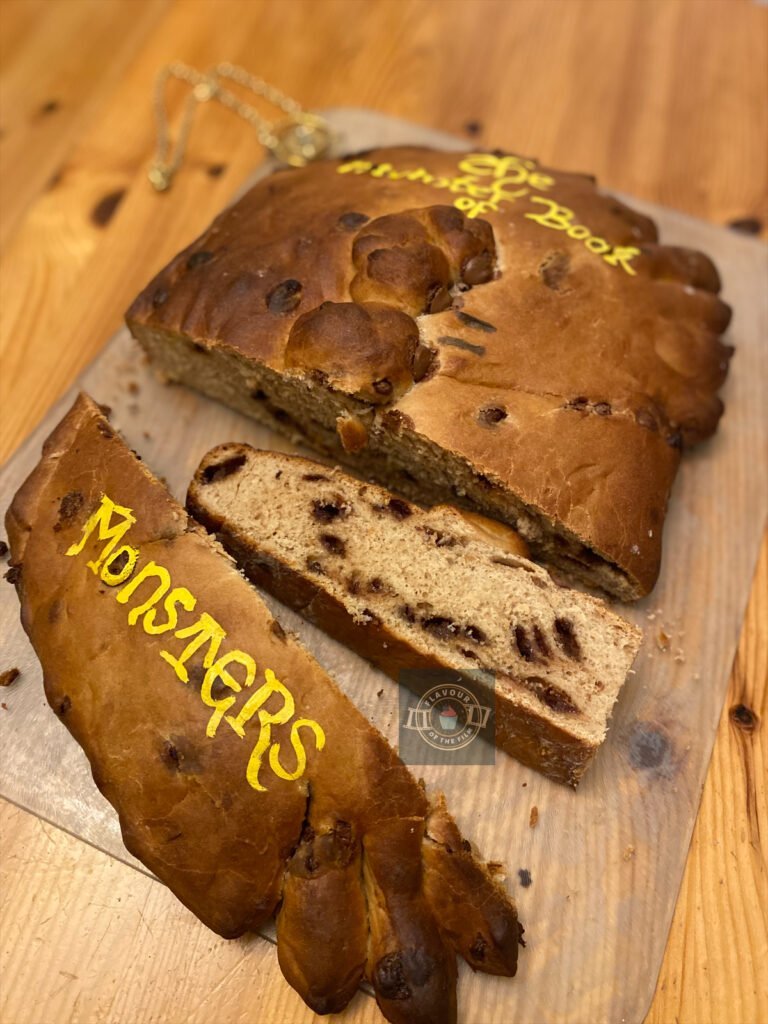
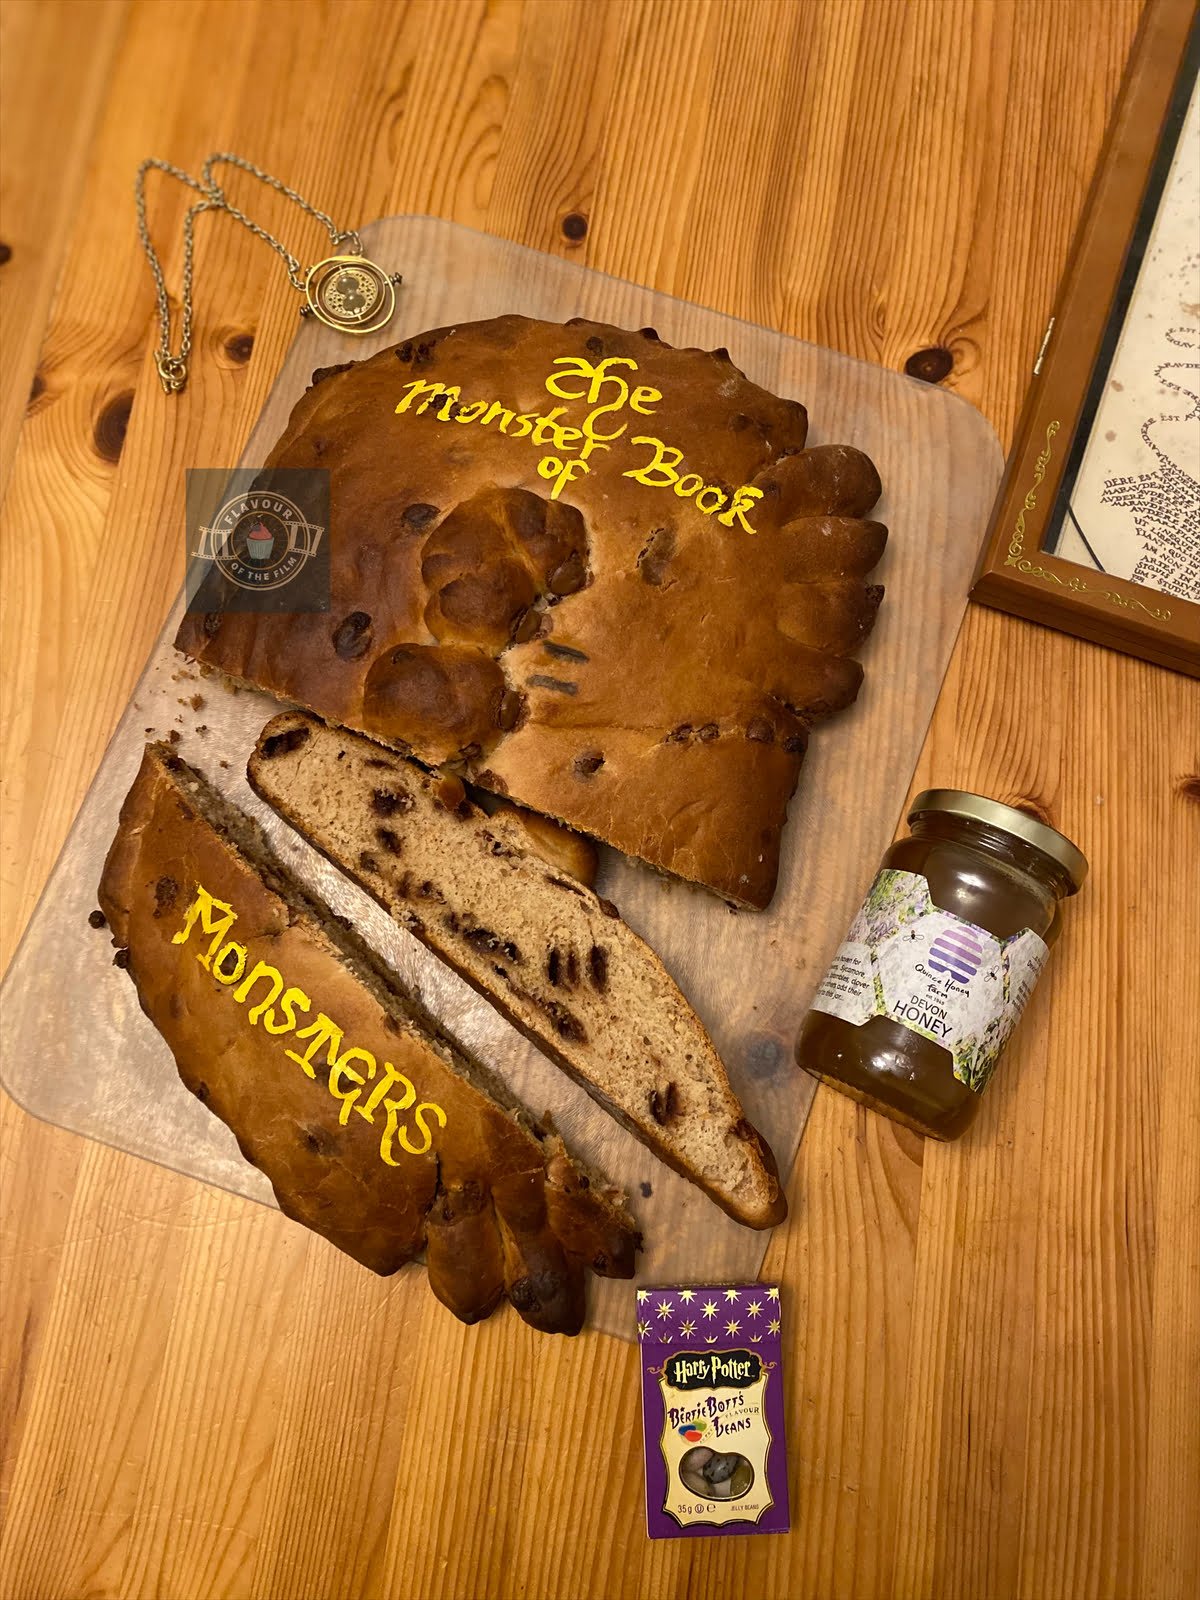
This chocolate and honey sweet bread is so incredibly soft.
It’s a Japanese milk bread, mostly because I love Japanese bread, but also because it was recently the Moon Festival in Japan… so yes, that’s my weak link to the brief. It was the Moon Festival in Japan, so I was inspired to make Japanese milk bread as there’s a strong moon theme in Harry Potter and the Prisoner of Azkaban… a full moon theme, to be exact.
Japanese milk bread is incredibly tasty. It’s also as soft as it is because a recipe for this bread includes the Tangzhong method. The Tangzhong method just requires you to mix bread flour and water together and heat it up until it creates a paste. It’s a little extra effort but it doesn’t take long at all and the results are more than worth it. Trust me.
As for the flavours, I went for chocolate as a reference to Lupin’s introductory scene.
It’s in this scene that we also get a feel for the dementors for the first time. Lupin gives Harry chocolate to help him feel better following his first encounter with a dementor. Thus, chocolate felt like a relevant tie to the film.
As another direct reference to the film, I sweetened the bread with honey instead of sugar. Purely as a homage to Honeydukes. The honey that I used is from a lovely place down in North Devon, England. I’ve been visiting Quince Honey Farm since I was little and their honey is the best. I have no business affiliation with them, I just love their honey.
Plus, their establishment is a great place to visit for a day out. I adore their cafe. Whichever honey you decide to use, make sure it’s the runny kind.
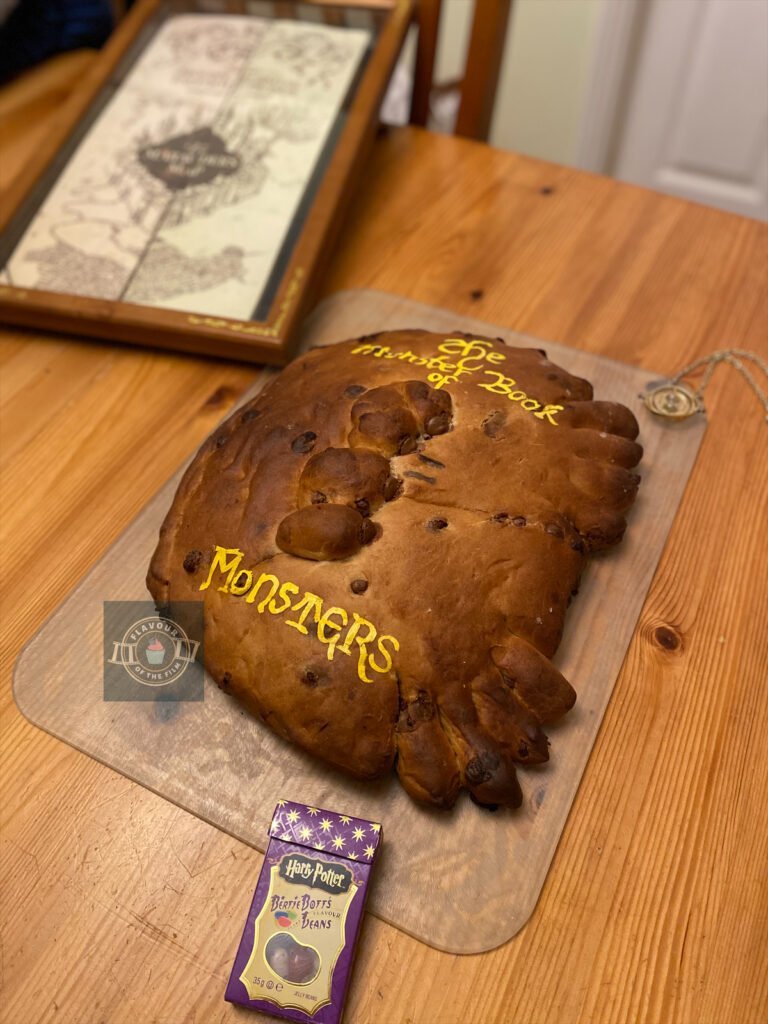
The only decoration I used on this chocolate sweet bread was a little gold food colouring to paint on the title of the book. Besides that, the bread decorated itself. Even the chocolate chips look like the patches on the fur of the book. Cool, right?
Top Tips
- Avoid over working the dough when kneading. An over worked dough can result in a tight bread which is less enjoyable to eat.
- You’ll know the gluten is developed enough when the dough is shiny, smooth and far less tacky than when you started kneading. You can also tell that it’s ready by using the window pane test: the dough thins and stretches to let light through before ripping, instead of ripping immediately.
- If you have access to one, feel free to knead the dough in a standing mixer with a dough hook attached. If, like me, you have to knead by hand, then embrace the shoulder and arm muscles you are about to strengthen!
- The honey and chocolate combo is utterly delicious but pretty delicate. Adding extra honey on the bread when serving makes this all the more special.
- To make sure the bread is baked, give it a few taps on the top and bottom to check that you hear a hollow sound. Be careful doing so as the bread loaf will be very hot!
There you have it. My Harry Potter and the Prisoner of Azkaban chocolate and honey sweet bread. This recipe is so easy and so incredibly delicious. I hope you have lots of fun making this bread, and more importantly, eating it. I recommend drizzling some extra runny honey over your slices of it. SO GOOD.
Happy baking, happy eating!
The Recipe
Ingredients
Tangzhong paste:
- 4 tbsp strong white bread flour
- 125ml [12 tbsp] water
Chocolate and honey sweet bread:
- 600g [3 ¾ cups] strong white bread flour
- 7g [1] sachet fast action dried yeast
- 1½ tsp salt
- 240ml [9 oz] lukewarm milk
- 60g [2 oz] unsalted butter melted but not hot
- 3 tbsp runny honey
- 1 large egg
- 250g – 300g [around 10 oz] milk chocolate chips/chunks + 4 for the eyes
Decoration:
- Gold food colouring
Serves: 12
Preparation time: 30 minutes
Proving time: 1 hour 30 minutes
Baking time: 30 minutes
Method
Chocolate and honey sweet bread:
- Make your Tangzhong paste first. Whisk together the flour and water in a small saucepan until it is smooth and lump-free.
- Place over a medium heat and keep whisking gently until a paste has formed.
- Set aside to cool.
- Melt the butter in a microwaveable bowl in the microwave until completely melted. Leave to the side to cool.
- Sieve the flour into a large bowl. Add the yeast to one side and the salt to the other. Do NOT let them touch yet.
- Pour the milk into another microwaveable bowl and microwave until warm (not hot) to the touch – about 40 seconds depending on your microwave. Leave to the side.
- Using a wooden spoon, make a well in the centre of the dry ingredients.
- Pour the melted butter and milk into the well. Add in the honey.
- Whisk the egg into your Tangzhong paste and spoon into the well.
- Using the wooden spoon, combine all of the ingredients, mixing well until a shaggy dough is formed.
- Add in the chocolate chips and fold in.
Kneading:
- Knead your dough either in a standing mixer with a dough hook for 5 – 10 minutes, or by hand on a clean and lightly floured surface for around 10 minutes. Add flour as you go as needed.
- Your dough will be ready when it is smooth and shiny. If it is still tacky, sprinkle some flour and knead a little more. The window pane test will also let you know if your dough is ready: rip a piece of dough off and pull it between two fingers in front of some light. If it stretches and allows light through before ripping, the gluten has developed enough. If it rips straight away, keep kneading and test again.
- Place your dough in a lightly oiled bowl and cover with a tea towel/cling film/beeswax wrap and allow it to rise in a relatively warm place for around 1 hour. I find that if my kitchen is cold, an airing cupboard works just as well as a proving oven!
- Prepare a baking tray by lining it with baking parchment/greaseproof paper.
- Once doubled in size, tip the dough out onto a clean and floured surface. Knock the air out – aka give it a few punches.
Shaping:
- Shape the dough into a rectangle and lift carefully onto your baking tray.
- Using a sharp knife, slice inwards into the right side of the bread so that you are left with sections of dough. Leave a gap in the middle and shape the mouth.
- Gently squeeze and pull the sections to resemble the legs/tentacles of the book.
- Slice a thin piece of dough off the left side to create a flatter spine. Rip this extra dough up and shape into the eye sockets. There should be four, each in a dome shape. Press them onto the top centre of the dough book, facing the right side.
- Press a chocolate chip/chunk into the side of each eye socket to create the eyes.
- Cover again and leave to rise a little more for 30 minutes.
- After 20 minutes, preheat your oven to 200°C [350°F] or 180°C fan.
- Remove the covering and bake your bread for 30 – 35 minutes, until golden brown. If it starts to colour quickly, carefully cover loosely with a sheet of tin foil and continue baking.
- Your bread will be ready when it is golden brown and sounds hollow when tapped on.
- Leave to cool on the tray and then carefully transfer to a wire rack to cool completely.
- Once cool, paint on your lettering with the gold food colouring and a thin tip paint brush.
- Don’t forget to stroke the spine before delving into it!
This utterly Riddikulus chocolate and honey sweet bread is best eaten fresh on the day, but will last for around 3 days in an airtight container. It’s delicious as is but I really recommend drizzling a little extra honey on the top to enjoy it even more. Enjoy!
The Film
What I really like about this particular chapter is the change of tone. It’s darker, scarier and more intense than the (now) nostalgic, fluffier films in Philosopher’s Stone and Chamber of Secrets. Part of the reason behind this change in tone is down to the change in director. Taking over the mantle from Chris Columbus was Mexican filmmaker Alfonso Cuarón.

With returning writer Steve Kloves, Cuarón brought audiences into the grittier progression of the story with such artistry and style. The colour palette completely shifted with the tone, as did the style of filmmaking. It needed it. With the introduction of characters tied to Harry’s past, as well as an apparent new threat to his life, the film was able to reflect just how dark Harry’s adolescence starts to become.
Even before their return to Hogwarts, Harry is made aware of an escaped prisoner, “notorious mass-murderer, Sirius Black”. Various people seem to be wanting to warn Harry of this apparent danger, but no one is willing to tell him exactly why it concerns him. Fair enough, he’s thirteen. But still. You can’t tell a teenager that their life is in danger but not tell them why.


Anyway, I digress. Back to 2004.
Harry, Ron and Hermione find themselves wrapped up in the conspiracy of Sirius Black and his supposed hunt for Harry. Hogwarts is surrounded by the guards of Azkaban whilst Black is on the run, and fear runs rampant throughout the castle. It’s up to the golden trio to make sure justice triumphs, even if that means meddling with time.
As expected, there were a few new characters introduced in the story. British acting royalty in the forms of Gary Oldman joins the cast as Sirius Black, along with Pam Ferris as Aunt Marge, David Thewlis as Professor Remus Lupin, and Dawn French as the Lady in the painting guarding the Gryffindor common room.
It wasn’t just new characters that were introduced, there were also new magical items and magical creatures that we got to meet.
Creatures including Buckbeak, and items including the Marauders Map. One of the many reasons I love the Harry Potter series is the constant addition of magical elements, whether that be characters, creatures, spells or objects. It’s the gradual expansion of the wizarding world that really gets you invested.
A number of fellow Potterheads I know say that Harry Potter and the Prisoner of Azkaban is their favourite instalment of the fantasy series. Let me know if this is your feeling, too! You know the socials.
Recipe Card
Chocolate and Honey Milk Bread | Harry Potter and the Prisoner of Azkaban
Ingredients
Tangzhong paste:
- 4 tbsp strong white bread flour
- 125 ml [12 tbsp] water
Chocolate and honey sweet bread:
- 600 g [3 ¾ cups] strong white bread flour
- 7 g [1] sachet fast action dried yeast
- 1½ tsp salt
- 240 ml [9 oz] lukewarm milk
- 60 g [2 oz] unsalted butter melted but not hot
- 3 tbsp runny honey
- 1 large egg
- 250 g – 300g [around 10 oz] milk chocolate chips/chunks + 4 for the eyes
Decoration:
- Gold food colouring
Instructions
- Make your Tangzhong paste first. Whisk together the flour and water in a small saucepan until it is smooth and lump-free.
- Place over a medium heat and keep whisking gently until a paste has formed.
- Set aside to cool.
- Melt the butter in a microwaveable bowl in the microwave until completely melted. Leave to the side to cool.
- Sieve the flour into a large bowl. Add the yeast to one side and the salt to the other. Do NOT let them touch yet.
- Pour the milk into another microwaveable bowl and microwave until warm (not hot) to the touch – about 40 seconds depending on your microwave. Leave to the side.
- Using a wooden spoon, make a well in the centre of the dry ingredients.
- Pour the melted butter and milk into the well. Add in the honey.
- Whisk the egg into your Tangzhong paste and spoon into the well.
- Using the wooden spoon, combine all of the ingredients, mixing well until a shaggy dough is formed.
- Add in the chocolate chips and fold in.
- Knead your dough either in a standing mixer with a dough hook for 5 – 10 minutes, or by hand on a clean and lightly floured surface for around 10 minutes. Add flour as you go as needed.
- Your dough will be ready when it is smooth and shiny. If it is still tacky, sprinkle some flour and knead a little more. The window pane test will also let you know if your dough is ready: rip a piece of dough off and pull it between two fingers in front of some light. If it stretches and allows light through before ripping, the gluten has developed enough. If it rips straight away, keep kneading and test again.
- Place your dough in a lightly oiled bowl and cover with a tea towel/cling film/beeswax wrap and allow it to rise in a relatively warm place for around 1 hour. I find that if my kitchen is cold, an airing cupboard works just as well as a proving oven!
- Prepare a baking tray by lining it with baking parchment/greaseproof paper.
- Once doubled in size, tip the dough out onto a clean and floured surface. Knock the air out – aka give it a few punches.
- Shape the dough into a rectangle and lift carefully onto your baking tray.
- Using a sharp knife, slice inwards into the right side of the bread so that you are left with sections of dough. Leave a gap in the middle and shape the mouth.
- Gently squeeze and pull the sections to resemble the legs/tentacles of the book.
- Slice a thin piece of dough off the left side to create a flatter spine. Rip this extra dough up and shape into the eye sockets. There should be four, each in a dome shape. Press them onto the top centre of the dough book, facing the right side.
- Press a chocolate chip/chunk into the side of each eye socket to create the eyes.
- Cover again and leave to rise a little more for 30 minutes.
- After 20 minutes, preheat your oven to 200°C [350°F] or 180°C fan.
- Remove the covering and bake your bread for 30 – 35 minutes, until golden brown. If it starts to colour quickly, carefully cover loosely with a sheet of tin foil and continue baking.
- Your bread will be ready when it is golden brown and sounds hollow when tapped on.
- Leave to cool on the tray and then carefully transfer to a wire rack to cool completely.
- Once cool, paint on your lettering with the gold food colouring and a thin tip paint brush.
- Don’t forget to stroke the spine before delving into it!
Notes
© Flavour of the Film. All content and imagery is copyright protected. Please do not use any of my images or written content without prior permission. If you would like to share any of the recipes or images on Flavour of the Film, please link back to the recipe in question and rewrite it in your own words, crediting Flavour of the Film as the original source.


3 Comments
Comments are closed.