Chocolate and Honey Milk Bread | Harry Potter and the Prisoner of Azkaban
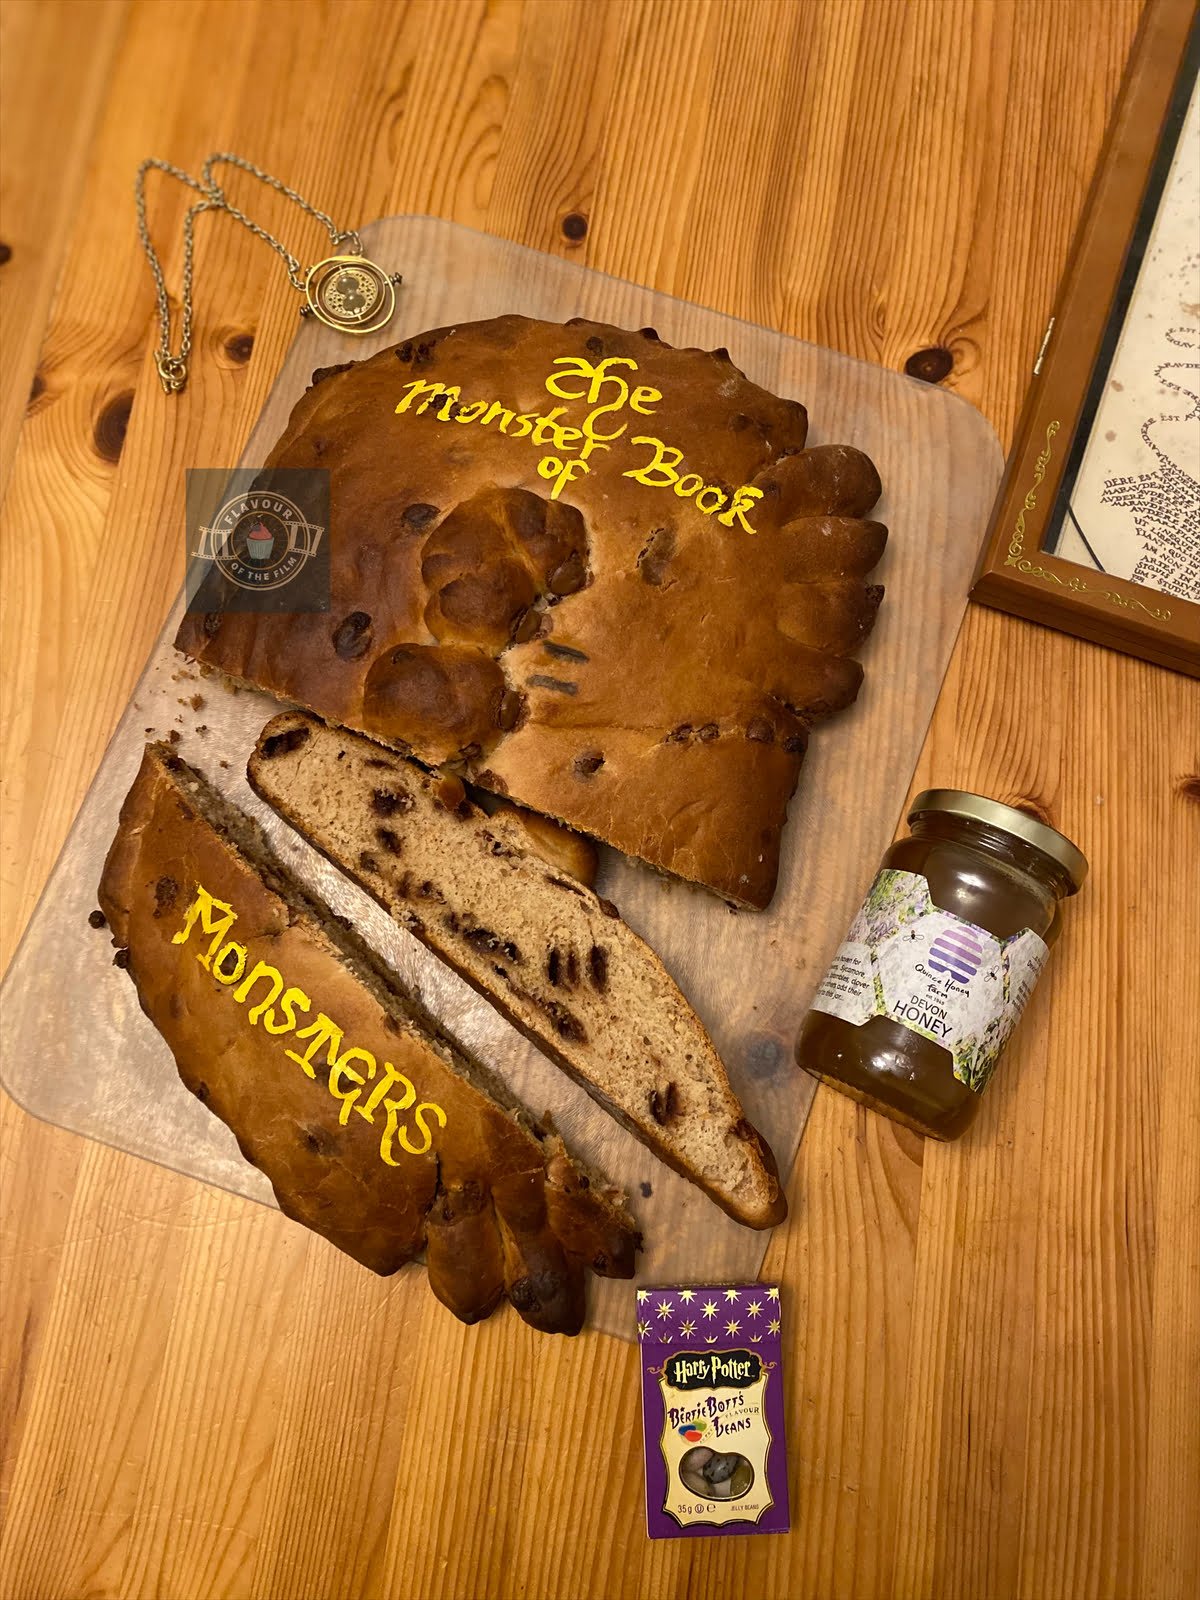
Magically soft and light milk bread flavoured with chocolate and honey, shaped and decorated like The Monster Book of Monsters, celebrating Harry Potter and the Prisoner of Azkaban.
Ingredients
Tangzhong paste:
- 4 tbsp strong white bread flour
- 125 ml [12 tbsp] water
Chocolate and honey sweet bread:
- 600 g [3 ¾ cups] strong white bread flour
- 7 g [1] sachet fast action dried yeast
- 1½ tsp salt
- 240 ml [9 oz] lukewarm milk
- 60 g [2 oz] unsalted butter melted but not hot
- 3 tbsp runny honey
- 1 large egg
- 250 g – 300g [around 10 oz] milk chocolate chips/chunks + 4 for the eyes
Decoration:
- Gold food colouring
Instructions
- Make your Tangzhong paste first. Whisk together the flour and water in a small saucepan until it is smooth and lump-free.
- Place over a medium heat and keep whisking gently until a paste has formed.
- Set aside to cool.
- Melt the butter in a microwaveable bowl in the microwave until completely melted. Leave to the side to cool.
- Sieve the flour into a large bowl. Add the yeast to one side and the salt to the other. Do NOT let them touch yet.
- Pour the milk into another microwaveable bowl and microwave until warm (not hot) to the touch – about 40 seconds depending on your microwave. Leave to the side.
- Using a wooden spoon, make a well in the centre of the dry ingredients.
- Pour the melted butter and milk into the well. Add in the honey.
- Whisk the egg into your Tangzhong paste and spoon into the well.
- Using the wooden spoon, combine all of the ingredients, mixing well until a shaggy dough is formed.
- Add in the chocolate chips and fold in.
- Knead your dough either in a standing mixer with a dough hook for 5 – 10 minutes, or by hand on a clean and lightly floured surface for around 10 minutes. Add flour as you go as needed.
- Your dough will be ready when it is smooth and shiny. If it is still tacky, sprinkle some flour and knead a little more. The window pane test will also let you know if your dough is ready: rip a piece of dough off and pull it between two fingers in front of some light. If it stretches and allows light through before ripping, the gluten has developed enough. If it rips straight away, keep kneading and test again.
- Place your dough in a lightly oiled bowl and cover with a tea towel/cling film/beeswax wrap and allow it to rise in a relatively warm place for around 1 hour. I find that if my kitchen is cold, an airing cupboard works just as well as a proving oven!
- Prepare a baking tray by lining it with baking parchment/greaseproof paper.
- Once doubled in size, tip the dough out onto a clean and floured surface. Knock the air out – aka give it a few punches.
- Shape the dough into a rectangle and lift carefully onto your baking tray.
- Using a sharp knife, slice inwards into the right side of the bread so that you are left with sections of dough. Leave a gap in the middle and shape the mouth.
- Gently squeeze and pull the sections to resemble the legs/tentacles of the book.
- Slice a thin piece of dough off the left side to create a flatter spine. Rip this extra dough up and shape into the eye sockets. There should be four, each in a dome shape. Press them onto the top centre of the dough book, facing the right side.
- Press a chocolate chip/chunk into the side of each eye socket to create the eyes.
- Cover again and leave to rise a little more for 30 minutes.
- After 20 minutes, preheat your oven to 200°C [350°F] or 180°C fan.
- Remove the covering and bake your bread for 30 – 35 minutes, until golden brown. If it starts to colour quickly, carefully cover loosely with a sheet of tin foil and continue baking.
- Your bread will be ready when it is golden brown and sounds hollow when tapped on.
- Leave to cool on the tray and then carefully transfer to a wire rack to cool completely.
- Once cool, paint on your lettering with the gold food colouring and a thin tip paint brush.
- Don’t forget to stroke the spine before delving into it!
Notes
This utterly Riddikulus chocolate and honey sweet bread is best eaten fresh on the day, but will last for around 3 days in an airtight container. It’s delicious as is but I really recommend drizzling a little extra honey on the top to enjoy it even more. Enjoy!