
Whenever I am asked for film recommendations, Hot Fuzz is always on my list. This joyous film is up there with the best of British cinema, in my opinion. It’s got everything you’d want from a police comedy: continuous jokes, accurate police representation, great action scenes, and unforgettable characters. My Hot Fuzz cake pays homage to just that. Hold on to your hats, friends.
Contents
The Bake
My main motivation for creating this Hot Fuzz cake recipe, besides posting it for Flavour of the Film, was wanting to make a birthday cake for one of my best friends, specifically with a Hot Fuzz theme. It’s one of her favourite films ever and I am very happy to report that she loved the cake. Despite the fact that it, unfortunately, did not survive the short car journey to her house.
It resembled a crime scene which, in all fairness, actually made some comical sense.

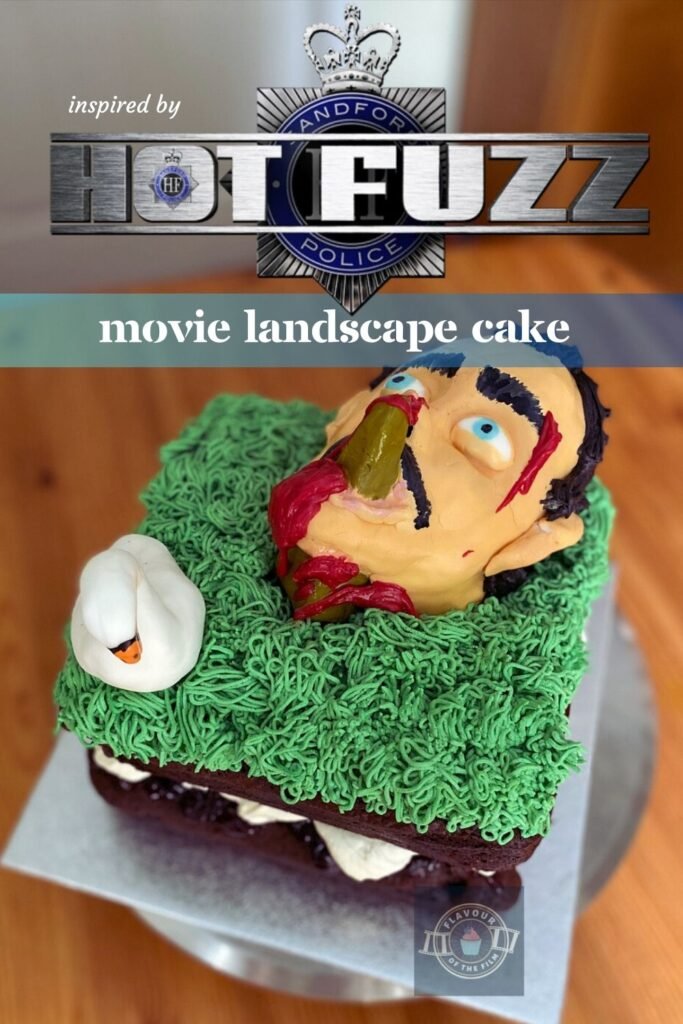
I decided to add this Hot Fuzz cake to my landscape cake collection.
I knew I wanted to do that pretty early on in the design process.
What evaded me was an idea for which scene I wanted to reference in the decoration of this bake. There are various notable (and creative) murders throughout the film which I considered, but soon realised that a murder scene may not be entirely attractive to anyone looking to bake a Hot Fuzz themed cake. And eat it, for that matter.
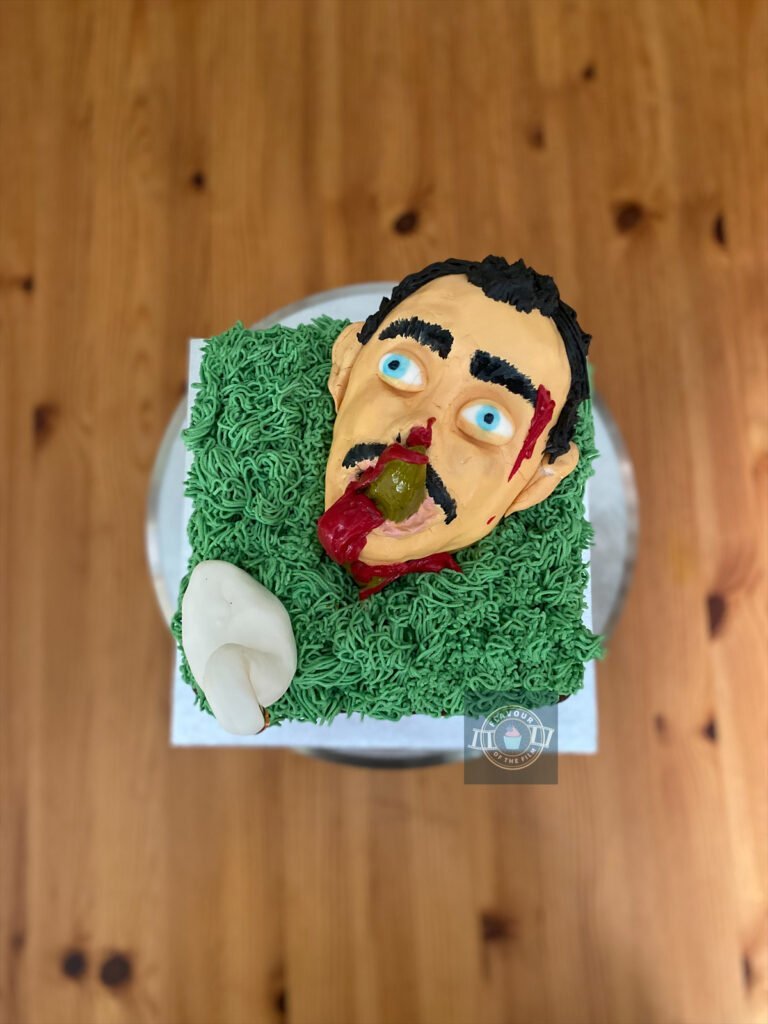
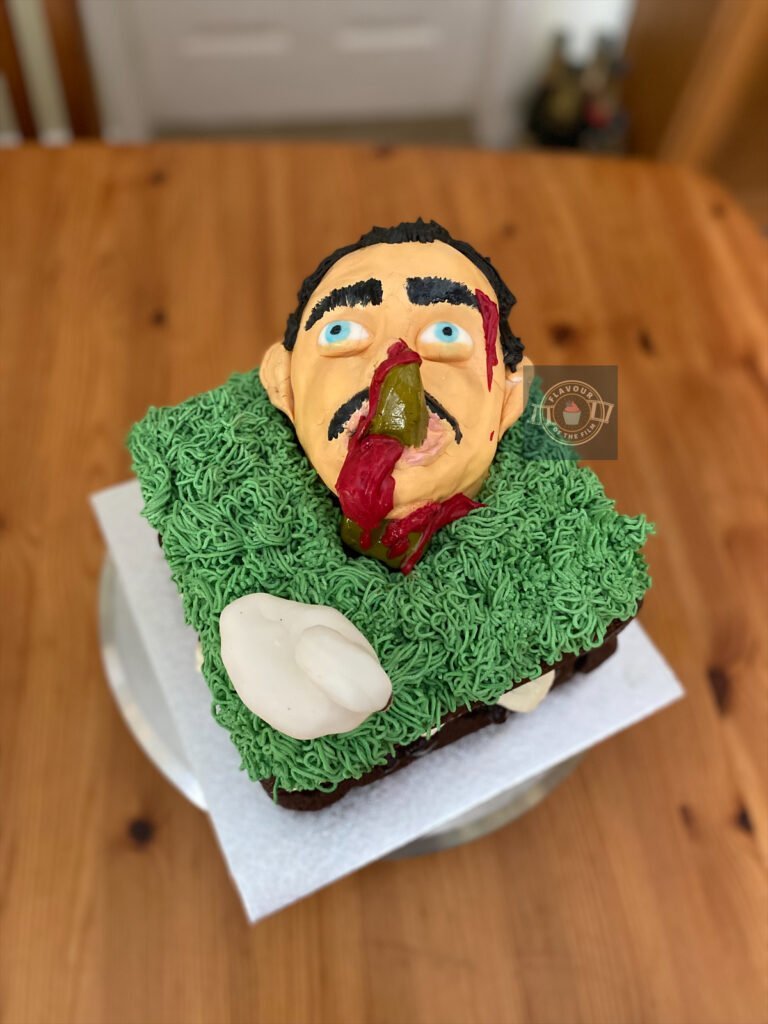
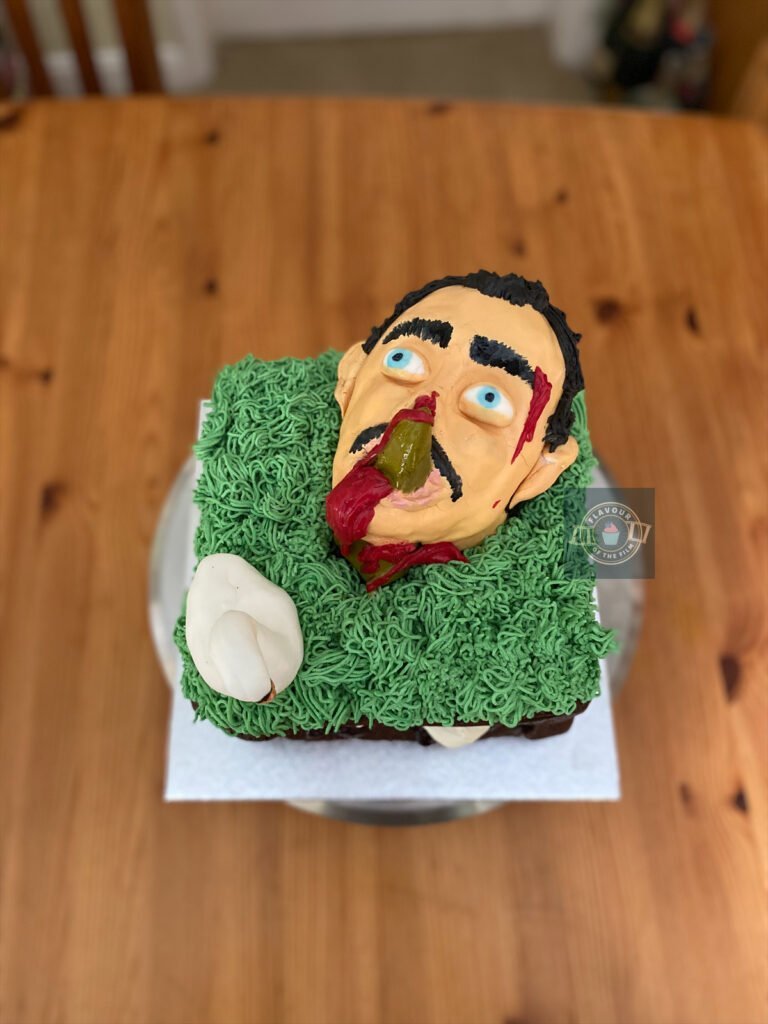
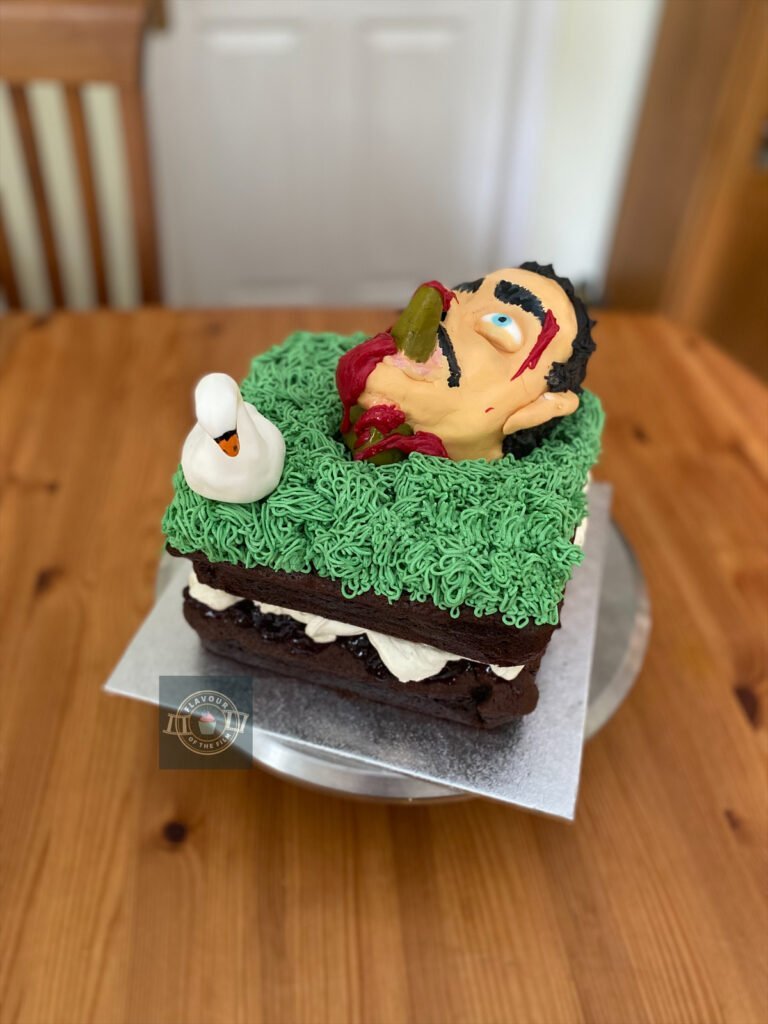
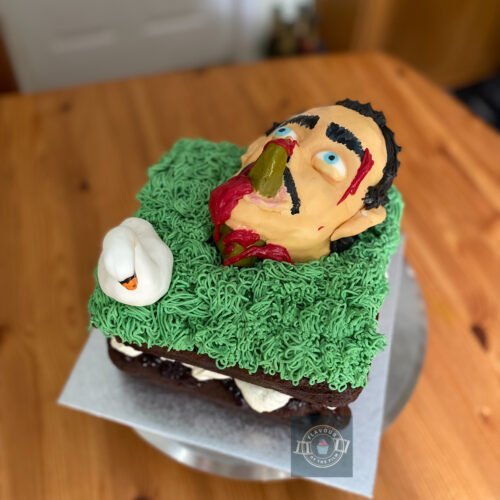
That is why I settled on an injury rather than a murder. Arguably the most hilarious and ridiculous injury in the film: Timothy Dalton having a model village church steeple burst through his jaw. Not a murder, but gory and recognisable enough to be identified with Hot Fuzz.
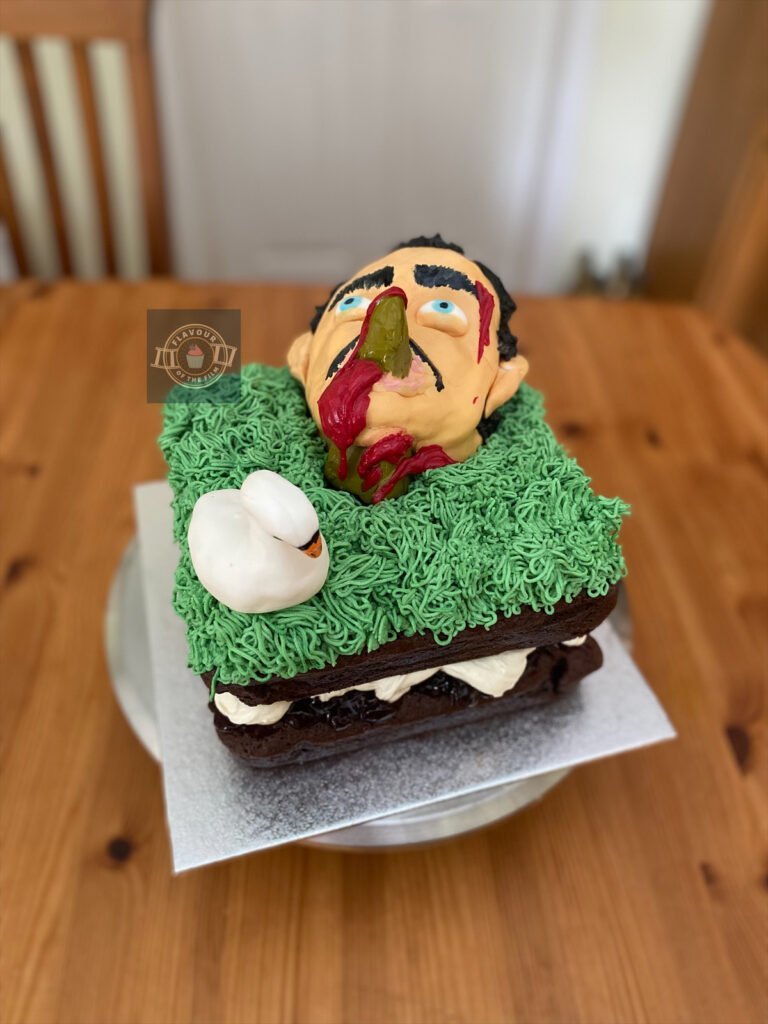
Plus, a swan for added effect. If you know, you know.
Both the swan and Timothy’s head are sculpted out of fondant icing and painted with food colouring. This was the easiest way I could find to shape the decorations, but you can use modelling chocolate to do the same if preferred.
I piped Timothy’s hair in buttercream. Again, this is optional if you’d prefer to paint it on. I just love the effect.
The ‘blood’ effect was achieved by making a white chocolate ganache and tinting it red. This is also optional and can be done by just pouring a little liquid food colouring in its place, but this would work out to be quite costly when it comes to the amount needed.
The ‘grass’ on this Hot Fuzz cake was piped in fresh whipped cream rather than buttercream.
This is because my chosen cake is a Black Forest Gateau, which is more often than not served with fresh cream instead of buttercream.
If you prefer buttercream or have a dairy allergy then by all means go for that instead! I’d recommend a ratio around 350g butter to 700g icing [confectioners] sugar if doing so.
I used a nozzle with multiple holes: the kind you use for a furr or grass effect.
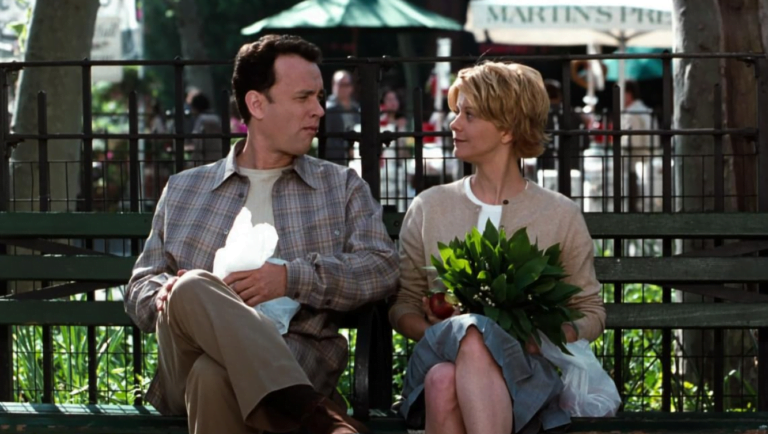
The reason for this cake being a Black Forest Gateau is my intention to pay homage to Nicholas Angel’s introduction to the village police station scene. While he is being given the tour, everyone is eating Black Forest Gateau. A cake that is punishment for “Danny’s little indiscretion” a.k.a misplacing his helmet.
The Hot Fuzz cake sponges are the most delicious chocolate fudge cake.
It’s adapted and altered from a Jane’s Patisserie recipe that I swear by. I adapted the amounts of each ingredient to both fit my design for the cake and my own taste.
As mentioned in my Grogu cake, the coffee that is listed in the ingredients is minimal. It is only in the recipe because it helps lift the flavour and richness of the chocolate – you can’t taste it at all.
If you have a coffee allergy or want to leave it out for other reasons, do so but add the hot water to the mix regardless.
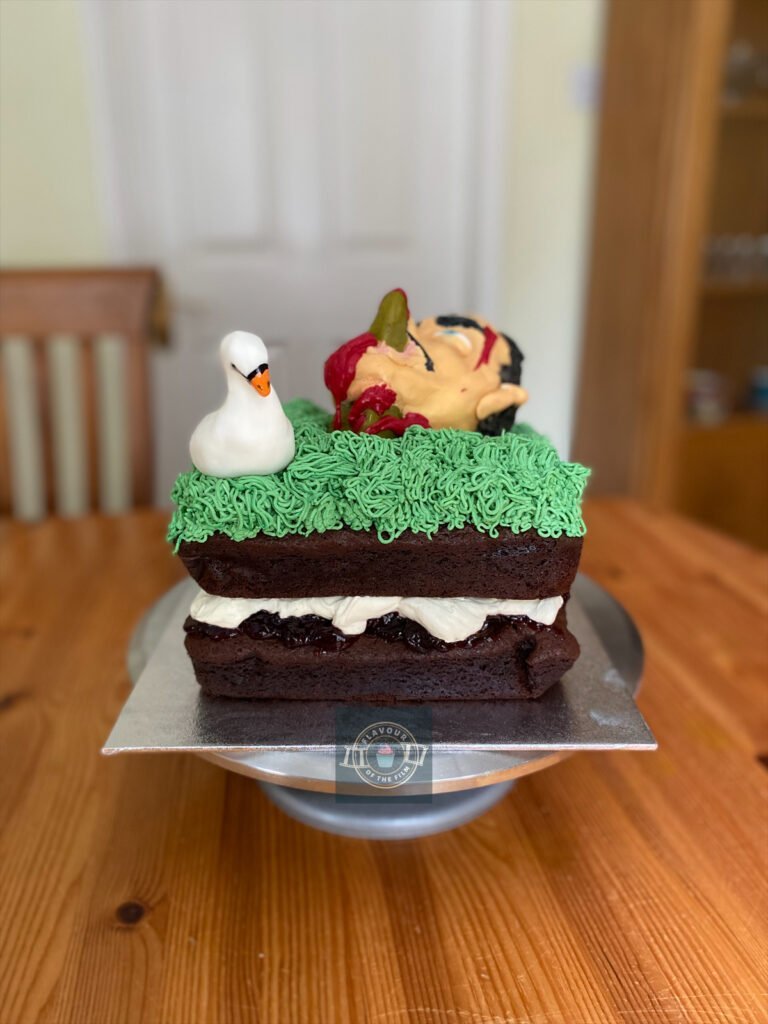
The last flavour that makes that iconic Black Forest Gateau taste is the cherry.
There is both cherry jam sandwiched between the layers of the Hot Fuzz themed cake, as well as cherries in Kirsch soaked in the sponges. If preferred, you can skip the soaking of the sponges. That’s down to personal preference, to be honest. Cherry can be quite an acquired taste so it’s down to you.
Now, whilst I am certainly an avid fan of making my own jam, I opted to go for shop bought jam for this recipe. There is no shame whatsoever in doing so, allow me to just remind you of that. Plus, it’s a massive time saver, so if you’re making this cake with a short time frame available then it saves you the extra hassle.
Top Tips
- Make sure not to over mix the cake batter. An over mixed cake batter can result in a not-so-light-and-fluffy sponge.
- The coffee is entirely optional in the sponge. You can’t taste it at all, it simply enhances the chocolate flavour! If leaving it out, make sure to still add the hot water.
- As always, use at least 70% dark chocolate – the higher the percentage, the richer the taste, the more chocolatey the flavour.
- If you can’t find buttermilk, simply sour an equal amount of cow’s milk with the juice of 1/2 a lemon. Let it sit for 10 minutes, then use.
- As is traditional with a black forest gateau, this cake is topped with whipped cream. However, to save space in the fridge, you can swap t out for an easy buttercream. 200g unsalted butter with 400g icing sugar should be plenty. This option is favourable if you need to be able to transport the cake. Trust me when I say that this cake may not make it from point A to point B if whipped cream is used. It’ll slide around like a knob of butter in a hot frying pan.
- Make sure to shape and paint your fondant features in good time. I left the features to dry overnight once I had painted them, just to make sure they air-dried in plenty of time.
- Have fun with the fondant molding! It will be weird to begin with but you should never judge art before it’s finished.
So, there you have it, chaps and chapettes. My Hot Fuzz inspired Black Forest Gateau. This Hot Fuzz cake is delectable and hilarious at the same time. Perfect for any Hot Fuzz themed party. I hope you have great fun making it and eating it.
Happy baking, happy eating!
The Recipe
Ingredients
Hot Fuzz cake:
- 290g [10.25 oz] dark chocolate (at least 70%)
- 290g [10.25 oz] unsalted butter
- 1 tbsp instant coffee granules optional
- 130ml [4.5 oz] boiling water
- 265g [1½ cups + 2 tbsp] plain [all-purpose] flour
- 40g [¼ cup + 2 tbsp] cocoa powder
- 1½ tsp baking powder
- ¼ tsp bicarbonate of soda [baking soda]
- 200g [1 cup] caster sugar
- 330g [1½ cups + 2 tbsp] light brown sugar
- 290g eggs (about 5 medium sized)
- 110ml [4.5 oz] buttermilk
- Cherries in Kirsch optional
Whipped cream:
- 600ml [22.5 ml] double [whipping] cream
- 2 tbsp icing [confectioners] sugar
- Green food colouring
- 4 heaped tbsp cherry jam
Decorations:
- 25g [1 oz] unsalted butter
- 50g [¼ cup + 1 tbsp] icing [confectioners] sugar
- Black food colouring
- Peach food colouring
- Blue food colouring
- Orange food colouring
- Pink food colouring
- Yellow food colouring and green food colouring mixed (for the steeple)
‘Blood’ ganache:
- 50g [1.75 oz] white chocolate
- 20 ml [1½ tbsp] double [heavy] cream
- Red food colouring
Serves: 10+
Preparation time: 30 minutes
Baking time: 45 – 50 minutes
Decorating time: 1 hour
Method
Hot Fuzz cake:
- Preheat your oven to 160°C [320°F] or 140°C fan. Grease and line two 8 x 8 x 2 inch square tins with baking parchment/greaseproof paper. Set aside.
- Melt together the dark chocolate and butter in a glass bowl over a bain marie (a pot of simmering water), or in short bursts in the microwave, stirring in between until fully smooth.
- Dissolve the coffee in a mug with the boiling water. Add to the chocolate and butter mix and stir in until smooth.
- Leave to the side to cool to room temperature.
- In another large mixing bowl, add the flour, cocoa powder, baking powder, bicarbonate of soda and sugars and mix together with a wooden spoon.
- In another bowl, whisk together the buttermilk and eggs until light and airy. You’ll know this is ready when you lift the whisk up and a trail continues pouring from the whisk for a few seconds.
- Fold the eggs and buttermilk mix into the chocolate and butter mix.
- Add the dry ingredients into this new chocolate mix and fold in gently until completely combined.
- Split the mix evenly into the two tins.
- Bake for 45 – 50 minutes. This will depend on how hot your oven runs. You can check the sponges after 40 minutes.
- The sponges will be ready when a skewer or cocktail stick comes out with a few crumbs attached but not wet, and the sponges make little to no bubbling/crackling sounds when you listen to them.
- Leave the sponges in the tins to cool. If soaking them in the cherry Kirsch, do so now. Poke a few holes in each sponge with a fork and spoon over a generous amount of the Kirsch. Around 5 or so tbsp for each is a good amount.
- Leave to cool in the tins for 10 or so minutes before transferring upside down to a wire rack to cool completely.
Shaping decorations:
- While your cakes are cooling, mould your characters. This is easier to do by moulding mostly from a single block rather than individual pieces.
- You can mould the ears separately and attach them with edible glue or by sticking cocktail sticks through them horizontally into the head.
- I recommend moulding the steeple and shaping the jaw around it.
- Make sure to add fondant under the head to support it – you can cover it with the hair.
- Paint the features of your characters using the different food colourings and small paint brushes.
- Set aside to dry as much as possible.
Construction:
- Whilst your fondant characters are drying, whip your cream.
- Whip the cream and icing sugar in a large bowl with an electric whisk until you have reached near stiff peaks.
- Place one of the sponge layers on a cake board/cake stand/plate.
- Smother a generous amount of cherry jam on the sponge.
- Gently spoon a generous amount of the whipped cream over the jam and spread to the edges as much as possible.
- Lay the second sponge on top.
- Add the green food colouring to the whipped cream and briefly whisk until the cream is an even colour. It should be in stiff peaks now.
- Carefully lift the fondant icing characters and push 4 or 5 cocktail sticks into the base (1 in the swan and the rest into the head) until halfway in. Lower them into the cake until the cocktail sticks are secure and the characters are balanced well.
- The head will be heavy but the cake is sturdy enough to hold it!
- If piping the hair, do so now using the following steps.
- In a new bowl, beat together the butter and icing sugar. Add a splash of milk to loosen if needed. Add the black food colouring and beat in until dark.
- Add the buttercream to a piping bag or sandwich bag with a multi-hole nozzle and pipe on to create the hair. I find that a squeeze, let go and lift technique works well here.
- Using the multi-hole nozzle (cleaned) in a piping bag or sandwich bag, pipe the grass – using the same technique – all over the top sponge. Be careful to pipe around the characters without touching or knocking them.
Ganache:
- Lastly, make the ‘blood’ ganache.
- Put the white chocolate and cream in a microwavable safe bowl and microwave in 20 second bursts until melted together, stirring in between.
- Once melted, add the red food colouring and mix in until an even blood-red colour has been achieved.
- Using the spoon, pour the ganache over the edge of the right (his left) eyebrow, and the rest over the mouth and steeple.
- Serve immediately or keep in a cake box in the fridge until ready to serve.
This comedic yet deliciously chocolatey Hot Fuzz cake should last for around 3 days due to the fresh cream element. Keep it in the fridge when not eating it. If you have used buttercream in place of the cream, then it will last for at least 4 days in an airtight container/cake box.
The Film
There is so much to unpack with Hot Fuzz, I’m trying to decide where to begin. Let’s start with the genius behind the masterpiece. In 2007, Edgar Wright took charge in the director’s seat to create this iconic film. He also co-wrote Hot Fuzz alongside Simon Pegg, the brilliant actor behind main character Nicholas Angel.
Even before Hot Fuzz, Wright and Pegg were already firm friends and partners, along with excellent actor Nick Frost. They had already combined efforts on previous works (eventually completing the Cornetto Trilogy) and Hot Fuzz was no different. Frost played Angel’s eager new co-worker and friend: PC Danny Butterman.
The cast of Hot Fuzz was a pretty incredible amalgamation of British acting talent.
Including the likes of Olivia Coleman, Bill Nighy, Timothy Dalton, Bill Bailey, Jim Broadbent, Martin Freeman, Paddy Considine, Rafe Spall, Steve Coogan, Stephen Merchant and more.
Not only does this film host such iconic British talent, it also features cameos from some very well known Australian talent too… here’s a fun fact for all of you Hot Fuzz fans: Cate Blanchett appears in the film, covered head to toe in CSI gear. She has a speaking part and only her eyes are visible.
Unless you know Cate Blanchett super well, it’s pretty difficult to know straight out of the gate that it’s her in this role.
The other notable cameo I want to mention here is the one that features in the very quick, but very funny shot of Nicholas Angel (Simon Pegg) being stabbed in the hand by a man dressed as Santa Claus.
That Santa Claus? Peter Jackson.
YES. Peter Jackson a.k.a the filmmaker behind the movie adaptation trilogy of The Lord of the Rings. Again, you wouldn’t know it was him immediately because he’s in a full Father Christmas get up and because it’s such a short amount of time on screen.
I reckon the Peter Jackson cameo is my favourite fun fact about Hot Fuzz.
For anyone that needs a refresher…
Hot Fuzz is about a London cop (Angel) who is transferred to a rural village. The reason for his transfer is essentially down to the fact that he’s too good a police officer and is showing-up his superiors. So, they send him to a village where the recorded crime rate is practically non-existent. Note that I have highlighted “recorded” in bold.
However, he soon realises that this quaint little English village is not all that it tries so very hard to be.
Both of my parents are retired police officers, and they often mention how accurately a lot of the actions and decisions made by Nicholas Angel in particular are accurate to what a real police officer would do in the same situation. I love when the research is done well!
It may be strange to say, but I genuinely count Hot Fuzz as one of my comfort films.
Yeah, it’s super gory. Yeah, it’s not exactly a chilled film.
But, it’s just SO funny. The jokes never get old. A couple of them haven’t aged amazingly well, I’ll admit that, but I just find such great comfort in sticking this film on and doing impressions of the characters.
It’s such a true favourite of mine that I actually organised, filmed and edited a three-minute parody of Hot Fuzz and entered it into a competition that my Mum’s old work held.
It won first place.
I’ll just leave that there.
Recipe Card
Hot Fuzz Cake | Danny’s Black Forest Gateau
Ingredients
Hot Fuzz cake:
- 290 g [10.25 oz] dark chocolate at least 70%
- 290 g [10.25 oz] unsalted butter
- 1 tbsp instant coffee granules optional
- 130 ml [4.5 oz] boiling water
- 265 g [1½ cups + 2 tbsp] plain [all-purpose] flour
- 40 g [¼ cup + 2 tbsp] cocoa powder
- 1½ tsp baking powder
- ¼ tsp bicarbonate of soda [baking soda]
- 200 g [1 cup] caster sugar
- 330 g [1½ cups + 2 tbsp] light brown sugar
- 290 g eggs about 5 medium sized
- 110 ml [4.5 oz] buttermilk
- Cherries in Kirsch optional
Decoration:
- 600 ml [22.5 ml] double [whipping] cream
- 2 tbsp icing [confectioners] sugar
- Green food colouring
- 4 heaped tbsp cherry jam
Modelled decorations:
- 25 g [1 oz] unsalted butter
- 50 g [¼ cup + 1 tbsp] icing [confectioners] sugar
- Black food colouring
- Peach food colouring
- Blue food colouring
- Orange food colouring
- Pink food colouring
- Yellow food colouring and green food colouring mixed for the steeple
'Blood’ ganache:
- 50 g [1.75 oz] white chocolate
- 20 ml [1½ tbsp] double [heavy] cream
- Red food colouring
Instructions
- Preheat your oven to 160°C [320°F] or 140°C fan. Grease and line two 8 x 8 x 2 inch square tins with baking parchment/greaseproof paper. Set aside.
- Melt together the dark chocolate and butter in a glass bowl over a bain marie (a pot of simmering water), or in short bursts in the microwave, stirring in between until fully smooth.
- Dissolve the coffee in a mug with the boiling water. Add to the chocolate and butter mix and stir in until smooth.
- Leave to the side to cool to room temperature.
- In another large mixing bowl, add the flour, cocoa powder, baking powder, bicarbonate of soda and sugars and mix together with a wooden spoon.
- In another bowl, whisk together the buttermilk and eggs until light and airy. You’ll know this is ready when you lift the whisk up and a trail continues pouring from the whisk for a few seconds.
- Fold the eggs and buttermilk mix into the chocolate and butter mix.
- Add the dry ingredients into this new chocolate mix and fold in gently until completely combined.
- Split the mix evenly into the two tins.
- Bake for 45 – 50 minutes. This will depend on how hot your oven runs. You can check the sponges after 40 minutes.
- The sponges will be ready when a skewer or cocktail stick comes out with a few crumbs attached but not wet, and the sponges make little to no bubbling/crackling sounds when you listen to them.
- Leave the sponges in the tins to cool. If soaking them in the cherry Kirsch, do so now. Poke a few holes in each sponge with a fork and spoon over a generous amount of the Kirsch. Around 5 or so tbsp for each is a good amount.
- Leave to cool in the tins for 10 or so minutes before transferring upside down to a wire rack to cool completely.
- While your cakes are cooling, mould your characters. This is easier to do by moulding mostly from a single block rather than individual pieces.
- You can mould the ears separately and attach them with edible glue or by sticking cocktail sticks through them horizontally into the head.
- I recommend moulding the steeple and shaping the jaw around it.
- Make sure to add fondant under the head to support it – you can cover it with the hair.
- Paint the features of your characters using the different food colourings and small paint brushes.
- Set aside to dry as much as possible.
- Whilst your fondant characters are drying, whip your cream.
- Whip the cream and icing sugar in a large bowl with an electric whisk until you have reached near stiff peaks.
- Place one of the sponge layers on a cake board/cake stand/plate.
- Smother a generous amount of cherry jam on the sponge.
- Gently spoon a generous amount of the whipped cream over the jam and spread to the edges as much as possible.
- Lay the second sponge on top.
- Add the green food colouring to the whipped cream and briefly whisk until the cream is an even colour. It should be in stiff peaks now.
- Carefully lift the fondant icing characters and push 4 or 5 cocktail sticks into the base (1 in the swan and the rest into the head) until halfway in. Lower them into the cake until the cocktail sticks are secure and the characters are balanced well.
- The head will be heavy but the cake is sturdy enough to hold it!
- If piping the hair, do so now using the following steps.
- In a new bowl, beat together the butter and icing sugar. Add a splash of milk to loosen if needed. Add the black food colouring and beat in until dark.
- Add the buttercream to a piping bag or sandwich bag with a multi-hole nozzle and pipe on to create the hair. I find that a squeeze, let go and lift technique works well here.
- Using the multi-hole nozzle (cleaned) in a piping bag or sandwich bag, pipe the grass – using the same technique – all over the top sponge. Be careful to pipe around the characters without touching or knocking them.
- Lastly, make the ‘blood’ ganache.
- Put the white chocolate and cream in a microwavable safe bowl and microwave in 20 second bursts until melted together, stirring in between.
- Once melted, add the red food colouring and mix in until an even blood-red colour has been achieved.
- Using the spoon, pour the ganache over the edge of the right (his left) eyebrow, and the rest over the mouth and steeple.
- Serve immediately or keep in a cake box in the fridge until ready to serve.
Notes
© Flavour of the Film. All content and imagery is copyright protected. Please do not use any of my images or written content without prior permission. If you would like to share any of the recipes or images on Flavour of the Film, please link back to the recipe in question and rewrite it in your own words, crediting Flavour of the Film as the original source.


One Comment
Comments are closed.