If you love Avatar: The Last Airbender and you love cute cakes, you’ve come to the right place! My Appa bento cake is an adorable cake-based sweet treat with a little chocolate flare, perfect for any Avatar: The Last Airbender fan. Flying bison raring to go? Let’s soar.
Contents
The Bake
Bento cakes have been on my radar for a while, but I’ve only just got round to creating my own. I’m officially hooked. If you’re looking for a tutorial on how to make a bento cake, look no further, friends.
The term “bento” is of Japanese origin and refers to a lunchbox. If you’ve ever heard of a bento box, you’ll know that they are one of the most popular ways to consume a lunch meal in Japan.
Essentially, a bento cake is a cake that is small enough to fit in a lunchbox.
Flavours, patterns, decorative styles can all change to suit the person eating the bento cake, but the basics of the concept remain the same.
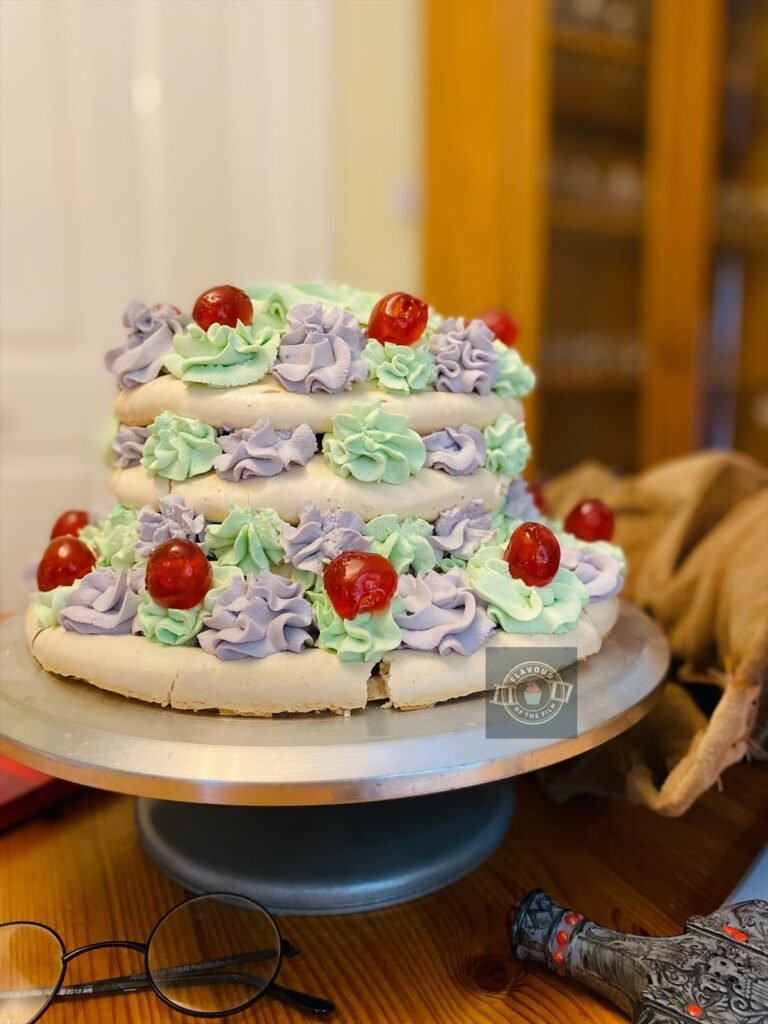
Size wise, they can range around 4 – 6 inches in diameter. Two layers of cake sponge with a layer of buttercream sandwiched between and a generous coating of buttercream all around.
The brilliant thing about bento cakes – besides their size – is how simple they are to make. Perfectly simple, yet entirely personalisable.
They really are the cutest little cakes you ever did see.
For my own version of a bento cake, I went back to a core favourite of mine for inspiration: Avatar: The Last Airbender.
Whilst season 1 of the Netflix live action (2024) wasn’t half bad, it’s the original Nickelodeon cartoon (2005 – 2008) that makes my heart flutter. Like with my Avatar: The Last Airbender cupcakes recipe, Michael Dante DiMartino and Bryan Konietzko’s creation is what gave me the artistic fictional flare for my bento cake.
For the design, I wanted to pay homage to everyone’s favourite flying bison: Appa.
Thus, I made him the focal point of the buttercream decoration.
To do this, I created a buttercream frosting transfer using an image of his face that I traced around. I used the image of this sticker by artist hopperograss because it was just too cute not to. You can absolutely choose your own image or even draw your own and trace around that!
That’s the beauty of doing a buttercream frosting transfer: you can be accurate without worrying about messing it up on the cake. I learned how to do a buttercream transfer through this tutorial by the Wilton team.
A standard American buttercream is best for this technique as the butter makes the freezing step much quicker and more successful. Rest assured, full instructions are included in my recipe! Be sure to check the Top Tips section for more important info regarding this technique.
Seriously, buttercream transfers are a game changer. I am definitely pulling that one out of my baking arsenal every now and again.
I love a little flare, so I added something extra to my bento cake design.
Colour tinted white chocolate shards that I pressed into the buttercream around the cake. The colours used represent each of the four main bendable elements: blue for water, red for fire, green for earth and cream (no added colour) for air.
To create the shards, I tempered white chocolate in individual bowls and added the colours to each one after.
This recipe includes instructions on how to temper chocolate in the microwave as it’s easy and accessible, but my Avatar: The Last Airbender cupcakes recipe (linked above) includes instructions on how to temper white chocolate using a thermometer if preferred!
I also discuss tempering chocolate in my The Nightmare Before Christmas cake and my Harry Potter cupcakes recipes. These both use dark chocolate, which requires reaching different temperatures than white chocolate, but the posts are worth reading if you’d prefer to use a milk or dark chocolate and paint the colours onto them instead!
These shards are completely optional, but they add some pastel tinted drama to the cake, wouldn’t you say?
As with most recipes on Flavour of the Film, this bento cake can be tailored to your taste.
For my own creation, I opted for a lemon and lime combo, both in the sponges and in the buttercream frosting. This flavour combination is light and airy; characteristics that make me think of Avatar: The Last Airbender. If these sound like your kind of flavours, I highly recommend following my recipe as stated.
However, you are more than welcome to adapt this recipe to your tastes. I have listed other suggestions and examples in the Top Tips section below.
Fair warning, friends: this cake requires you to use a lot of small (cereal sized) bowls and multiple piping/sandwich bags.
Top Tips
- Weigh out your eggs in their shells as near to 300g as you can. Then, weigh out your remaining ingredients to that exact weight. Allow for up to 20g either way.
- If you want to make this cake smaller, weigh your base ingredients out to 200g each instead for either thinner layers or 4 inch (diameter) layers. Adjust the baking time accordingly: around 25 – 30 minutes for thinner layers or 35 – 40 minutes (potentially longer) for smaller layers.
- Avoid overmixing the cake batter once the flour has been added so that you achieve the fluffiest texture possible.
- If citrus isn’t your thing, feel free to swap out the zest and juice for your favourite extract or flavouring. 1 – 2 tsp in the sponges and the same in the buttercream is enough for a delicious flavour.
- For a chocolate cake, replace 50g of the plain flour with cocoa powder. Adding any sort of cocoa powder or chocolate (other than white) to the frosting can affect the colour of it, so keep that in mind if wanting to make the frosting chocolate flavour too. I recommend either using 1 – 2 tsp of a chocolate extract or melting down 2 rows of white chocolate, letting it cool and then beating that into the buttercream.
- The buttercream transfer is super easy; just make sure to have a piping bag prepared for each colour needed for your design (in this case: Appa’s head)!
- If you don’t have a printer, have the image ready on a screen i.e. tablet or laptop and trace the image in pen on baking parchment/greaseproof paper for your buttercream transfer.
- Cocktail sticks are brilliant for getting the buttercream into the harder to reach places and more detailed areas when making the buttercream transfer image.
- The chocolate shards are entirely optional but give an extra magical element to this bento cake.
- Tempering chocolate is ideal for the shards but not essential if you are planning on keeping the cake in the fridge or keeping it in a cool room once it’s done.
This adorable Avatar: The Last Airbender inspired bento cake design is super easy to make and utterly delicious. It makes the perfect lunchbox sized gift for any A:TLA fan, or as a lovely little themed party treat or birthday cake for four or less people. Enjoy!
Happy baking, happy eating!
The Recipe
Ingredients
Bento cake sponges:
- 300g [3.5 oz] unsalted butter room temperature
- 300g [1½ cups] caster sugar
- 300g (around 5 large) eggs
- 300g [1¾ cups + 2 tbsp] self-raising flour
- Zest of 2 limes unwaxed
- Zest of 2 lemons unwaxed
Buttercream frosting:
- 300g [3.5 oz] unsalted butter room temperature or slightly softened
- 600g [4 cups + 2 tbsp] icing [confectioners] sugar
- Splash of milk
- Juice of 1 lime
- Juice of 1 lemon
- Sky blue food colouring oil based
- Brown food colouring oil based
- Black food colouring oil based
- Pink food colouring oil based
- Red food paint/colouring oil based
Chocolate shards (optional):
- 400g [14 oz] white chocolate
- Blue food colouring oil based
- Red food colouring oil based
- Green food colouring oil based
Serves: 4 – 6
Preparation time: 25 minutes
Baking time: 40 – 45 minutes
Decorating time: Up to 2 hours
Method
Bento cake sponges:
- Preheat your oven to 180°C [350°F] or 160°C fan. Grease and line two 6 inch cake round cake tins. If needing to, trace the image for your buttercream transfer now and set aside (pen is clearer than pencil). See the Top Tips section above for guidance if you don’t have access to a printer.
- In a large bowl, cream together the butter and sugar until light and fluffy.
- Add in the eggs, beating in one at a time.
- Sprinkle in the zest and beat in until evenly distributed.
- Sift in the flour and mix in until no flour is visible. Avoid over mixing here.
- Split the mixture evenly between the two tins and tap them a couple of times on the counter to pop and air bubbles hiding in the mixture.
- Bake on the middle shelf for 40 – 45 minutes (these are thick cake layers!). This will depend on how hot your oven runs and can take less or more time, so check after 35 minutes.
Appa buttercream transfer:
- While your cakes are baking, make the buttercream for your transfer.
- Turn the sheet of baking parchment/greaseproof paper that you have traced on over so that the pen is facing down. Place it on a baking tray and tape the paper to the tray to prevent slippage while you pipe.
- In a large bowl, beat the butter to loosen it. Add ½ the icing sugar and beat in until fluffy. Add the other ½ and beat in until fully incorporated.
- Squeeze in the juice and beat in until smooth. Add the milk and beat in until the buttercream is creamy and a little softer. The milk simply makes the buttercream easier to work with.
- Spoon roughly 1 tbsp into a smaller bowl. Repeat this for another 2 bowls, then ½ tbsp in another bowl.
- Leave one bowl free of food colouring. Add the brown food colouring to one bowl and mix in until an even colour is achieved. Add a tiny amount of black food colouring to another bowl and mix in to achieve a shade of grey. Lastly, add the pink food colouring to the bowl of ½ tbsp buttercream.
- Add the grey buttercream to a piping bag/sandwich bag with a very small amount of the end snipped off. Trace around the image outline using the grey buttercream.
Buttercream transfer freezing:
- Place the tray in the freezer to harden the buttercream outline. Spoon the rest of the different tinted colours into separate piping bags/sandwich bags with a very small amount of the ends snipped off.
- Retrieve the tray from the freezer and outline the rest of Appa’s features using the different colours before filling them in. Use a cocktail stick to carefully spread the buttercream into the hard to reach places like the fur above his eyes.
- Use a cutlery knife or small palette knife to smooth over the surface of the filled areas very gently. Place back in the freezer for now.
- Add the sky blue food colouring to the rest of your buttercream in the large mixing bowl and beat in until your desired colour is achieved.
- Spoon some of this blue buttercream into a piping bag. Retrieve your tray from the freezer again and pipe the blue buttercream around the outline of your Appa. This creates stability and allows for better blending when the transfer is complete.
- Pipe the blue buttercream over the entire image and gently smooth over with your palette or cutlery knife again to make sure that Appa will lay flat.
- Place your buttercream Appa in the freezer again and leave in there until it is firm to the touch.
Chocolate shards (optional):
- Your cake sponges should now be about ready. You will know this when a skewer or cocktail stick comes out clean when tested, the surfaces bounce back when gently pressed on, and you hear little to no crackling/bubbling when you listen to them.
- Once baked, allow your sponges to cool in the tins for 10 or so minutes before transferring upside down to a wire rack to cool completely.
- While your cakes are cooling, make your white chocolate shards. Line a baking tray with baking parchment/greaseproof paper.
- Split the chocolate evenly into four heatproof bowls. One at a time, temper the chocolate in the microwave following the proceeding steps. This is ideal but not essential.
- Take around ⅓ of the chocolate out of the first bowl and put it aside for now. Melt the remaining chocolate in the microwave in 20 second bursts, stirring in between until melted. Once completely melted, add the ⅓ you took out earlier piece by piece, stirring until it has melted in the warm chocolate. This brings the temperature of the chocolate back down.
- Place the bowl back in the microwave for 10 seconds.
- Repeat steps 5 and 6 with the three other bowls, adding the blue, red and green food colouring into separate bowls once tempered. Leave the first bowl of tempered chocolate free of colour as this will be the chocolate that represents air bending.
- Spoon the chocolate onto the lined tray, spreading and swirling however you wish. Be mindful that the more your spread and swirl, the more the colours will blend into one and will be hard to differentiate!
- Place your chocolate in the fridge while you decorate your cake.
Decoration:
- Using the remaining blue buttercream, stack and decorate your cake. If needed, carefully cut and remove the top of your cake sponges if they have domed.
- Place a small dab of buttercream onto your plate/cake board/cake stand and place your first layer on top of it.
- Spoon a generous amount of buttercream on the top of the cake layer and spread it out evenly. Place the second and last sponge layer on the top.
- Cover the entire cake with the remainder of your blue buttercream. This doesn’t have to be perfectly smooth! But, if you are aiming for a smooth finish, make sure to do a thin (crumb) coat of buttercream first. Then, chill for 10 or so minutes in the fridge, then smooth over the remaining buttercream using a cutlery or palette knife until smooth.
- Retrieve your Appa transfer from the freezer. Remove the tape and carefully lift the paper from the tray. Fold the paper in half if needed, then turn your buttercream Appa upside down onto the top of your cake with the paper facing up. Gently peel the paper away from your buttercream transfer.
- If needed, heat a teaspoon under some hot water, dry it off and then use the tip to gently smooth any areas on the buttercream transfer. If doing so, remember to wipe it clean in between colours.
- Use the black food colouring and the red food colouring/paint to paint or dab on any features like Appa’s eyes, nose and tongue detail.
- Use any remaining buttercream to pipe “YIP YIP” around Appa’s face if desired.
- Retrieve the chocolate from your fridge. Carefully break it into well sized shards and press them into the buttercream around the edge of the cake.
- Chill until ready to serve.
This adorable Avatar: The Last Airbender inspired bento cake really is the cutest little sweet treat. Appa would approve, as would Momo, I reckon. The perfect cake-based gift or addition to your A:TLA themed party. The cake will last for around 4+ days if stored (covered) in the fridge or in an airtight container. The sponges can be baked ahead and frozen (wrapped) for up to 3 months. Enjoy!
The TV Show
I went into pretty intense fangirl mode when I discussed Avatar: The Last Airbender in my cupcakes recipe. I don’t think there is much need in doing the same again… or maybe there is…
Either way, I do want to emphasise how much I REALLY LOVE this series. Being introduced to it whilst I was in Japan makes it even more special. Pretty much anything I experienced when I was living in Japan has a special place in my heart, but this show seems to go deeper.
I’m not sure there are words to truly do it justice.
What I do know is that there are plenty of folk out there that also adore this show. Whether you grew up watching Avatar: The Last Airbender on Nickelodeon or, like me, you found it later on in life, this kind of story stays with you in the best way.
Fans far and wide remain loyal to the original cartoon.
But if you’re here having only seen the new Netflix adaptation, welcome! I highly recommend taking the time to watch the original Nickelodeon production if you’re interested. It’s a cracker.
In fact, I’m rewatching it at this very moment.
Avatar: The Last Airbender is similar to The Golden Girls for me: a form of entertainment that I find comfort in and go back to every now and again. Watching shows like these makes me feel like I’m getting a warm hug around my heart.
I genuinely believe that everyone should have a show that means this to them. Movies, too. A retreat for the senses that acts like a security blanket.
P.S. A need for escape doesn’t have to mean your day to day world is hard to live in all the time. It just means you give yourself the respite you need as and when you need it. Switching off and focusing on something wholesome from time to time only improves our day to day lives! Allow it, friends.
Recipe Card
Appa Bento Cake | Avatar: The Last Airbender
Ingredients
Bento cake sponges:
- 300 g [3.5 oz] unsalted butter room temperature
- 300 g [1½ cups] caster sugar
- 300 g around 5 large eggs
- 300 g [1¾ cups + 2 tbsp] self-raising flour
- Zest of 2 limes unwaxed
- Zest of 2 lemons unwaxed
Buttercream frosting:
- 300 g [3.5 oz] unsalted butter room temperature or slightly softened
- 600 g [4 cups + 2 tbsp] icing [confectioners] sugar
- Splash of milk
- Juice of 1 lime
- Juice of 1 lemon
- Sky blue food colouring oil based
- Brown food colouring oil based
- Black food colouring oil based
- Pink food colouring oil based
- Red food paint/colouring oil based
Chocolate shards (optional):
- 400 g [14 oz] white chocolate
- Blue food colouring oil based
- Red food colouring oil based
- Green food colouring oil based
Instructions
Bento cake sponges:
- Preheat your oven to 180°C [350°F] or 160°C fan. Grease and line two 6 inch cake round cake tins. If needing to, trace the image for your buttercream transfer now and set aside (pen is clearer than pencil). See the Top Tips section above for guidance if you don’t have access to a printer.
- In a large bowl, cream together the butter and sugar until light and fluffy.
- Add in the eggs, beating in one at a time.
- Sprinkle in the zest and beat in until evenly distributed.
- Sieve in the flour and mix in until no flour is visible. Avoid over mixing here.
- Split the mixture evenly between the two tins and tap them a couple of times on the counter to pop and air bubbles hiding in the mixture.
- Bake on the middle shelf for 40 – 45 minutes (these are thick cake layers!). This will depend on how hot your oven runs and can take less or more time, so check after 35 minutes.
Appa buttercream transfer:
- While your cakes are baking, make the buttercream for your transfer.
- Turn the sheet of baking parchment/greaseproof paper that you have traced on over so that the pen is facing down. Place it on a baking tray and tape the paper to the tray to prevent slippage while you pipe.
- In a large bowl, beat the butter to loosen it. Add ½ the icing sugar and beat in until fluffy. Add the other ½ and beat in until fully incorporated.
- Squeeze in the juice and beat in until smooth. Add the milk and beat in until the buttercream is creamy and a little softer. The milk simply makes the buttercream easier to work with.
- Spoon roughly 1 tbsp into a smaller bowl. Repeat this for another 2 bowls, then ½ tbsp in another bowl.
- Leave one bowl free of food colouring. Add the brown food colouring to one bowl and mix in until an even colour is achieved. Add a tiny amount of black food colouring to another bowl and mix in to achieve a shade of grey. Lastly, add the pink food colouring to the bowl of ½ tbsp buttercream.
- Add the grey buttercream to a piping bag/sandwich bag with a very small amount of the end snipped off. Trace around the image outline using the grey buttercream.
Buttercream transfer freezing:
- Place the tray in the freezer to harden the buttercream outline. Spoon the rest of the different tinted colours into separate piping bags/sandwich bags with a very small amount of the ends snipped off.
- Retrieve the tray from the freezer and outline the rest of Appa’s features using the different colours before filling them in. Use a cocktail stick to carefully spread the buttercream into the hard to reach places like the fur above his eyes.
- Use a cutlery knife or small palette knife to smooth over the surface of the filled areas very gently. Place back in the freezer for now.
- Add the sky blue food colouring to the rest of your buttercream in the large mixing bowl and beat in until your desired colour is achieved.
- Spoon some of this blue buttercream into a piping bag. Retrieve your tray from the freezer again and pipe the blue buttercream around the outline of your Appa. This creates stability and allows for better blending when the transfer is complete.
- Pipe the blue buttercream over the entire image and gently smooth over with your palette or cutlery knife again to make sure that Appa will lay flat.
- Place your buttercream Appa in the freezer again and leave in there until it is firm to the touch.
Chocolate shards (optional):
- Your cake sponges should now be about ready. You will know this when a skewer or cocktail stick comes out clean when tested, the surfaces bounce back when gently pressed on, and you hear little to no crackling/bubbling when you listen to them.
- Once baked, allow your sponges to cool in the tins for 10 or so minutes before transferring upside down to a wire rack to cool completely.
- While your cakes are cooling, make your white chocolate shards. Line a baking tray with baking parchment/greaseproof paper.
- Split the chocolate evenly into four heatproof bowls. One at a time, temper the chocolate in the microwave following the proceeding steps. This is ideal but not essential.
- Take around ⅓ of the chocolate out of the first bowl and put it aside for now. Melt the remaining chocolate in the microwave in 20 second bursts, stirring in between until melted. Once completely melted, add the ⅓ you took out earlier piece by piece, stirring until it has melted in the warm chocolate. This brings the temperature of the chocolate back down.
- Place the bowl back in the microwave for 10 seconds.
- Repeat steps 5 and 6 with the three other bowls, adding the blue, red and green food colouring into separate bowls once tempered. Leave the first bowl of tempered chocolate free of colour as this will be the chocolate that represents air bending.
- Spoon the chocolate onto the lined tray, spreading and swirling however you wish. Be mindful that the more your spread and swirl, the more the colours will blend into one and will be hard to differentiate!
- Place your chocolate in the fridge while you decorate your cake.
Decoration:
- Using the remaining blue buttercream, stack and decorate your cake. If needed, carefully cut and remove the top of your cake sponges if they have domed.
- Place a small dab of buttercream onto your plate/cake board/cake stand and place your first layer on top of it.
- Spoon a generous amount of buttercream on the top of the cake layer and spread it out evenly. Place the second and last sponge layer on the top.
- Cover the entire cake with the remainder of your blue buttercream. This doesn’t have to be perfectly smooth! But, if you are aiming for a smooth finish, make sure to do a thin (crumb) coat of buttercream first. Then, chill for 10 or so minutes in the fridge, then smooth over the remaining buttercream using a cutlery or palette knife until smooth.
- Retrieve your Appa transfer from the freezer. Remove the tape and carefully lift the paper from the tray. Fold the paper in half if needed, then turn your buttercream Appa upside down onto the top of your cake with the paper facing up. Gently peel the paper away from your buttercream transfer.
- If needed, heat a teaspoon under some hot water, dry it off and then use the tip to gently smooth any areas on the buttercream transfer. If doing so, remember to wipe it clean in between colours.
- Use the black food colouring and the red food colouring/paint to paint or dab on any features like Appa’s eyes, nose and tongue detail.
- Use any remaining buttercream to pipe “YIP YIP” around Appa’s face if desired.
- Retrieve the chocolate from your fridge. Carefully break it into well sized shards and press them into the buttercream around the edge of the cake.
- Chill until ready to serve.
Notes
© Flavour of the Film. All content and imagery is copyright protected. Please do not use any of my images or written content without prior permission. If you would like to share any of the recipes or images on Flavour of the Film, please link back to the recipe in question and rewrite it in your own words, crediting Flavour of the Film as the original source.

5 Comments
Comments are closed.