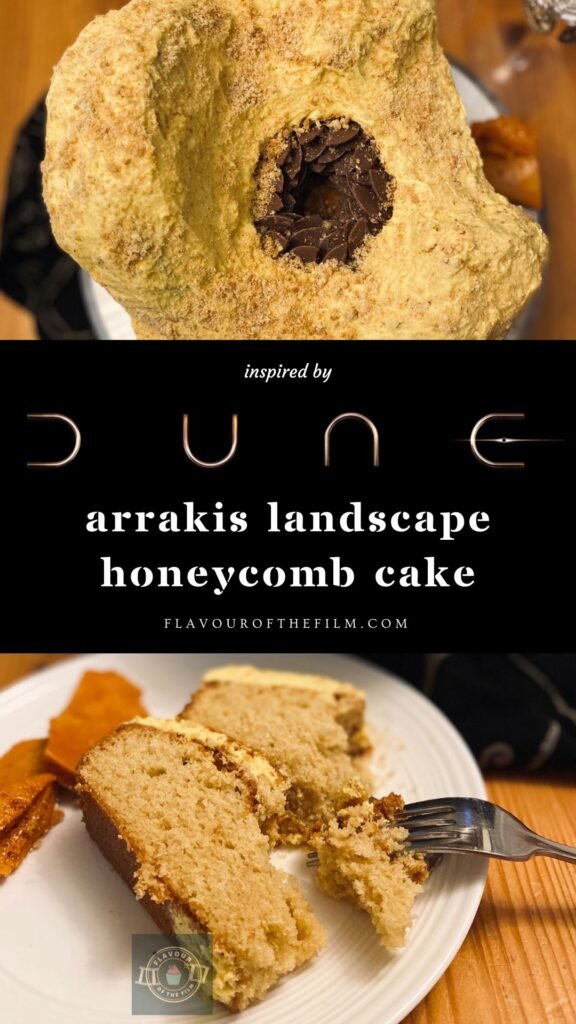
Dune: Part Two is out this week and I am beyond ready to see it. Dune is quite possibly the most majestically epic sci-fi film… ever? I’m more than ready for the next instalment to bring me that same energy, if not more of it. My honeycomb Dune cake makes the stark landscape of Arrakis oh-so-sweet. Put the spice down for a minute, we’ve got a worm to ride.
Contents
The Bake
Sure, who wouldn’t watch Dune and immediately think of a honeycomb cake? It’s an intense film, so sweetness is of course the first thing I consider, and you can’t get much sweeter than honeycomb.
I haven’t created a landscape cake in some time, but I’ve had this one planned for a long while. Pretty much since the promo for Dune: Part Two first started months ago. So, I’m excited to add this recipe to my landscape cake collection.
I reckon my Hot Fuzz cake and Outlander coffee and walnut cake are in need of another new friend.


The concept of this Dune cake is simple enough: Arrakis with a couple of the planet’s surprises included.
When it comes to the visuals, Dune gives us simplicity and minimalism, despite the complexity of the cinematography. The colour palette and general vibe is stripped back and made more stark, to reflect both the worlds we see, as well as the story.
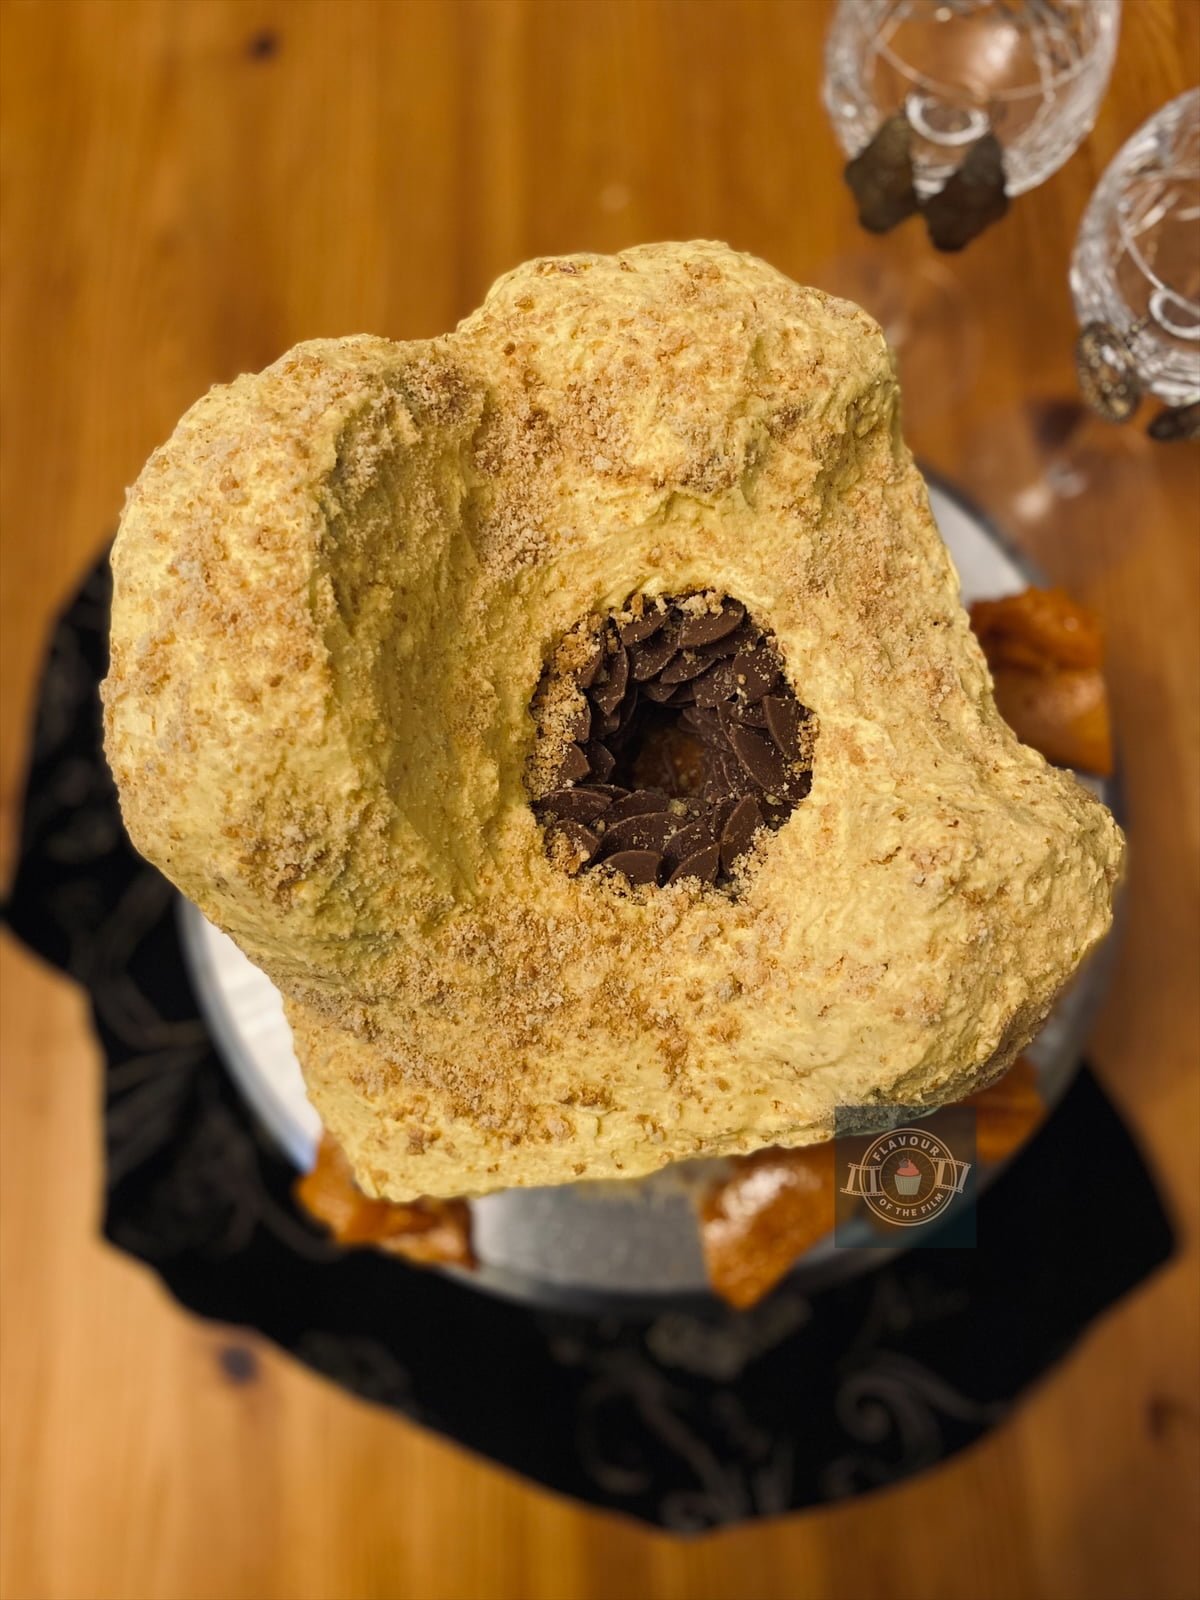
Thus, my Dune inspired cake needed to reflect that. Overdoing the decoration would pull away from the beauty in the simplicity of Dune’s overall visuals. My Arrakis landscape cake represents the contrastingly harsh but spectacular dessert that the planet is made up of. Add in a worm and you have yourself a sweet cake with a taste of danger.
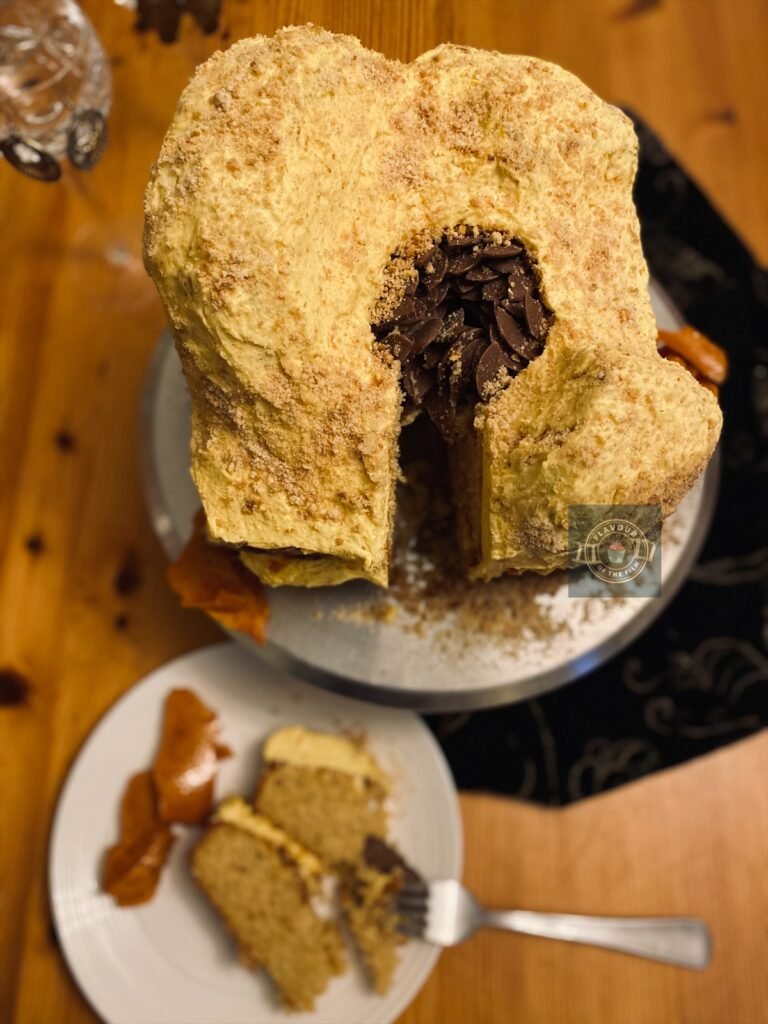
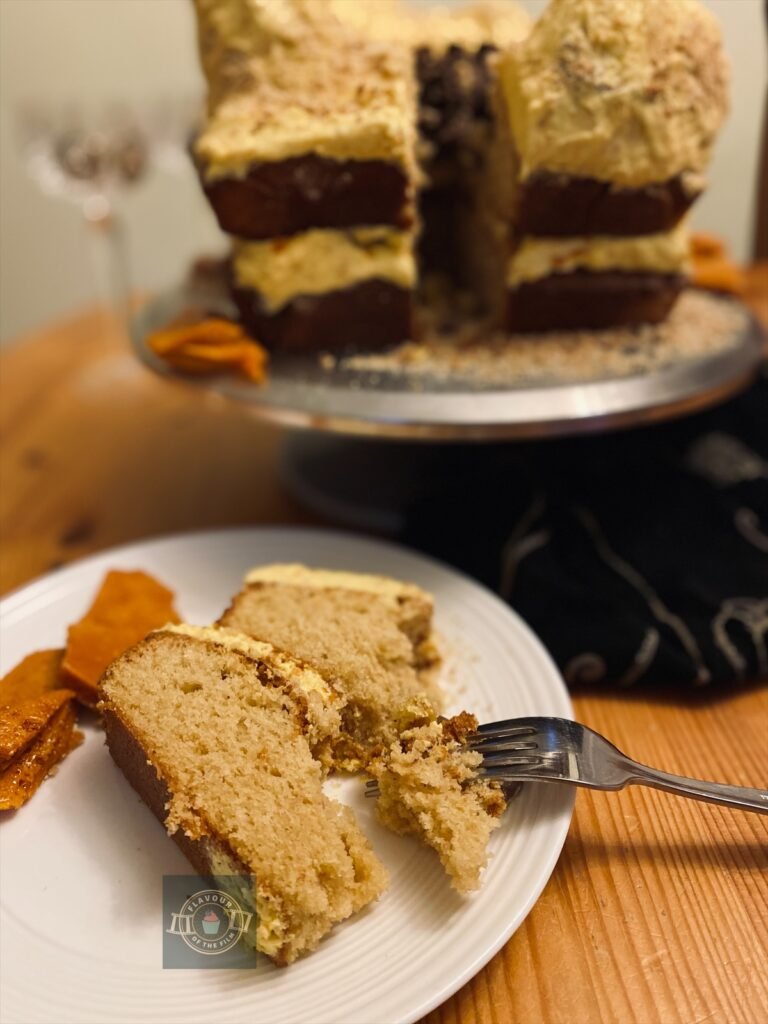
Like with my The Hobbit landscape cake, my Dune inspired cake is made up of two square layers and one six inch cake used for the landscape shaping. Making the extra smaller sponge allows more scope for building a fuller landscape.
As Arrakis is a planet covered in desert, it was important to me to be able to achieve varying heights on this honeycomb cake.
By carving the smaller round cake into pieces, building a landscape with sand dunes is much more achievable. It means you can adapt the landscape to reflect what you see in a desert. Your sand dunes are yours to carve and shape as you please.
It also looks cool.
The honeycomb element of my honeycomb cake is my edible version of the most lucrative substance in this film’s universe: “spice”.
I loved making my honeycomb, so I really recommend you make your own too. It’s incredibly simple and a magical process. Literally magical.
However, if you are short on time then feel free to buy some good quality plain honeycomb and blitz that instead. Especially if you know a local farm or farm shop that makes their own honeycomb – support the small businesses where you can, friends.
When made, honeycomb can be varying shades in colour. From pale yellow to gold to a deep orange. The colour and taste vary based on the ingredients you use. There are lots of recipes that call for golden syrup to be used in honeycomb. It makes sense, but I really wanted to get the honey in there for flavour.
Instead of using just golden syrup, I opted for a mix. Hence why the colour of my honeycomb is as deep and rich as it is. If preferred, you can use just golden syrup in place of the honey. Know that it will change the taste and colour if doing so.


To achieve the sand-like aesthetic on my honeycomb cake, I crushed biscuits over the buttercream.
I genuinely just got a couple of plain Digestive biscuits and crushed them between my fingers. Sprinkling crushed biscuits over the buttercream gave the cake a more textured appearance, but didn’t affect the overall taste and feel of the buttercream.
The buttercream is already grittier with the honeycomb mixed through it (utterly delicious, by the way), so adding the biscuit ‘sand’ didn’t make the buttercream taste odd. Especially as my recipe calls for a much softer buttercream than usual in order to achieve the sand dune texture visually.
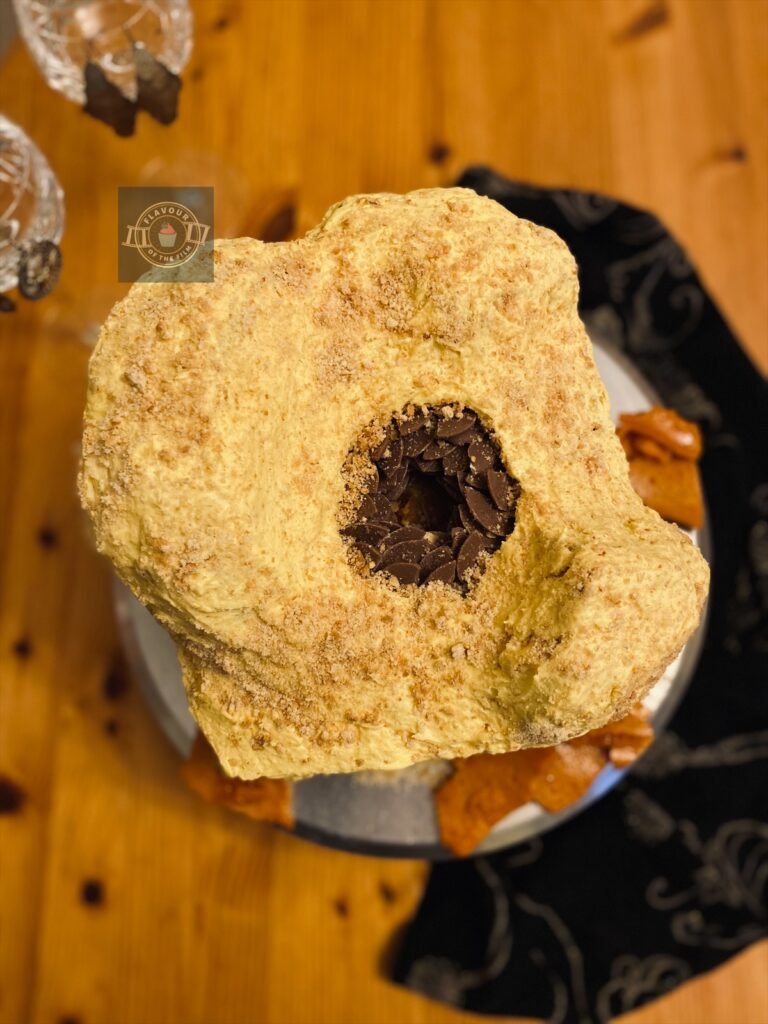
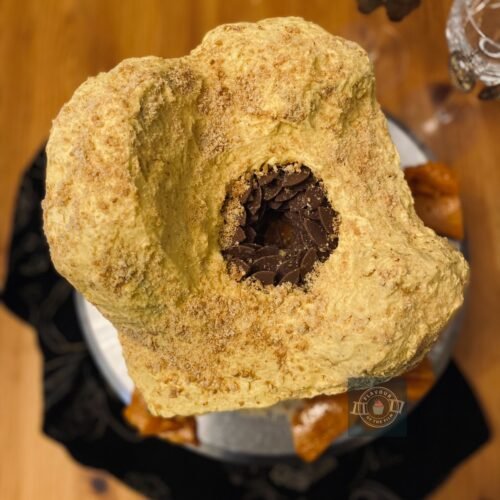
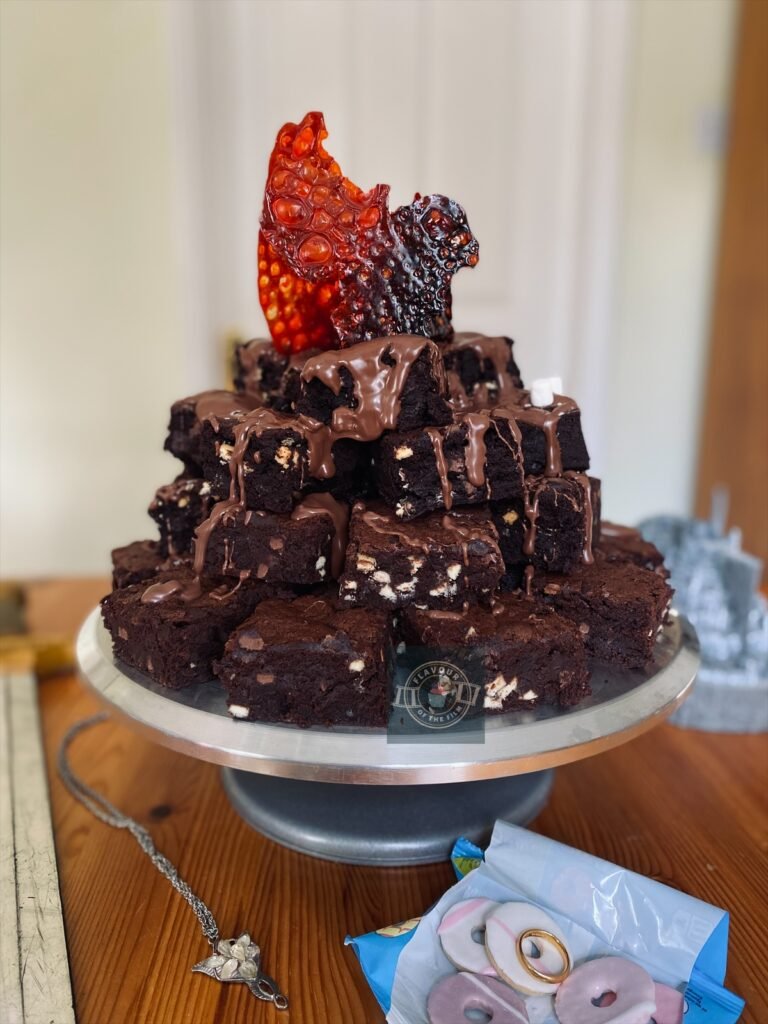
To finish, I carved a hole out of the top layer square sponge and filled it with ‘teeth’.
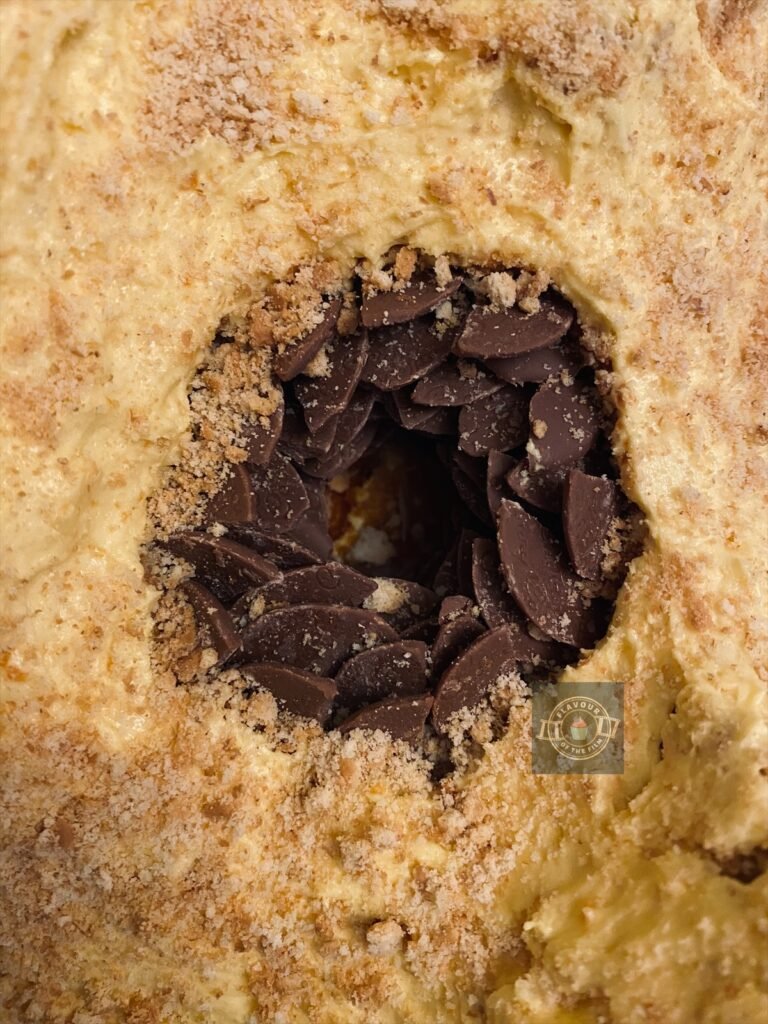
I simply cut some chocolate buttons in half and pressed them into the sides of the gap I had made in my honeycomb cake. I arranged them in a swirling pattern to give the impression that there were more ‘teeth’ in there, as the worms in Dune have SO many teeth. This created my own worm.
My friend’s partner suggested that I make a worm for this cake when we were talking about it. I managed to find a way to bring his idea to fruition, which is very exciting.
The simplicity of this idea actually came from a film called Tremors (1990) that I studied years ago.
This film had such a low budget that they only made the back end and head of the creatures. The way the film was shot led you to perceive the creatures as far bigger than they actually were, despite the fact that the audience only ever saw the heads and tails.
It was incredibly clever and very well executed. So, when it came to making my version of Dune’s worms, I wanted to make it as easy as possible whilst still having a real impact with the cake. The worm in my cake appears to be travelling up and out of the sand, mouth open.
When you look down into the chocolate worm, you can see ‘sand’ and ‘spice’. Cool, right?
Top Tips
- After combining the honeycomb ingredients over heat, work fast when adding the bicarbonate of soda. The quicker you can get it in and mixed in, the better. Plus, you get to see the magic happen much faster.
- The honeycomb will be very hot when made, so take extra care!
- Don’t worry about the size of the tin for your honeycomb. You want it to be relatively thick, but the point is to blitz it anyway, so it doesn’t need to have set perfectly square or in a specific size. The ideal size is a 20cm square tin, but I used one that was a little bigger.
- Avoid over mixing the batter of your honeycomb cake. A batter that has been over mixed can result in a more dense cake rather than a light and fluffy one.
- As always with standard cake sponges, measure out your eggs in their shells first, getting as close to the weight that the recipe calls for as possible. Measure the rest of your ingredients to the exact weight of your eggs and you’ll achieve the best sponge!
- Carve the hole out of your top sponge before you start decorating. It’s just much easier.
- If you don’t have a food processor, break the honeycomb into shards and put it in a sandwich bag. Then, smash to crumbs with a rolling pin. If using a food processor, use boiling water to dissolve any honeycomb that gets stuck when you want to clean.
- Make sure to add a few splashes of water or milk to your buttercream. You want it soft enough to spread really easily, but it should still be able to hold its shape. Avoid getting to pouring consistency as this won’t hold shape.
- Use the buttercream as a glue when adding your sand dune cake pieces on the top. Hold the sponges down onto the buttercream that’s already there, then smother more on the top so that the cake is secure.
- Sand dunes are not smooth, so don’t get wrapped up in trying to make your buttercream perfectly smooth in appearance. You want it to look like the sand is moving because the worm is causing it to shift as it erupts from the centre of the cake!
- If you have any honeycomb left over, use it to make honeycomb ice cream. See my Living inspired ice cream post for a vanilla no-churn, super easy ice cream recipe.
My Dune inspired honeycomb cake pays homage to the stunning but minimalist cinematography in the Dune films. A deliciously sweet cake for an incredibly intense story with some delicious chocolate elements to really connect to the brief. This cake is so simple to make, but gives a really dramatic impact. Perfect for all you fellow Dune fans. Have fun and enjoy!
Happy baking, happy eating!
The Recipe
Ingredients
Honeycomb (if making yourself):
- 200g [1 cup] caster sugar
- 2 tbsp golden syrup
- 3 tbsp runny honey
- 2 tsp bicarbonate of soda
Honeycomb cake square layers:
- 400g [14 oz] unsalted butter room temperature
- 400g [2 cups] light brown sugar
- 400g [around 5 large] eggs
- 400g [2½ cups] self-raising flour
- 2 tsp vanilla extract
Small carving cake:
- 150g [5.25 oz] unsalted butter
- 150g [¾ cup] light brown sugar
- 150g [around 2 large] eggs
- 150g [¾ cup + 3 tbsp] self-raising flour
- 1 tsp vanilla extract
Decoration:
- 200g [7 oz] unsalted butter softened
- 500g [3¼ cups + 3 tbsp] icing [confectioners] sugar
- 3 splashes of milk
- Yellow/gold food colouring optional
- 2 Digestive biscuits or graham crackers crushed
- 119g [2 large handfuls] chocolate buttons of your choice
Serves: 12
Preparation time: 45 minutes + 1 hour for the honeycomb to set
Cooking time: 10 minutes
Baking time: 40 minutes
Decorating time: 45 minutes
Method
Honeycomb (if making your own):
- Line a square tray around 20 cm in size with greaseproof paper/baking parchment.
- In a saucepan over a medium heat, stir together the sugar, honey and golden syrup. Stir until the sugar has dissolved. The mix will be quite stiff to begin with but stick with it, it will soften as the sugar dissolves. Avoid letting the mixture bubble before the sugar has dissolved.
- Once the sugar has dissolved, turn the heat up and let the mixture simmer until it has turned a slightly deeper shade of amber. This will take a minute or two, so do not leave it!
- Take off the heat and pour in the bicarbonate of soda straight away. Beat into the mixture with a wooden spoon until fully incorporated, then watch the magic happen! Pour the mixture into your lined tin when it starts bubbling and rising. Remember to work fast and be very careful as the mixture will be very hot!
- Leave the honeycomb to set in the tin at room temperature for around 1 hour while you make your cakes.
Honeycomb cakes:
- Preheat your oven to 180°C [350°F] or 160°C fan. Grease and line two 8 x 8 x 2 inch square tins with greaseproof paper/baking parchment. Do the same for a deep 6 inch round cake tin. Set aside.
- In a large mixing bowl, beat the butter to loosen it slightly, then beat in the sugar until light and fluffy.
- Add the eggs, beating in one at a time until fully incorporated. Beat in the vanilla.
- Sieve in the flour and mix in until fully incorporated and you can’t see any flour left. Avoid over mixing here.
- Split the mix evenly into the lined square tins.
- Repeat steps 2 to 4 for the 6 inch round cake and pour the mixture into the deep lined tin.
- Bake the cakes on the middle shelves of your oven for around 40 minutes. Make sure to place the deep 6 inch cake on the top middle shelf with one of your square cakes as it is a thicker sponge and may bake at a different rate. The timing will depend on the size of your oven, and how hot it runs.
- Your cakes will be ready when a skewer or cocktail stick comes out clean, the surfaces of the sponges bounce back when gently pressed on, and you hear little to no bubbling/crackling sound when you listen to them.
- Once baked, allow your cakes to cool in the tins for at least 10 minutes, then transfer upside down to a wire rack to cool completely.
Decoration prep:
- While your sponges are cooling, prepare your buttercream.
- In a large mixing bowl, beat together the softened butter and ½ the icing sugar until fully combined. Add the other ½ of the icing sugar and beat in until smooth.
- Add the splashes of milk one at a time and beat in until your buttercream is smooth and soft but can still hold its shape.
- Your honeycomb should be set and cool now. If this is the case, lift it from the tin in the paper and simply drop the honeycomb back down onto your work surface until it breaks. Continue breaking the honeycomb into shards using your hands or the end of the rolling pin.
- Either in a food processor or sandwich bag paired with a rolling pin, blitz or crush ½ of your honeycomb into a mostly fine powder. The honeycomb will likely stick together in places, but don’t stress. It doesn’t need to be ultra fine.
- Scrape ⅔ of the blitzed honeycomb into your buttercream and beat in. Keep the rest for later.
- Add the yellow or gold food colouring into the buttercream now if desired. If the colour of your buttercream is sand-like enough for you, leave the food colouring out.
Decoration:
- Once your cakes are cool, place the first square layer onto a plate/cake board/cake stand. Smother it in a generous layer of buttercream, then sprinkle some of your remaining blitzed honeycomb over the top.
- Carve out a medium sized hold in your top square sponge. This can be in the centre, or wherever you are wanting to create your worm. Feel free to eat the round piece of sponge you have just carved out.
- Place this square sponge on top of the base one. Cover the top in buttercream, avoiding the hole you have just carved out.
- Place the six inch cake down flat and cut in half. Place one half onto your cake like a rainbow. Smother this in buttercream, using it as a glue and to form your first sand dune.
- Cut the other half of the 6 inch cake in half again to build a smaller sand dune. You can also choose to cut these pieces in half again to help build a bigger sand dune with the half already on your cake. This is completely up to you! Get creative.
- Smother any remaining buttercream on and around your sand dunes. Use a palette knife to create lines and textured swirls in your buttercream to show movement.
- Using your finger tip or the back of a spoon, gently press in any spikey parts of the buttercream to neaten it up.
- Cut the chocolate buttons in halves and carefully press them into the sides of the inside of your hole. Start from the bottom and arrange them in a swirling pattern going upwards. Like a spiral staircase.
- Crush and sprinkle your biscuits over the top of your cake to create a sand-like effect.
- Chill until ready to serve if it is a warm day.
This Dune inspired honeycomb cake is so light, so fluffy and oh so delicious. It will last for around 4 days in an airtight container/cake box/cake case or covered in tin foil. The sponges can be made ahead and kept in an airtight box for a day before they lose their peak texture. The sponges can be baked and frozen (individually wrapped) for up to 3 months.
See my Top Tips sections above for an idea on using any leftover honeycomb. Store the leftover honeycomb in an airtight container and use within a week or two so that it doesn’t soften. If making in warm weather, keep the container of honeycomb in the fridge until needed. Enjoy!
The Film
“Dreams are messages from the deep.”
I mean… when a film starts like that, you know it’s going to be a trip. This quote happens to be one of my favourites in cinema. I talk about my dreams on the regular and I fully believe in the power and meaning behind many of our dreams.
Now, I’m not necessarily talking about that dream that you had about a talking tree eating one of your favourite shoes…
I am referring to the ones that interpret what is hanging around in your subconscious, whether it is serving you or not. Dreams can present these things to us in the weirdest of ways, but I have found that the stranger the dream, the more important it is to address it.
I have some incredibly bizarre dreams, let me tell you.

Dune delved into the idea of such dream power in a way that made you – as the audience member – understand.
The first instalment of this story was released in 2021. Dune, directed by formidable filmmaker, Denis Villeneuve, is based on the written text by Frank Herbert. It follows the story of main protagonist, Paul Arteides, as he navigates his destiny in a dystopian universe.
As a member of a noble family who have accepted stewardship of Arrakis – a dangerous planet covered in desert – Paul finds himself whipped up into the age-old fight over the galaxy’s most precious substance: spice. A substance only found on the planet of Arrakis.
He is thrust into the conflict whilst trying to get to grips with crippling visions of a dark future that haunt both his sleeping and waking hours. Not to mention, House Harkonnen plotting revenge after House Atreides arrives on Arrakis.
This story is multi-threaded and deeply intertwined within itself.
Dune is not a film to just “put on in the background”. It takes some concentration, but it really draws you in. Denis Villeneuve, alongside co-writers Jon Spaihts and Eric Roth, made sure of that.
Even if the story wasn’t enough to keep you engaged, the visuals certainly are. I mean, seriously. There is a reason why I talk about Dune being a majestically epic film. The cinematography is second to none, thanks to the extensive art department. This team was MASSIVE. You can tell such talent was the reason for such a visually stunning piece of cinema.
It actually feels like the spaceships are landing right in front of you. That’s how impressive Dune is to watch.
Then there’s the music and sound design. Hans Zimmer gave us yet another powerful collection of scores, alongside another mammoth team in the sound department.
What about the cast? I hear you ask. You mean the who’s who of Hollywood?
Timothée Chalamet; Zendaya, Oscar Isaac, Rebecca Ferguson, Josh Brolin, Jason Momoa, Sharon Duncan-Brewster, Stellan Skarsgård, Dave Bautista, Charlotte Rampling, Javier Bardem, Chang Chen, Babs Olusanmokun, Stephen McKinley Henderson.
Need I go on?
Dune: Part Two brings us even more famous faces, too. Florence Pugh, Christopher Walken and Austin Butler are a handful of names that spring to mind.
Update: I’ve seen the film and I had jaw ache after the viewing. It had me in AWE.
Recipe Card
Honeycomb Cake | Dune Landscape Cake
Ingredients
Honeycomb (if making yourself):
- 200 g [1 cup] caster sugar
- 2 tbsp golden syrup
- 3 tbsp runny honey
- 2 tsp bicarbonate of soda
Honeycomb cake square layers:
- 400 g [14 oz] unsalted butter room temperature
- 400 g [2 cups] light brown sugar
- 400 g [around 5 large] eggs
- 400 g [2½ cups] self-raising flour
- 2 tsp vanilla extract
Small carving cake:
- 150 g [5.25 oz] unsalted butter
- 150 g [¾ cup] light brown sugar
- 150 g [around 2 large] eggs
- 150 g [¾ cup + 3 tbsp] self-raising flour
- 1 tsp vanilla extract
Decoration:
- 200 g [7 oz] unsalted butter softened
- 500 g [3¼ cups + 3 tbsp] icing [confectioners] sugar
- 3 splashes of milk
- Yellow/gold food colouring optional
- 2 Digestive biscuits or graham crackers crushed
- 119 g [2 large handfuls] chocolate buttons of your choice
Instructions
Honeycomb (if making your own):
- Line a square tray around 20 cm in size with greaseproof paper/baking parchment.
- In a saucepan over a medium heat, stir together the sugar, honey and golden syrup. Stir until the sugar has dissolved. The mix will be quite stiff to begin with but stick with it, it will soften as the sugar dissolves. Avoid letting the mixture bubble before the sugar has dissolved.
- Once the sugar has dissolved, turn the heat up and let the mixture simmer until it has turned a slightly deeper shade of amber. This will take a minute or two, so do not leave it!
- Take off the heat and pour in the bicarbonate of soda straight away. Beat into the mixture with a wooden spoon until fully incorporated, then watch the magic happen! Pour the mixture into your lined tin when it starts bubbling and rising. Remember to work fast and be very careful as the mixture will be very hot!
- Leave the honeycomb to set in the tin at room temperature for around 1 hour while you make your cakes.
Honeycomb cakes:
- Preheat your oven to 180°C [350°F] or 160°C fan. Grease and line two 8 x 8 x 2 inch square tins with greaseproof paper/baking parchment. Do the same for a deep 6 inch round cake tin. Set aside.
- In a large mixing bowl, beat the butter to loosen it slightly, then beat in the sugar until light and fluffy.
- Add the eggs, beating in one at a time until fully incorporated. Beat in the vanilla.
- Sieve in the flour and mix in until fully incorporated and you can’t see any flour left. Avoid over mixing here.
- Split the mix evenly into the lined square tins.
- Repeat steps 2 to 4 for the 6 inch round cake and pour the mixture into the deep lined tin.
- Bake the cakes on the middle shelves of your oven for around 40 minutes. Make sure to place the deep 6 inch cake on the top middle shelf with one of your square cakes as it is a thicker sponge and may bake at a different rate. The timing will depend on the size of your oven, and how hot it runs.
- Your cakes will be ready when a skewer or cocktail stick comes out clean, the surfaces of the sponges bounce back when gently pressed on, and you hear little to no bubbling/crackling sound when you listen to them.
- Once baked, allow your cakes to cool in the tins for at least 10 minutes, then transfer upside down to a wire rack to cool completely.
Decoration prep:
- While your sponges are cooling, prepare your buttercream.
- In a large mixing bowl, beat together the softened butter and ½ the icing sugar until fully combined. Add the other ½ of the icing sugar and beat in until smooth.
- Add the splashes of milk one at a time and beat in until your buttercream is smooth and soft but can still hold its shape.
- Your honeycomb should be set and cool now. If this is the case, lift it from the tin in the paper and simply drop the honeycomb back down onto your work surface until it breaks. Continue breaking the honeycomb into shards using your hands or the end of the rolling pin.
- Either in a food processor or sandwich bag paired with a rolling pin, blitz or crush ½ of your honeycomb into a mostly fine powder. The honeycomb will likely stick together in places, but don’t stress. It doesn’t need to be ultra fine.
- Scrape ⅔ of the blitzed honeycomb into your buttercream and beat in. Keep the rest for later.
- Add the yellow or gold food colouring into the buttercream now if desired. If the colour of your buttercream is sand-like enough for you, leave the food colouring out.
Decoration:
- Once your cakes are cool, place the first square layer onto a plate/cake board/cake stand. Smother it in a generous layer of buttercream, then sprinkle some of your remaining blitzed honeycomb over the top.
- Carve out a medium sized hold in your top square sponge. This can be in the centre, or wherever you are wanting to create your worm. Feel free to eat the round piece of sponge you have just carved out.
- Place this square sponge on top of the base one. Cover the top in buttercream, avoiding the hole you have just carved out.
- Place the six inch cake down flat and cut in half. Place one half onto your cake like a rainbow. Smother this in buttercream, using it as a glue and to form your first sand dune.
- Cut the other half of the 6 inch cake in half again to build a smaller sand dune. You can also choose to cut these pieces in half again to help build a bigger sand dune with the half already on your cake. This is completely up to you! Get creative.
- Smother any remaining buttercream on and around your sand dunes. Use a palette knife to create lines and textured swirls in your buttercream to show movement.
- Using your finger tip or the back of a spoon, gently press in any spikey parts of the buttercream to neaten it up.
- Cut the chocolate buttons in halves and carefully press them into the sides of the inside of your hole. Start from the bottom and arrange them in a swirling pattern going upwards. Like a spiral staircase.
- Crush and sprinkle your biscuits over the top of your cake to create a sand-like effect.
- Chill until ready to serve if it is a warm day.
Notes
© Flavour of the Film. All content and imagery is copyright protected. Please do not use any of my images or written content without prior permission. If you would like to share any of the recipes or images on Flavour of the Film, please link back to the recipe in question and rewrite it in your own words, crediting Flavour of the Film as the original source.

One Comment
Comments are closed.