Who lives in a pineapple under the sea? You know him. My SpongeBob SquarePants cake is an absolute winner for any fan. Swirling marbled cake flavours and rice krispie treat decorations to top. Let’s dive in.
Contents

The Bake
There was no way that I would work on this blog and not create a bake that celebrates the absolute treasure that is SpongeBob SquarePants. This show has been around for as long as I can remember but I still class it as a throwback because it’s one of the shows that I grew up with.
Take it or leave it, SpongeBob SquarePants is ICONIC.
I have a couple of friends who adore this show, one of whom just turned 26. I had already told her that I was making her birthday cake this year (just to make sure that none of her loved ones would pay for a cake!) and having recalled how much of a fan of SpongeBob she is, there was no doubt what the theme of her cake would be.
You may be able to tell from this post and my The Nightmare Before Christmas cake that I find real joy in baking loved ones’ birthday cakes.
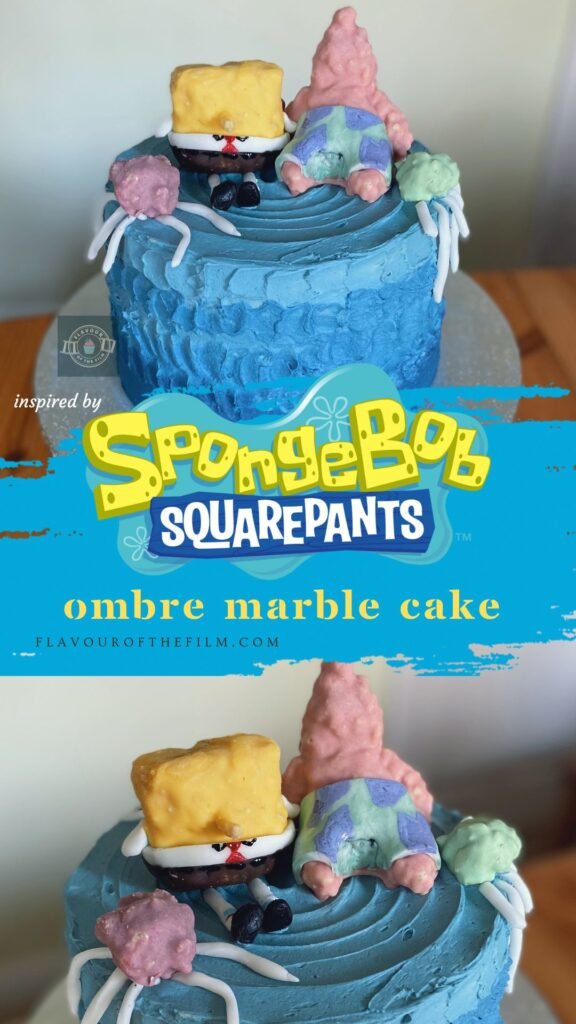
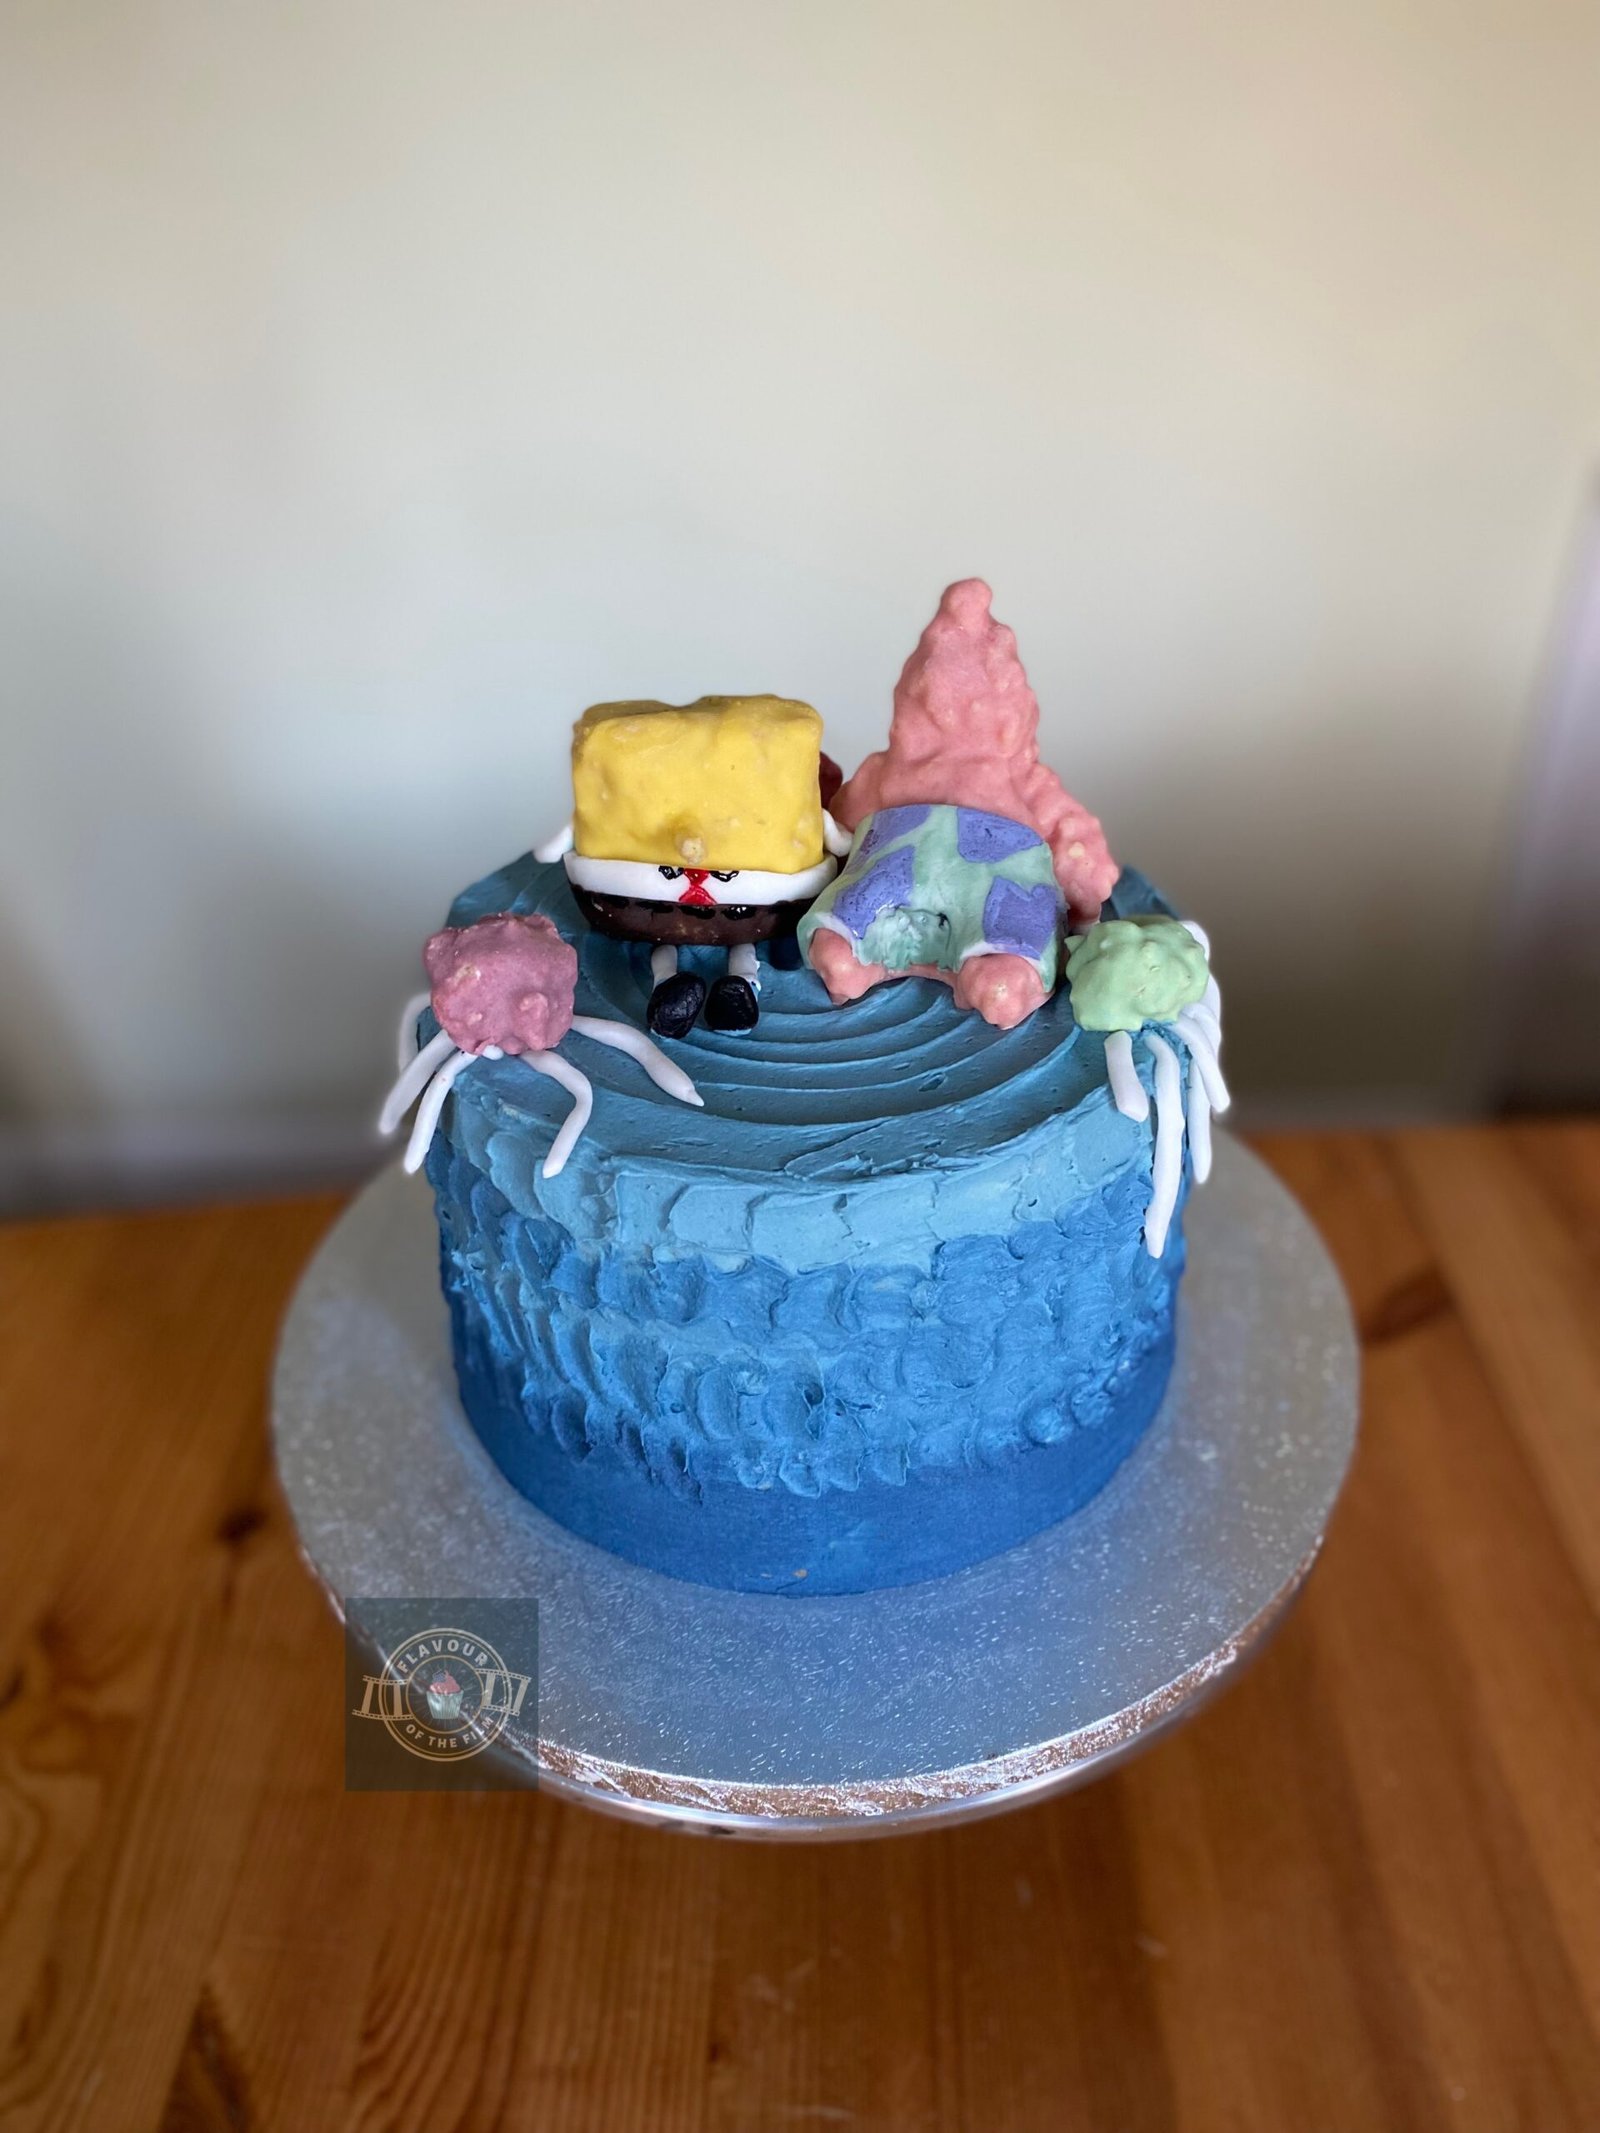
For this SpongeBob Squarepants cake, I wanted to emulate the look of seabed rock, so the sponges themselves are marbled.
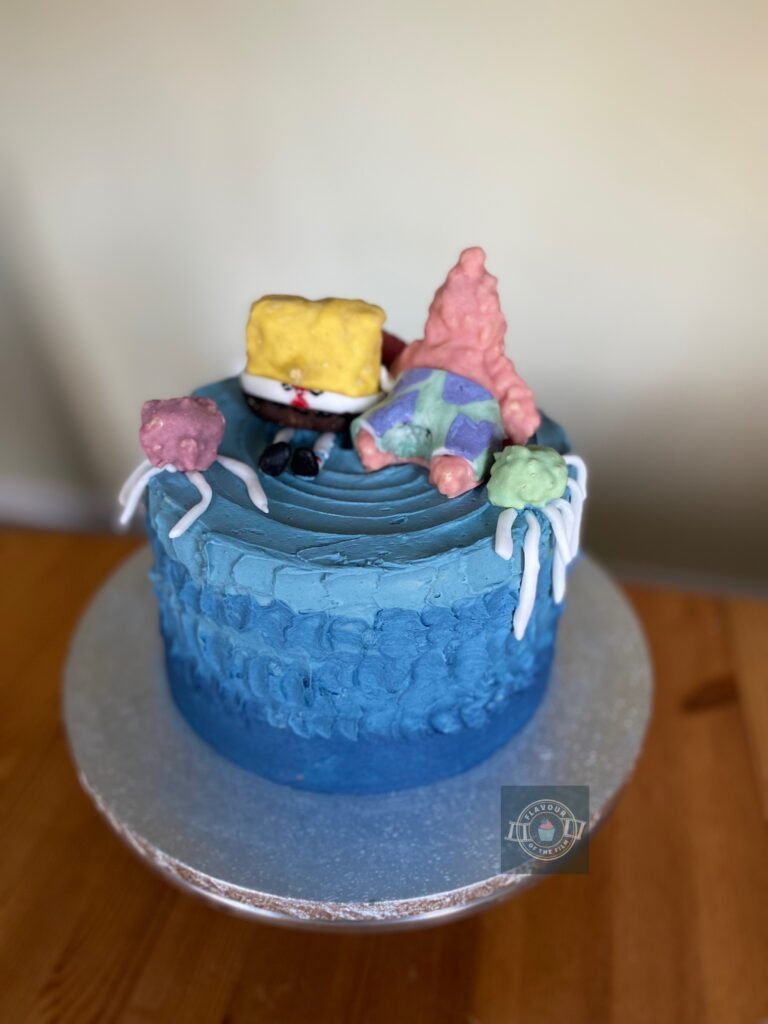
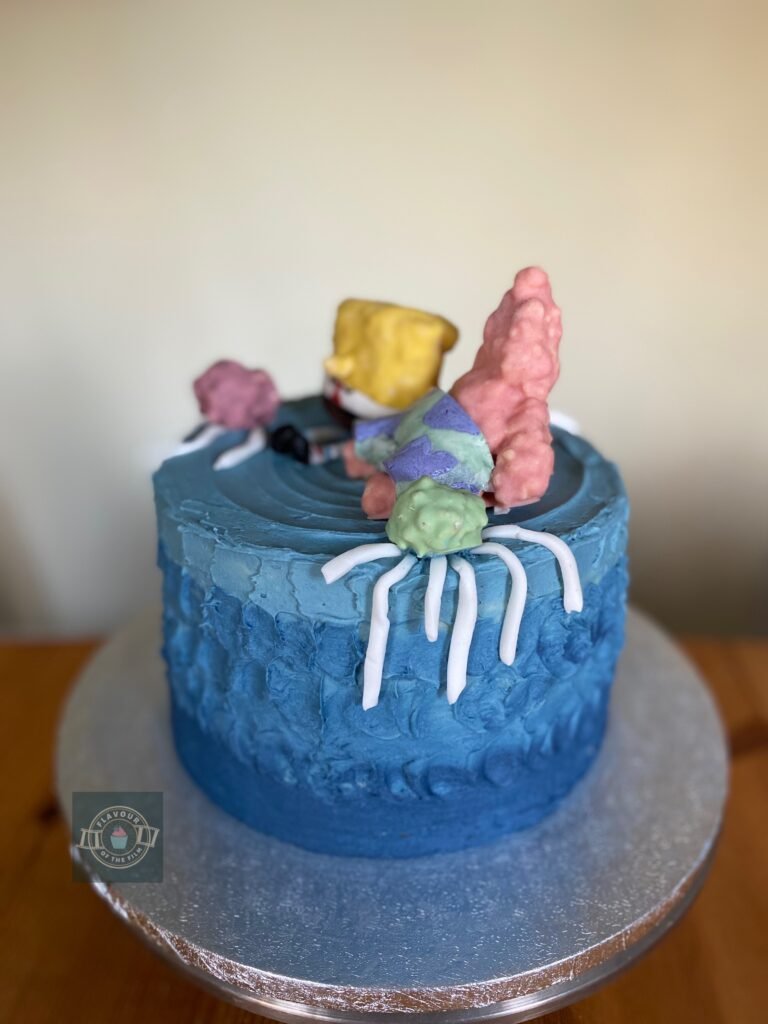
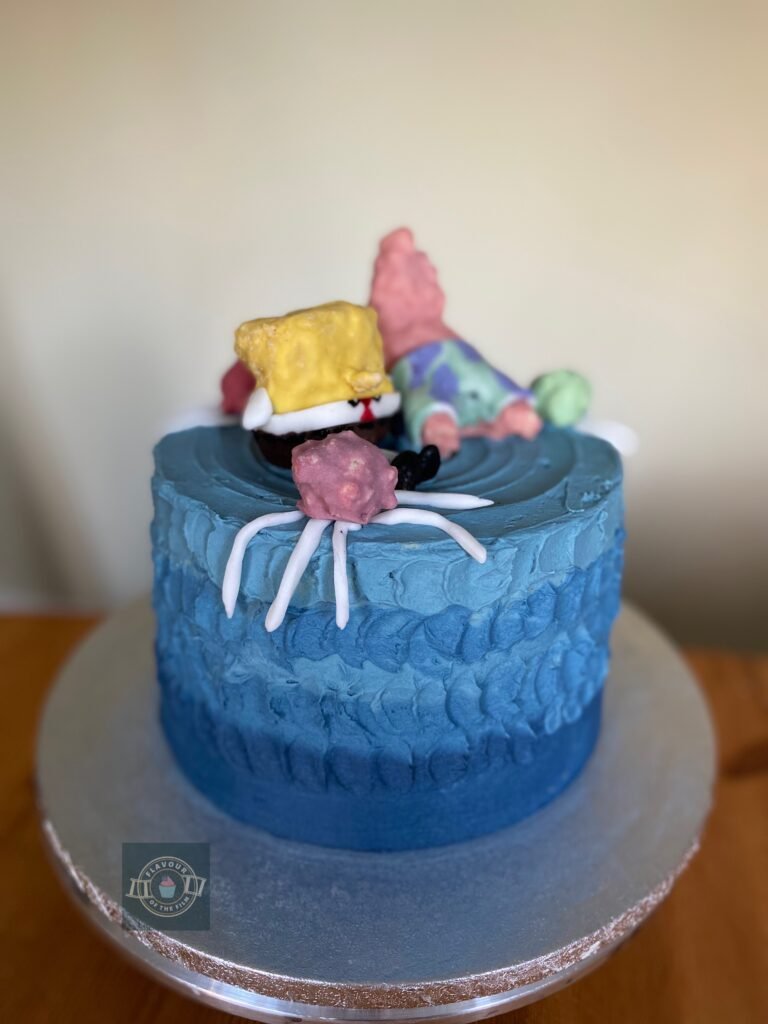
I loved the idea of the cake looking like it has movement to it, so I opted for a blue ombre look with a pattern I made with a palette knife. Playful vibes.
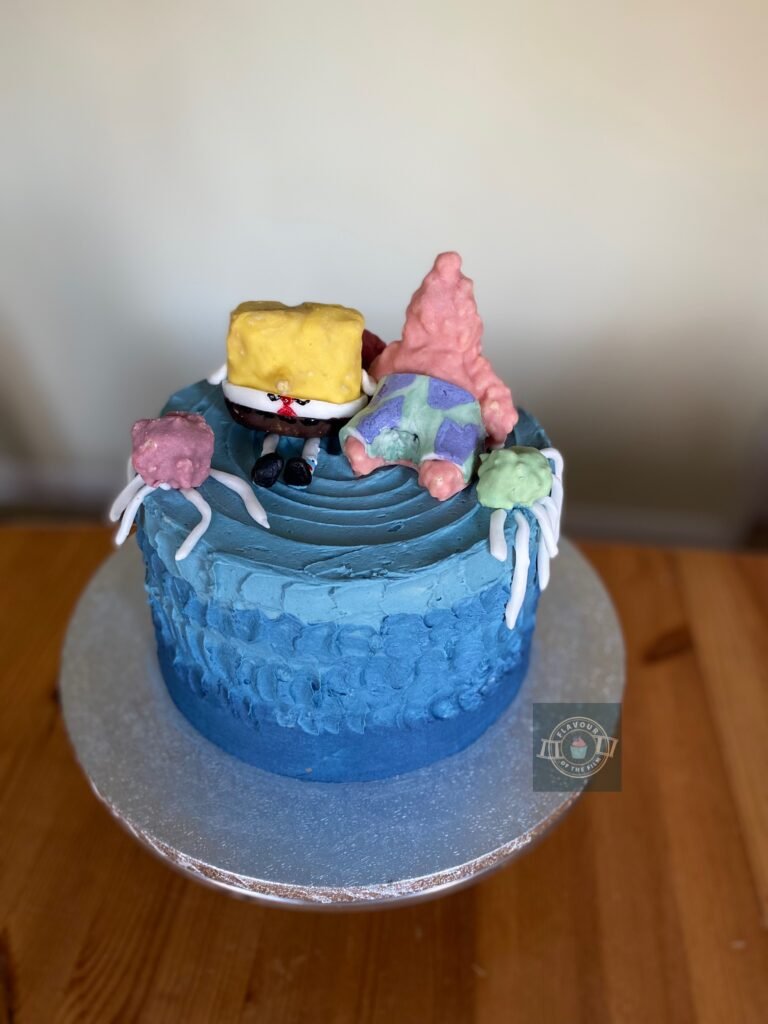
The character decorations: SpongeBob and Patrick sitting with jellyfish, are made from rice krispie treats that were covered in tinted white chocolate. To finish it off, the character outfits were made from white and black fondant icing that I moulded and painted.

You’ll notice from the photos that I opted not to include the character facial features.
I genuinely sculpted and painted the facial features for both SpongeBob and Patrick using fondant icing. Before attaching to the character figures, the features looked so cool! Proper cartoon-like.
When I started attaching the features to the characters, I quickly decided against it because, in all honestly, they looked incredibly creepy. Plus, the character figures actually looked pretty cool without facial features. It’s playful and artsy.
SpongeBob and Patrick are so recognisable as characters that you don’t actually need to give them faces!

If you’d prefer to include their facial features, that’s completely up to you.
You could paint directly onto the white chocolate using oil-based food colouring or sculpt the features with fondant/sugar paste icing which you can also paint with food colouring should you prefer to get just white sugar paste for the base.
Alternatively, you can get the various different coloured blocks of sugar paste icing and build the features up using those.
In the measurements below, I have given a range for the amount of ingredients needed for the rice krispie treats as this is completely down to you. Essentially, it’s based on how big you want to make your characters. It also means you can make more decorations. For example, more jellyfish if you use more ingredients.
This mix will last for ages in an airtight container so even if you don’t use it all for this SpongeBob themed cake. You can have it as a snack over the next few days or carry it over for your next bake!

The friend that I made this SpongeBob cake for absolutely adores Kinder chocolate.
So, I used a chocolate and hazelnut natural flavouring in the chocolate parts of the cake and I added melted Kinder chocolate to the buttercream. This flavouring is what makes it a chocolate and hazelnut cake! Seeing as I had reports back that the cake was delicious, I’m going to say that these flavours really work.
As I say with most of my bakes on Flavour of the Film: any flavour you choose will work. It’s the measurements and designs that I am happily providing you with!
Top Tips
- Avoid over mixing the cake batters. An over mixed cake batter is less likely to result in a light and fluffy texture once baked.
- Be as random as you can when spooning the mixture in. This way you’ll avoid ending up with too much of one flavour in any of your slices.
- As always, weigh out your eggs in their shells and weigh out the rest of the ingredients to the same exact weight for the ultimate cake sponge texture.
- Don’t over complicate the aesthetic of the cake. It’s minimalist and artsy which is easier and quicker to achieve.
- Make sure to oil your hands when shaping the Rice Krispie figures to prevent any of it sticking to your hands.
- Be careful handling the Rice Krispie mixture once made as it is very hot and can burn your skin. Spoon it out onto some greaseproof paper/baking parchment and leave it to cool for a moment before handling.
Reach for that child-like sense of fun when you make this SpongeBob Squarepants themed cake. I hope you both enjoy the process of making and eating this cake! If the reason you’re making it is solely for yourself, I’m here for it. When a challenge arises in life and logic isn’t providing a solution, maybe take a page out of SpongeBob’s book and look for the unconventional routes. I certainly do. Enjoy!
Happy baking, happy eating!
The Recipe
Ingredients
Vanilla half of the cake:
- 250g [8.75 oz] unsalted butter
- 125g [½ cup + 2 tbsp] caster sugar
- 125g [⅔ cup + ½ tbsp] light brown sugar
- 3 large eggs
- 1 tsp vanilla extract
- 250g [1½ cup + 1 tbsp] plain [all-purpose] flour
- 1¼ tsp baking powder
- ¼ tsp salt
Chocolate half of the cake:
- 250g [8.75 oz] unsalted butter
- 125g [½ cup + 2 tbsp] caster sugar
- 125g [⅔ cup + ½ tbsp] light brown sugar
- 3 large eggs
- 1 tsp natural chocolate & hazelnut flavouring
- 220g [2 cups] plain [all-purpose] flour
- 30g [⅓ cup] high quality cocoa powder
- 1¼ tsp baking powder
- ¼ tsp salt
Characters:
- 50g to 100g [1 cup to 2 cups] marshmallows (mini or regular)
- 50g to 100g [2 cups to 4 cups] rice crisp cereal i.e. Rice Krispies
- 175g [¾ cup + 3 tbsp] white chocolate (chopped or in chip form)
- White fondant icing/sugar paste
- Brown fondant icing/sugar paste
- Yellow food colouring (oil-based)
- Red food colouring
- Blue food colouring (oil-based)
- Pink food colouring (oil-based)
- Green food colouring
- Blue food colouring (oil-based)
Buttercream:
- 250g [8.75 oz] unsalted butter
- 500g – 550g [5 cups – 5½ cups] icing [confectioners] sugar
- 7 individual kinder chocolate bars
- Baby blue food colouring
- Blue food colouring
Serves: 12+
Preparation time: 20 minutes
Chilling time: 15 minutes
Baking time: 38 – 45 minutes
Decorating time: 40 minutes
Method
SpongeBob cake sponges:
- Preheat your oven to 180°C [325°F] or 160°C fan. Grease and line 3 deep 8 inch (20cm) round cake tins with baking parchment/greaseproof paper.
- Prepare two separate bowls (a similar size if you can!) as you will be making the batters separately before marbling them together.
- In the bowl for the vanilla batter, beat together the butter and sugars until light and fluffy.
- Beat in the eggs one at a time until fully combined and add the vanilla extract. Beat again until smooth.
- Sieve the flour and baking powder into the batter. Add the salt and beat in just until combined. Be careful not to overmix.
- In the second bowl, beat together the butter and sugars for the chocolate cake until light and fluffy.
- Beat in the eggs one at a time until fully combined and add the natural chocolate & hazelnut flavour. Beat again until smooth.
- Sieve the flour, cocoa powder and baking powder into your batter. Add the salt and beat in just until combined. Be careful not to overmix.
- Using a large spoon, divide the vanilla mix into the 3 cake tins. Lay spoonfuls of the mix in random places in the cake tins.
- If you can avoid lumping too much of the same batter together and make sure you have plenty of gaps for the other batter, it will bring out a more interesting marble pattern.
- When you have used all of the vanilla batter up and you have similar amounts in each cake tin, repeat the process with the chocolate batter. Fill in the gaps you left in the cake tins with the chocolate batter until used up.
- Using a knife, swirl through the batters to gently create the marbling pattern you’re after. Be careful not to overdo this as you could end up with the batters just fully combining instead of baking in a beautiful swirling pattern.
- Bake for 38 – 45 minutes on the middle shelf. The timing depends on how hot your oven runs. The cakes will be baked through when a cocktail stick comes out clean; the top of the cakes spring back when gently pressed on and the cakes are not making a bubbling/crackling sound when you listen to them.
- Allow your cakes to cool in the tins for around 15 minutes and then turn out onto a cooling rack to cool completely.
Rice krispie characters:
- Whilst your cakes are cooling, make your rice krispie treat characters. Prepare a lined traybake tin or a piece of greaseproof paper/baking parchment on your work surface.
- Melt a small knob of butter into a pan over a medium heat.
- Add the marshmallows (if using regular size, roughly chop them up before adding) and stir until they have all melted. Stir regularly to avoid the marshmallows catching or burning.
- When fully melted, add the rice crisp cereal you are using and stir in until combined. Take off the heat and keep stirring.
- Tip into your lined tin or onto the piece of greaseproof paper/baking parchment. Oil your hands (with sunflower/vegetable oil) and press the mixture firmly together and leave for a few moments.
- When the mixture is cool enough to handle, add more oil to your hands (this prevents the mixture from sticking to your skin) and begin moulding your characters. A simple thick rectangular figure with a nose for SpongeBob. A thick star-shaped figure in a sitting position for Patrick (don’t forget his belly!). Mould as many jellyfish as you would like to include on your cake: just simple ball shapes.
- Line a baking tray and sit your characters on it.
- Divide the white chocolate into at least two heatproof bowls: more if using more colours for the jellyfish.
- Melt your white chocolate either over bain marie (bowl over boiling water) or in the microwave in 10-20 second bursts. Do one bowl at a time.
- Mix in the food colouring until you get the right colour. For example, start with yellow in the first bowl of melted white chocolate. In the next one, mix in pink.
- Dip the SpongeBob rice krispie figure into the yellow white chocolate. Use a spoon to help cover the figure completely. Be careful not to crush your piece of art! Lift it out and allow any excess white chocolate to drip back into the bowl before placing back onto the lined baking tray.
- Make sure you lay your characters on the lined baking tray in the position you want them to be in when you lay them on the cake. This way you won’t have any visible flat edges where the chocolate has set against the surface of the tray.
- Repeat this process with your Patrick figure (in the pink coloured white chocolate) and any jellyfish/other characters you are adding.
- Place the baking tray with your characters on in the fridge to set completely.
Buttercream:
- Beat the butter a little to loosen it before adding the icing [confectioners] sugar. Beat until light and fluffy.
- Melt the kinder chocolate bars in a bowl in the microwave in 20 second bursts. Add to the buttercream and beat until combined.
- If the buttercream is a little stiff, add a tablespoon of water or milk to loosen it a little.
- Spread a little buttercream on the cake board/cake stand you are using and place the first of your cooled sponges over the top.
- Spread over some more buttercream – just until covered well – and add the second layer. Repeat until you have stacked all of your cake sponges.
- Smooth some buttercream over the entire cake in a thin layer, creating a crumb coat.
- Place in the fridge to chill.
Character decoration:
- Your characters should be set enough by now to finish them. Test this by touching one of them in a less visible place and see if any chocolate comes off onto your finger. If it does, allow them to chill for longer.
- Before removing from the fridge, make the clothes and features (i.e. jellyfish legs) for your characters using the various fondant icing (make sure to use white for Patrick’s shorts and SpongeBob’s shirt/legs so that you can paint them). Have fun with this!
- When your fondant pieces are ready, take your characters from the fridge and gently press the fondant features to the character figures.
- Paint the stripes and tie/collar on SpongeBob’s shirt and socks using the blue, black and red food colouring.
- Paint Patrick’s shorts with the purple and green food colouring.
- Set aside to dry.
Construction:
- Take your cake from the fridge. Separate the remaining buttercream into 3 bowls and add the blue food colouring to each one in varying amounts. Put the most buttercream in the bowl with the lightest blue colouring as you will cover the top of the cake with this shade. You want to aim for 3 different shades of blue for the ombre effect.
- Either pipe or spread the three different colours around your cake with the lightest shade of blue on the top and the darkest around the bottom.
- Using a palette knife, smooth the buttercream around your cake to achieve that ombre look. Smooth the top of the cake to your preference.
- Using the tip of the palette knife, create a ‘movement’ pattern in the top two shades of blue. It is completely up to you what you want to do so have fun with it! My technique for this cake was to press the tip of the palette knife and lift it to the right as I moved around the cake.
- Place your finished characters on the top of the cake to finish.
This delectable SpongeBob Squarepants cake will last 4+ days in an airtight container. As I mentioned earlier in the post, this cake was a hit with my friend and her family. I hope you and your loved ones enjoy it just as much!
The TV Show
From the very first episode airing in 1999, SpongeBob SquarePants has been a household name in the Children’s TV industry. When it was first pitched by the creator, Stephen Hillenburg, to Nickelodeon, he reportedly carried a fish tank into the room and proceeded to explain what was inside. He then placed a cartoon drawing of SpongeBob in the tank and introduced the room to the “star” of their new show.
I love the confidence.
Set under the sea in the subsurface city of Bikini Bottom, SpongeBob SquarePants is the ever-optimistic, cheerfully childish and well-dressed sea sponge that lives in a two-story pineapple with his pet sea snail, Gary. Along with his best pal Patrick Star (whose mind is an enigma), SpongeBob spends his days jellyfishing, flipping patties at the Krusty Krab and attending classes at the local boating school.
One of the most endearing (and relatable) of SpongeBob’s qualities is that of his preference to approach daily and life challenges with an unconventional and far more fun approach rather than a straight up logical one.

There is always something going on in Bikini Bottom and the city isn’t short of quirky and memorable characters.
Namely Sandy Cheeks (a squirrel in a suit that basically lives in a snow globe); Mr. Krabs who runs the Krusty Krab, plus Squidward AKA that one guy that can’t stand SpongeBob but is always involved in SpongeBob’s life in some way or another.
Oh, who could forget about Plankton? The owner of the Chum Bucket and the thorn in Mr. Krabs’s side – always after that secret formula for krabby patties.
The character voices are just as iconic as their appearances.
This incredibly talented cast includes the likes of Tom Kenny as SpongeBob; Bill Fagerbakke as Patrick Star, Rodger Bumpass as Squidward, Clancy Brown as Mr. Krabs, Mr. Lawrence as Plankton, Carolyn Lawrence as Sandy Cheeks and more.
I’d love to know if you have any favourite episodes, let me know what they are in the comments!
Love it or not, SpongeBob SquarePants is pure fun and pure laughter. There are jokes for all. It’s one of those shows that you can put on, lay back and trust that you’ll have a laugh. No need for intense concentration or intellect. Everyone needs a show like this to pop on and enjoy in this day and age.
There’s a good reason why there have been multiple films made alongside the TV show, as well as why the show has been running for over two decades.
Recipe Card

Vanilla and Chocolate Nut Cake | SpongeBob SquarePants
Ingredients
Vanilla half of the chocolate nut cake:
- 250 g [8.75] unsalted butter
- 125 g [½ cup + 2 tbsp] caster sugar
- 125 g [⅔ cup + ½ tbsp] light brown sugar
- 3 large eggs
- 1 tsp vanilla extract
- 250 g [1½ cup + 1 tbsp] plain [all-purpose] flour
- 1¼ tsp baking powder
- ¼ tsp salt
Chocolate half of the chocolate nut cake:
- 250 g [8.75 oz] unsalted butter
- 125 g [½ cup + 2 tbsp] caster sugar
- 125 g [⅔ cup + ½ tbsp] light brown sugar
- 3 large eggs
- 1 tsp natural chocolate & hazelnut flavouring
- 220 g [2 cups] plain [all-purpose] flour
- 30 g [⅓ cup] high quality cocoa powder
- 1¼ tsp baking powder
- ¼ tsp salt
For the characters:
- 50 g to 100g [1 cup to 2 cups] marshmallows mini or regular
- 50 g to 100g [2 cups to 4 cups] rice crisp cereal i.e. Rice Krispies
- 175 g [¾ cup + 3 tbsp] white chocolate chopped or in chip form
- White fondant icing/sugar paste
- Brown fondant icing/sugar paste
- Yellow food colouring oil-based
- Red food colouring
- Blue food colouring oil-based
- Pink food colouring oil-based
- Green food colouring
- Blue food colouring oil-based
Buttercream:
- 250 g [8.75 oz] unsalted butter
- 500 g – 550g [5 cups – 5½ cups] icing [confectioners] sugar
- 7 individual kinder chocolate bars
- Baby blue food colouring
- Blue food colouring
Instructions
- Preheat your oven to 180°C [325°F] or 160°C fan. Grease and line 3 deep 8 inch (20cm) round cake tins with baking parchment/greaseproof paper.
- Prepare two separate bowls (a similar size if you can!) as you will be making the batters separately before marbling them together.
- In the bowl for the vanilla batter, beat together the butter and sugars until light and fluffy.
- Beat in the eggs one at a time until fully combined and add the vanilla extract. Beat again until smooth.
- Sieve the flour and baking powder into the batter. Add the salt and beat in just until combined. Be careful not to overmix.
- In the second bowl, beat together the butter and sugars for the chocolate cake until light and fluffy.
- Beat in the eggs one at a time until fully combined and add the natural chocolate & hazelnut flavour. Beat again until smooth.
- Sieve the flour, cocoa powder and baking powder into your batter. Add the salt and beat in just until combined. Be careful not to overmix.
- Using a large spoon, divide the vanilla mix into the 3 cake tins. Lay a spoonful in random places in the cake tins.
- If you can avoid lumping too much of the same batter together and make sure you have plenty of gaps for the other batter, it will bring out a more interesting marble pattern.
- When you have used all of the vanilla batter up and you have similar amounts in each cake tin, repeat the process with the chocolate batter. Fill in the gaps you left in the cake tins with the chocolate batter until used up.
- Using a knife, swirl through the batters to gently create the marbling pattern you’re after. Be careful not to overdo this as you could end up with the batters just fully combining instead of baking in a beautiful swirling pattern.
- Bake for 38 – 45 minutes on the middle shelf. The timing depends on how hot your oven runs. The cakes will be baked through when a cocktail stick comes out clean; the top of the cakes spring back when gently pressed on and the cakes are not making a bubbling/crackling sound when you listen to them.
- Allow your cakes to cool in the tins for around 15 minutes and then turn out onto a cooling rack to cool completely.
- Whilst your cakes are cooling, make your rice krispie treat characters. Prepare a lined traybake tin or a piece of greaseproof paper/baking parchment on your work surface.
- Melt a small knob of butter into a pan over a medium heat.
- Add the marshmallows (if using regular size, roughly chop them up before adding) and stir until they have all melted. Stir regularly to avoid the marshmallows catching or burning.
- When fully melted, add the rice crisp cereal you are using and stir in until combined. Take off the heat and keep stirring.
- Tip into your lined tin or onto the piece of greaseproof paper/baking parchment. Oil your hands (with sunflower/vegetable oil) and press the mixture firmly together and leave for a few moments.
- When the mixture is cool enough to handle, add more oil to your hands (this prevents the mixture from sticking to your skin) and begin moulding your characters. A simple thick rectangular figure with a nose for SpongeBob. A thick star-shaped figure in a sitting position for Patrick (don’t forget his belly!). Mould as many jellyfish as you would like to include on your cake: just simple ball shapes.
- Line a baking tray and sit your characters on it.
- Divide the white chocolate into at least two heatproof bowls: more if using more colours for the jellyfish.
- Melt your white chocolate either over bain marie (bowl over boiling water) or in the microwave in 10-20 second bursts. Do one bowl at a time.
- Mix in the food colouring until you get the right colour. For example, start with yellow in the first bowl of melted white chocolate. In the next one, mix in pink.
- Dip the SpongeBob rice krispie figure into the yellow white chocolate. Use a spoon to help cover the figure completely. Be careful not to crush your piece of art! Lift it out and allow any excess white chocolate to drip back into the bowl before placing back onto the lined baking tray.
- Make sure you lay your characters on the lined baking tray in the position you want them to be in when you lay them on the cake. This way you won’t have any visible flat edges where the chocolate has set against the surface of the tray.
- Repeat this process with your Patrick figure (in the pink coloured white chocolate) and any jellyfish/other characters you are adding.
- Place the baking tray with your characters on in the fridge to set completely.
- Make the buttercream.
- Beat the butter a little to loosen it before adding the icing [confectioners] sugar. Beat until light and fluffy.
- Melt the kinder chocolate bars in a bowl in the microwave in 20 second bursts. Add to the buttercream and beat until combined.
- If the buttercream is a little stiff, add a tablespoon of water or milk to loosen it a little.
- Spread a little buttercream on the cake board/cake stand you are using and place the first of your cooled sponges over the top.
- Spread over some more buttercream – just until covered well – and add the second layer. Repeat until you have stacked all of your cake sponges.
- Smooth some buttercream over the entire cake in a thin layer, creating a crumb coat.
- Place in the fridge to chill.
- Your characters should be set enough by now to finish them. Test this by touching one of them in a less visible place and see if any chocolate comes off onto your finger. If it does, allow them to chill for longer.
- Before removing from the fridge, make the clothes and features (i.e. jellyfish legs) for your characters using the various fondant icing (make sure to use white for Patrick’s shorts and SpongeBob’s shirt/legs so that you can paint them). Have fun with this!
- When your fondant pieces are ready, take your characters from the fridge and gently press the fondant features to the character figures.
- Paint the stripes and tie/collar on SpongeBob’s shirt and socks using the blue, black and red food colouring.
- Paint Patrick’s shorts with the purple and green food colouring.
- Set aside to dry.
- Take your cake from the fridge. Separate the remaining buttercream into 3 bowls and add the blue food colouring to each one in varying amounts. Put the most buttercream in the bowl with the lightest blue colouring as you will cover the top of the cake with this shade. You want to aim for 3 different shades of blue for the ombre effect.
- Either pipe or spread the three different colours around your cake with the lightest shade of blue on the top and the darkest around the bottom.
- Using a palette knife, smooth the buttercream around your cake to achieve that ombre look. Smooth the top of the cake to your preference.
- Using the tip of the palette knife, create a ‘movement’ pattern in the top two shades of blue. It is completely up to you what you want to do so have fun with it! My technique for this cake was to press the tip of the palette knife and lift it to the right as I moved around the cake.
- Place your finished characters on the top of the cake to finish.
Notes
© Flavour of the Film. All content and imagery is copyright protected. Please do not use any of my images or written content without prior permission. If you would like to share any of the recipes or images on Flavour of the Film, please link back to the recipe in question and rewrite it in your own words, crediting Flavour of the Film as the original source.


3 Comments
Comments are closed.