It’s the first anniversary of Flavour of the Film this week so what better way to celebrate than to create a bake inspired by my favourite film. That’s right, friends. Top Gun: Maverick is my favourite film and there are a plethora of reasons why. My Top Gun cake is a supersonic treat for any fan. Suit up, aviators. Let’s fly.
Contents
The Bake
As the Top Gun films are so popular, I thought I’d create something a little more abstract. A lot of Top Gun themed cakes have graced various birthday party tables. Many of which use copious amounts of fondant icing or sugar paste.
Which is great! If that’s your thing.
Regulars here will know that I am not the biggest fan of working with fondant, as I have noted in recipes like my Stitch cake.
I tend to only really use it when I know I can get away with a rougher look. This was certainly the case with my The Last Of Us inspired cake.

As such, I opted to decorate my Top Gun cake with purely American buttercream.
It meant that I could give it the look and texture that I wanted without spending ages cutting strips of fondant to layer on. It also allowed more scope for pipe work, which I find particularly enjoyable.
I will note that if fondant/sugar paste is your thing, then by all means use it! You can mirror the design of my Top Gun cake using your favourite fondant icing – just make sure to smother the cake in a crumb coat (thin layer) of buttercream first.
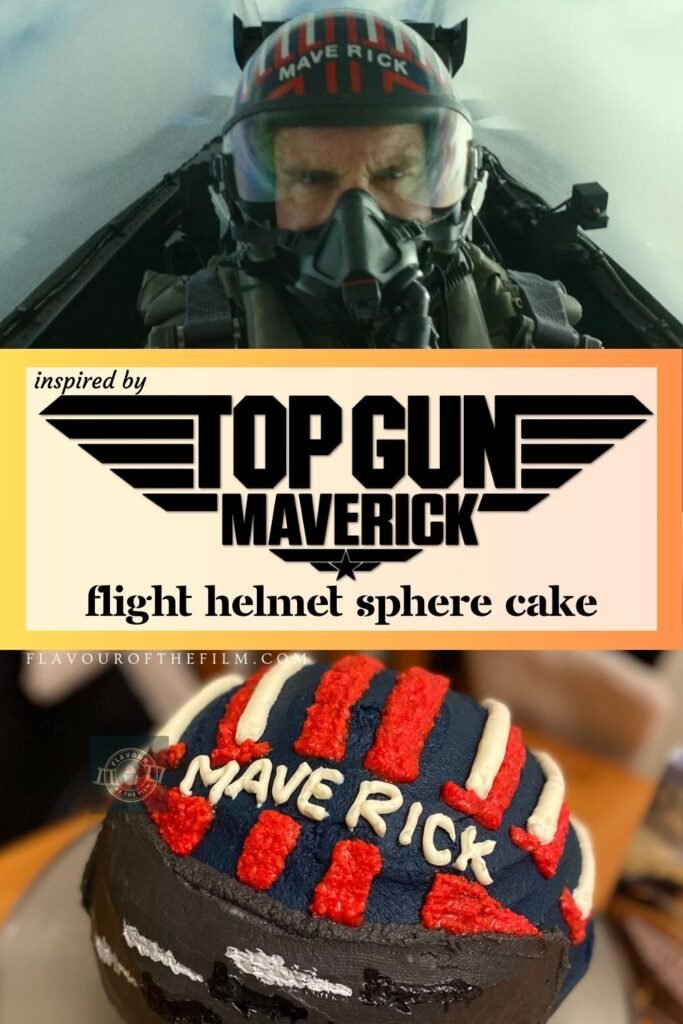
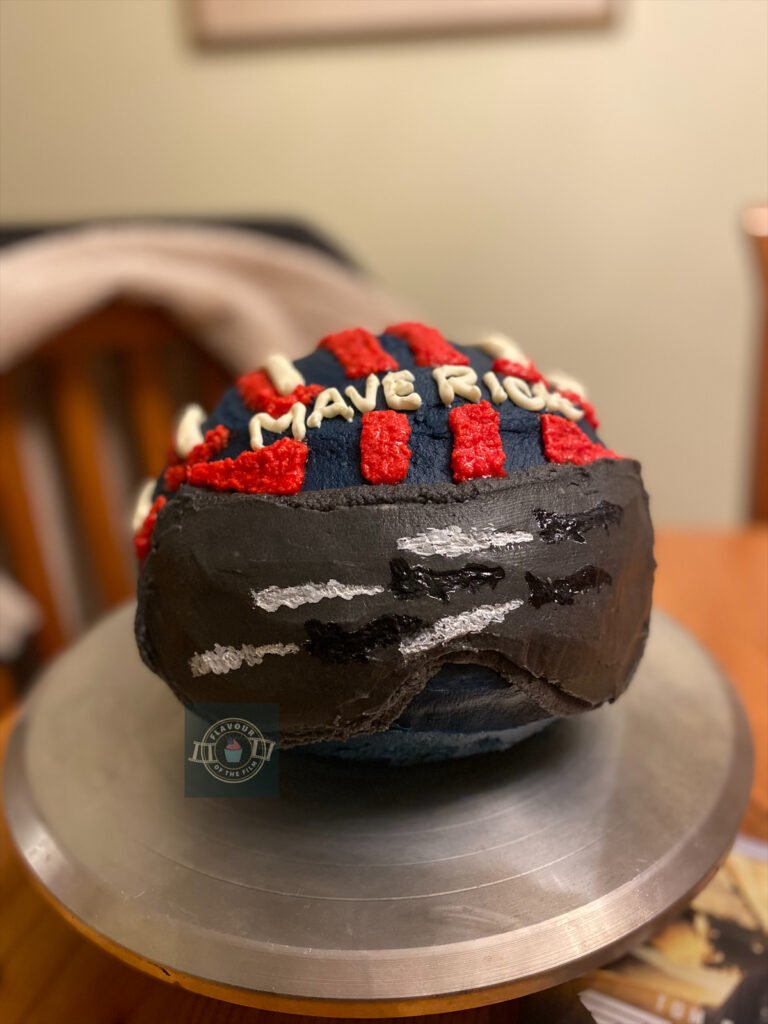
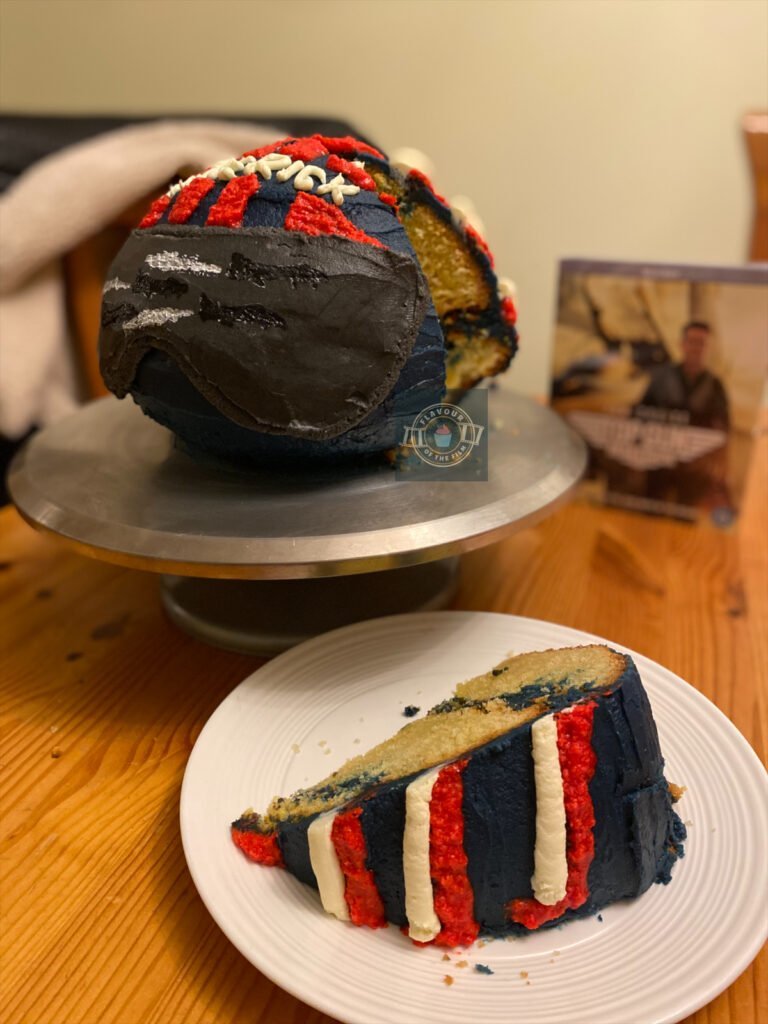
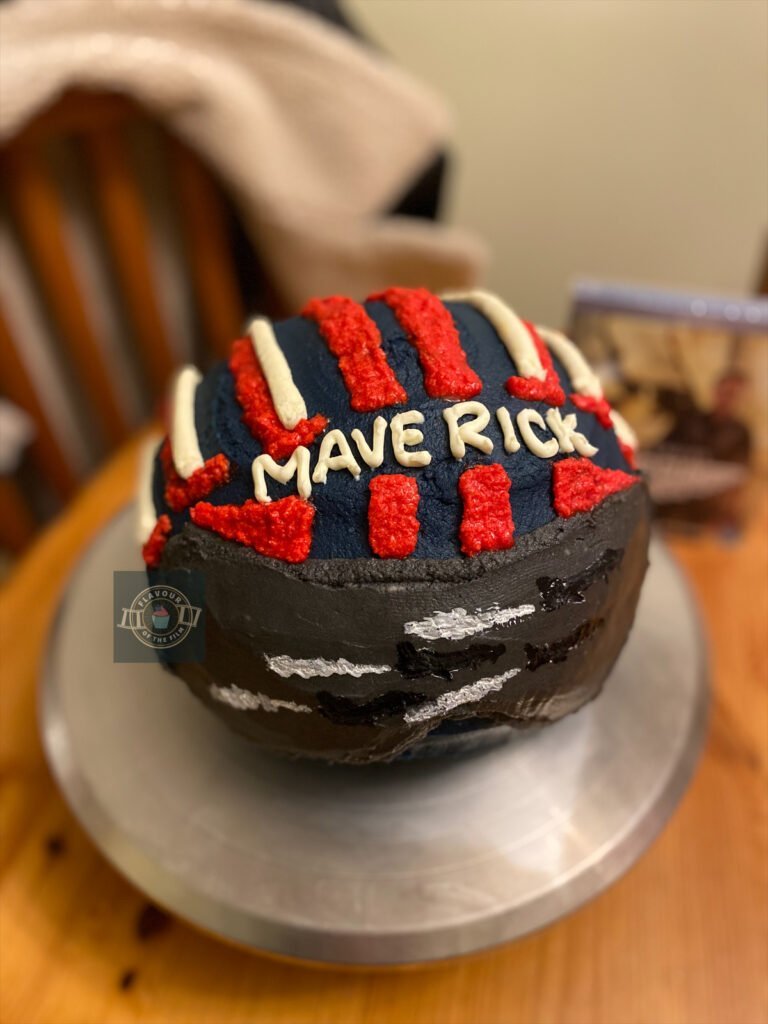
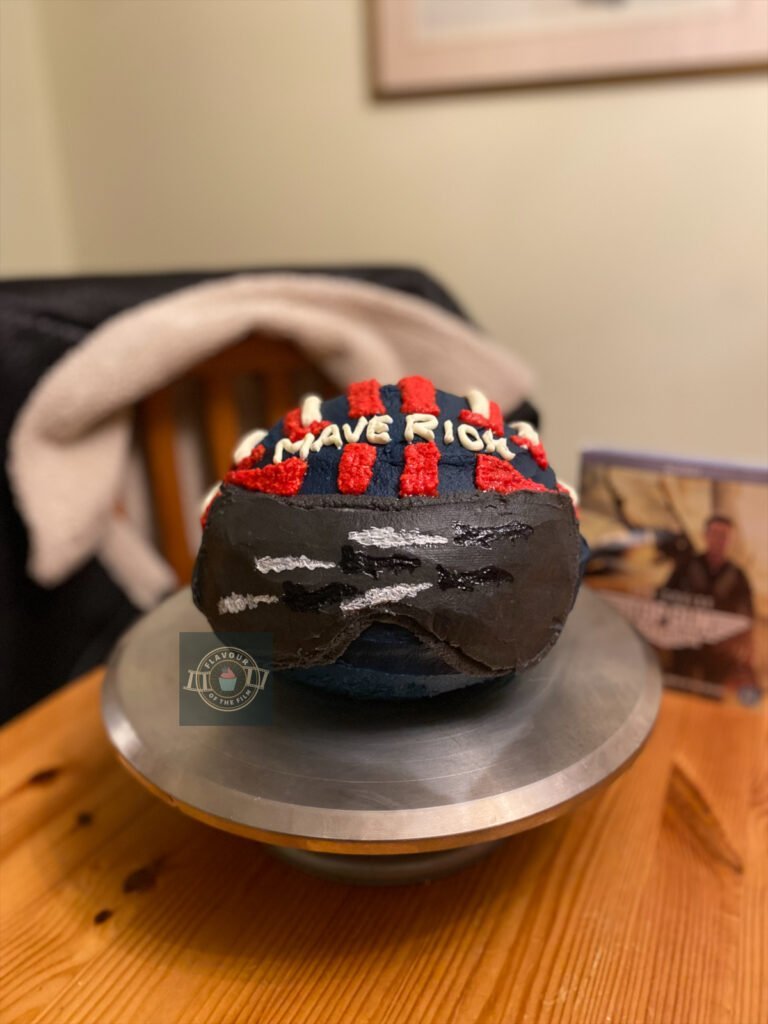
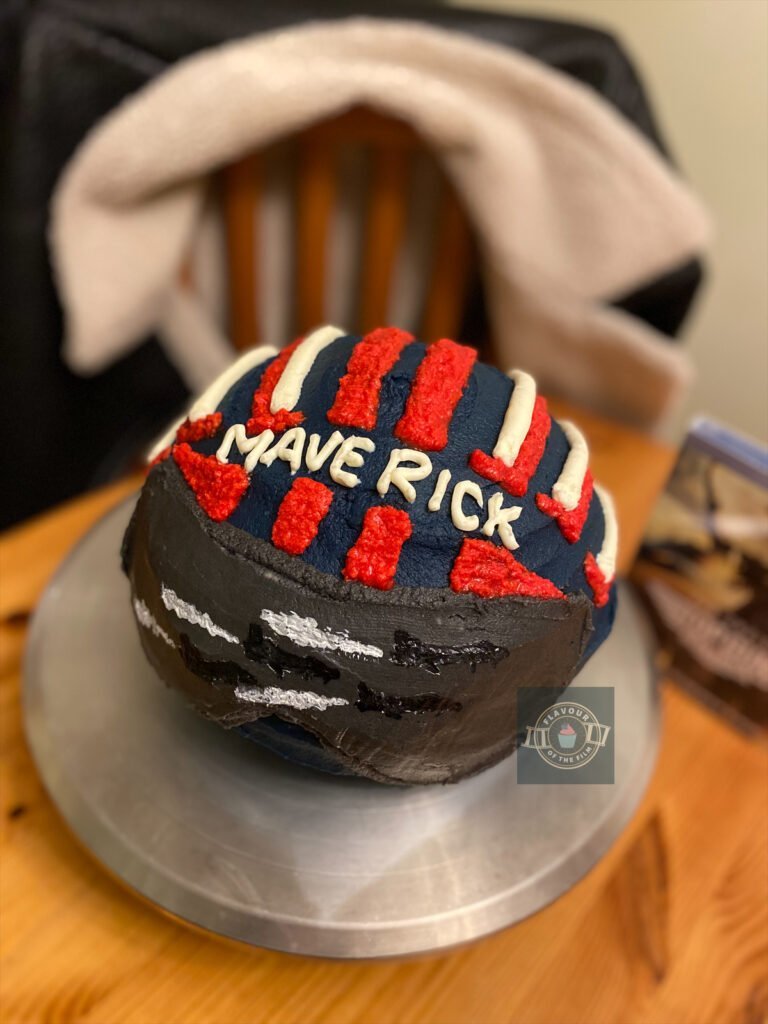
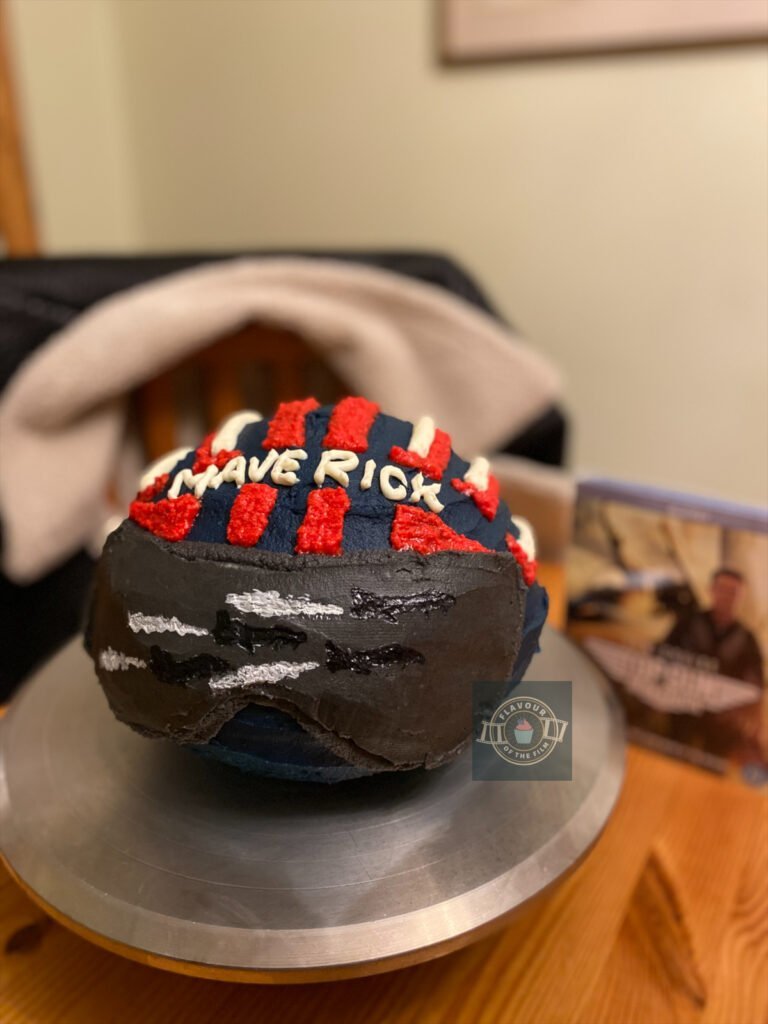
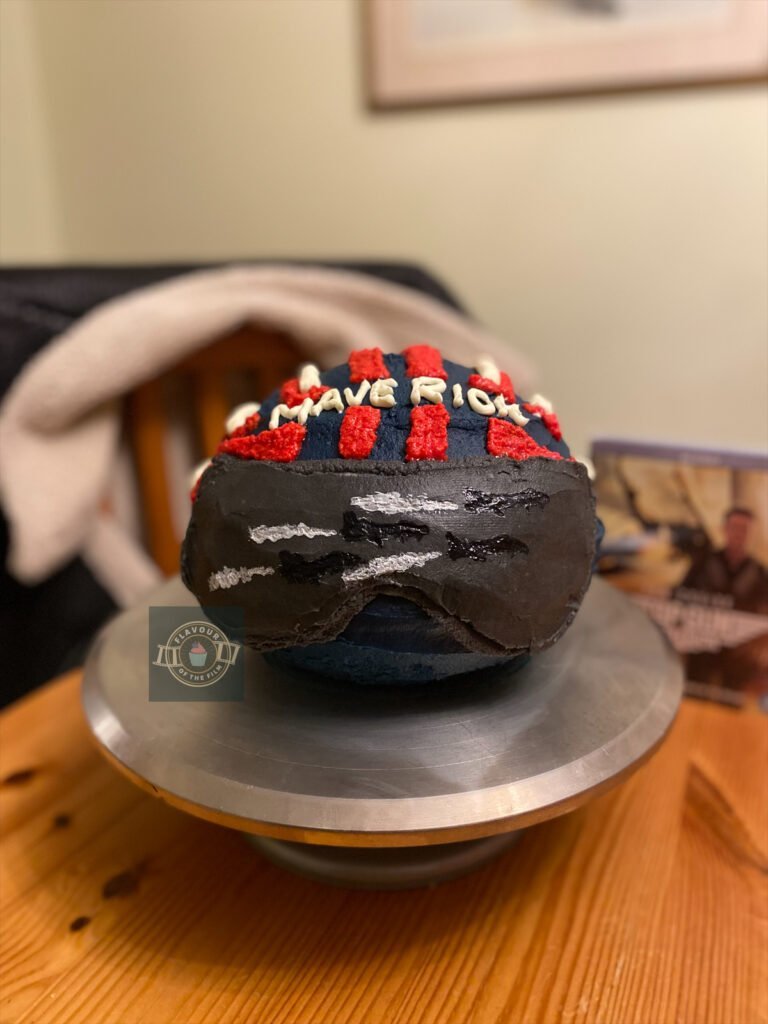
The entire aesthetic of my Top Gun inspired cake is Maverick’s flight helmet.
This cake is inspired by Top Gun: Maverick, after all.
It’s a relatively simple design – made a lot easier by piping the buttercream detailing and then using a cocktail stick to neaten everything up. Trust me on this, the cocktail stick is a golden tool.
In order not to overcomplicate things, I opted to not mould or pipe the mask that each pilot wears whilst flying in the film. Accessible recipes, here friends. But, if you would like to add the mask, then go for it. It’s completely your choice.
What I made sure to recreate on my Top Gun themed cake, besides the name and painted detailing, was the visor.
This was buttercream piped and smoothed over with a cutlery knife dipped in boiling hot water. I left the buttercream to dry out a little and then hand painted a scene to represent the immense cinematography that we see throughout the film; especially when reflected on the pilot’s visors.
The scene I chose was a flyover with the remaining four pilots that fly with Maverick on the dangerous mission that the film leads up to. I felt that this was both important and representative of Maverick’s character: his focus is on his fellow pilots more than anything, especially Rooster.
A fun thing that you can do with this cake is change the name painted on the helmet.
If you’re making this cake for a birthday, you can pipe the recipient’s name in place of Maverick above the visor. That way you can make it even more personal!
Now, my Top Gun themed cake is the first fully round cake that I have created. When I created my Barbie cake, I carved the top tier into a sphere. For this recipe, I used a hemisphere cake tin.
I only bought the one tin, so I have written the method section of this recipe with that in mind. You can obviously use two hemisphere tins – it’ll certainly shorten the time needed to make this cake.
Fair warning, friends. You’ll want to grease your hemisphere cake tin(s) very generously.
Especially if it’s the first time you are using this specific tin and you’re using a brand new one. It’s very easy for the cake to get stuck in the tin once baked.
These sponges require longer than you may think in the oven because they’re so thick. You want the thickness for the height, friends.
BUT, if you do have some cake get stuck, you can easily remedy this by glueing any broken pieces with some buttercream. No stress, friends. No stress.
Flavour wise, I opted for a classic vanilla for my Top Gun inspired cake.
Mostly because I wanted to create a recipe that provided a base for any further adaptations that you may want to make. For example, you can swap the vanilla out for an equal amount of a different extract or natural flavouring.
Or, you can swap out 50g – 75g of the flour with cocoa powder to make it a chocolate cake. You could even replace the extract or add to it using the zest of a citrus fruit.
Whatever floats your boat. Or will fly your plane.
Top Tips
- Grease the hemisphere tin(s) more than you would a usual cake tin. There is no use of baking parchment/greaseproof paper with these tins, so this is an important tip to make sure your cakes are released as whole as possible.
- Avoid over mixing the cake batter. Over mixing can alter the texture of the cake away from light and fluffy.
- The cakes take longer to bake than one would assume. Especially if the hemisphere tin(s) is/are new. Keep this in mind when setting out to make this Top Gun cake.
- Make sure to sit the hemisphere cake tin(s) in a small bowl on a baking tray. This will make sure that your cake mix stays stable while it bakes. Otherwise, you could end up with a landslide of a cake due to the tin rolling around during the baking process.
- If desired, you can simply carve the cake into shape, rather than using hemisphere tins. This takes more time and effort, but it can be more cost effective if you don’t already have the right tins. Use my Clapperboard Cake recipe to create a delicious three layer vanilla cake – remember to leave out the food colouring if not wanting to add it. Then build it and carve into a sphere using a sharp knife held at an angle. If carving, make sure to take a little off at a time and pace yourself.
- Don’t try to achieve perfect smoothness with your buttercream. Get it as smooth as you can, but don’t let it be the main focus. Achieving perfectly smooth buttercream on a spherical cake can be a mission.
- If making this cake for a loved one’s birthday, feel free to pipe their name/nickname in place of Maverick when decorating.
Top Gun: Maverick is a truly special film in my opinion and I hold it deeply in my heart. I will go on recommending it to as many people as possible. This Top Gun inspired cake is a fun and simple way to create something that can be personalised, as well as celebrate this beautiful film. Enjoy!
Happy baking, happy eating!
The Recipe
Ingredients
Top Gun cake:
- 500g [17.75 oz] unsalted butter room temperature
- 500g [2½ cups] caster sugar
- 500g eggs [around 7-8 medium]
- 500g [3 cups + 2 tbsp] self-raising flour
- 2 tsp vanilla extract
Top Gun cake decoration:
- 400g [14 oz] unsalted butter softened
- 800g [5½ cups] icing [confectioners] sugar
- 1 tsp vanilla extract
- Black/grey food colouring oil based
- Red food colouring oil based
- Navy blue food colouring oil based
- White food colouring oil based
Serves: 12 +
Preparation time: 15 minutes
Baking time: 45 – 50 minutes (doubled if using one hemisphere cake tin at a time)
Decorating time: 1 hour
Method
Top Gun cake:
- Preheat your oven to 180°C [350°F] or 160°C fan.
- Very generously grease your 20 cm hemisphere cake tin(s) with butter. Leave to the side.
- Weigh out your eggs in their shells and get as close as you can to 500g, allowing for around 20g either way. Measure the rest of your ingredients out to the exact weight that you settle on.
- In a large mixing bowl, cream together the butter and sugar until light and fluffy.
- Add the eggs one at a time, beating in between until fully incorporated.
- Spoon in the vanilla and beat in.
- Sieve the flour over your mixture and mix in just until the flour is no longer visible. Try not to overmix here.
- If using one tin, divide the mixture evenly between the tin and a bowl. If using two tins, divide the mixture evenly between the two greased tins.
- Sit the tin into a small bowl to keep it stable. Do this for both tins if using two. Place the bowls with the tins sitting in them onto a baking tray.
- Slide the tray onto the middle shelf of your oven and bake the sponge(s) for at least 45 – 50 minutes. The cake(s) will likely not quite be ready by this point, so cover with a sheet of tin foil to prevent the surface from burning.
- Your sponge(s) will be ready when they are golden in colour; a skewer comes out clean when tested, the surface bounces back when gently pressed on, and you hear little to no crackling/bubbling sound when you listen to it/them.
- Leave the sponge(s) to cool for at least 15 minutes in the tin(s) before tipping out and transferring to a wire rack to cool completely. You may need to use your skewer to ease the sponge(s) out of the tin.
- If only using one tin, repeat steps 8 to 11 to bake the second sponge.
Construction:
- While your sponges are cooling, prepare your buttercream.
- In a large mixing bowl, beat together the butter until loosened.
- Add half of the sugar and beat in until light and fluffy.
- Add the other half of the sugar and the vanilla and beat in until slightly softened and fluffy. If needed, add a small splash of milk and beat in to loosen the mixture slightly. Your sponges will be soft so keep this in mind.
- Spoon around 5 heaped tbsp of buttercream into a small bowl. This is for your visor.
- Spoon another 3 heaped tbsp of buttercream into another bowl, then repeat once more so that you have 3 small bowls of buttercream.
- Add the navy food colouring to the large bowl of buttercream and beat in until an even colour is achieved.
- Add the grey/a small amount of black food colouring to the bowl with 5 tbsp of buttercream and beat in well.
- In one of the small bowls with 3 tbsp in, beat in the red food colouring.
- In the last small bowl, beat in the white food colouring.
- Once your sponges are completely cool, begin building your cake. Glue any broken sponge back together using some of the navy buttercream, then smudge some buttercream on a cake board/plate/stand.
- Place the first sponge over the smudge with the flat side facing up.
- Spread a generous amount of navy buttercream over the sponge.
- Top with the last sponge, putting both flat sides together.
Decoration:
- Cover the entire cake sphere with the remaining navy coloured buttercream. A good tip here is to dip your palette knife into boiling hot water and smooth this over the buttercream. Be sure to tap any excess water off the knife first!
- Once covered, chill the entire cake in the fridge for around 15 minutes, just until firm.
- Fill a piping bag or sandwich bag with the grey buttercream.
- Retrieve your cake from the fridge.
- Pipe on the visor. Do the outline first, then pipe the remaining grey buttercream to fill in it.
- Dip a cutlery knife into boiling hot water – tap the excess water off – and use this to smooth the grey buttercream around so that the visor has a smoother appearance.
- Fill a piping bag or sandwich bag with a leaf piping tip attached with the red buttercream.
- Pipe the red detailing on the top of your cake, leaving a gap for the name.
- Use a cocktail stick to push and lift the red buttercream to tidy it up.
- Fill a piping bag or sandwich bag with the white buttercream.
- Pipe the white detailing next to the red buttercream.
- Pipe ‘Maverick’ or your chosen name in the gap using the white buttercream.
- Finally, using white and black food colouring or food paint and a thin paintbrush, paint the planes – or your chosen scene – onto the visor.
- Leave to set fully in the fridge.
This heavenly Top Gun cake inspired by Top Gun: Maverick is best eaten on the day, but will last for around 4 days if kept in an airtight container/cake box. Enjoy!
The Film
For as long as I can remember, people have asked me this same question: “what is your favourite movie?”
For as long as I can remember, I haven’t been able to answer it. When you’re this passionate about film and television, it can be very difficult to narrow down numerous favourite pieces to just one standout choice.
Sure, if you’d asked me this question a couple of years ago, I’d have given you a handful of different titles. Probably even a top ten or top five list to illustrate my taste. But, I have never truly been able to give just one simple answer.
Until Top Gun: Maverick.
That plethora of reasons that I mentioned in the intro? Let’s begin there. Don’t worry, I’ll keep it concise.
Not only is the cinematography some of the best in the business – big up Claudio Miranda, director of photography – which makes the viewing of this film that much more satisfying, Top Gun: Maverick is pure heart.
It’s both a love letter to its predecessor, Top Gun (1986), and a combined story in its own right.
The very opening of the film is proof of the former: the sequence is incredibly similar to that of Top Gun. As is the soundtrack. There are also mentions, scenes and specific plot threads running through Top Gun: Maverick that pay homage to the first film.
One of which could be recognised as a character, rather than a memory. The impact is that strong.
Top Gun: Maverick is all heart with spectacular visuals.
These specific visuals include the stylistic shots; the airborne scenes, the lighting arrangements, right down to the overall colour palette. All glorious.
Lighting and sound are arguably the two most difficult things to get right in cinema. Top Gun: Maverick nailed both elements.
The soundtrack includes some of the same songs from Top Gun, but the score is what moves me the most. The team that scored this film are the legend himself Hans Zimmer, Lorne Balfe, Lady Gaga and Harold Faltermeyer.
Lady Gaga’s piece, “Hold My Hand”, is genuinely one of my favourite songs of all time.
After decades of considering a Top Gun sequel, Top Gun: Maverick was released in 2022.
It’s important to note here that cinema had been hit hard by the events of the years leading up to this film’s release. Many productions were left in suspension, some were delayed, some were abandoned altogether.
When Top Gun: Maverick hit big screens worldwide, it brought hope back to the industry. It is so utterly fantastic that Steven Spielberg himself apparently approached Tom Cruise and declared that Top Gun: Maverick had saved cinema.
That’s one heck of a compliment, wouldn’t you say?

Top Gun: Maverick was directed by the superbly talented Joseph Kosinski and hosts an entire cast of talent.
In this story, we see Maverick still pushing the boundaries as a top U.S. Naval aviator. When he is called back to ‘Top Gun’ after thirty years, Maverick is forced to deal with the trauma of the past whilst training the very best of ‘Top Gun’ to fly a mission they may not come back from.
Alongside Tom Cruise reprising his role as Pete ‘Maverick’ Mitchell; we see Jennifer Connolly as Penny and Val Kilmer reprising his role as Tom ‘Iceman’ Kazinksy.
Plus, excellent actors John Hamm as Adm. Beau ‘Cyclone’ Simpson; Charles Parnell as Adm. Solomon ‘Warlock’ Bates, Bashir Salahuddin as CWO4 Bernie ‘Hondo’ Coleman, and Ed Harris as Radm. Chester ‘Hammer’ Cain.
The twelve ‘Top Gun’ recruits are made up of Miles Teller as ‘Rooster’; Monica Barbaro as ‘Phoenix’, Lewis Pullman as ‘Bob’, Jay Ellis as ‘Payback’ and Danny Ramirez as ‘Fanboy’.
Joining them were Glen Powell as ‘Hangman’; Greg Tarzan Davis as ‘Coyote’, Manny Jacinto as ‘Fritz’, Kara Wang as ‘Halo’, Jack Schumacher as ‘Omaha’, Raymond Lee as ‘Yale’, and Jake Picking as ‘Harvard’.
That’s not all. Lyliana Wray played the role of Amelia and Jean Louisa Kelly took on the role of Sarah Kazansky, plus many more.
It was a massive cast and crew for a massive film. Every single person had an integral part in the creation of this cinematic masterpiece.
Yeah, I’m calling it a masterpiece.
I genuinely adore this film and I will watch it over and over. I’m so glad I was able to see it in the cinema: what an experience that was.
What is even more impressive about Top Gun: Maverick is the level of dedication and effort put into its creation.
To achieve the shots that the film achieved, the actors playing the twelve ‘Top Gun’ recruits were trained extensively to be able to withstand the environments of being in actual flights. This minimised the use of green screen and CGI as a considerable amount of footage was filmed in-flight, real time.
Hard graft for the craft, that is.
Recipe Card

Top Gun Cake | Top Gun: Maverick
Ingredients
Top Gun cake:
- 500 g [17.75 oz] unsalted butter room temperature
- 500 g [2½ cups] caster sugar
- 500 g eggs [around 7-8 medium]
- 500 g [3 cups + 2 tbsp] self-raising flour
- 2 tsp vanilla extract
Top Gun cake decoration:
- 400 g [14 oz] unsalted butter softened
- 800 g [5½ cups] icing [confectioners] sugar
- 1 tsp vanilla extract
- Black/grey food colouring oil based
- Red food colouring oil based
- Navy blue food colouring oil based
- White food colouring oil based
Instructions
Top Gun cake:
- Preheat your oven to 180°C [350°F] or 160°C fan.
- Very generously grease your 20 cm hemisphere cake tin(s) with butter. Leave to the side.
- Weigh out your eggs in their shells and get as close as you can to 500g, allowing for around 20g either way. Measure the rest of your ingredients out to the exact weight that you settle on.
- In a large mixing bowl, cream together the butter and sugar until light and fluffy.
- Add the eggs one at a time, beating in between until fully incorporated.
- Spoon in the vanilla and beat in.
- Sieve the flour over your mixture and mix in just until the flour is no longer visible. Try not to overmix here.
- If using one tin, divide the mixture evenly between the tin and a bowl. If using two tins, divide the mixture evenly between the two greased tins.
- Sit the tin into a small bowl to keep it stable. Do this for both tins if using two. Place the bowls with the tins sitting in them onto a baking tray.
- Slide the tray onto the middle shelf of your oven and bake the sponge(s) for at least 45 – 50 minutes. The cake(s) will likely not quite be ready by this point, so cover with a sheet of tin foil to prevent the surface from burning.
- Your sponge(s) will be ready when they are golden in colour; a skewer comes out clean when tested, the surface bounces back when gently pressed on, and you hear little to no crackling/bubbling sound when you listen to it/them.
- Leave the sponge(s) to cool for at least 15 minutes in the tin(s) before tipping out and transferring to a wire rack to cool completely. You may need to use your skewer to ease the sponge(s) out of the tin.
- If only using one tin, repeat steps 8 to 11 to bake the second sponge.
Construction:
- While your sponges are cooling, prepare your buttercream.
- In a large mixing bowl, beat together the butter until loosened.
- Add half of the sugar and beat in until light and fluffy.
- Add the other half of the sugar and the vanilla and beat in until slightly softened and fluffy. If needed, add a small splash of milk and beat in to loosen the mixture slightly. Your sponges will be soft so keep this in mind.
- Spoon around 5 heaped tbsp of buttercream into a small bowl. This is for your visor.
- Spoon another 3 heaped tbsp of buttercream into another bowl, then repeat once more so that you have 3 small bowls of buttercream.
- Add the navy food colouring to the large bowl of buttercream and beat in until an even colour is achieved.
- Add the grey/a small amount of black food colouring to the bowl with 5 tbsp of buttercream and beat in well.
- In one of the small bowls with 3 tbsp in, beat in the red food colouring.
- In the last small bowl, beat in the white food colouring.
- Once your sponges are completely cool, begin building your cake. Glue any broken sponge back together using some of the navy buttercream, then smudge some buttercream on a cake board/plate/stand.
- Place the first sponge over the smudge with the flat side facing up.
- Spread a generous amount of navy buttercream over the sponge.
- Top with the last sponge, putting both flat sides together.
Decoration:
- Cover the entire cake sphere with the remaining navy coloured buttercream. A good tip here is to dip your palette knife into boiling hot water and smooth this over the buttercream. Be sure to tap any excess water off the knife first!
- Once covered, chill the entire cake in the fridge for around 15 minutes, just until firm.
- Fill a piping bag or sandwich bag with the grey buttercream.
- Retrieve your cake from the fridge.
- Pipe on the visor. Do the outline first, then pipe the remaining grey buttercream to fill in it.
- Dip a cutlery knife into boiling hot water – tap the excess water off – and use this to smooth the grey buttercream around so that the visor has a smoother appearance.
- Fill a piping bag or sandwich bag with a leaf piping tip attached with the red buttercream.
- Pipe the red detailing on the top of your cake, leaving a gap for the name.
- Use a cocktail stick to push and lift the red buttercream to tidy it up.
- Fill a piping bag or sandwich bag with the white buttercream.
- Pipe the white detailing next to the red buttercream.
- Pipe ‘Maverick’ or your chosen name in the gap using the white buttercream.
- Finally, using white and black food colouring or food paint and a thin paintbrush, paint the planes – or your chosen scene – onto the visor.
- Leave to set fully in the fridge.
Notes
© Flavour of the Film. All content and imagery is copyright protected. Please do not use any of my images or written content without prior permission. If you would like to share any of the recipes or images on Flavour of the Film, please link back to the recipe in question and rewrite it in your own words, crediting Flavour of the Film as the original source.