
What would you do to protect your family, even after all seems lost? It’s a deep question to start, but sometimes those are the best ones to kick things off. My Demon Slayer inspired mini versions of a Japanese strawberry roll cake are just the ticket for a sweet treat, Nezuko-style. Let’s set off into the snow.
Contents
The Bake
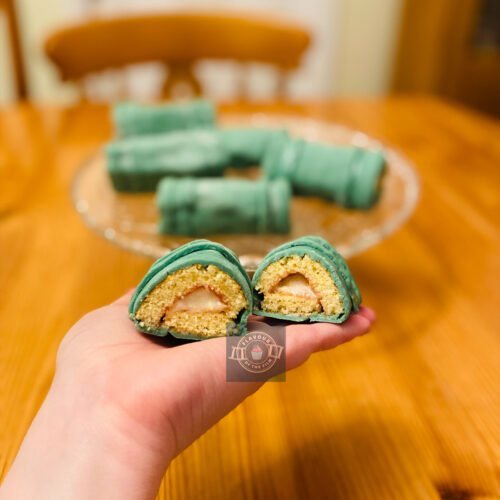
I’ve been loving bringing my anime-inspired recipes to life, so joining my Jujutsu Kaisen demon fingers and my Totoro cinnamon bread, I bring you Nezuko’s bamboo mouthpiece from Demon Slayer… in the form of cake!
I really ummed and arred when it came to this bake. Well, mostly the flavour that I wanted to choose. I considered a matcha and white chocolate combination, but I quickly realised that it’s not super accessible for folks. Matcha powder in its purest form isn’t easily available in the U.K., so I opted out of that one.
As regular readers of Flavour of the Film will know: I am all about making these bakes as easily accessible as possible.
Fun? Yes. Artistic and creative? Yes. Exclusively for those who can afford/find specific ingredients and equipment? Absolutely not.
Baking is for everyone and should remain that way.
But, I digress.
When it came to the aesthetic, it didn’t take long for me to know that I wanted to recreate Nezuko’s bamboo mouthpiece. It’s iconic and it also inspires me.
To make the bamboo mouthpieces, I opted for small individual cakes. I considered making the sponge a genoise sponge so that it was light and soft, but it didn’t feel connected to Demon Slayer. I also considered a lime and lemon flavour combination, but binned the idea for the same reason.
Finally, an idea formed. An idea better than all others. A treat that I recalled from my days living in Japan, as it happens.

Strawberry shortcake… AND a Japanese strawberry cake roll.
But, this is not the shortcake as you may already know. Japanese shortcake is a light and fluffy sponge cake, first developed in the early twentieth century. Historically, Japanese strawberry shortcake is sold as a Christmas cake and is still regarded as such.
It’s similar to the cake sponges you also find in places like South Korea, too. A Korean roll cake is also highly popular and resembles a Swiss roll design. As does the Japanese strawberry roll cake!
To make sure I stayed true to authenticity, I researched recipes for the sponge cake.
The method for the shortcake is more specific than a Western sponge cake. It requires whipping separated eggs and adding sugar slowly. This is what gives it the fluffy texture as well as the rise – as there is no rising agent added – so follow the instructions properly to avoid a dense sponge!
I looked around at various recipes, including this wonderful recipe on Just One Cookbook and this epic one by Catherine Zhang. There are some recipes that differ – some include milk and some don’t – which is good to know if you have an intolerance.
The recipe that I referenced and adapted is this gorgeous one by Yumiko on RecipeTin Japan. I love this blog. Yumiko is so informative and her posts include some of my favourite authentic Japanese recipes. She also has a whole list of troubleshooting tips.
My favourite tip is to make sure that all of your bowls and equipment are completely clean and dry: egg whites do not like grease or water when you are trying to whisk them.
This can cause an issue with the stability of your whisked egg whites which isn’t ideal considering that the fluffier the egg whites, the better the rise of your sponge!
It’s worth noting that Yumiko’s recipe is for the iconic strawberry shortcake as it is known. Mine is adapted with this and a Japanese strawberry roll cake to fit my bamboo vision!
I remember seeing various decorated strawberry shortcake Christmas cakes when I was in Japan.
They always looked so delicious. I actually shared an ice cream shortcake with my gorgeous best friend on Christmas Day in Japan. Such a wonderful time.
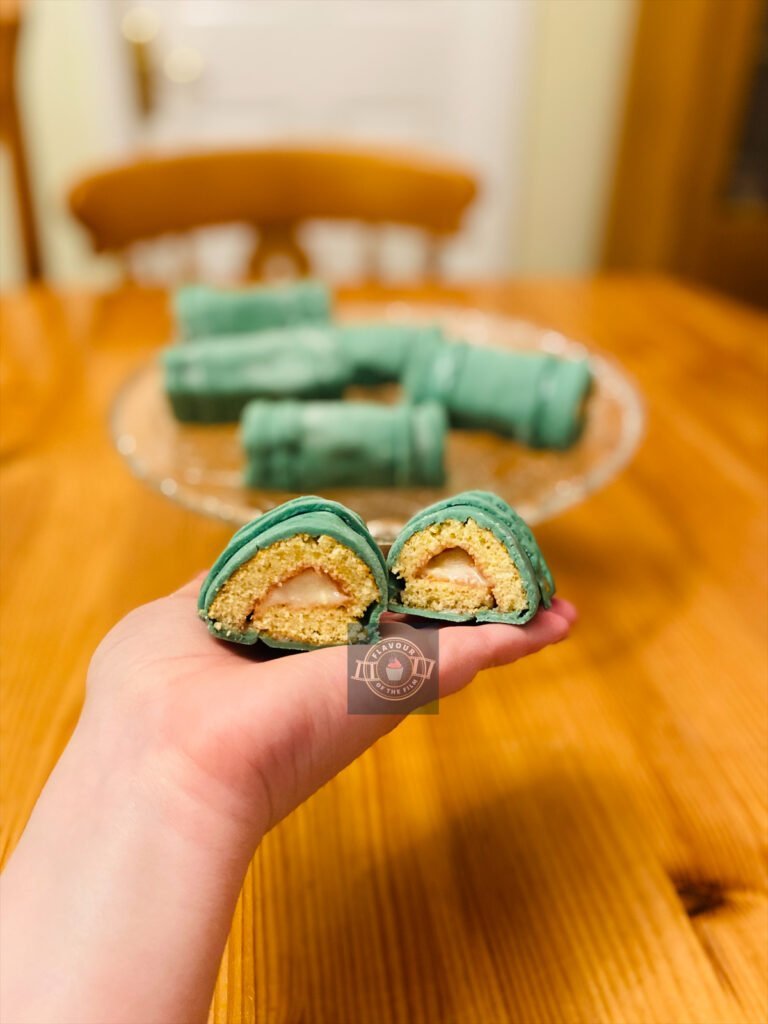
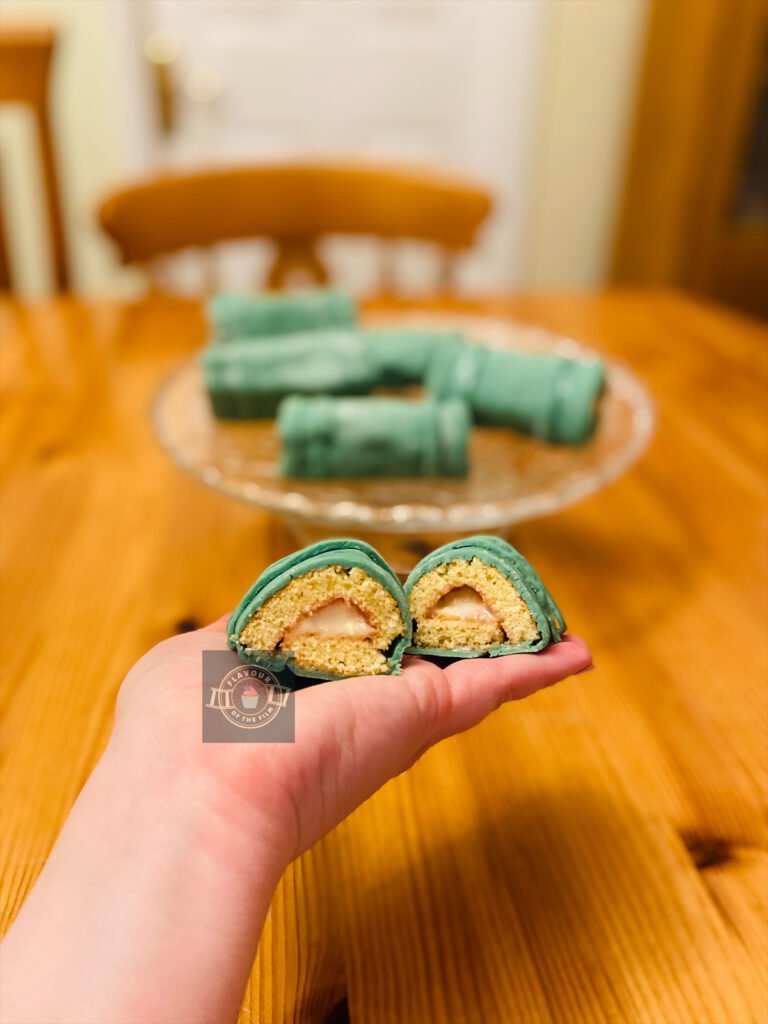
As I wanted to roll the sponges slightly to create the bamboo shape, I couldn’t use the traditional decoration of whipped cream and fresh strawberries. They’re just too small for a fresh filling to stay put!
Instead, I opted for a vanilla buttercream and strawberry jam to make sure that the flavours were there, but so that it was easier to create the shape without losing all of the filling. These fillings work well aesthetically, too. The buttercream and sponge represent the pale inside of natural bamboo, and the jam represents the ribbon that holds the mouthpiece securely for Nezuko!
As always, you can make the jam yourself or buy a jar from the shop.
Usually I make my own because I love the process, but this time I used some from the shop. My local supermarket had no strawberries! Literally none at all. The shelves were empty of strawberries. Hence, I used a ready-made jar of jam. No shame in it, though.
The key with this recipe is to make sure you don’t overdo it with the filling! You also want to make sure that you don’t stress about the rolling process. The likelihood of you achieving a swirl with this sponge at this size is so minimal. Don’t stress, friends. It’s not the swirl that you are going after. It’s purely as round a shape as you can get.
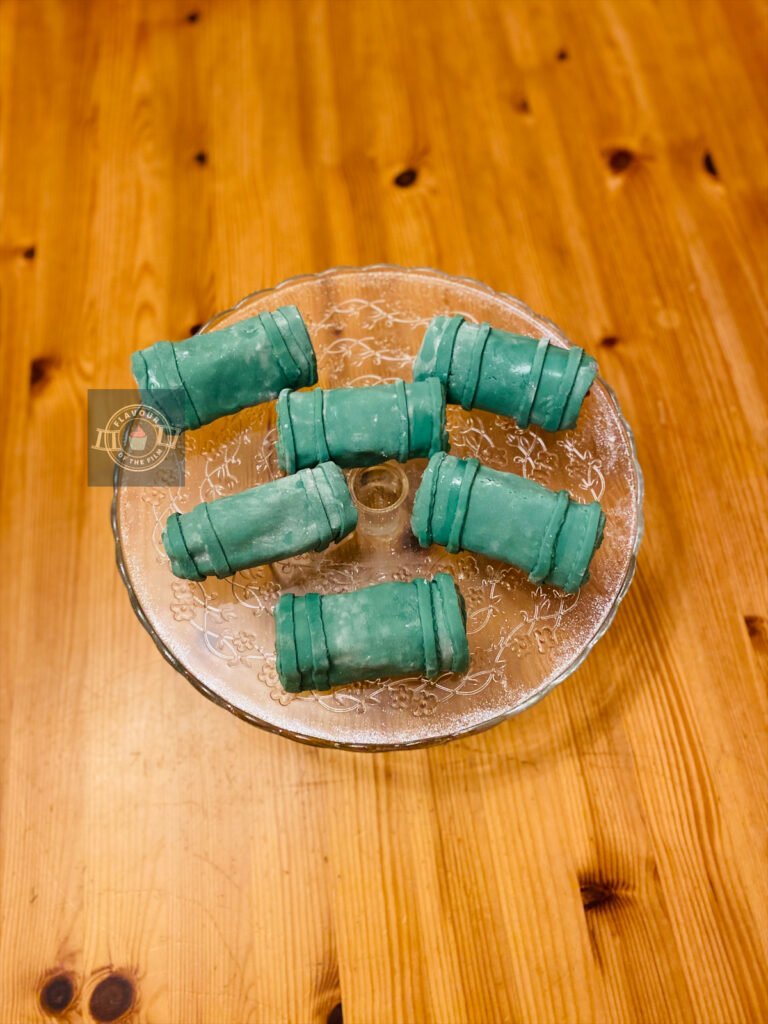
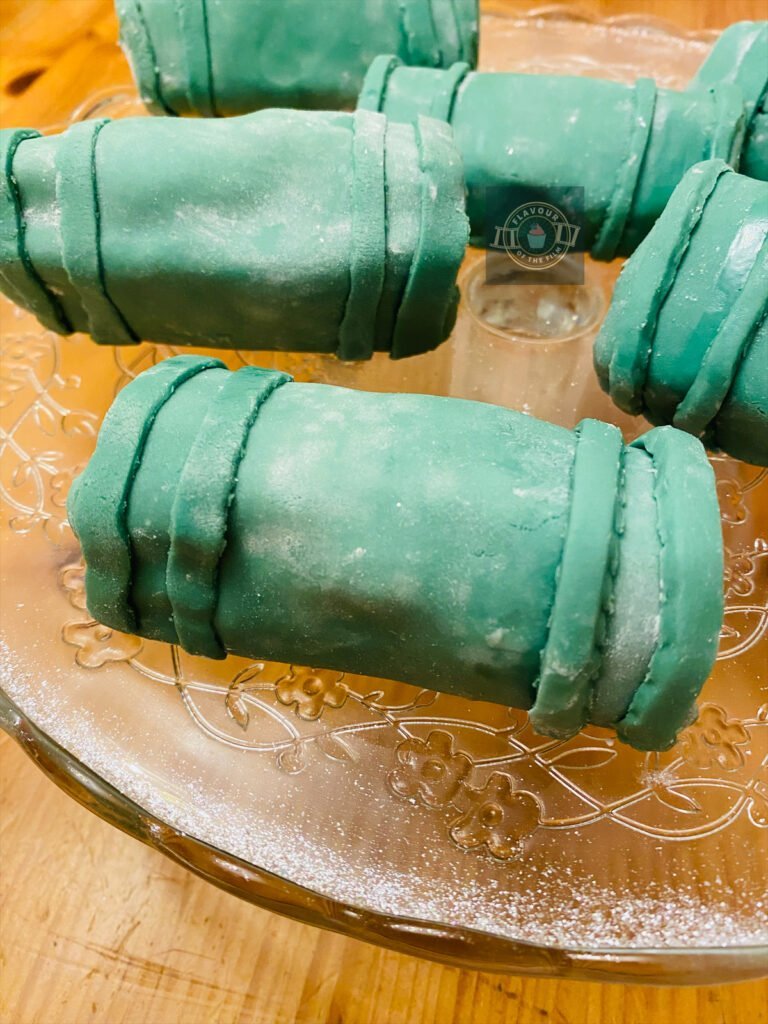
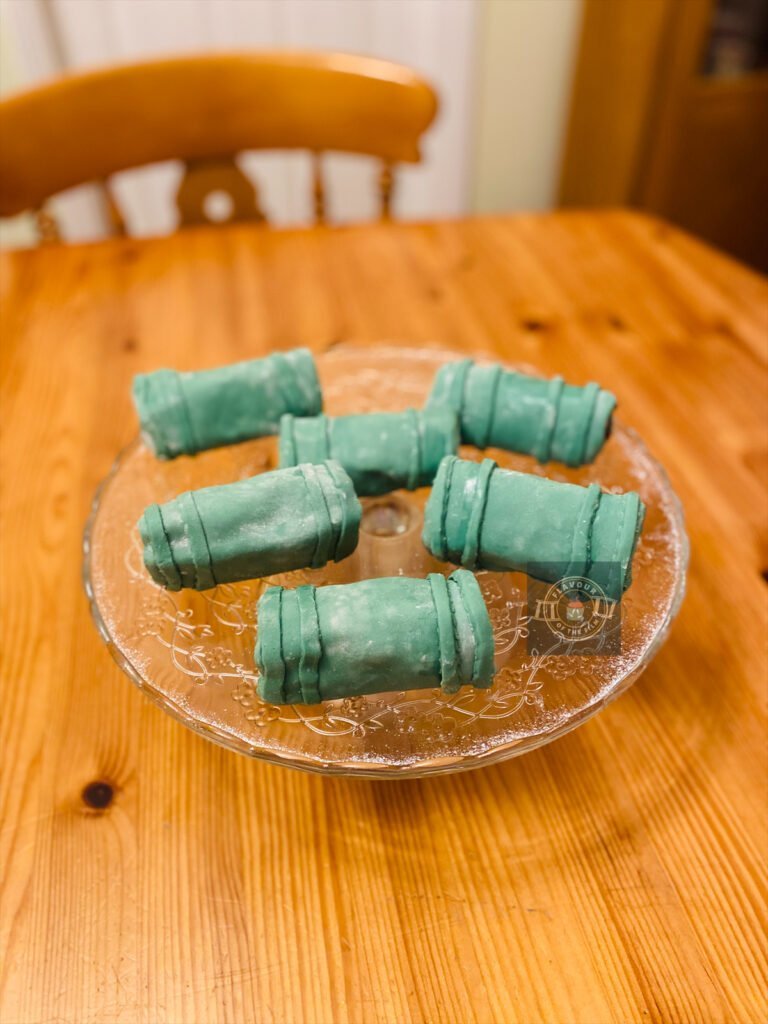
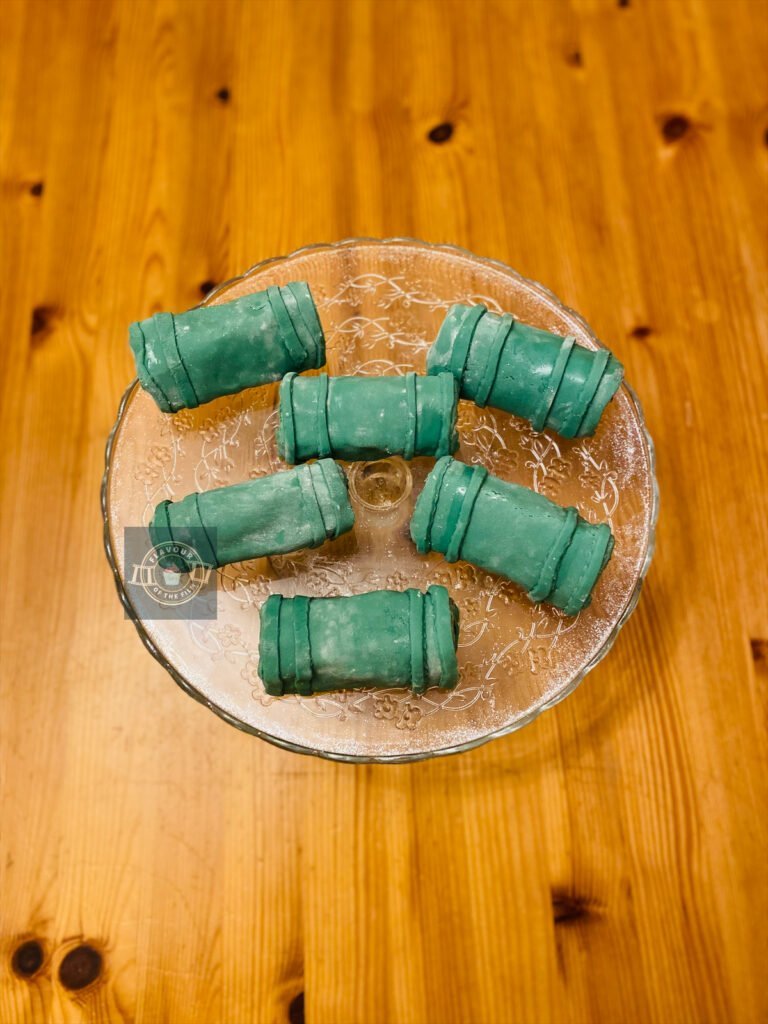
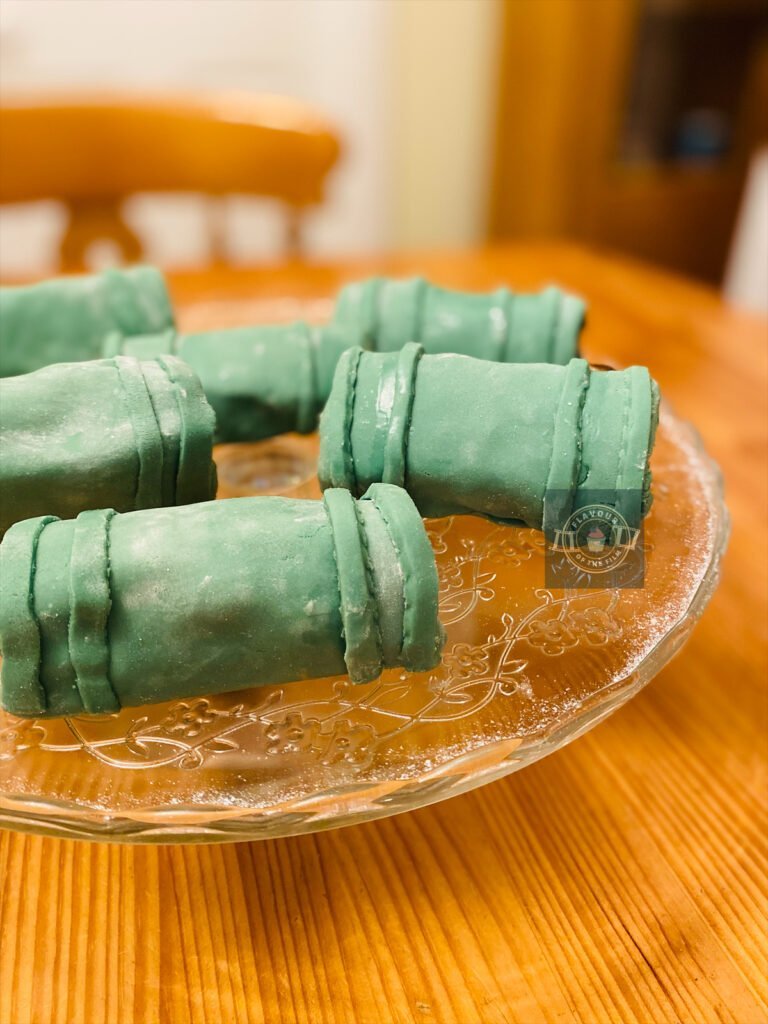
To decorate, I chose to wrap the cakes in a thin layer of green fondant icing. For the bamboo effect, I added strips of fondant over the full layer.
Top Tips
- Avoid over mixing the cake batter. A Japanese cake roll is meant to be lovely and soft. An over mixed batter can affect that.
- Make sure that you use a clean and dry bowl to whisk the meringue in. Any grease or water can upset the egg whites and they may not whisk properly!
- Always use extract over essence. Extract is a purer flavour, whereas essence isn’t great for our planet.
- Be careful not to overfill the rolls. It’ll all pour out when your roll the cakes if you do!
- Bamboo comes in different tints and shades of green so don’t stress too much about the shade of green your fondant is. The shaping is more important for the overall effect.
- As a dusting of icing sugar is needed for the rolling out of the fondant icing (so that it doesn’t stick to your work top), you can usually see evidence of the sugar left on the fondant. Now, it is completely up to you whether or not you clean it off. You can do so with a touch of water. I chose not to clean it off purely because I loved the added texture and differences in colour that it left. It made it more natural looking!
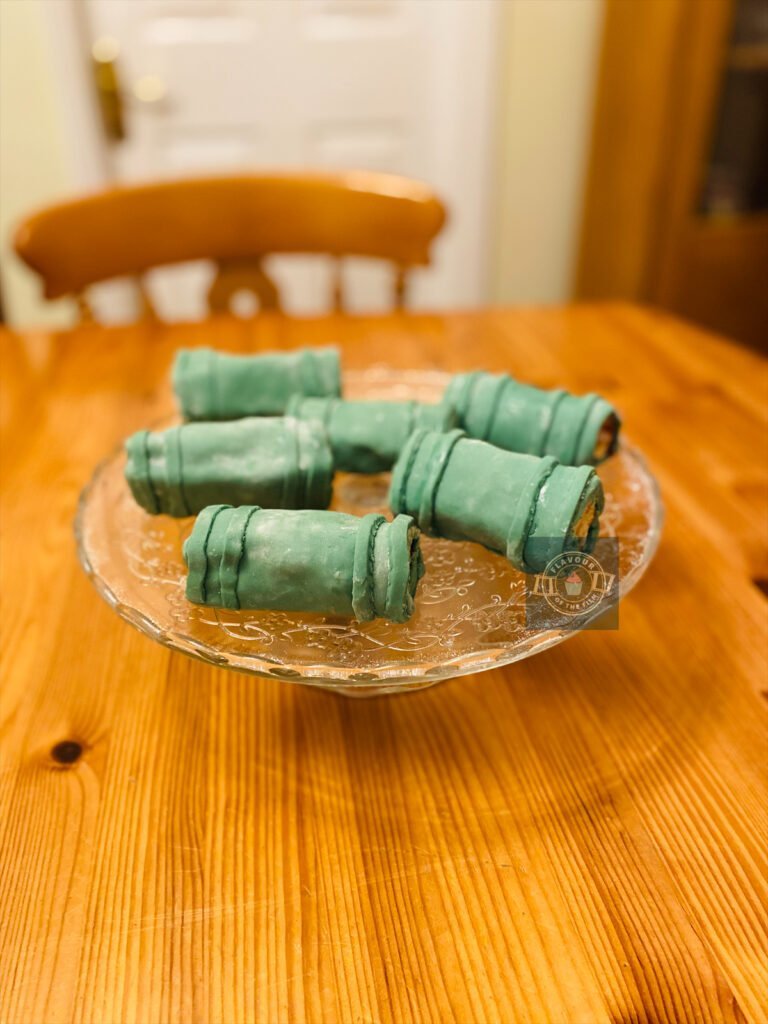
There you have it, friends. My Demon Slayer inspired mini versions of a Japanese strawberry roll cake. These really are a joy to make and they are truly delicious. A taste of Japanese cake in your own kitchen. I’m here for it. This recipe is for six roll cakes, but you can double it by literally doubling the ingredient amounts. Enjoy!
Happy baking, happy eating!
The Recipe
Ingredients
Japanese strawberry roll cake sponge:
- 60g [¼ cup + 2 tbsp] plain [cake] flour
- 50g [¼ cup] caster sugar
- 2 medium eggs
- 30g [1 oz] unsalted butter
- 1 tsp vanilla extract (make sure it is extract, not essence)
Decoration:
- 200g [7 oz] green fondant icing
- 25g [2 tbsp] unsalted butter
- 50g [¼ cup + 1 tbsp] icing [confectioners] sugar
- 4 – 5 tbsp strawberry jam
Serves: 6
Preparation time: 20 minutes
Baking time: 8 – 10 minutes
Cooling time: 30 minutes
Decorating time: 30 minutes
Method
Japanese strawberry roll cake:
- Preheat your oven to 180°C [350°F] or 160°C fan.
- Line a baking tray with plenty of oil directly on the tray, and a sheet of baking paper/greaseproof parchment on the top. Set aside.
- Melt the butter in a microwave-safe bowl in the microwave until completely melted. Set aside to cool.
- Make sure that your mixing bowls are dry and grease-free. Egg white needs a clean bowl!
- Separate your eggs: yolks in one bowl and whites into another.
- Add ¾ of the sugar to the yolks and whisk with an electric hand whisk until light and mousse-like. You’ll know it’s ready when you lift the whisk out and the egg mix leaves a ribbon or trail from the whisk for a few seconds.
- Clean your whisk attachment and dry it completely before reattaching.
- Whisk your egg whites until doubled in size and fluffy.
- Add the rest of the sugar to the egg whites, in small batches at a time, whilst still whisking. Whisk until the egg whites hold themselves and are glossy white: a meringue with stiff peaks.
- Add the flour to your egg yolk mix and fold in until completely incorporated. Be gentle and patient here – you don’t want to overmix this!
- Spoon ⅓ of the meringue into the flour paste and fold in gently.
- Add the rest of the meringue to your flour mix ⅓ at a time and fold in gently. Be gentle still as you don’t want to knock all of the air out of your meringue. This is what makes your sponge rise!
- Add the vanilla and melted butter and fold in a few times. Don’t worry if the butter doesn’t completely incorporate – it’ll still bake well.
- Pour the cake mix slowly onto the lined baking tray. Tip the tray both lengthways to help the sponge spread into a rough rectangle. A thin sponge is the desired result here.
- Bake for 8 – 10 minutes or until golden brown and until a cocktail stick comes out clean. If the stick comes out a little wet, bake for another minute or two and test again.
- Slide the sponge on the paper onto a cooling rack to cool completely. This will only take around 30 minutes as it’s so thin.
- Once completely cool, begin to decorate.
Decoration:
- Prepare another sheet of baking parchment/greaseproof paper. Lay it on your worktop and lightly dust with icing sugar.
- Flip the sponge upside down onto the new sheet of paper and peel the old sheet of paper off the bottom of the sponge.
- Thinly trim the edges of the sponge to achieve a sharp rectangle.
- Cut the sponge in half lengthways so that you have 2 long halves.
- Cut the 2 halves into 3 squares so that you have 6 even squares in total.
- In a mixing bowl, beat together the butter and icing sugar. Add a very small splash of milk to loosen if needed.
- Spoon a thin layer of jam onto each square. Be careful not to put too much on!
- Spread a small amount of buttercream on top of the jam covered squares. Use all of it up.
- Roll one sponge at a time. Don’t try to roll tight swirls! Meet edge to edge and tuck one under the other. Use the buttercream to help them hold their shape.
- Dust a clean surface with icing sugar and roll out the fondant. Cut into squares that are slightly larger than your sponge squares were. This doesn’t need to be exact – you can trim them!
- Roll each cake in fondant and tuck the edges in. The ends do not need to be covered: the inside of bamboo is pale!
- Trim any excess fondant that isn’t wanted.
- Use any remaining fondant to add the detail. Slice into thin strips and attach 2 strips to the ends of each bamboo bite, slightly apart. Add a touch of water to each one to secure them well.
- Dab your finger in water and wipe away any excess icing sugar on the fondant if desired. Otherwise, enjoy your bamboo bites in their natural form!
These mouth watering mini versions of a Japanese strawberry roll cake make the perfect Demon Slayer inspired viewing or themed party treat! They will last around 4 days in an airtight container. That’s if they last that long. Enjoy!
The Anime
Demon Slayer, also known originally as Kimetsu no Yaiba, had its first arc aired in 2019. In this arc, we are introduced to Tanjiro, a country boy who lives to take care of his family. Until one day, when his entire family is slaughtered by a demon. Everyone lost… except for his sister, Nezuko.
Tanjiro rushes to revive her, only to discover that not only is she alive, but she is transforming into a demon herself. Rather than giving up on her, Tanjiro manages to bring remnants of Nezuko’s true self back to the surface. He then sets out, with Nezuko in tow, to find a way to change her back to her human form.
On this quest, Tanjiro trains to be a slayer of demons.
Demon slayers are incredibly skilled – usually with a katana in hand – at ridding the world of demons. The more skilled a demon slayer, the more highly regarded they are.
However, the same principle goes for demons. The more powerful the demon, the harder they are to kill. One demon in particular, is feared above all: Muzan Kibutsuji. The granddaddy of all demons, if you will.
Demons are ranked. As are demon slayers. Demon slayers also exhibit specific skills whilst in combat. These skills make for some very intense, truly fantastic fight scenes.
No surprise there, really.
Anime rarely disappoints when it comes to battle scenes. Demon Slayer is no exception.
Ufotable’s Demon Slayer is based on the manga by Koyoharu Gotōge, who also worked as head writer on the anime. There have been nineteen directors that worked on the series so far, with Haruo Sotozaki having directed the most: forty four episodes in total.
This incredibly talented cast includes the likes of Natsuki Hanae as the voice of Tanjiro, Akari Kitô as Nezuko, Yoshitsugu Matsuoka as Inosuke, Hiro Shimono as Zenitsu, alongside many more wonderful voice performers.
Demon Slayer is a top tier anime and there are plenty of fans that will testify to that.
It has everything you’d want from an anime like it. The characters show varying degrees of desirable traits, but Tanjiro’s resilience and pure heart tops it. Alongside Nezuko’s strength; protectiveness over her brother, and determination to stay herself, of course.
It boils down to the fact that it’s incredibly popular for a reason.
My brother’s favourite arc is the entertainment district arc, and I can completely understand why. As with some of the other arcs, it was a single location for the entire chapter. Not unlike the movie.
Seriously, how good is the film?! Setting the entire arc on the Mungen train but making it feel like there was so much more to it… beautifully crafted work.
I’m ready for the next arc. Bring it on.
Recipe Card
Japanese Strawberry Roll Cake | Demon Slayer
Ingredients
Japanese strawberry cake roll sponge:
- 60 g [¼ cup + 2 tbsp] plain [cake] flour
- 50 g [¼ cup] caster sugar
- 2 medium eggs
- 30 g [1 oz] unsalted butter
- 1 tsp vanilla extract make sure it is extract, not essence
Decoration:
- 200 g [7 oz] green fondant icing
- 25 g [2 tbsp] unsalted butter
- 50 g [¼ cup + 1 tbsp] icing [confectioners] sugar
- 4 – 5 tbsp strawberry jam
Instructions
- Preheat your oven to 180°C [350°F] or 160°C fan.
- Line a baking tray with plenty of oil directly on the tray, and a sheet of baking paper/greaseproof parchment on the top. Set aside.
- Melt the butter in a microwave-safe bowl in the microwave until completely melted. Set aside to cool.
- Make sure that your mixing bowls are dry and grease-free. Egg white needs a clean bowl!
- Separate your eggs: yolks in one bowl and whites into another.
- Add ¾ of the sugar to the yolks and whisk with an electric hand whisk until light and mousse-like. You’ll know it’s ready when you lift the whisk out and the egg mix leaves a ribbon or trail from the whisk for a few seconds.
- Clean your whisk attachment and dry it completely before reattaching.
- Whisk your egg whites until doubled in size and fluffy.
- Add the rest of the sugar to the egg whites, in small batches at a time, whilst still whisking. Whisk until the egg whites hold themselves and are glossy white: a meringue with stiff peaks.
- Add the flour to your egg yolk mix and fold in until completely incorporated. Be gentle and patient here – you don’t want to overmix this!
- Spoon ⅓ of the meringue into the flour paste and fold in gently.
- Add the rest of the meringue to your flour mix ⅓ at a time and fold in gently. Be gentle still as you don’t want to knock all of the air out of your meringue. This is what makes your sponge rise!
- Add the vanilla and melted butter and fold in a few times. Don’t worry if the butter doesn’t completely incorporate – it’ll still bake well.
- Pour the cake mix slowly onto the lined baking tray. Tip the tray both lengthways to help the sponge spread into a rough rectangle. A thin sponge is the desired result here.
- Bake for 8 – 10 minutes or until golden brown and until a cocktail stick comes out clean. If the stick comes out a little wet, bake for another minute or two and test again.
- Slide the sponge on the paper onto a cooling rack to cool completely. This will only take around 30 minutes as it’s so thin.
- Once completely cool, begin to decorate.
- Prepare another sheet of baking parchment/greaseproof paper. Lay it on your worktop and lightly dust with icing sugar.
- Flip the sponge upside down onto the new sheet of paper and peel the old sheet of paper off the bottom of the sponge.
- Thinly trim the edges of the sponge to achieve a sharp rectangle.
- Cut the sponge in half lengthways so that you have 2 long halves.
- Cut the 2 halves into 3 squares so that you have 6 even squares in total.
- In a mixing bowl, beat together the butter and icing sugar. Add a very small splash of milk to loosen if needed.
- Spoon a thin layer of jam onto each square. Be careful not to put too much on!
- Spread a small amount of buttercream on top of the jam covered squares. Use all of it up.
- Roll one sponge at a time. Don’t try to roll tight swirls! Meet edge to edge and tuck one under the other. Use the buttercream to help them hold their shape.
- Dust a clean surface with icing sugar and roll out the fondant. Cut into squares that are slightly larger than your sponge squares were. This doesn’t need to be exact – you can trim them!
- Roll each cake in fondant and tuck the edges in. The ends do not need to be covered: the inside of bamboo is pale!
- Trim any excess fondant that isn’t wanted.
- Use any remaining fondant to add the detail. Slice into thin strips and attach 2 strips to the ends of each bamboo bite, slightly apart. Add a touch of water to each one to secure them well.
- Dab your finger in water and wipe away any excess icing sugar on the fondant if desired. Otherwise, enjoy your bamboo bites in their natural form!
Notes
© Flavour of the Film. All content and imagery is copyright protected. Please do not use any of my images or written content without prior permission. If you would like to share any of the recipes or images on Flavour of the Film, please link back to the recipe in question and rewrite it in your own words, crediting Flavour of the Film as the original source.


3 Comments
Comments are closed.