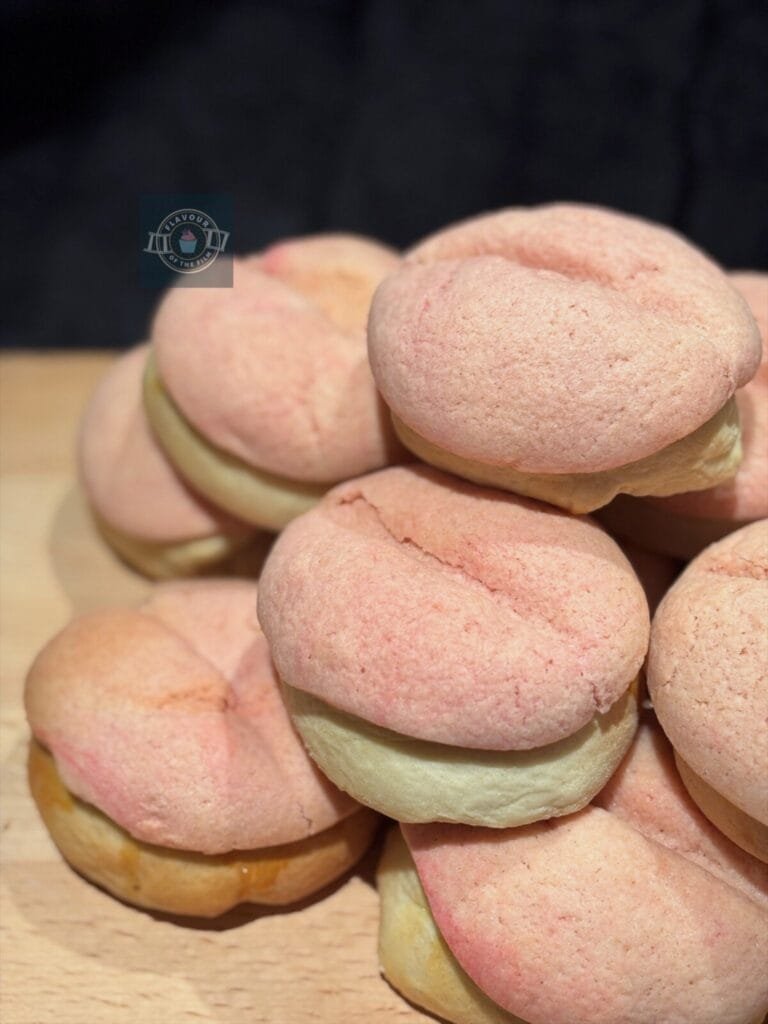
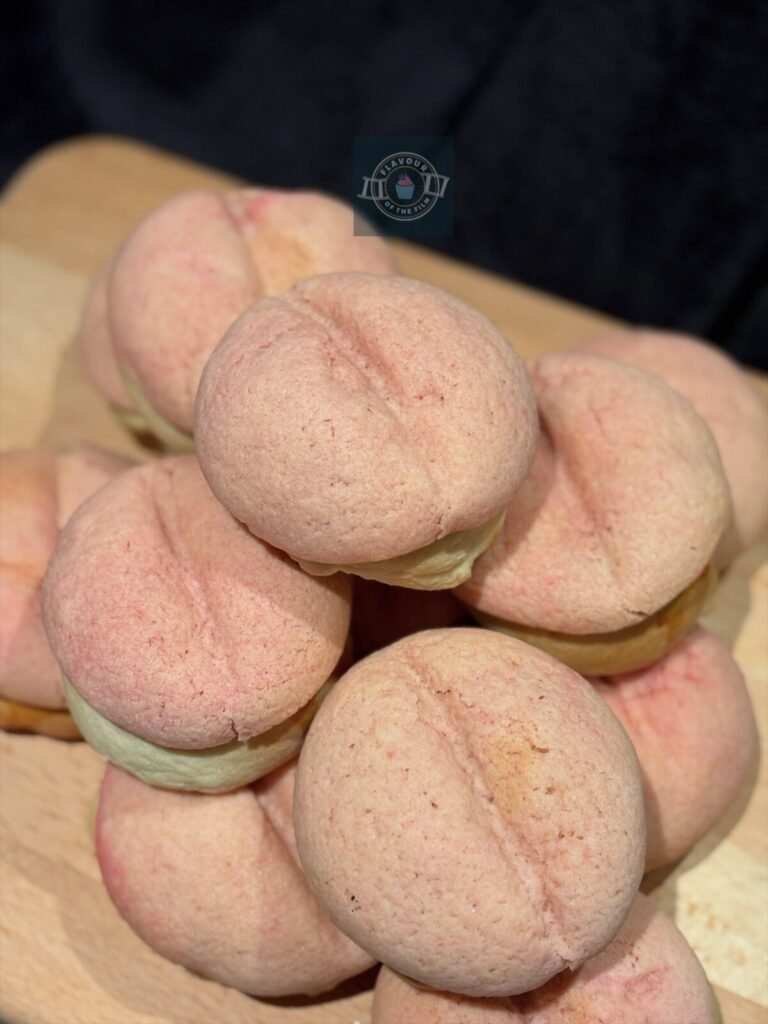
There’s no doubt about it, Spirited Away is one of Studio Ghibli’s most popular films. Somehow, this mystical movie makes me both hungry and lose my appetite at the same time. As expected, it’s Miyazaki showing that he truly is a master of his craft. My peach buns are inspired by one of the many dishes offered to No Face. Gold not on offer this time.
Contents
The Bake
It’s been a while since I made bread for Flavour of the Film. Thus, I declare it overdue.
There’s so much food in Spirited Away, it almost seems never ending! But, there’s one particular dish that always stands out to me when I watch it.

Out of all of the dishes offered to No Face when the gold starts flowing, the peach buns steal the show for me.
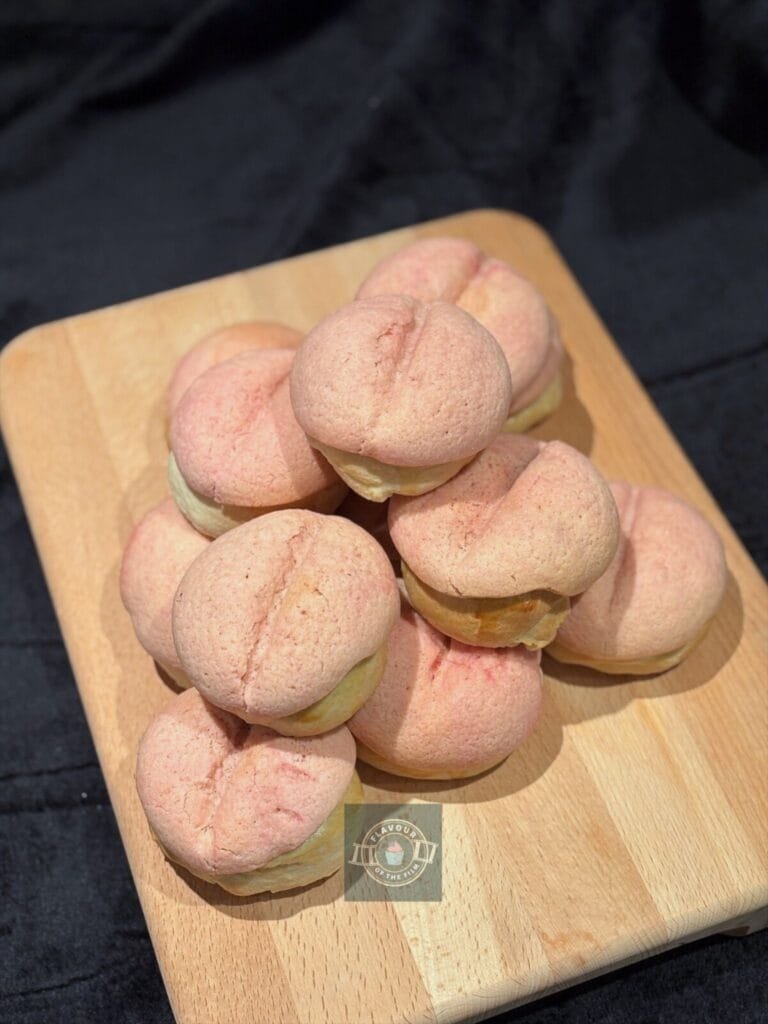
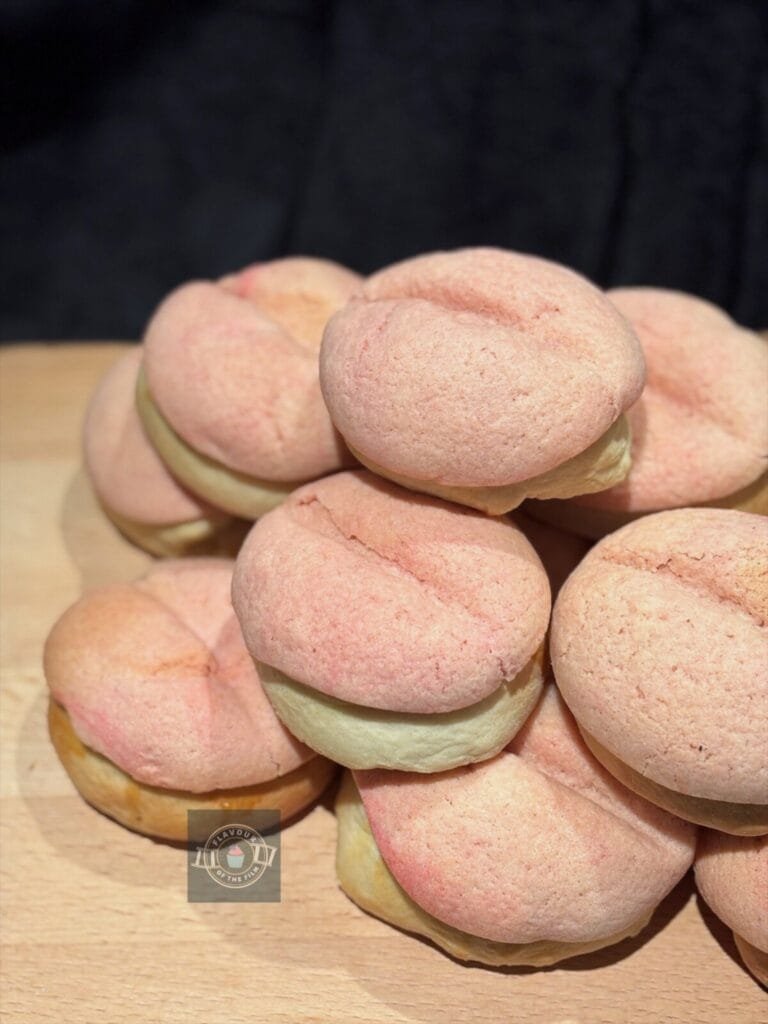
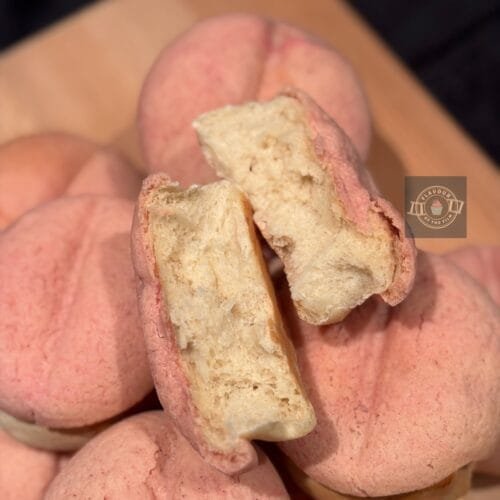
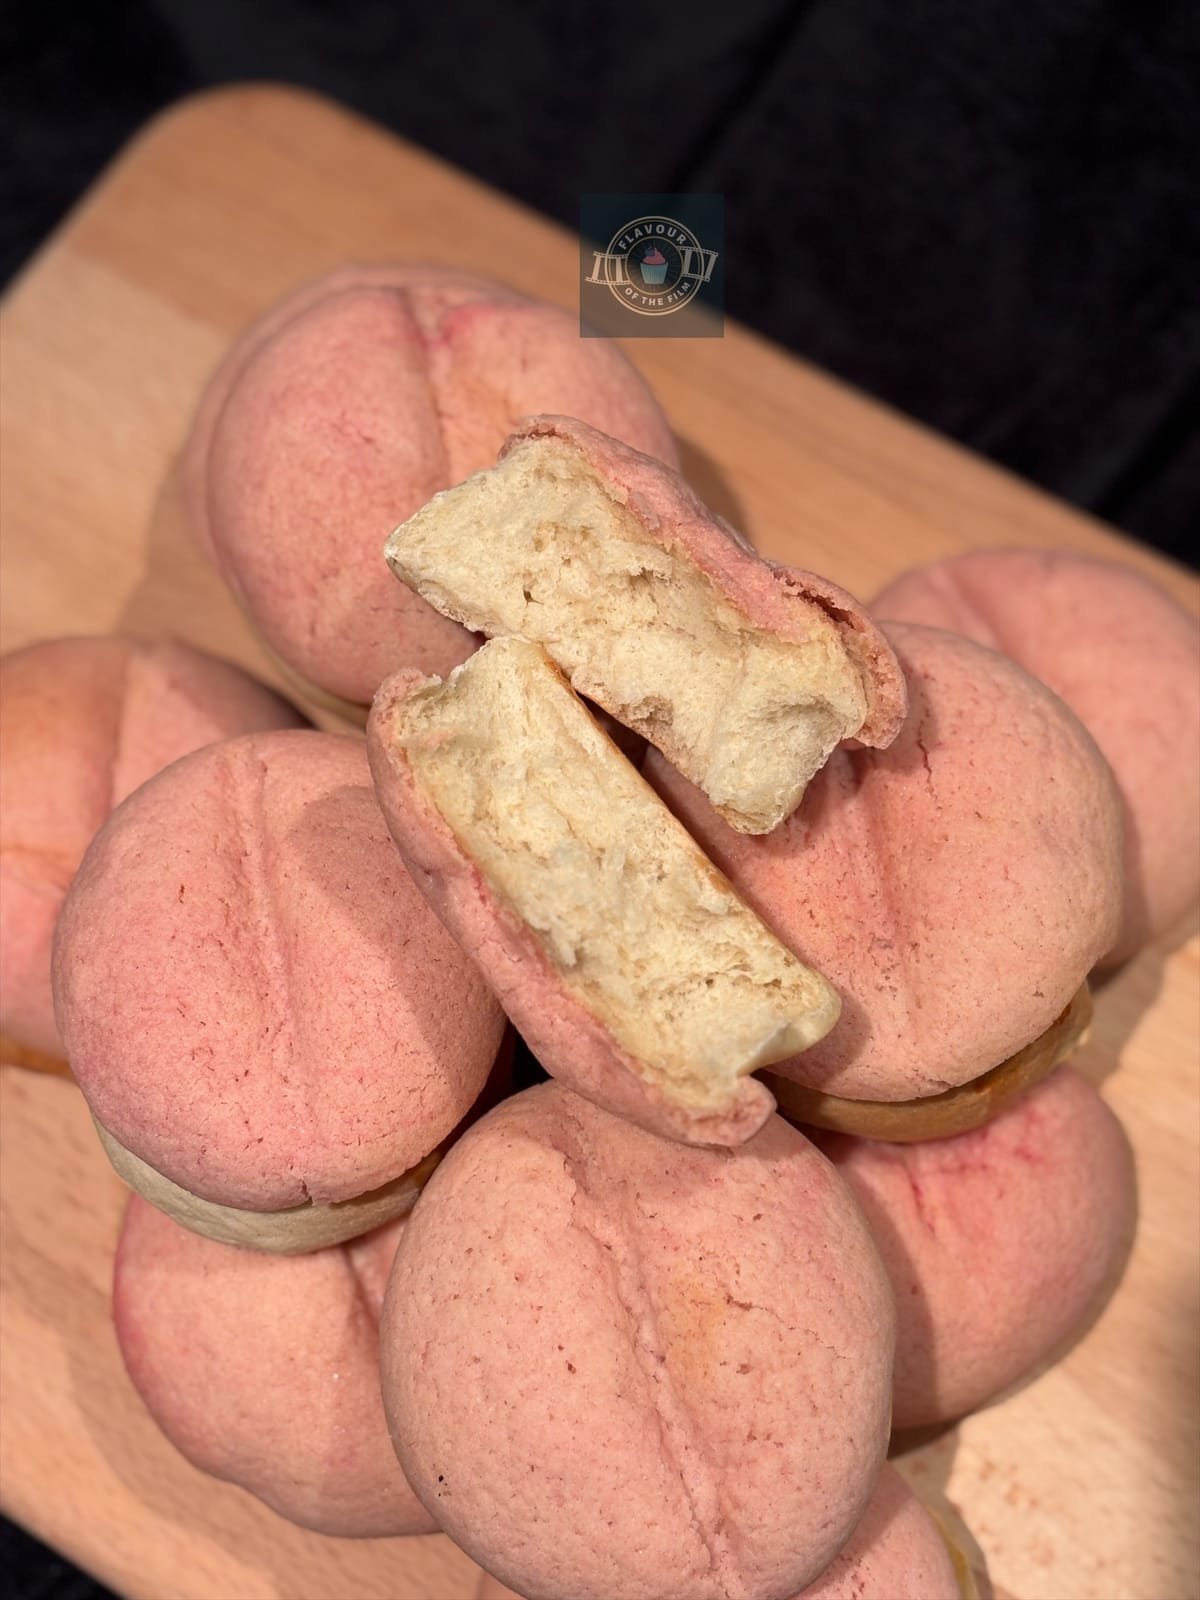
These particular buns appear to be what are known as “longevity buns” in East Asian cuisine. Lovely steamed buns that have the appearance of peaches.
In a similar way to melon pan not actually tasting like melon, these steamed buns aren’t known to actually taste like peaches. Their name comes from their appearance rather than their flavour.
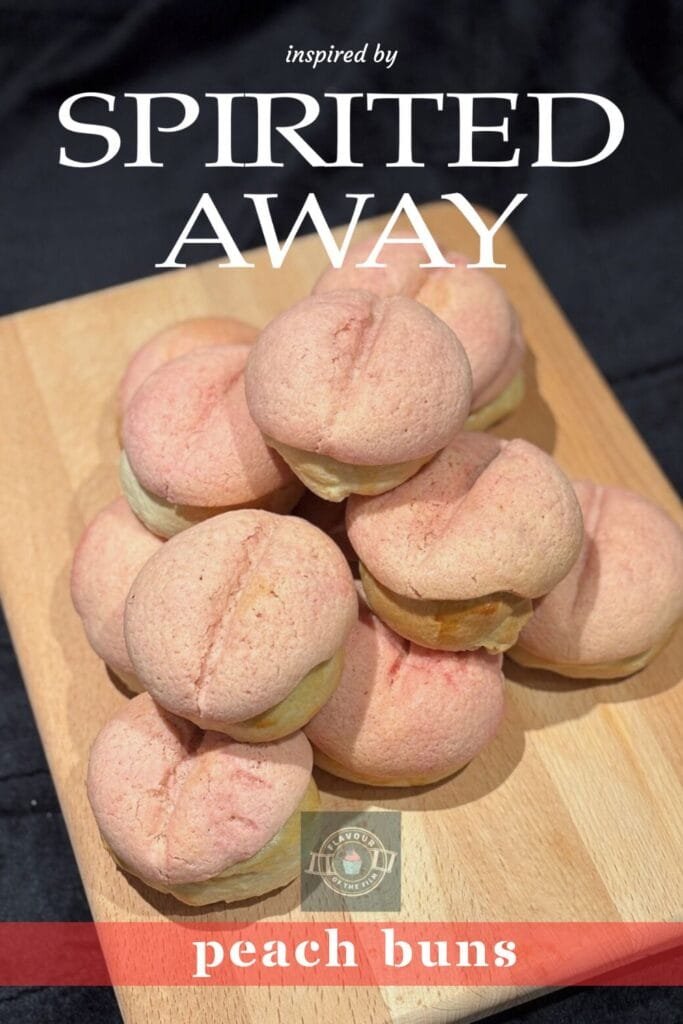
Now, I made an executive decision to recreate these buns in a different way.
This recipe is for those who want to put together a Studio Ghibli party food spread, but maybe don’t have the equipment to make steamed buns, or perhaps don’t like the texture of steamed buns.
Rather than making my Spirited Away peach buns in steamed bun form, I chose to make them more like a melon pan. My Big Hero 6 melon pan were utterly divine, so I revisited that recipe for inspiration.
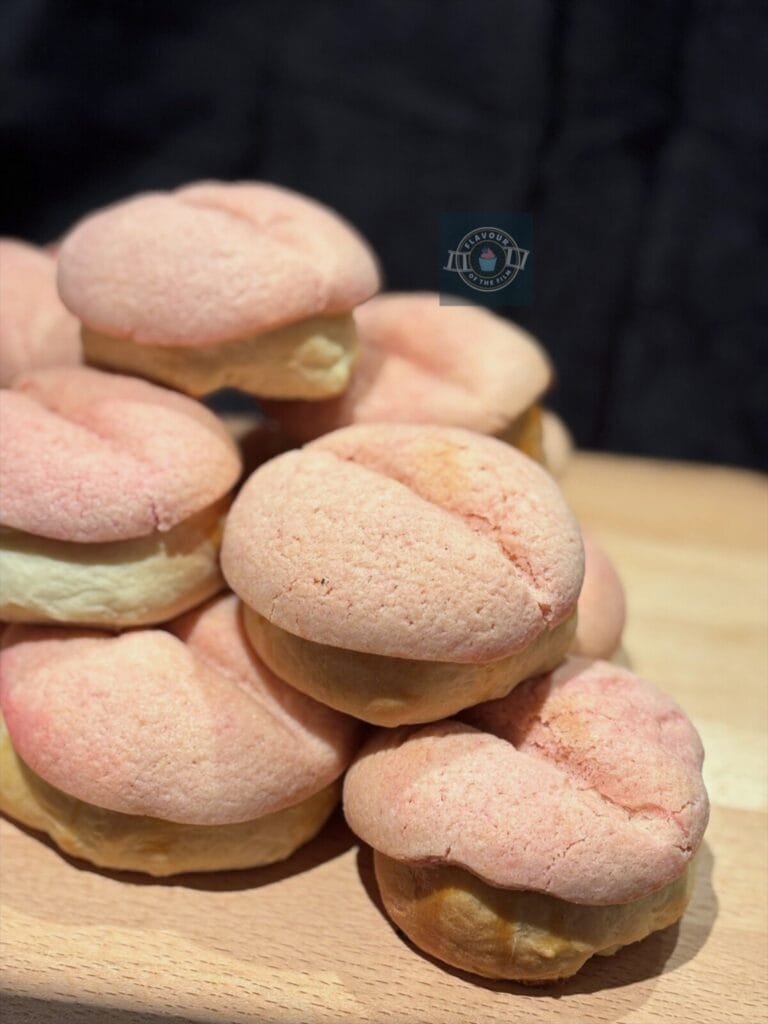

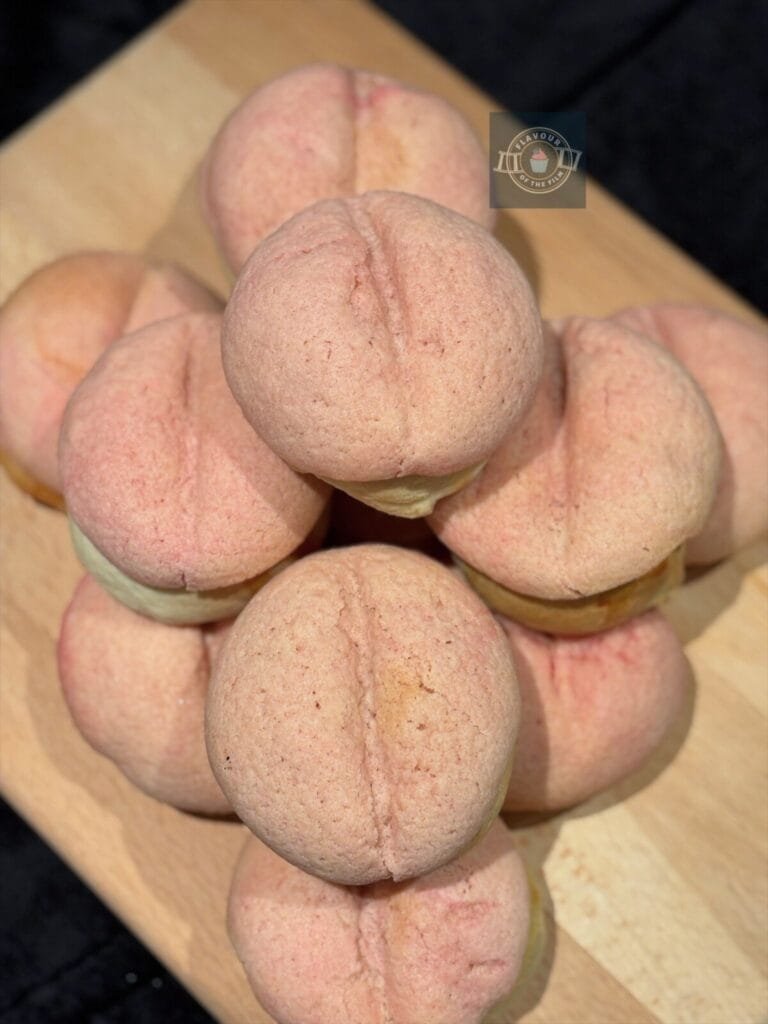
The main differences are the addition of natural peach flavouring and making the cookie on the top look like a peach.
I love peaches. For that reason alone, I added in the peach flavouring. The buns don’t need it (they’re delicious as they are), but they level up tenfold as a result of the extra flavour.
You can check out my other Studio Ghibli inspired recipes like my Soot Sprite cookie dough bites and my Totoro iced cinnamon loaf for more Studio Ghibli party recipes!
Top Tips
- The peach flavouring is optional, but really levels up the buns. I used this high strength natural flavouring (no affiliation). A little goes a long way!
- Avoid over-flouring your work surface when needed. It can lead to a drier dough. Trust that the dough will come away from the surface it may stick to as you work with it.
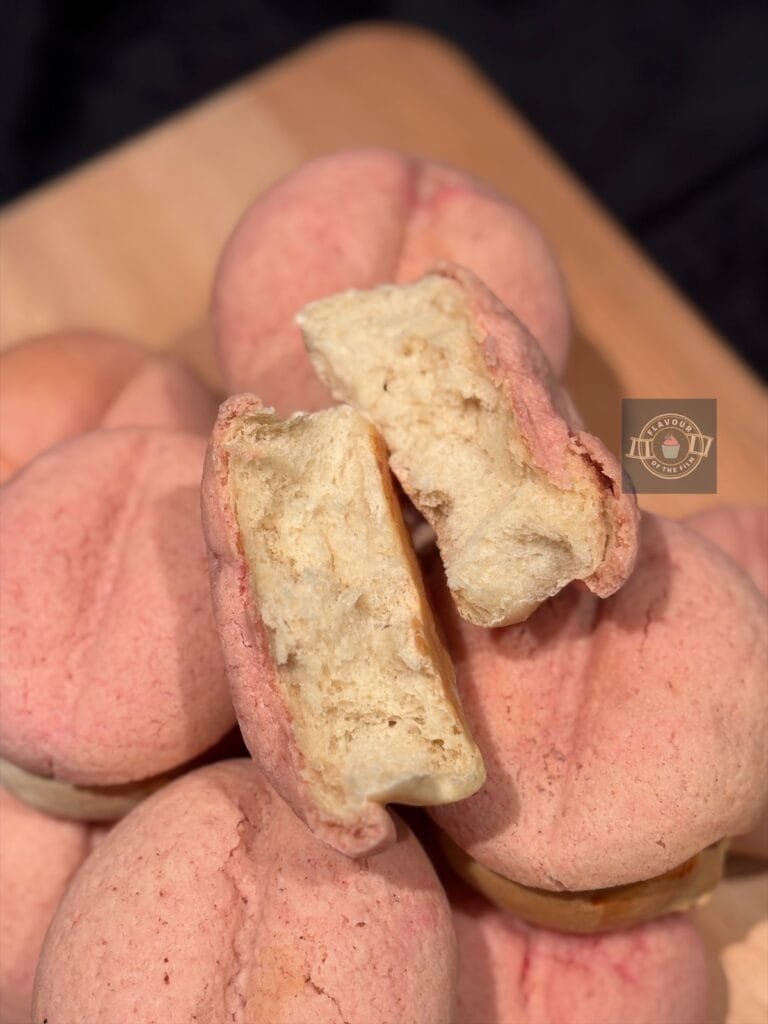
- You’ll know your dough is ready and the gluten well developed after kneading when the surface is smooth, and it springs back halfway when you gently press on it. It should feel a little bouncy once it’s ready.
- If your house is typically a little cold, place your dough in an airing cupboard or in the oven (turned off) to isolate some warmth and allow the dough to rise well. Just make sure to check it once an hour has passed! Over proving can affect the end result of your bread.
- If you don’t have strong bread flour, you can certainly use plain/all-purpose flour. Just be mindful that the texture of the bread will likely differ, but it will still be delicious.
- Using a chopstick to create the peach shape of the buns is ideal, but a similar tool – like a metal straw – would work just fine.
- You may want to cover your buns with a layer of tin foil about 5 – 10 minutes into the baking process to avoid discolouration of their surface.
- If there are a few bubbles or marks in your buns once baked, don’t stress! This gives them character.
These Spirited Away peach buns really are a delight to eat. They make a great addition to any Studio Ghibli party or Spirited Away movie night, despite needing a little extra time to make. Trust me, the time needed is so worth it. It’s mostly rising time anyway!
The YouTube Video
The Recipe
Ingredients
Peach bun dough:
- 600g [3¾ cups] strong white bread flour
- 40g [3 tbsp + 1 tsp] caster sugar
- 1 tsp salt
- 14g [4 ½ tsp or 2 sachets] fast action dried yeast
- 60g [2 oz] unsalted butter
- 140ml [5.25 oz] milk
- 1 tsp high strength natural peach flavouring optional
- 1 large egg
- 140ml [5 oz] water
- Oil for greasing
- 1 medium egg lightly beaten for brushing
Biscuit/cookie dough:
- 100g [3.5 oz] unsalted butter
- 140g [½ cup + 3 tbsp] caster sugar
- ½ tsp pink or peach food colouring
- 1 large egg
- 320g [2 cups] plain [all-purpose] flour
- ½ tsp bicarbonate of soda [baking soda]
Serves: 12
Preparation time: 25 minutes
Proving time: 1 hour 45 minutes
Baking time: 20 – 25 minutes
Method
Peach bun dough:
- Lightly grease a large mixing bowl with your oil. Set aside.
- In a small heatproof bowl, melt the butter in the microwave for 30 seconds until completely melted. Set aside.
- Sieve the flour into a large clean mixing bowl. Add the salt, sugar and yeast. Make sure the yeast and salt do NOT touch yet.
- In a heatproof bowl or jug, warm the milk in the microwave for 20 – 30 seconds. You want it to be warm to the touch, but not hot.
- Mix your dry ingredients in the bowl until evenly distributed. Add the melted butter, milk, natural peach flavouring and water. Whisk the egg in a separate bowl and then add to the mix.
- If using a standing mixer with a dough hook attached, knead the dough on a medium speed for around 10 minutes. Your dough will be ready when it is smooth, shiny, less tacky to touch and bouncy.
- If kneading by hand, bring the mixture together into a shaggy ball of dough using a wooden spoon. Then, tip out onto a clean and lightly floured surface. Avoid adding too much flour as you knead – use a scraper or large knife to pull the dough away from the surface as needed.
- Knead by hand for around 10 minutes. The gluten in your dough will be well developed once the dough is smooth, shiny and bouncy. If you press your finger into the dough lightly and it springs back half or most of the way back, it’s ready.
- Place your ball of dough into your lightly oiled bowl. Cover with cling film/plastic wrap/beeswax paper and leave to prove for 1 hour, until well risen and doubled in size. This will depend on the temperature of your kitchen. If your kitchen feels quite cold, place the bowl of dough in an airing cupboard or in the oven (turned off) for more isolated heat.
Shaping:
- When your dough has doubled in size, tip it out onto a clean and lightly floured surface. Knock the air out by kneading it very briefly.
- Line 2 baking trays with greaseproof paper/baking parchment and set aside.
- Begin dividing your dough equally into 12 pieces. Each should weigh around 84g.
- Shape the dough into balls by smoothing over with your thumb and tucking the dough in underneath itself so that you have a smooth surface. This doesn’t have to be perfect!
- Place 6 balls onto each tray. Cover with cling film/plastic wrap/beeswax paper and leave to rise again for around 45 minutes. Again, this depends on the temperature of your kitchen. Feel free to put them back in the airing cupboard/oven (turned off) if needed.
Peach biscuit/cookie dough:
- While your buns are in their second prove, make your biscuit dough.
- In a large mixing bowl, cream together the butter and sugar until light and fluffy.
- Add the egg and beat in until fully incorporated.
- Squeeze in some pink/peach food colouring and mix in. Add as much as you want – just be mindful that the colour will develop over time. I put around ½ tsp of pink food colouring in.
- Sieve in the flour. Add the bicarbonate of soda and mix in until a dough has formed.
- Gather the dough and wrap it in cling film/plastic wrap/beeswax paper. Set aside. This dough does not need to be refrigerated.
Construction:
- Nearing the end of the second rise, preheat your oven to 170°C [340°] or 150°C fan.
- The buns should have doubled in size when ready and spring back halfway when pressed on lightly with your finger.
- On a clean and lightly floured surface, roll out your cookie dough until around ¼ inch in thickness. Find a round cookie cutter that is a similar size to your buns.
- Cut 12 circles out of your cookie dough. If they are a little small, very gently roll them out with a rolling pin until they are a little bigger.
- Remove the covering from your buns. Beat an egg in a small bowl lightly and then brush the egg over each bun. Try to keep the egg from running down the sides – start lightly with the egg, then add more if needed.
- Very carefully lift the biscuit circles from your work surface and place each one onto a bun, pressing down onto the egg to secure the biscuit to the bread dough. If needed, use a knife angled down to the work surface under the biscuit to ease it from the surface.
- Tuck the biscuit dough gently around the bun. Avoid pulling and pressing too hard here as you could easily rip the biscuit dough.
- Using a chopstick or metal straw, gently press an indentation in the centre of each biscuit-covered bun to create a peach-like shape.
Baking:
- Sprinkle the buns with caster or granulated sugar if desired, then bake on the middle shelves of your preheated oven for 20 – 25 minutes. Make sure to cover the buns with a sheet of tin [aluminium] foil about 5 minutes into the baking process to prevent discolouration!
- Your buns will be ready when the biscuit feels dry to the touch; the buns (underneath the biscuit) are a golden colour, and you hear a hollow sound when you tap the top and underneath sides of the buns.
- Once baked, use your chopstick or metal straw to deepen the indentation again if the cookie has lost its shape. Do this while the buns are warm, then leave to cool for a couple of minutes on the trays before transferring to a wire rack to cool completely. This won’t take long!
This delicious peach bun recipe yields 12 perfectly sized sweet buns. They are best enjoyed on the day of baking, but will last for around 3 more days. With each day that passes, the buns will lose their light texture and the biscuit will soften more so try to consume them within 2 days. Eat your Spirited Away peach buns as they are, friends. They are tasty in the traditional way of eating: nothing extra added. Enjoy!
The Film
Most Anime that I watch makes me yearn for my time living in Japan. Yes, even the extra fantastical ones, friends.
The landscapes in Studio Ghibli films give me that yearning feeling on a different level altogether. They make my heart glow.

In 2001, Ghibli’s master filmmaker Hayao Miyazaki brought us Spirited Away (Sen to Chihiro no kamikakushi).
On the way to their new home, a young girl and her parents stop their journey when they come across a tunnel. Despite their daughter’s pleas, Chihiro’s parents head through the tunnel. She follows suit.
Whilst things appear to be fine at first, events spiral and Chihiro stumbles across a world where spirits are king, witches are all-powerful and humans change form.
Chichiro’s journey is a wild one, but a transformative one.
With a cast of talent including the likes of Rumi Hiiragi, Miya Irino, Mari Natzuki, Takashi Naitô, Yumi Tamai, Tatsuya Gashûin, Yasuko Sawaguchi and more, it’s no surprise that Ghibli fans around the globe love the characters of Spirited Away.
There’s a reason Spirited Away is one of Studio Ghibli’s most popular. It’s a magical, mystical tale full of the unexpected.
How could you not love that?

Recipe Card
Spirited Away Peach Buns
Ingredients
Peach bun dough:
- 600 g [3¾ cups] strong white bread flour
- 40 g [3 tbsp + 1 tsp] caster sugar
- 1 tsp salt
- 14 g [4 ½ tsp or 2 sachets] fast action dried yeast
- 60 g [2 oz] unsalted butter
- 140 ml [5.25 oz] milk
- 1 tsp high strength natural peach flavouring optional
- 1 large egg
- 140 ml [5 oz] water
- Oil for greasing
- 1 medium egg lightly beaten for brushing
Biscuit/cookie dough:
- 100 g [3.5 oz] unsalted butter
- 140 g [½ cup + 3 tbsp] caster sugar
- ½ tsp pink or peach food colouring
- 1 large egg
- 320 g [2 cups] plain [all-purpose] flour
- ½ tsp bicarbonate of soda [baking soda]
Instructions
Peach bun dough:
- Lightly grease a large mixing bowl with your oil. Set aside.
- In a small heatproof bowl, melt the butter in the microwave for 30 seconds until completely melted. Set aside.
- Sieve the flour into a large clean mixing bowl. Add the salt, sugar and yeast. Make sure the yeast and salt do NOT touch yet.
- In a heatproof bowl or jug, warm the milk in the microwave for 20 – 30 seconds. You want it to be warm to the touch, but not hot.
- Mix your dry ingredients in the bowl until evenly distributed. Add the melted butter, milk, natural peach flavouring and water. Whisk the egg in a separate bowl and then add to the mix.
- If using a standing mixer with a dough hook attached, knead the dough on a medium speed for around 10 minutes. Your dough will be ready when it is smooth, shiny, less tacky to touch and bouncy.
- If kneading by hand, bring the mixture together into a shaggy ball of dough using a wooden spoon. Then, tip out onto a clean and lightly floured surface. Avoid adding too much flour as you knead – use a scraper or large knife to pull the dough away from the surface as needed.
- Knead by hand for around 10 minutes. The gluten in your dough will be well developed once the dough is smooth, shiny and bouncy. If you press your finger into the dough lightly and it springs back half or most of the way back, it’s ready.
- Place your ball of dough into your lightly oiled bowl. Cover with cling film/plastic wrap/beeswax paper and leave to prove for 1 hour, until well risen and doubled in size. This will depend on the temperature of your kitchen. If your kitchen feels quite cold, place the bowl of dough in an airing cupboard or in the oven (turned off) for more isolated heat.
Shaping:
- When your dough has doubled in size, tip it out onto a clean and lightly floured surface. Knock the air out by kneading it very briefly.
- Line 2 baking trays with greaseproof paper/baking parchment and set aside.
- Begin dividing your dough equally into 12 pieces. Each should weigh around 84g.
- Shape the dough into balls by smoothing over with your thumb and tucking the dough in underneath itself so that you have a smooth surface. This doesn’t have to be perfect!
- Place 6 balls onto each tray. Cover with cling film/plastic wrap/beeswax paper and leave to rise again for around 45 minutes. Again, this depends on the temperature of your kitchen. Feel free to put them back in the airing cupboard/oven (turned off) if needed.
Peach biscuit/cookie dough:
- While your buns are in their second prove, make your biscuit dough.
- In a large mixing bowl, cream together the butter and sugar until light and fluffy.
- Add the egg and beat in until fully incorporated.
- Squeeze in some pink/peach food colouring and mix in. Add as much as you want – just be mindful that the colour will develop over time. I put around ½ tsp of pink food colouring in.
- Sieve in the flour. Add the bicarbonate of soda and mix in until a dough has formed.
- Gather the dough and wrap it in cling film/plastic wrap/beeswax paper. Set aside. This dough does not need to be refrigerated.
Construction:
- Nearing the end of the second rise, preheat your oven to 170°C [340°] or 150°C fan.
- The buns should have doubled in size when ready and spring back halfway when pressed on lightly with your finger.
- On a clean and lightly floured surface, roll out your cookie dough until around ¼ inch in thickness. Find a round cookie cutter that is a similar size to your buns.
- Cut 12 circles out of your cookie dough. If they are a little small, very gently roll them out with a rolling pin until they are a little bigger.
- Remove the covering from your buns. Beat an egg in a small bowl lightly and then brush the egg over each bun. Try to keep the egg from running down the sides – start lightly with the egg, then add more if needed.
- Very carefully lift the biscuit circles from your work surface and place each one onto a bun, pressing down onto the egg to secure the biscuit to the bread dough. If needed, use a knife angled down to the work surface under the biscuit to ease it from the surface.
- Tuck the biscuit dough gently around the bun. Avoid pulling and pressing too hard here as you could easily rip the biscuit dough.
- Using a chopstick or metal straw, gently press an indentation in the centre of each biscuit-covered bun to create a peach-like shape.
Baking:
- Sprinkle the buns with caster or granulated sugar if desired, then bake on the middle shelves of your preheated oven for 20 – 25 minutes. Make sure to cover the buns with a sheet of tin [aluminium] foil about 5 minutes into the baking process to prevent discolouration!
- Your buns will be ready when the biscuit feels dry to the touch; the buns (underneath the biscuit) are a golden colour, and you hear a hollow sound when you tap the top and underneath sides of the buns.
- Once baked, use your chopstick or metal straw to deepen the indentation again if the cookie has lost its shape. Do this while the buns are warm, then leave to cool for a couple of minutes on the trays before transferring to a wire rack to cool completely. This won’t take long!
Notes
© Flavour of the Film. All content and imagery is copyright protected. Please do not use any of my images or written content without prior permission. If you would like to share any of the recipes or images on Flavour of the Film, please link back to the recipe in question and rewrite it in your own words, crediting Flavour of the Film as the original source.



One Comment
Comments are closed.