
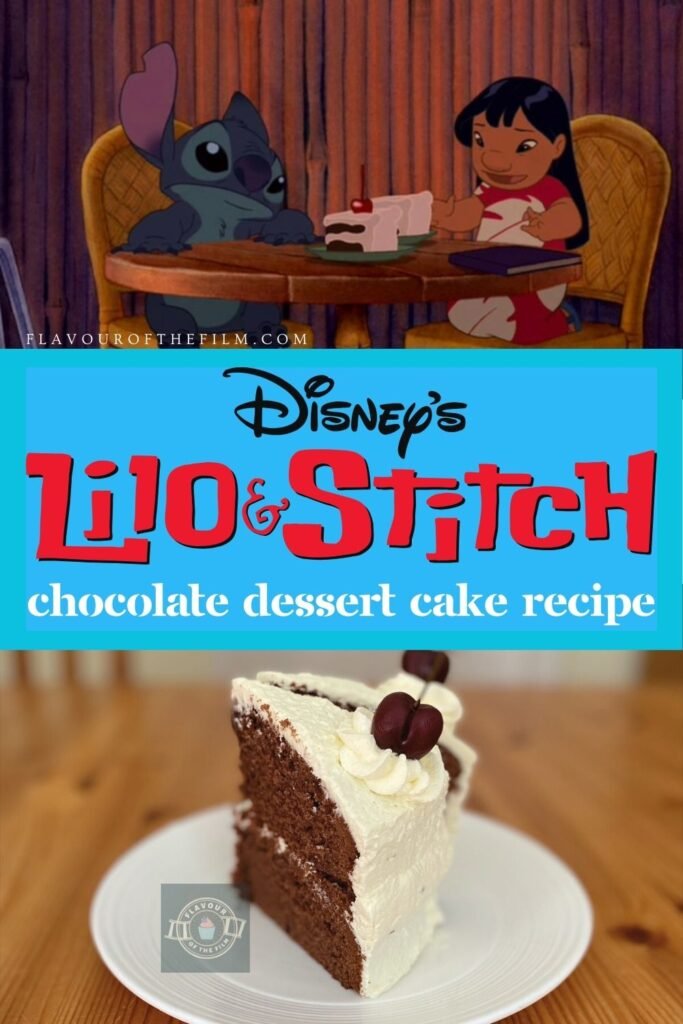
I may have mentioned that I’ve got my rock solid top favourite Disney films… Well, Lilo & Stitch is up there in the top five. Like with my copy of Disney’s Hercules, I wore my VHS copy of Lilo & Stitch out until it was barely functional. My Lilo & Stitch cake will satiate any chocolate cake craving. Set up that record player, let’s get baking.
Contents
The Bake
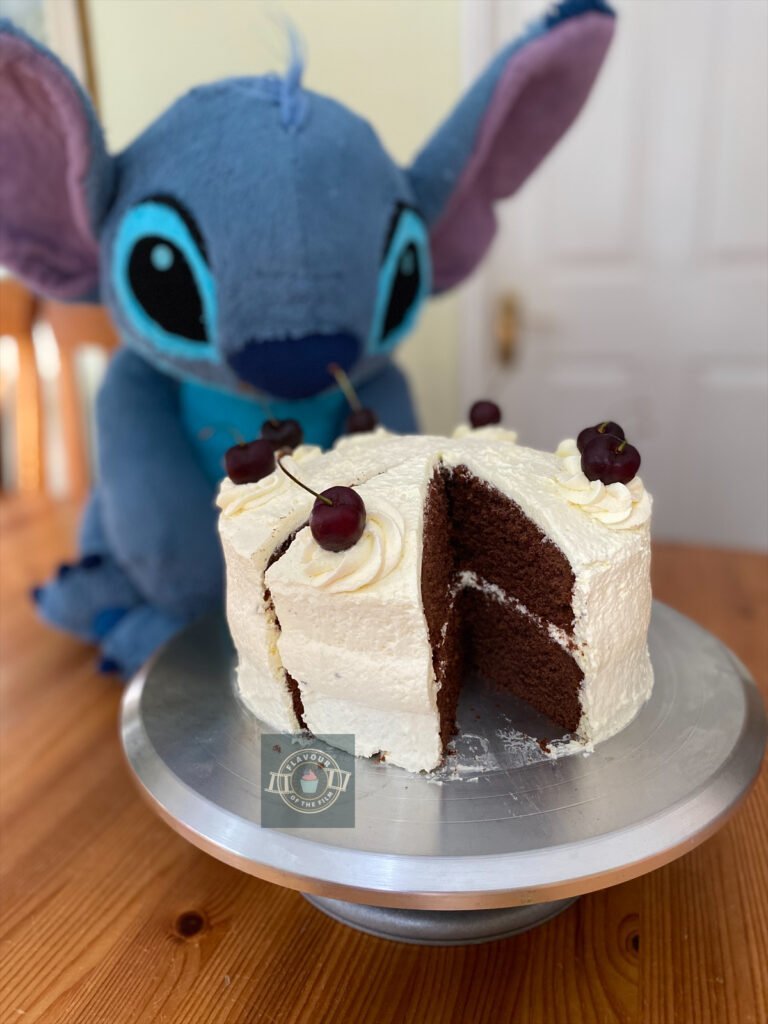
I decided to take direct inspiration from a dessert that features in the film. While Nani is working a shift at a Lūʻau restaurant, Lilo and Stitch are seated at one of the tables. Lilo is drawing out a scale that measures how badly behaved Stitch is, and demands dessert when Nani clears their table.
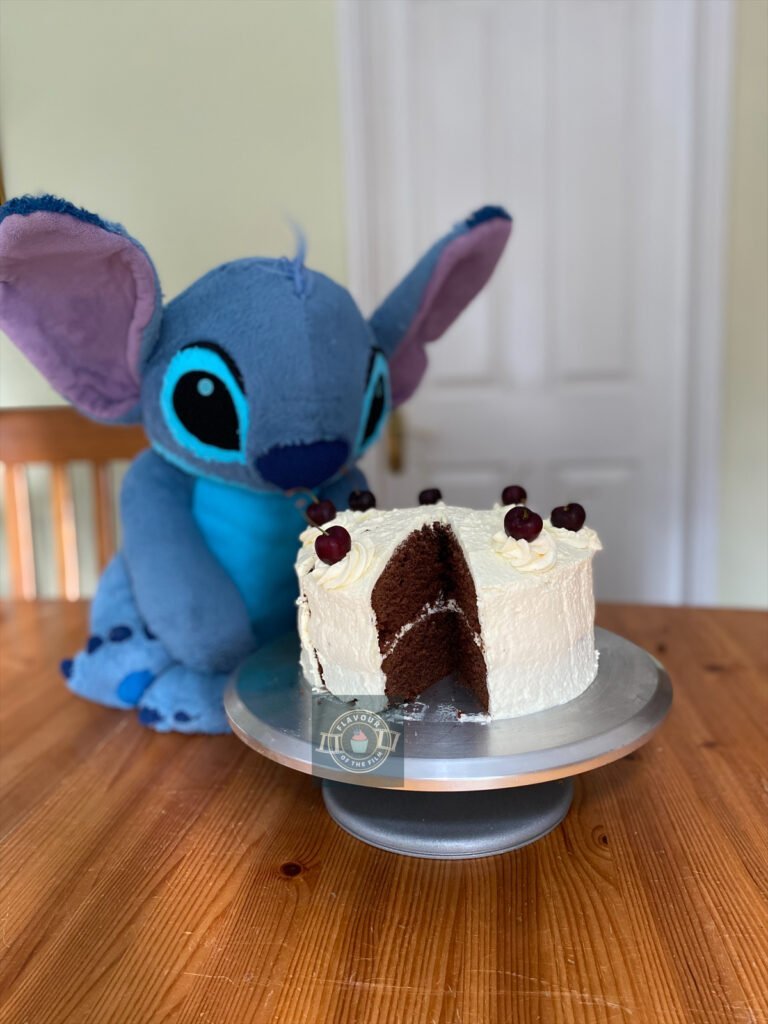
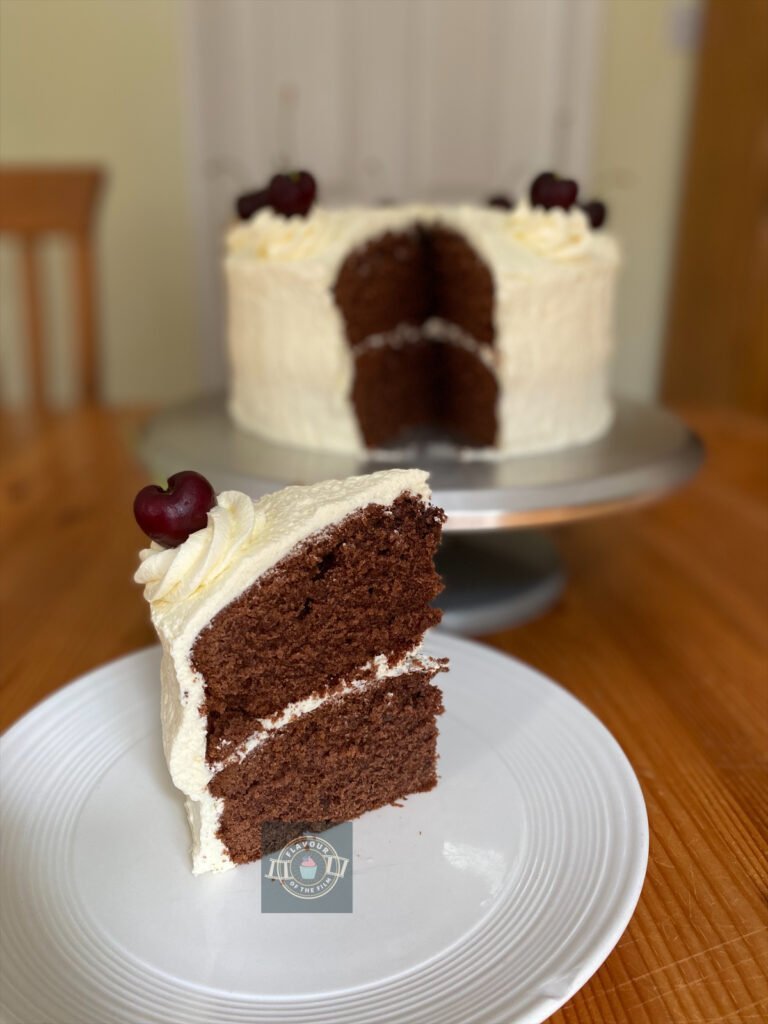
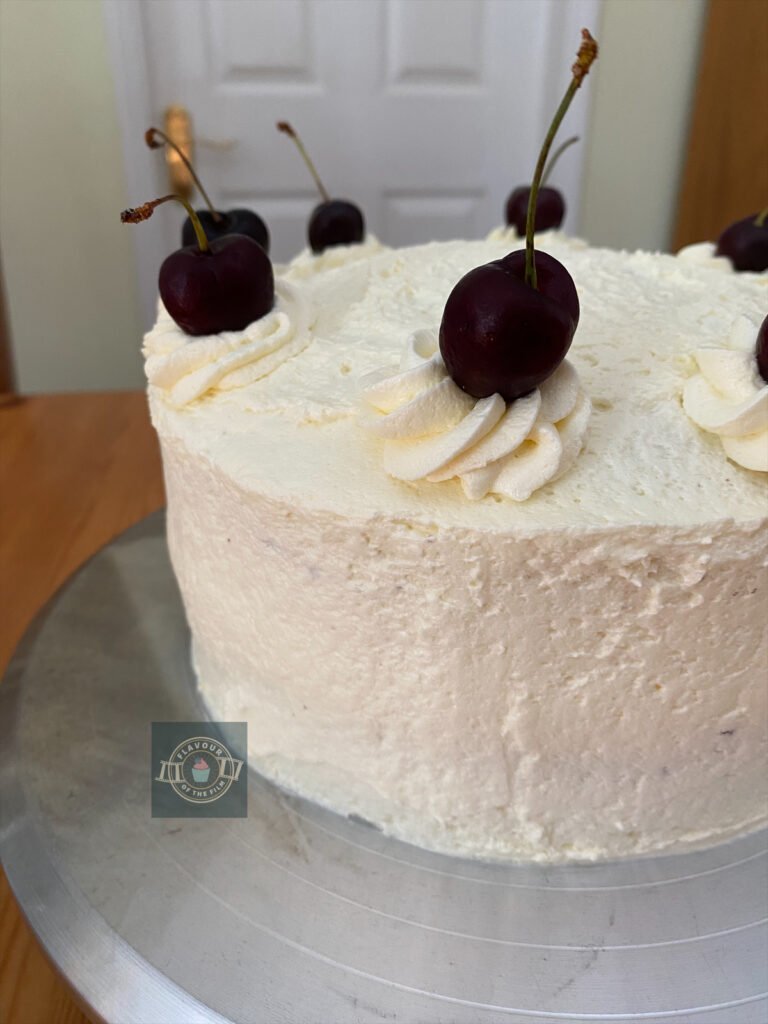
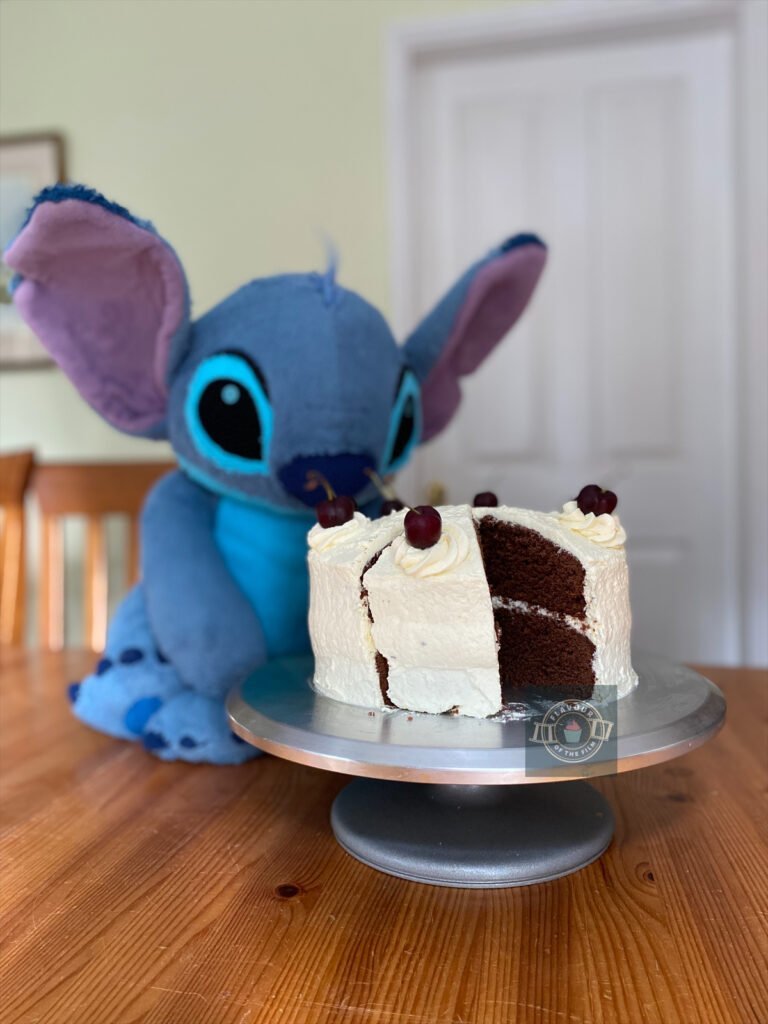
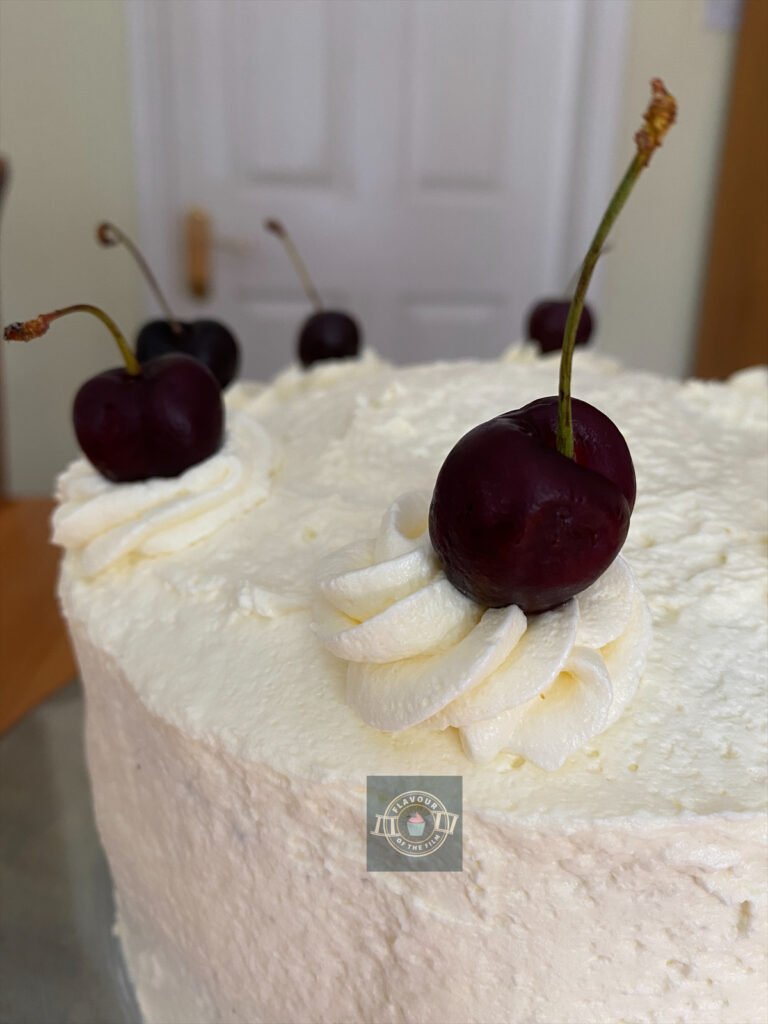
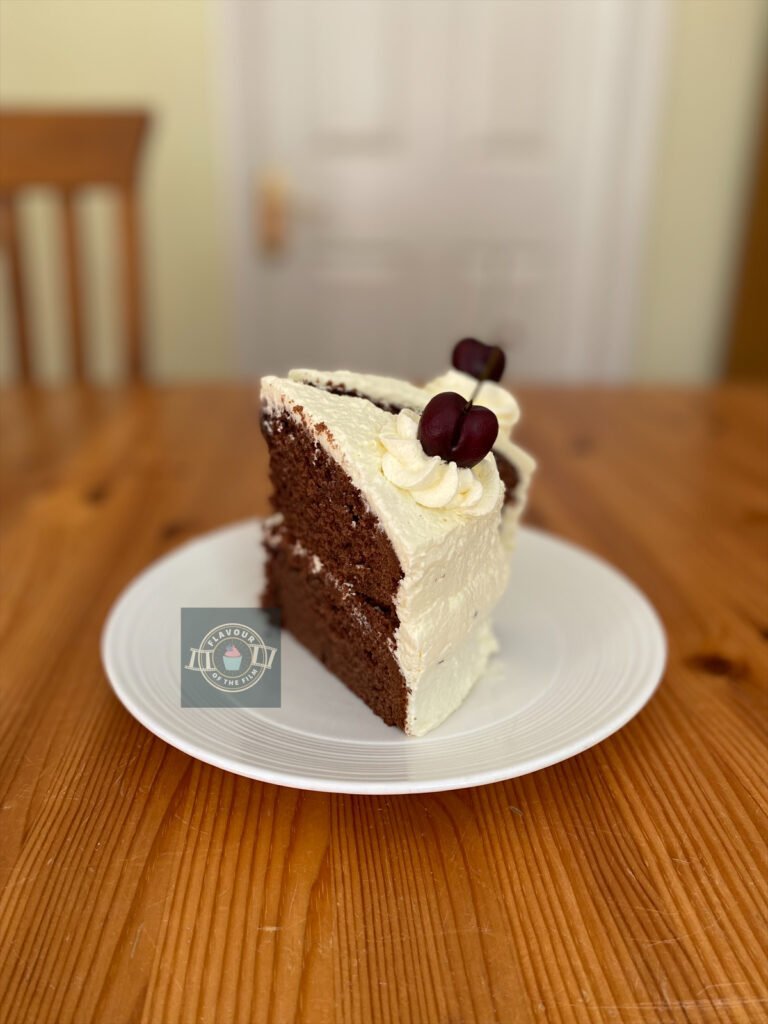
That very dessert is a two-layered chocolate cake smothered in white frosting and topped with cherries. Stitch proceeds to inhale both slices, Lilo’s included, and when she protests, Stitch regurgitates them back onto the plate.
This is the inspiration for my Lilo & Stitch cake.
It’s a simple but delicious chocolate cake with a Swiss meringue buttercream that I added coconut flavouring too, for that more tropical element. The coconut isn’t necessary, I just love it. You can switch it out for a different flavour that pairs well with chocolate, or leave it out altogether.
Swiss meringue buttercream can seem a little daunting at first as there’s a little more to it than a regular American buttercream. However, it’s so worth doing because it’s a lot lighter and way less sweet than an American buttercream.
It’s the right colour to match my Lilo & Stitch inspired cake with the cake in the film, too. It also spreads and pipes incredibly well, making decorating that much easier.
Plus, it tastes delicious.
Swiss meringue buttercream just requires a little patience and a slight heating process.
Some say this isn’t technically required anymore but I like to air on the safe side when it comes to food. It isn’t much more effort in the grander scheme of things.
I learned the method by reading Kim-Joy’s instructions and also from Sally’s Baking Addiction, who has all the troubleshooting advice you could possibly think of.
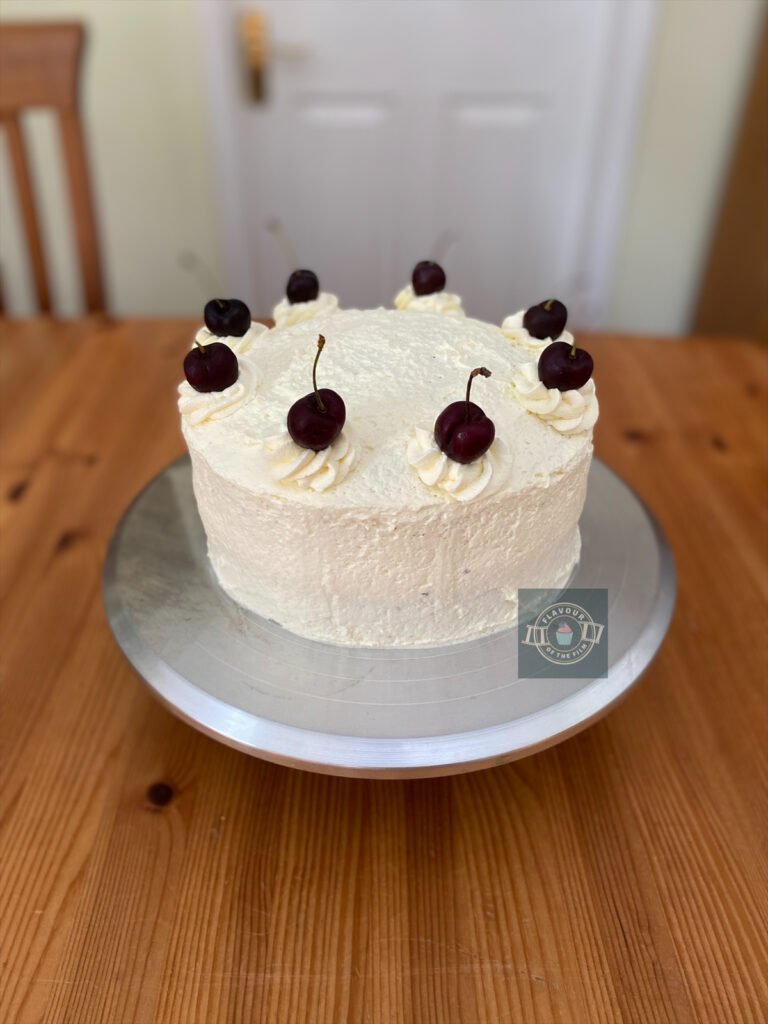
To finish, I topped the cake with fresh cherries. Each of the two slices in the film had a cherry each, so I just visualised what the entire cake likely looked like and that was my end result.
Top Tips
- Avoid over mixing the cake batter. This is even more important with chocolate cake as you want it to be light and fluffy, rather than stodgy and dense.
- Make sure that your self-raising flour is in date! Using old self-raising flour can result in a cake with little rise.
- Don’t be scared by the Swiss meringue buttercream. A little more time and attention is needed for it than a standard American buttercream, but it really is worth it. Just take your time with it and follow the steps.
- When separating the eggs, pour the egg white into your large mixing bowl after every egg. That way you don’t risk ruining the entire batch of egg whites if any egg yolk finds its way in there.
- If your Swiss meringue buttercream is thin after adding the butter, place it uncovered in the fridge for 20 or so minutes to firm up then beat again until light and smooth.
- If it is overly thick, lumpy or curdled, place it back over your bain marie for no longer than two minutes. Allow the sides of the meringue to liquidise a little, then remove from the heat and beat again until smooth. If you happen to melt your buttercream too much, place it in the fridge uncovered for 20 minutes then beat until smooth.
- Customise the flavour of the buttercream to your taste. If you aren’t a coconut fan, then you can stick to vanilla or pick another natural extract or flavouring that you know works well with chocolate.
This Lilo & Stitch cake is so light, but so indulgent. It’s perfect for those looking for a chocolate cake fix that isn’t too sweet. It’s also perfect for a lovely Lilo & Stitch movie night or themed party. A light treat for a (mostly) light film. I hope you have fun making this cake!
Happy baking, happy eating!
The Recipe
Ingredients
Lilo & Stitch cake:
- 400g [around 6 large] eggs
- 400g [2 cups] caster sugar
- 400g [14 oz] unsalted butter
- 325g [2 cups] self-raising flour
- 75g [½ cup + 3 tbsp] high quality cocoa powder
Swiss meringue buttercream:
- 4 large egg whites
- 260g [1 cup + 3 tbsp] granulated sugar
- 230g [8 oz] unsalted butter cool and cubed
- 2 tsp coconut extract (or extract of your choice) optional
- Pinch of salt
Lilo & Stitch decoration:
- 12 fresh cherries (stems left on)
Serves: 12
Preparation time: 20 minutes
Baking time: 40 – 45 minutes
Decorating time: 15 minutes
Method
Lilo & Stitch cake:
- Preheat your oven to 180°C [350°F] or 160°C fan. Grease and line two 8 inch (20cm) cake tins with greaseproof paper/baking parchment and set aside.
- Weigh out your eggs in their shells until you get as close to 400g as possible. Allow for 20g either way. Whatever weight you end up with, weigh out the rest of your ingredients to this exact number.
- In a large bowl, cream together the sugar and butter until light and fluffy.
- Add the eggs, one at a time, and beat in until fully incorporated.
- Sieve in the flour and cocoa powder and mix in well, until you see no visible lumps.
- Divide evenly between the tins and bake for 40 – 45 minutes. Check after 40 minutes.
- Your sponges will be ready when a skewer/cocktail stick comes out clean, the surface of the sponges bounce back when pressed on, and you hear little to no crackling/bubbling sound when you listen to your cakes.
- Allow the cakes to cool in the tins for around 10 minutes, then transfer upside down to a wire rack to cool completely.
- Whilst your cakes are cooling, make your Swiss meringue buttercream.
Swiss meringue buttercream:
- Separate each egg, putting the yolks in one bowl and the whites in a small bowl, then into a large bowl. Good advice would be to pour the egg white into the large bowl every time you separate an egg, so that you don’t risk ruining the whole batch of egg whites if any yolk gets in.
- Whisk the sugar into the egg whites by hand briefly. Save the yolks for another meal.
- Set the bowl over a bain marie (saucepan of hot simmering water). Make sure the bowl does not touch the water.
- Whisk the sugar and whites by hand over the heat until the mixture is thinner and the sugar has completely dissolved. It’ll be tacky to begin with but will become lovely and frothy when it’s ready.
- To test that the mixture is heated through and the sugar has dissolved, quickly dip your finger lightly into the mixture and rub it between your finger and thumb. If you can still feel sugar granules, it needs longer. If the sugar granules are non-existent, it’s ready. Be careful doing this as the mixture will be hot!
- If wanting to use a food grade thermometer, leave it in during this process until the mixture has reached 71°C [160°F].
- Take the bowl from the heat and prepare a standing mixer or electric hand mixer with a whisk attachment. You don’t need to wait for the mixture to cool as it’s better for the mixture to be warm for this stage.
- On a medium-high speed, whisk the mixture to stiff peaks. They should be glossy, too! Depending on the weather and the temperature of your kitchen, this can take 10+ minutes. You want the mixture to be cool by the end.
- If it’s not reaching stiff peaks, place in the fridge uncovered for around 10 minutes before trying again.
- Make sure that the meringue is fully cool before moving onto the next step.
- Change the whisk attachment out for a paddle or set of beaters.
- Add the butter, one block at a time, and beat in until each cube is fully incorporated.
- Once all the butter has been added, add the flavouring (if using) and the salt and beat in briefly. See the Top Tips section above for troubleshooting tips.
- Your cakes should be cool now, so begin building your cake!
Decoration:
- Lay one sponge on a plate/cake board/cake stand and smother with your swiss meringue buttercream.
- Lay the second sponge over the top of the bottom sponge and smother the remaining buttercream over the entire cake using a palette knife.
- If piping on the top of the cake, use any remaining buttercream and a piping bag/sandwich bag with the end cut off and your chosen piping tip.
- A good tip for getting an even distribution of piped buttercream swirls on the top is to pipe them on as if marking a compass, then pipe two more times in each gap.
- Wash and dry the cherries and place one on each swirl, or around the top of the cake.
This deliciously fun Lilo & Stitch cake is worthy of inhaling in one go, but will last around 4 days in an airtight container/cake box. The sponges can be baked and kept frozen (once cooled) for 3 months. Enjoy!
The Film
You’ll still see Lilo & Stitch merchandise in mass circulation and that is because this film still holds its own. If, like me, you grew up with this wonderful film, then you will understand the draw to the story twenty years on. People love both an underdog story and a tale of redemption, and this film involves both.
Released in 2002, Lilo & Stitch is about an alien science experiment, known as #626, escaping incarceration and crashing to Earth, where he lands on the island of Kaua’i, Hawai’i. Disguising himself as a rather peculiar looking dog, Stitch hides himself in the company of a lonely young girl and her older sister. All the while, his creator and an alien with a fascination with Earth are attempting to recapture him.

Lilo & Stitch is a firm favourite for a reason.
There is so much heart, so much love and so much understanding in this film. The sister bond that is central to the story is relatable and melancholy and warming all at the same time. Lilo and Nani share an unbreakable bond that can be felt throughout, despite the trials and tribulations they both contend with.
Stitch brings so much comedy and as an audience, we fall in love with him like he’s one of our own. He goes through quite the transformation. Plus, Pleakly and Jumba make this adventure even more of a joke-filled ride.
Then there’s the scene with Stitch reading The Ugly Duckling in the rain… man, it makes me WEEP. EVERY TIME. Anyone else?
I love how determined Nani is to protect Lilo and keep their family together. It shows just how much strength she has as an integral character. Lilo comes before anything else. Even when endearing, supportive David is trying to ask her out.
I had the BIGGEST crush on David growing up. Yeah, I said it. He was my cartoon crush. Aladdin, too.
Lilo & Stitch remains a firm favourite of mine and I’m clearly not alone. These characters are everlasting and this lovely story is timeless!
Recipe Card

Lilo & Stitch Cake | Lūʻau Dessert Cake
Ingredients
Lilo & Stitch cake:
- 400 g [around 6 large] eggs
- 400 g [2 cups] caster sugar
- 400 g [14 oz] unsalted butter
- 325 g [2 cups] self-raising flour
- 75 g [½ cup + 3 tbsp] high quality cocoa powder
Swiss meringue buttercream:
- 4 large egg whites
- 260 g [1 cup + 3 tbsp] granulated sugar
- 230 g [8 oz] unsalted butter cool and cubed
- 2 tsp coconut extract or extract of your choice optional
- Pinch of salt
Decoration:
- 12 fresh cherries stems left on
Instructions
- Preheat your oven to 180°C [350°F] or 160°C fan. Grease and line two 8 inch (20cm) cake tins with greaseproof paper/baking parchment and set aside.
- Weigh out your eggs in their shells until you get as close to 400g as possible. Allow for 20g either way. Whatever weight you end up with, weigh out the rest of your ingredients to this exact number.
- In a large bowl, cream together the sugar and butter until light and fluffy.
- Add the eggs, one at a time, and beat in until fully incorporated.
- Sieve in the flour and cocoa powder and mix in well, until you see no visible lumps.
- Divide evenly between the tins and bake for 40 – 45 minutes. Check after 40 minutes.
- Your sponges will be ready when a skewer/cocktail stick comes out clean, the surface of the sponges bounce back when pressed on, and you hear little to no crackling/bubbling sound when you listen to your cakes.
- Allow the cakes to cool in the tins for around 10 minutes, then transfer upside down to a wire rack to cool completely.
- Whilst your cakes are cooling, make your Swiss meringue buttercream.
- Separate each egg, putting the yolks in one bowl and the whites in a small bowl, then into a large bowl. Good advice would be to pour the egg white into the large bowl every time you separate an egg, so that you don’t risk ruining the whole batch of egg whites if any yolk gets in.
- Whisk the sugar into the egg whites by hand briefly. Save the yolks for another meal.
- Set the bowl over a bain marie (saucepan of hot simmering water). Make sure the bowl does not touch the water.
- Whisk the sugar and whites by hand over the heat until the mixture is thinner and the sugar has completely dissolved. It’ll be tacky to begin with but will become lovely and frothy when it’s ready.
- To test that the mixture is heated through and the sugar has dissolved, quickly dip your finger lightly into the mixture and rub it between your finger and thumb. If you can still feel sugar granules, it needs longer. If the sugar granules are non-existent, it’s ready. Be careful doing this as the mixture will be hot!
- If wanting to use a food grade thermometer, leave it in during this process until the mixture has reached 71°C [160°F].
- Take the bowl from the heat and prepare a standing mixer or electric hand mixer with a whisk attachment. You don’t need to wait for the mixture to cool as it’s better for the mixture to be warm for this stage.
- On a medium-high speed, whisk the mixture to stiff peaks. They should be glossy, too! Depending on the weather and the temperature of your kitchen, this can take 10+ minutes. You want the mixture to be cool by the end.
- If it’s not reaching stiff peaks, place in the fridge uncovered for around 10 minutes before trying again.
- Make sure the meringue is fully cool before moving onto the next step.
- Change the whisk attachment out for a paddle or set of beaters.
- Add the butter, one block at a time, and beat in until each cube is fully incorporated.
- Once all the butter has been added, add the flavouring (if using) and the salt and beat in briefly. See the Top Tips section of the blog post for troubleshooting tips.
- Your cakes should be cool now, so begin building your cake!
- Lay one sponge on a plate/cake board/cake stand and smother with your swiss meringue buttercream.
- Lay the second sponge over the top of the bottom sponge and smother the remaining buttercream over the entire cake using a palette knife.
- If piping on the top of the cake, use any remaining buttercream and a piping bag/sandwich bag with the end cut off and your chosen piping tip.
- A good tip for getting an even distribution of piped buttercream swirls on the top is to pipe them on as if marking a compass, then pipe two more times in each gap.
- Wash and dry the cherries and place one on each swirl, or around the top of the cake.
Notes
© Flavour of the Film. All content and imagery is copyright protected. Please do not use any of my images or written content without prior permission. If you would like to share any of the recipes or images on Flavour of the Film, please link back to the recipe in question and rewrite it in your own words, crediting Flavour of the Film as the original source.

3 Comments
Comments are closed.