Throw the best Bluey themed birthday party for your kids using my Bluey inspired party menu to create a food spread that will hit the brief. Not only is it customisable, it’s complete with recipes and tips for each element and a free printable menu which you can download and print for your Bluey themed party! Ready to play?
Contents
- Bluey
- Bluey Party Menu
- Episode One
- Mini Pizzas Recipe
- Episode Two
- Summer Berry Pavlova Recipe
- Episode Three
- Bandit’s Biscuits Recipe
- Episode Four
- Bonus Features
- Purple Lemonade Recipe
- Season Finale
- Bluey Menu Printable Graphic
Bluey
You don’t have to have kids to be aware of Bluey and its huge global success.
Since 2018, this lovely little Australian cartoon has taken the world by storm, charming kids and parents alike across numerous countries. With its bright colours, engaging storylines and fun characters, it’s not hard to see why!
Created by Joe Brumm, Bluey has something for all kinds of kids and all kinds of families. The success of this show is surely in part due to its sentimentality. A few episodes had me welling up unexpectedly, let me tell you.
My best friend’s son is a big Bluey fan, so I wanted to put together a party menu in his honour. A menu that any parent of a Bluey fan can use to put together an epic themed food spread for their kid’s Bluey themed birthday party!
Read on for tips, recipes and a printable version of the menu graphic below!
Bluey Party Menu
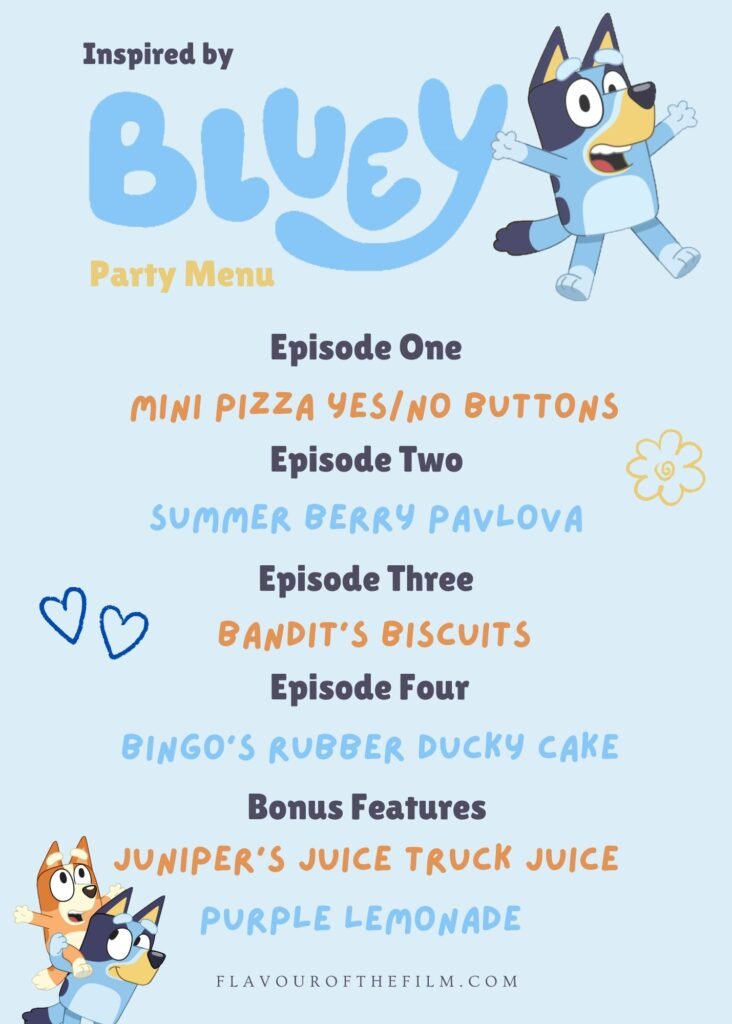
Here is the text on the menu, in case you prefer to see it in text form rather than on an image:
Episode One
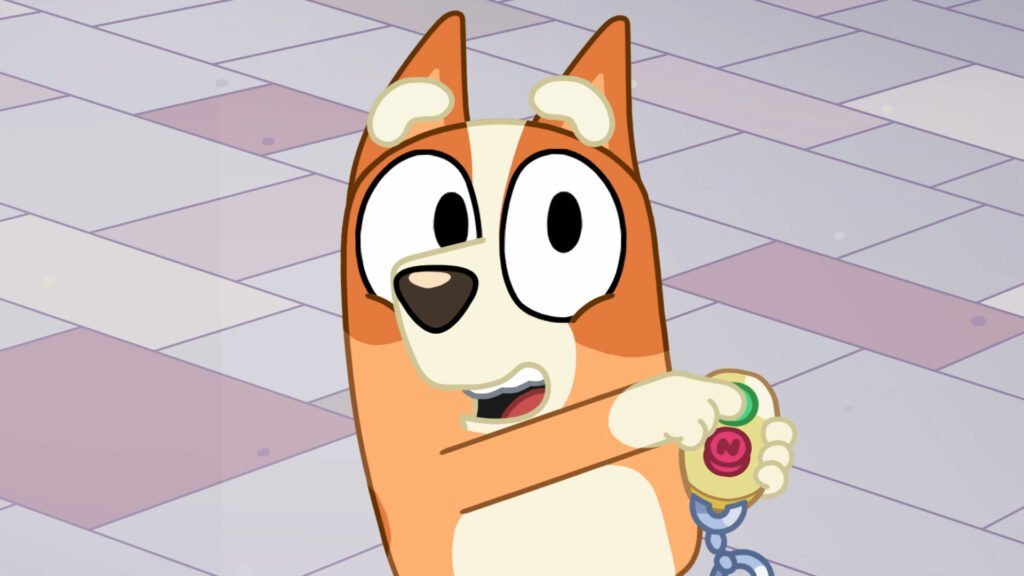
Mini pizza yes/no buttons
Episode Two
Summer berry pavlova
Episode Three
Bandit’s biscuits
Episode Four
Bingo’s rubber ducky cake
Bonus Features
Juniper’s juice truck juice
Purple lemonade
You can find the printable menu graphic at the bottom of this post.

Episode One
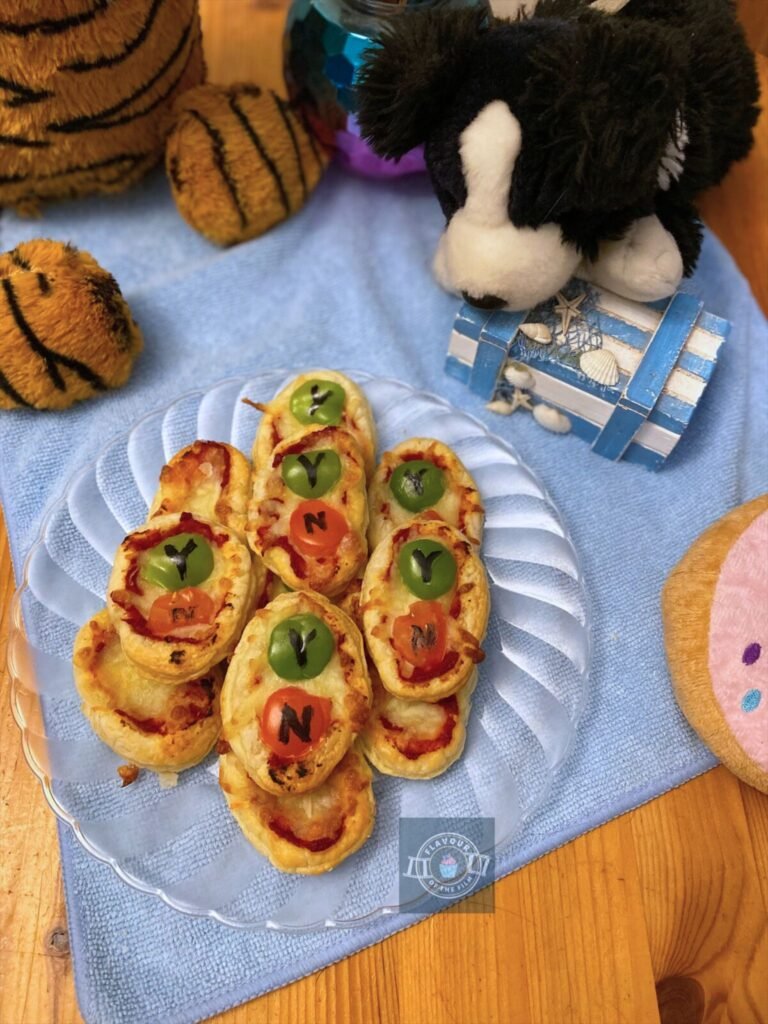
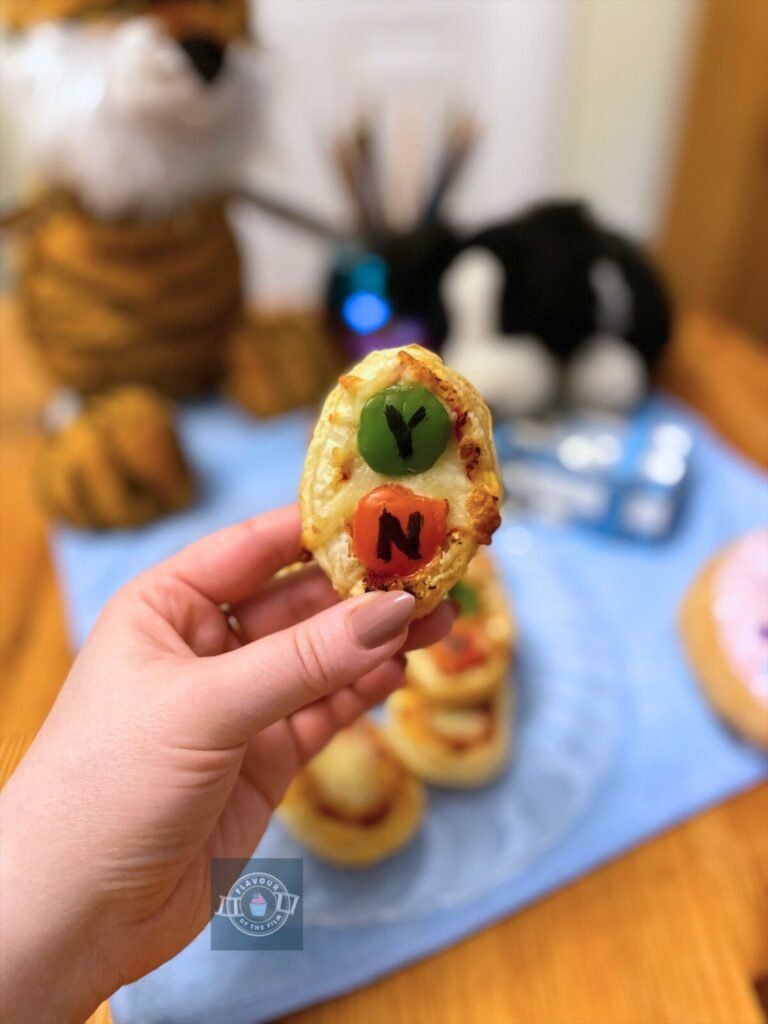
It’s the only savoury dish on this menu, but it’s a cracker to start with.
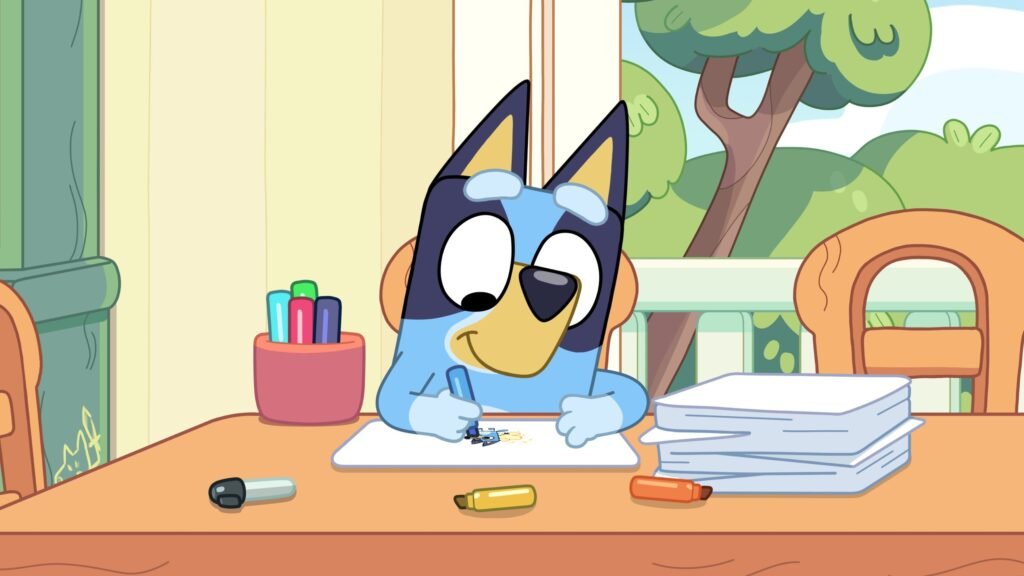
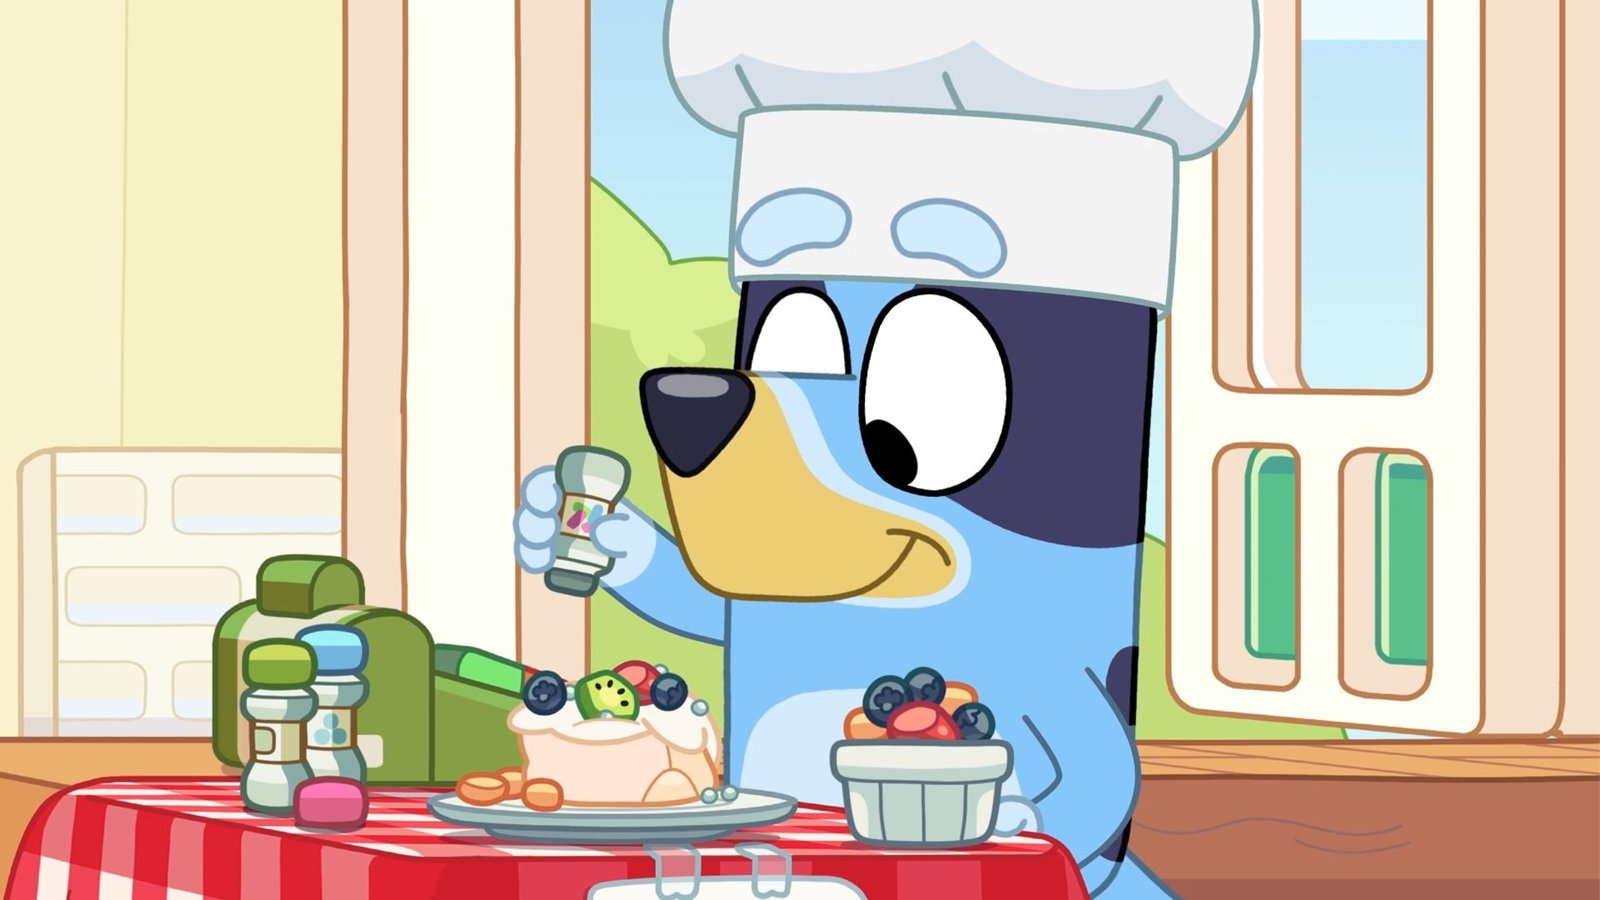
Episode one of season two titled “Dance Mode” is the inspiration behind the first element of my Bluey themed menu. The yes/no button specifically.
Pizza is always a great option at a party, especially when kids are the main audience. It’s an easy and delicious dish that can be customised to multiple tastes and requirements (which can be a challenge when you’re trying to cater for multiple children!).
My mini pizza yes/no buttons can be made using homemade pizza dough, shop bought pizza dough or shop bought puff pastry. If you’re a dab hand at making your own puff pastry pizza, have at it!
I used shop bought puff pastry when I created my pizza yes/no buttons, but this is entirely down to preference.
Note: do not roll out pre-rolled pastry! If you get shop bought pastry in sheet form, rolling it out before using it can diminish the lamination and you won’t get as much of a rise or flakey texture.
You could do a mix of different bases if you know that you are catering for picky eaters. My Home Alone cheese pizza recipe includes a recipe for dough and for sauce. It’s easily adaptable – just know that it makes a massive pizza as is so if you’re feeding a class worth, it’s ideal!
This dish can further be tailored to your taste by choosing your own cheese. Mozzarella or burrata are my go-tos for pizza. If you’re using either, make sure to get one that is relatively low moisture and not covered in starch (pre-grated often is) so that you achieve a glorious crisp on the top of the cheese.
To create the yes and no buttons, I used green and red bell peppers that I cut out using the wide end of a piping tip and simply painted on the appropriate letters. I did this using food colouring, but you can draw the letters in tomato sauce or something similar if preferred. Simple.
Mini Pizzas Recipe
Makes: 12 mini pizzas (can be doubled, tripled etc. for a larger yield)
Ingredients
- 1 sheet puff pastry
- 1 tin pizza sauce
- 1 ball of fresh mozzarella (or cheese of your choice) shredded
- 2 red bell peppers
- 2 green bell peppers
Method
- Preheat your oven to 220°C or 200°C fan [390°F] and line a baking tray with greaseproof paper/baking parchment. Set aside.
- Cut out circles of pastry using a 4 inch round cookie cutter, then use your hands to gently stretch each one into an oval shape. Do not roll the pastry with a rolling pin! Lay them on the baking tray, leaving an inch in between each one.
- Bake your pastry ovals for 5 – 8 minutes in the oven or until puffy and crisp.
- Wash the bell peppers, core them and then cut out small circles: 12 from each colour. I did this using the wide end of a metal piping tip. Flip the circles of pepper so that the smooth surface is facing up.
- Remove the pastries from the oven and carefully spread the pizza sauce over each one, leaving a slight border to avoid spillage.
- Sprinkle over the cheese, then arrange the pepper circles on each one: green at the top and red on the bottom. Place your mini pizzas back in the oven for another 5 or so minutes, just until the cheese is melted and slightly crisp.
- Leave to cool for a couple of minutes before handling, then paint or draw on the “Y” and “N” letters on your bell pepper pieces. Enjoy either warm or cold!
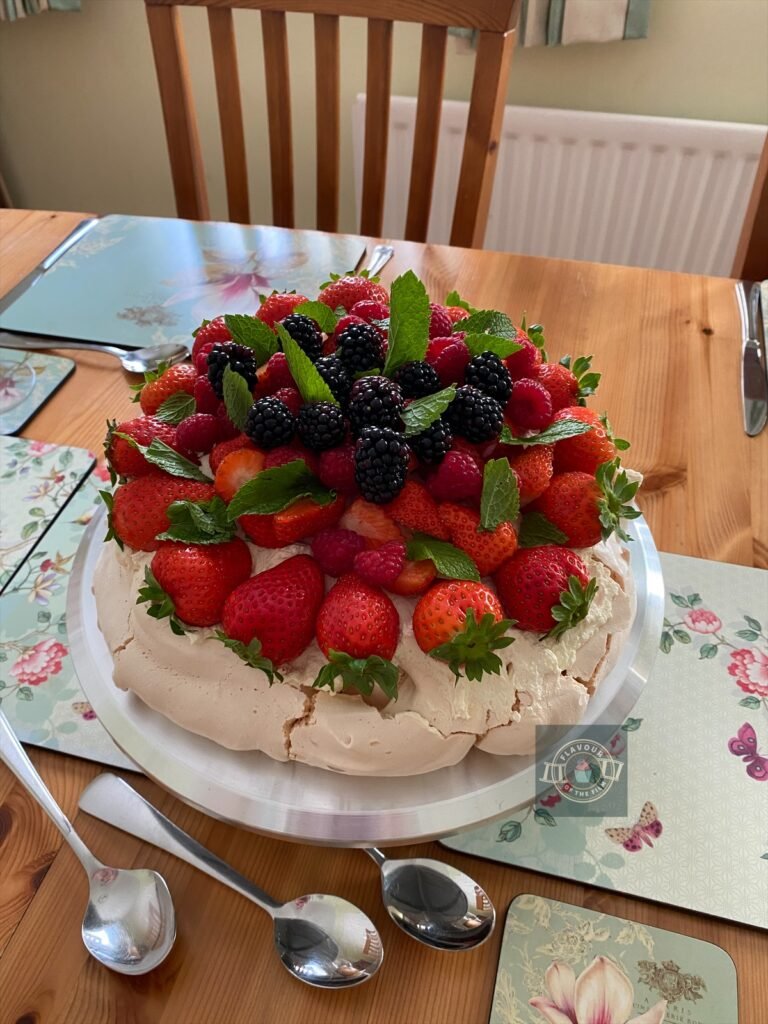
Episode Two
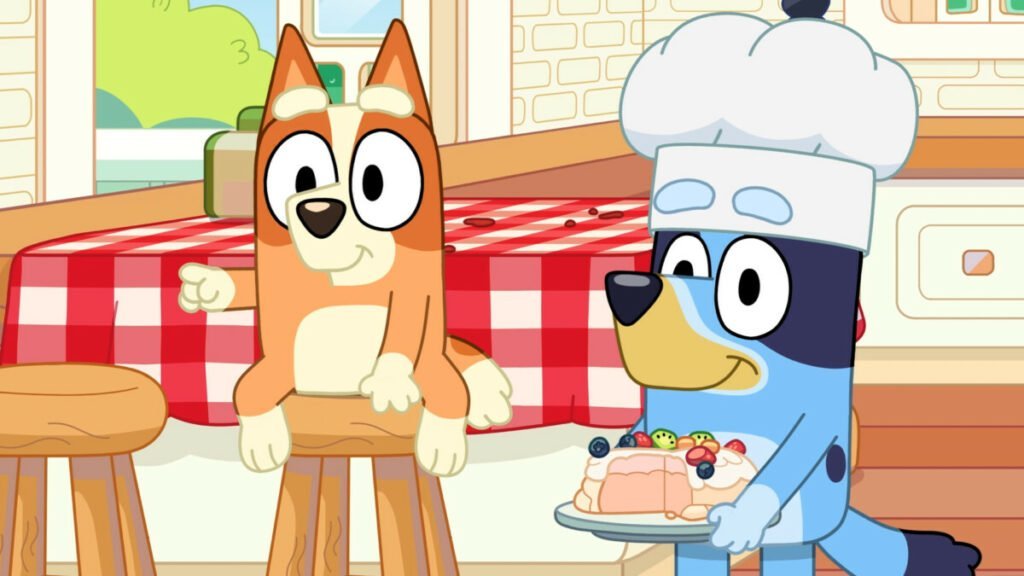
When I was discussing this menu with my best friend (and mother of the Bluey fan that this menu is dedicated to), she mentioned how she’d never heard of pavlova until she saw it in episode seventeen, season three of Bluey.
This kind of blew my mind because pavlova is one of my favourite desserts and something that I often make for a dessert following a sit down dinner. My version of Aunt Petunia’s floating dessert in Harry Potter and the Chamber of Secrets has an air of pavlova about it.
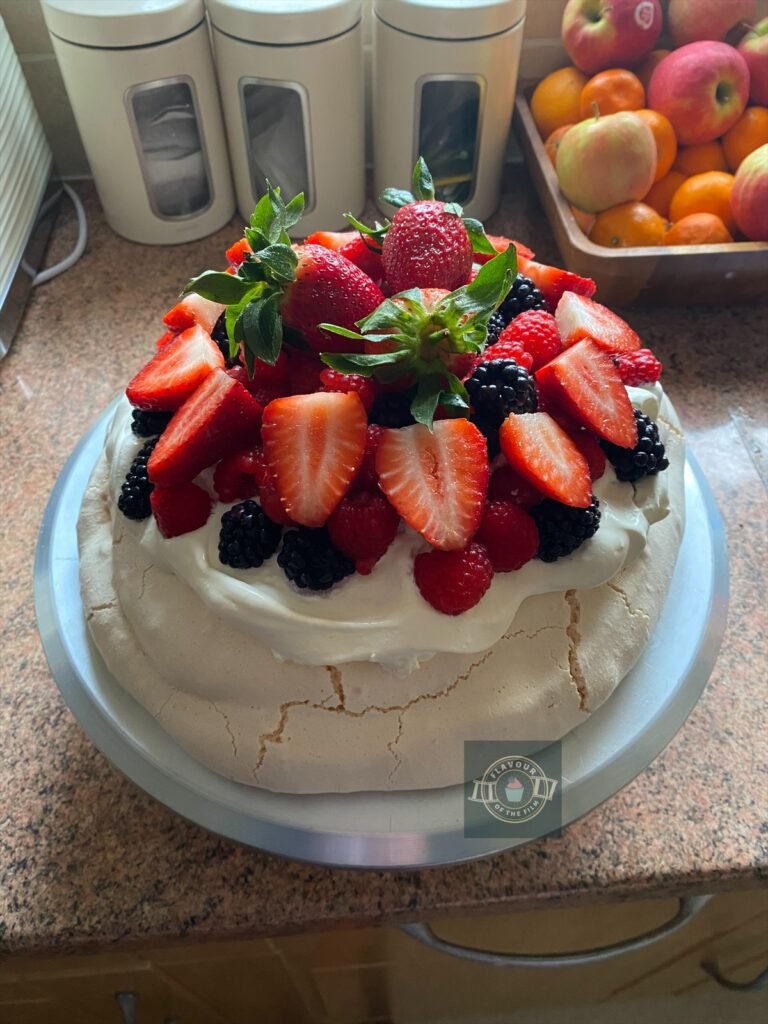
For those of you who aren’t entirely aware of what pavlova is, it’s a delectably light dessert made from egg whites and sugar that is baked at a low heat. The end result is a crisp outer shell and a marshmallow like interior. It’s often topped with whipped cream and fresh fruit to finish.
There are lots of variations of pavlova (including making it with aquafaba instead of egg whites), which makes it a really fun dessert to make for a party.
A pavlova is usually a large, individual dessert that is cut up to serve.
This is what you see in Bluey and is what I would recommend if the party you are hosting involves a handful of kids (and parents) at the most.
If you are planning on holding a larger party, I recommend making mini pavlovas using this recipe instead of one big one. You can simply pipe or spoon small mounds of the meringue instead of creating one big one. That way the kids have their own pavlova.
If you are making mini pavlovas, reduce the baking time to between 30 – 40 minutes and leave to dry out in the oven for two hours.
The meringue bases can be stored in an airtight container for up to 1 week before they need to be consumed, so you can make these ahead. They aren’t suitable for the freezer, though, so keep that in mind!
The whipped cream can also be made ahead and kept in the fridge for around four days.
The fruit you top your pavlova is completely up to you. If you want to be true to the show, stick to my recipe below. Otherwise, cater to those attending your party.
You could even make this dish an activity to do during the party!
This would be especially fun if you plan on making mini pavlovas. Sort of like biscuit [cookie] decorating at a party, but posh. Just be sure to have the meringue bases ready to decorate and laid out before the kids get near them.
Feel free to use cans of whipped cream for this if it’s easier!
I would also make them aware that they are delicate and easily breakable to save potential tears later down the line. Even if the bases are broken at any point, you can add the whipped cream and fruit to make great Eton messes.

Summer Berry Pavlova Recipe
Serves: 8 adults (can be doubled etc for extra mini pavlovas or a multiple large ones)
Ingredients
Meringue:
- 6 large egg whites fridge cold is recommended but not essential
- 400g [2 cups] caster sugar
- 1 tsp white wine vinegar optional
- 2 tsp cornflour [cornstarch] optional
- 2 tsp vanilla extract optional
Toppings:
- 600ml [22.5 oz] double [whipping] cream
- 2 tbsp icing [confectioners] sugar
- Kiwi slices
- Strawberry slices
- Apricot or nectarine slices
- Blueberries
Method
Meringue
- Preheat the oven to 130°C or 120°C fan [245°F].
- Clean a large mixing bowl and whisk attachment with lemon juice or white wine vinegar to remove any impurities like grease.
- Separate your eggs into smaller bowls, tipping the egg white into the large mixing bowl one at a time. This prevents any yolk getting into the entire mix and ruining the whole lot!
- Whisk the egg whites on a medium – high speed until they have reached soft peaks. Whilst still whisking, add the sugar 1 tbsp at a time and whisk into the egg whites. Be sure to make sure the sugar has fully incorporated before adding the next tbsp.
- Once all of your sugar is added, your meringue should be glossy and light. Add the vanilla, cornflour and white wine vinegar if using and whisk in briefly.
- Line a baking tray with greaseproof paper/baking parchment (line multiple if making plenty of mini pavlovas). Dab some of the meringue in each corner and stick the paper down to the tray.
- Either spoon or pipe the meringue in a rough circle on your lined baking tray. This can be as smooth or as rough as you like. Feel free to make a very slight indent in the centre for the toppings to sit in.
- Bake in the oven on the middle shelf for 45 minutes to 1 hour (30 – 40 minutes for minis), until the exterior looks dry and crisp. Without opening the oven door, turn the oven off and leave the meringue to cool down with the oven and continue to dry out for 3 hours (2 hours for minis). Don’t worry about cracks!
Decoration
- After the allotted time, carefully transfer your pavlova(s) to the serving plates/boards you are using. Lift and peel is the easiest way to do this.
- In a large mixing bowl, whisk the icing sugar into the cream until the cream can hold its shape (stiff peaks). Store in the fridge in an airtight container until ready to serve.
- If ready to serve, wash and cut the fruit up. Spoon the whipped cream onto the pavlova and top with the fruit.
- A fully constructed pavlova will last in the fridge for up to 2 days. See the main body of this section for more information on storing individual elements of this dessert.
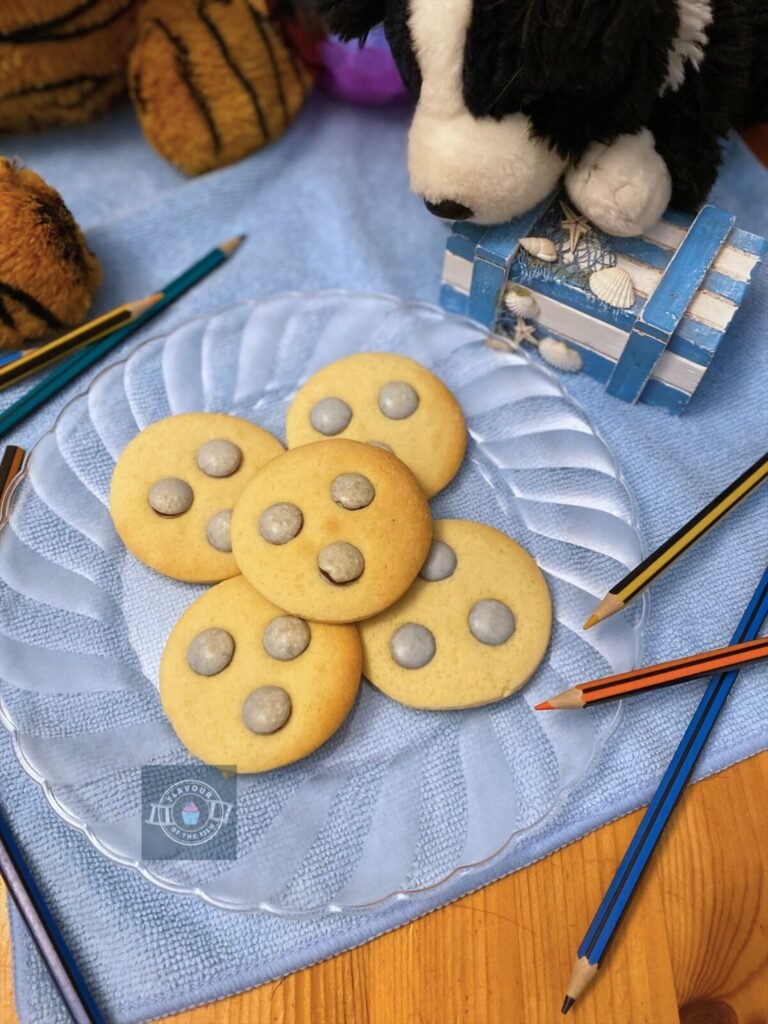
Episode Three
This dish pays homage to Bandit’s catchphrase:
“Oh, biscuits!”
Biscuits are great for a themed party because they can be easily adapted to suit the theme. For a Bluey themed party, I put together simple golden biscuits with blue candy chocolates to decorate. Tip: they’d make a yummy party favour, too!
Biscuits in Australia and biscuits in the U.K. are pretty much the same thing. For my American friends, these biscuits are similar to sugar cookies.
I reached for my Good Omens inspired sugar cookies recipe for this one: these particular biscuits are lovely and don’t need chilling before baking. The only difference here is the decoration.
I chose Smarties to decorate because they’re tasty and popular with kids.
What I will say is that they have a tendency to lose the brightness of their colour during the baking process.
This isn’t a huge issue with the blue in particular because they remain blue (albeit, a paler tint of blue), but if you want bright colours then you may want to opt for something like M’n’Ms instead.
If you wanted to make these biscuits entirely blue, simply add some blue liquid or gel food colouring to the biscuit dough before adding the flour.
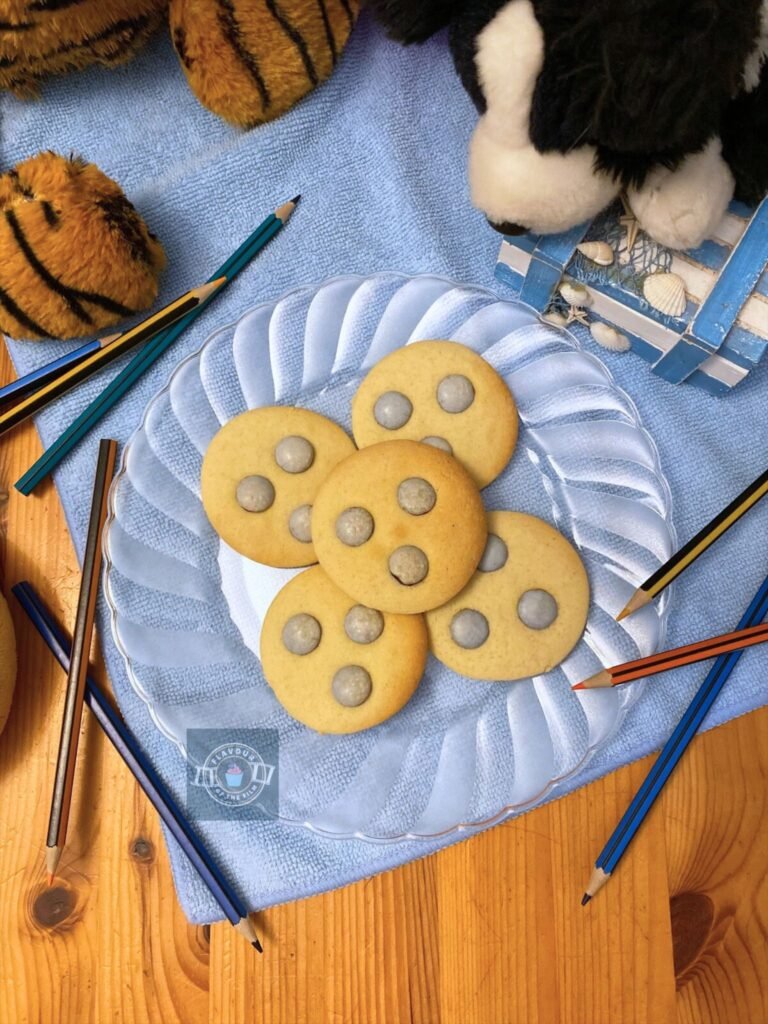
Bandit’s Biscuits Recipe
Makes: 24 (can be doubled for a larger yield)
Ingredients
- 115g [4 oz] unsalted butter room temperature
- 100g [½ cup] golden caster sugar
- 1 medium egg
- 1 tsp vanilla extract
- 180g [1 cup + 2 tbsp] plain flour
- 1 tsp baking powder
- Pinch of sea salt
- 72 blue chocolate candies i.e. Smarties or M’n’M’s (roughly 4 or 5 standard sized bags)
Method
Biscuits
- Preheat your oven to 200°C [350°F] or 180°C fan and line two baking trays with greaseproof paper/baking parchment. Set aside.
- In a large mixing bowl, cream together the sugar and butter until light and fluffy. Add the egg and vanilla and beat in until smooth.
- Sieve in the flour. Add the baking powder and salt and mix together until a dough is formed. Add a little more flour if the dough seems sticky or overly soft. You should be able to bring the dough together easily without much scraping.
- Tip the dough out onto a clean and lightly floured surface. Dust your hands with flour and then bring the dough together into a ball.
- Roll the dough out with a rolling pin until around ¼ inch in thickness (roughly the thickness of a £1 coin).
- Using a 4 inch round cookie cutter, cut out your biscuits and lay them on the trays. You will likely need to bring the dough together and roll it out again a few times to get 24 biscuits. I placed mine in 3 rows of 4 on each tray, leaving about ½ inch in between each cookie.
- Gently press three blue chocolate candies into the top of each cookie.
- Bake on the middle shelves for 8 – 10 minutes, until dry on the top and golden. Once baked, leave to cool completely on the trays before serving. Store in an airtight container for up to 1 week but be aware that the longer the biscuits are kept, the softer they may end up.

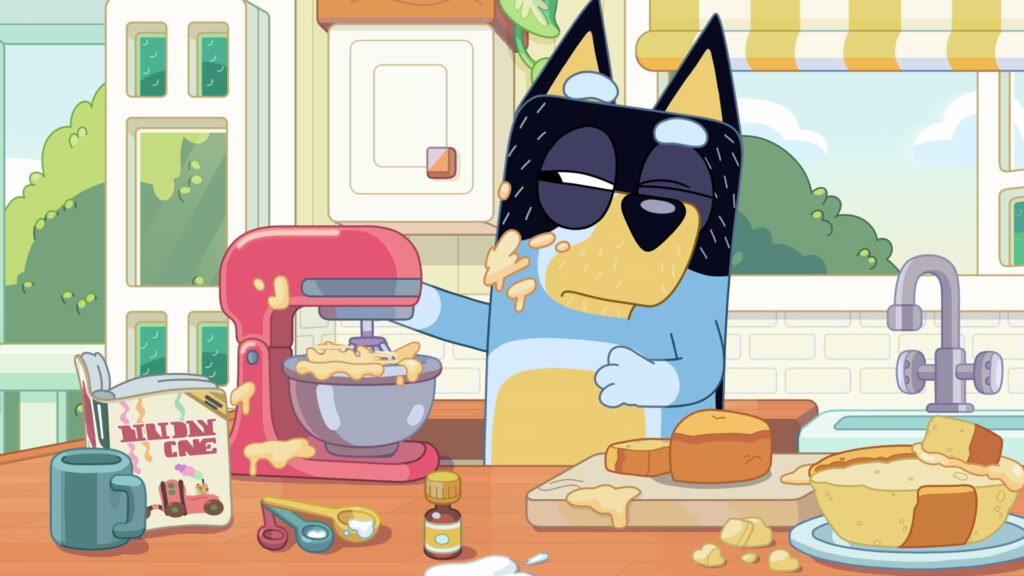
Episode Four
This one is a given, in my opinion. No Bluey themed birthday party would be complete without the very cake that Bingo requests for her own birthday in episode forty-three of season two: the rubber ducky cake.
What I love about this dish (aside from the unconventional ingredients) is that it’s a real recipe from a real cookbook. The Australian Women’s Weekly Children’s Birthday Cake Book contains this very recipe and is apparently a childhood icon for many people.
To see it cartoon-ified in Bluey must be such a nostalgia trip!
“Because it made my tail wag.”…
… Is Bingo’s reasoning behind choosing the rubber duck cake for her birthday. This is so cute. Would you need any other reason besides that to go for it?
You can find the original recipe on the official Bluey website. It is more of a box cake, store bought frosting kind of deal. Which is understandable considering the magnitude of the cake.
If you would prefer to make it entirely from scratch, Andrew of Binging with Babish has a video of him making it (ingredient amounts included). He creates a buttermilk sponge and shows you exactly how to construct a duck shaped cake.
My tip for this particular dish is to perhaps reference both of the recipes I have linked in this section.
My reason being that even if you use the original recipe for ease, being able to see how the cake is constructed in the Binging with Babish video is really helpful. He goes through it part by part and to be able to see him building it makes it easier to see yourself building it.
At least, that’s how I feel when it comes to visual aids.
Also… Fruit Winders would make a great red ribbon to finish. Just an idea.

Bonus Features
As usual, my Bonus Features section is dedicated to drinks. We gotta stay hydrated, friends. Especially during something as predictably hectic as a Bluey themed party.
I will always advocate for staying hydrated with water – the importance of this is not up for debate. But, a themed party should be complete with themed drinks, wouldn’t you say?
Juniper’s juice truck seemed like a good place to start.
Especially as you could set up a drink’s station to look like Juniper’s juice truck and provide various fruit based drinks or smoothies as options!
The official Bluey website has some ideas, including a recipe for watermelon juice, which is a favourite amongst a number of core Bluey characters.
I recommend mixing coconut water (hello electrolytes) and pineapple juice for a tropical option. You could also offer apple juice mixed with sparkling water if you know kids who love a fizzy combo.

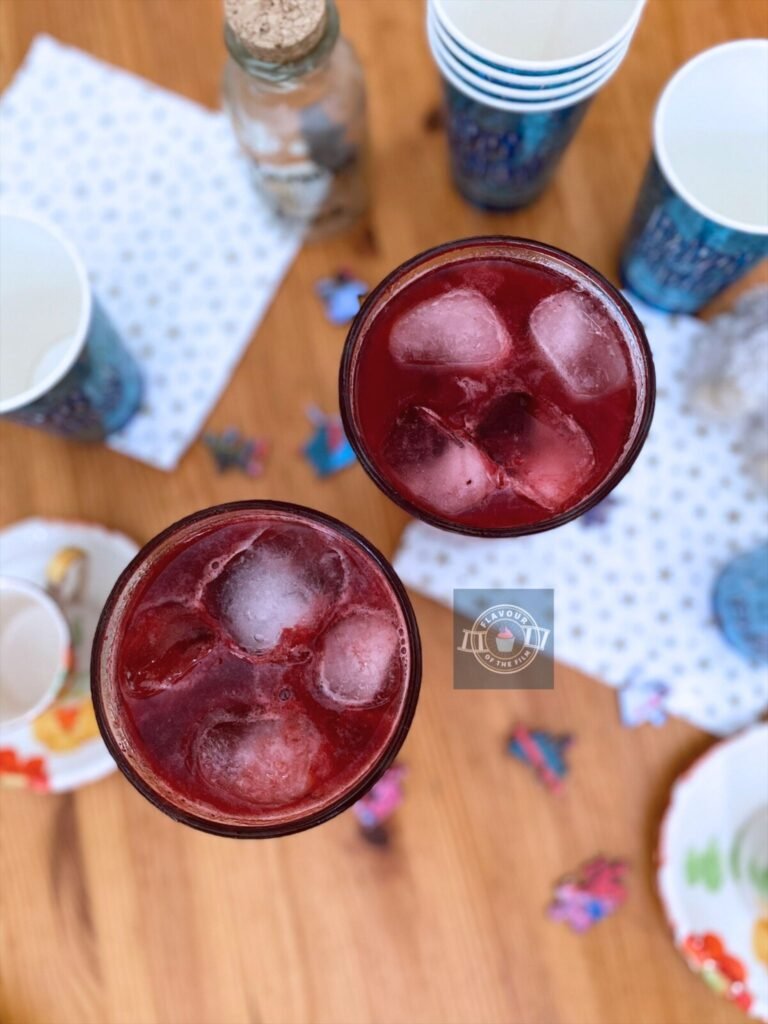
The other drink option I listed in my Bluey menu is purple lemonade.
This is inspired by the minisode titled “The Three Pigs”. The official Bluey website also has a recipe for this which you can find through the link above.
I adapted the recipe using blackberries instead of blueberries and rather than using honey to sweeten it, I created the same syrup that I made for the lemonade in my Lilo & Stitch inspired menu.
You can use whichever recipe is best suited to the preferences of the folk attending your Bluey party!
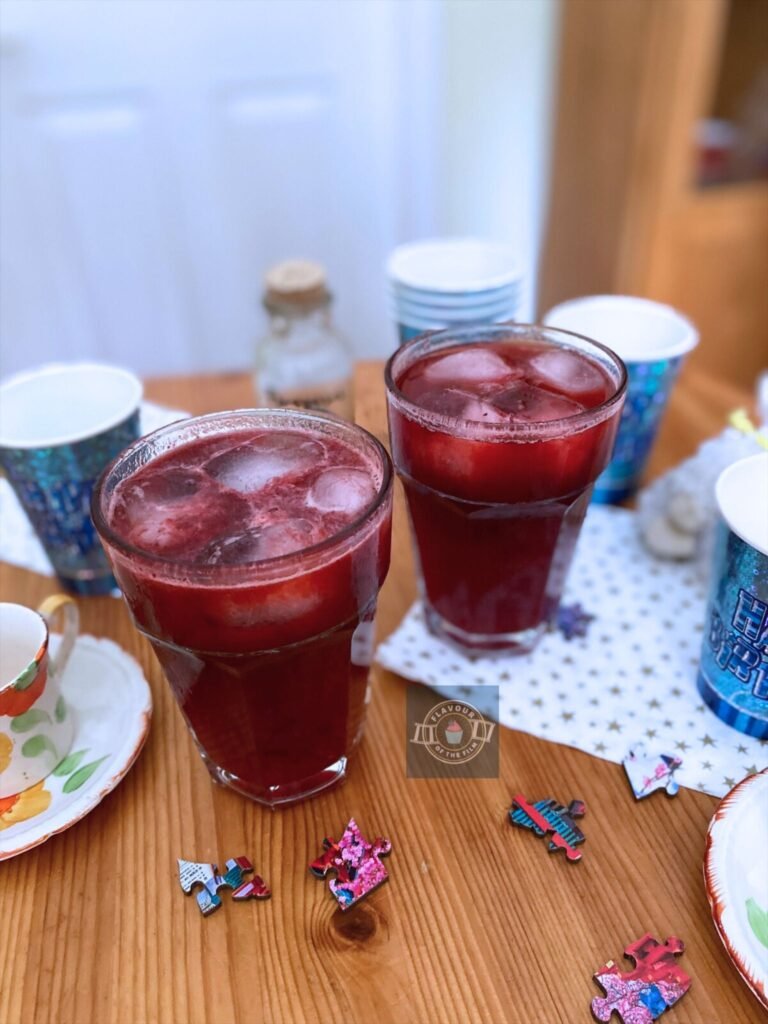
Purple Lemonade Recipe
Makes: up to 5 half glasses or 15 small party cups (can be doubled etc. for a larger yield)
Ingredients
Syrup:
- 125 ml [4.5 oz] still water
- 100g [½ cup] caster sugar
Lemonade:
- Juice of 10 lemons
- 725ml [5 cups] sparkling or still water
- 215g [1½ cup] blackberries
Method
- To make the syrup, add the sugar and water to a saucepan set over medium heat. Stir until the sugar has completely dissolved. Leave to the side to cool.
- Wash the blackberries and place them in a food processor.
- Squeeze the lemons and pour the juice into the food processor with the blackberries.
- Add the now cooled syrup and blitz until smooth.
- Pour the mix through a sieve and into a large jug. Add the sparkling (or still) water and stir well. Serve with ice for a refreshing taste.
Season Finale
There you have it, friends. My Bluey inspired party menu.
As mentioned, this particular themed menu is in honour of my best friend’s adorable son: a true Bluey fan through and through.
As discussed throughout the post, each of these recipes can be adapted to suit the needs and preferences of your party goers. Recipes like the pavlova and the biscuits can even be activities to be carried out during the party!
Whatever you decide, I hope your Bluey themed party is a success and fun is had all around.
Feel free to download and print out my free Bluey printable menu graphic to display at your party! You can find this below.
Bluey Menu Printable Graphic
© Flavour of the Film. All content and imagery is copyright protected. Please do not use any of my images or written content without prior permission. If you would like to share any of the recipes or images on Flavour of the Film, please link back to the recipe in question and rewrite it in your own words, crediting Flavour of the Film as the original source.


2 Comments