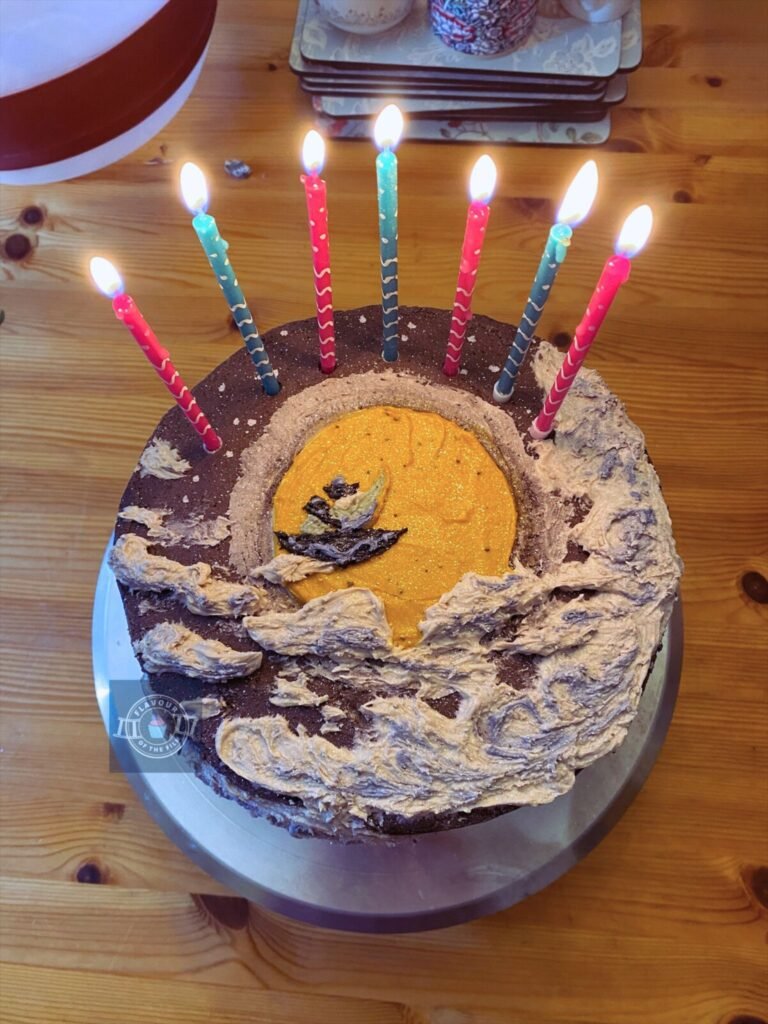
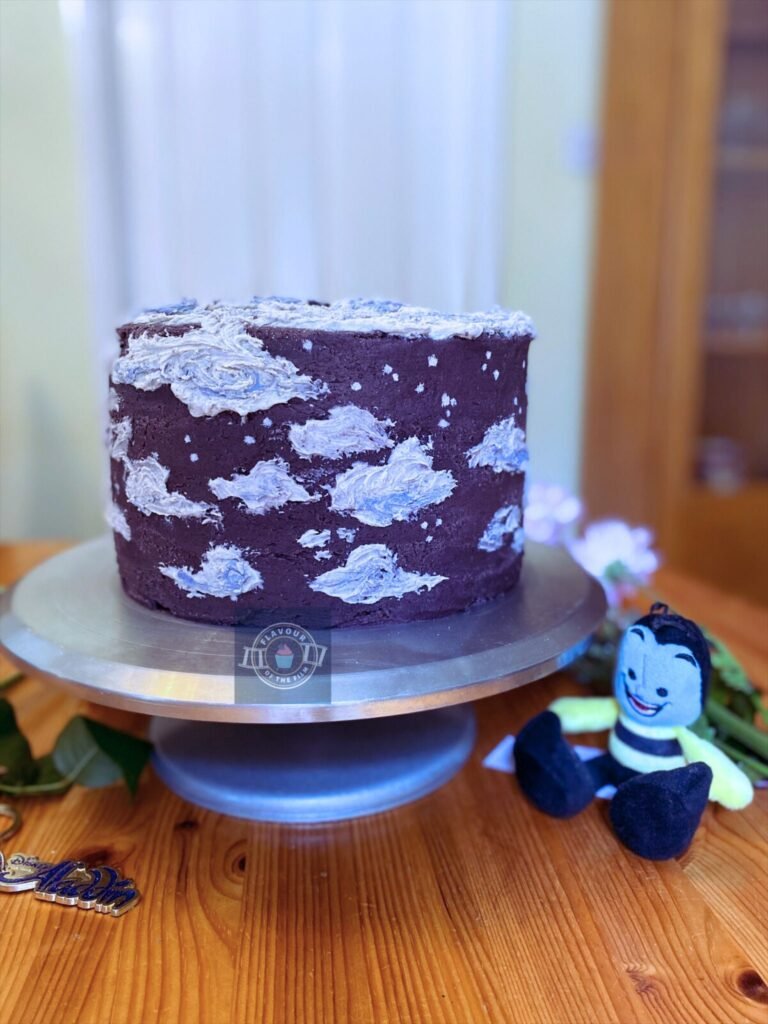
For my 27th birthday cake, I went old school. Disney’s Aladdin was my favourite film growing up. What better way to celebrate my own birthday than with a core favourite film inspired cake? My simple Aladdin cake is finished with a textured painted buttercream cake look inspired by the A Whole New World scene. This one is an easy showstopper! Magic carpet at the ready, let’s make a cake.
Contents
The Bake
Recently, I’ve been a little too invested in checking out painted buttercream cakes on Pinterest. Each time one crops up, I get all excited and feel so inspired by them. It’s been a year since I created my Onward inspired birthday cake for my 26th, which was also a painted buttercream cake!
Painted buttercream cakes are essentially cakes that have been decorated in buttercream, but in a way that makes them resemble paintings. Most common techniques include watercolour and oil/acrylic painting vibes.
Baker and cake designer, Dawn Konofaos, has written about how she paints cakes with buttercream and it’s a fascinating read. You can find it here.
Whilst I love watercolour paintings, I really love the concept of a textured painted buttercream cake, so that’s exactly what I aimed for with my own birthday cake.
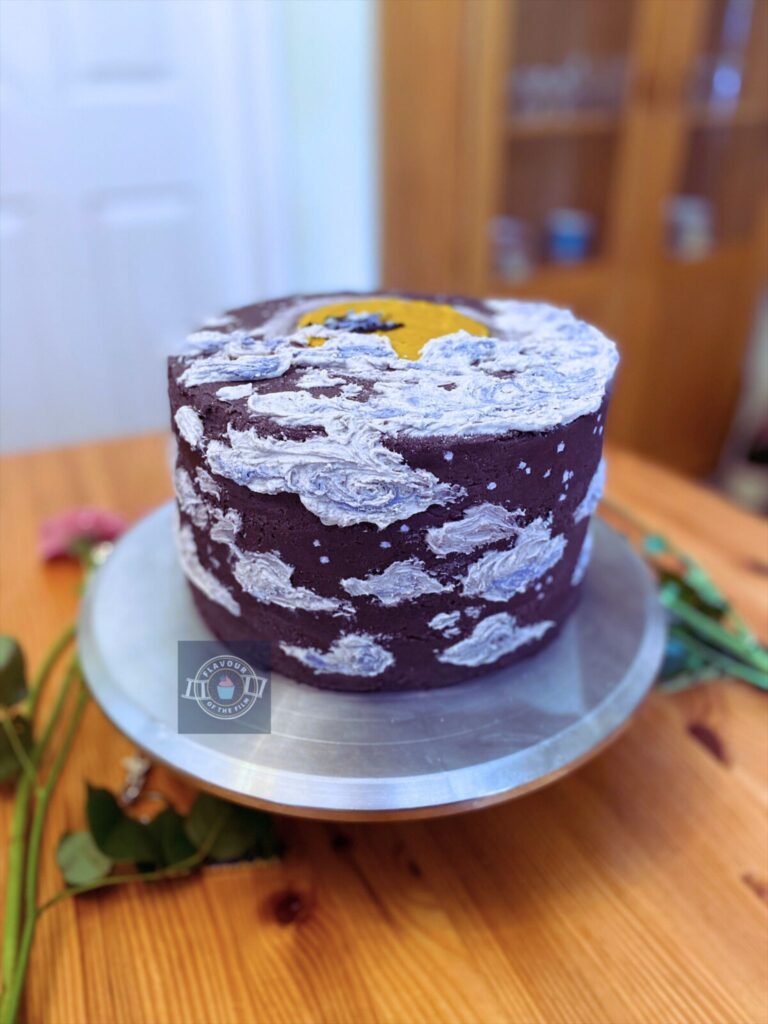
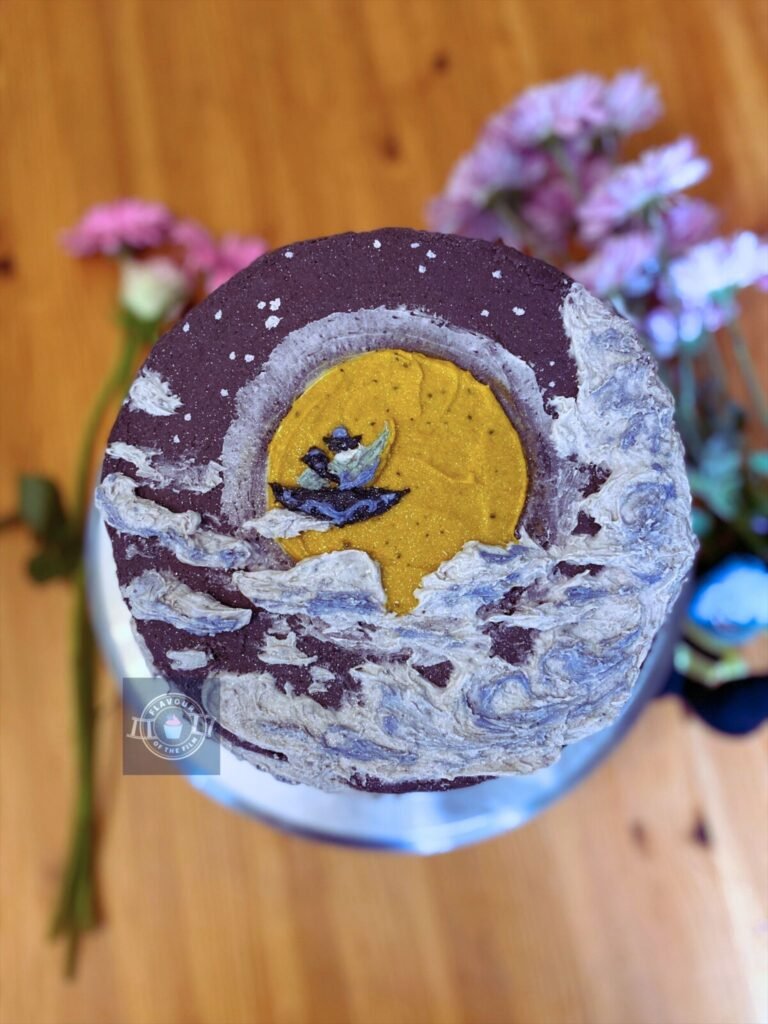
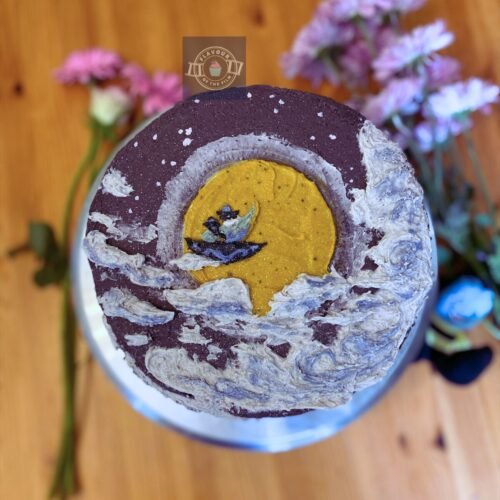
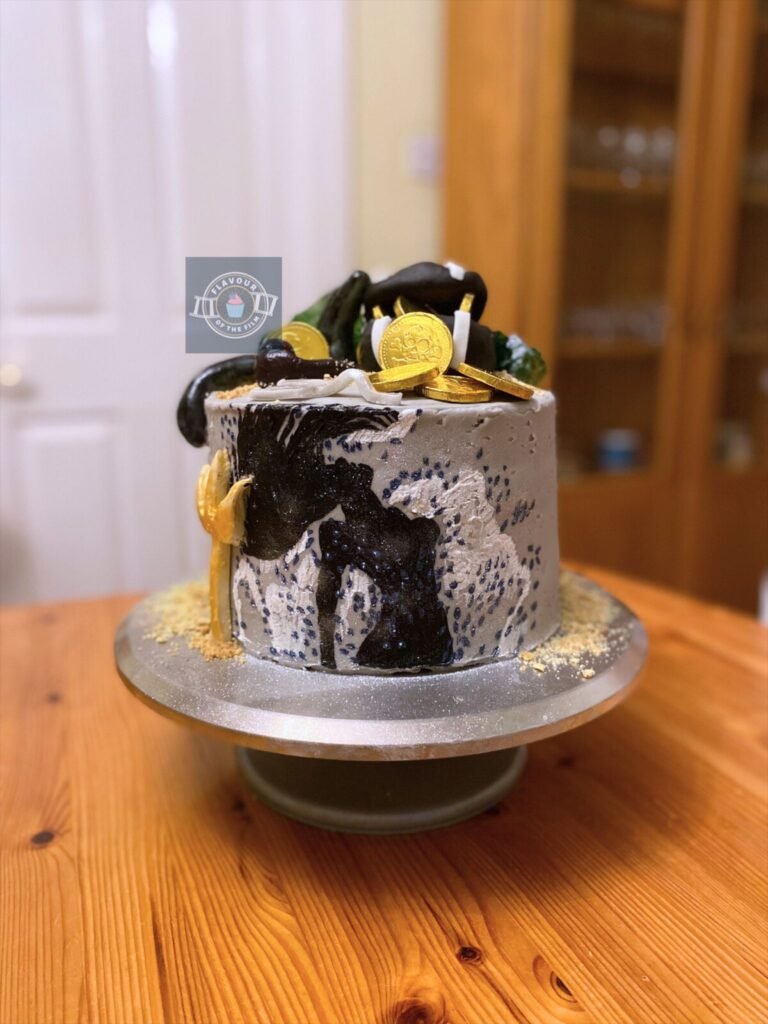
My simple Aladdin cake is completely customisable and features a textured painted buttercream cake look.
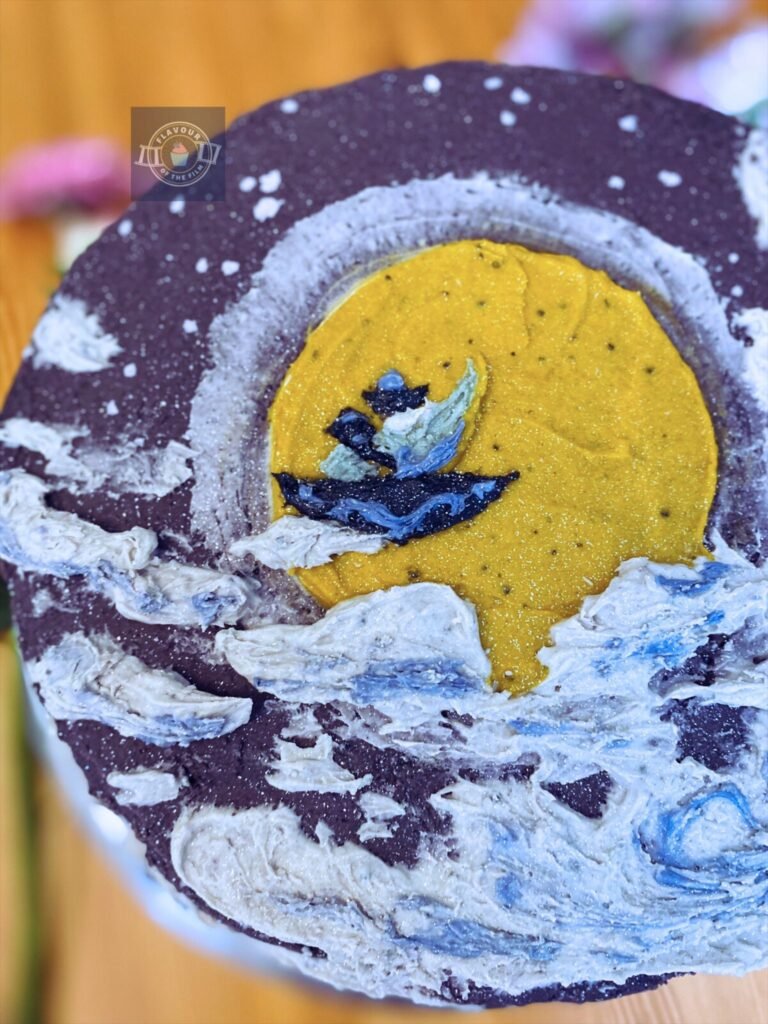
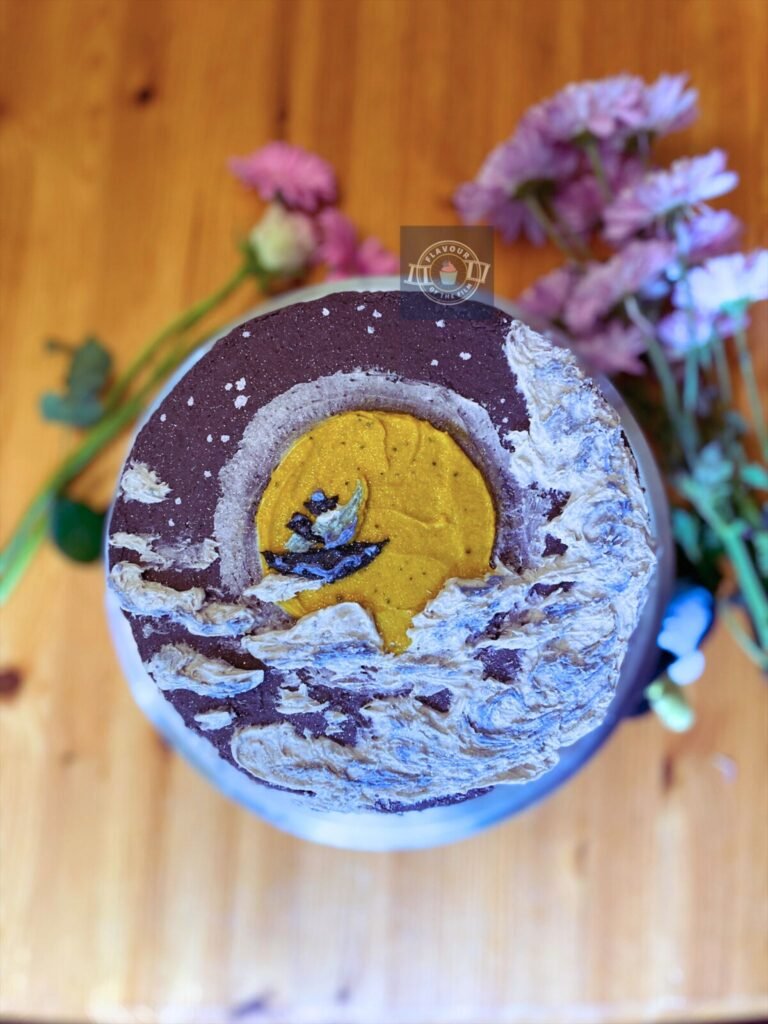
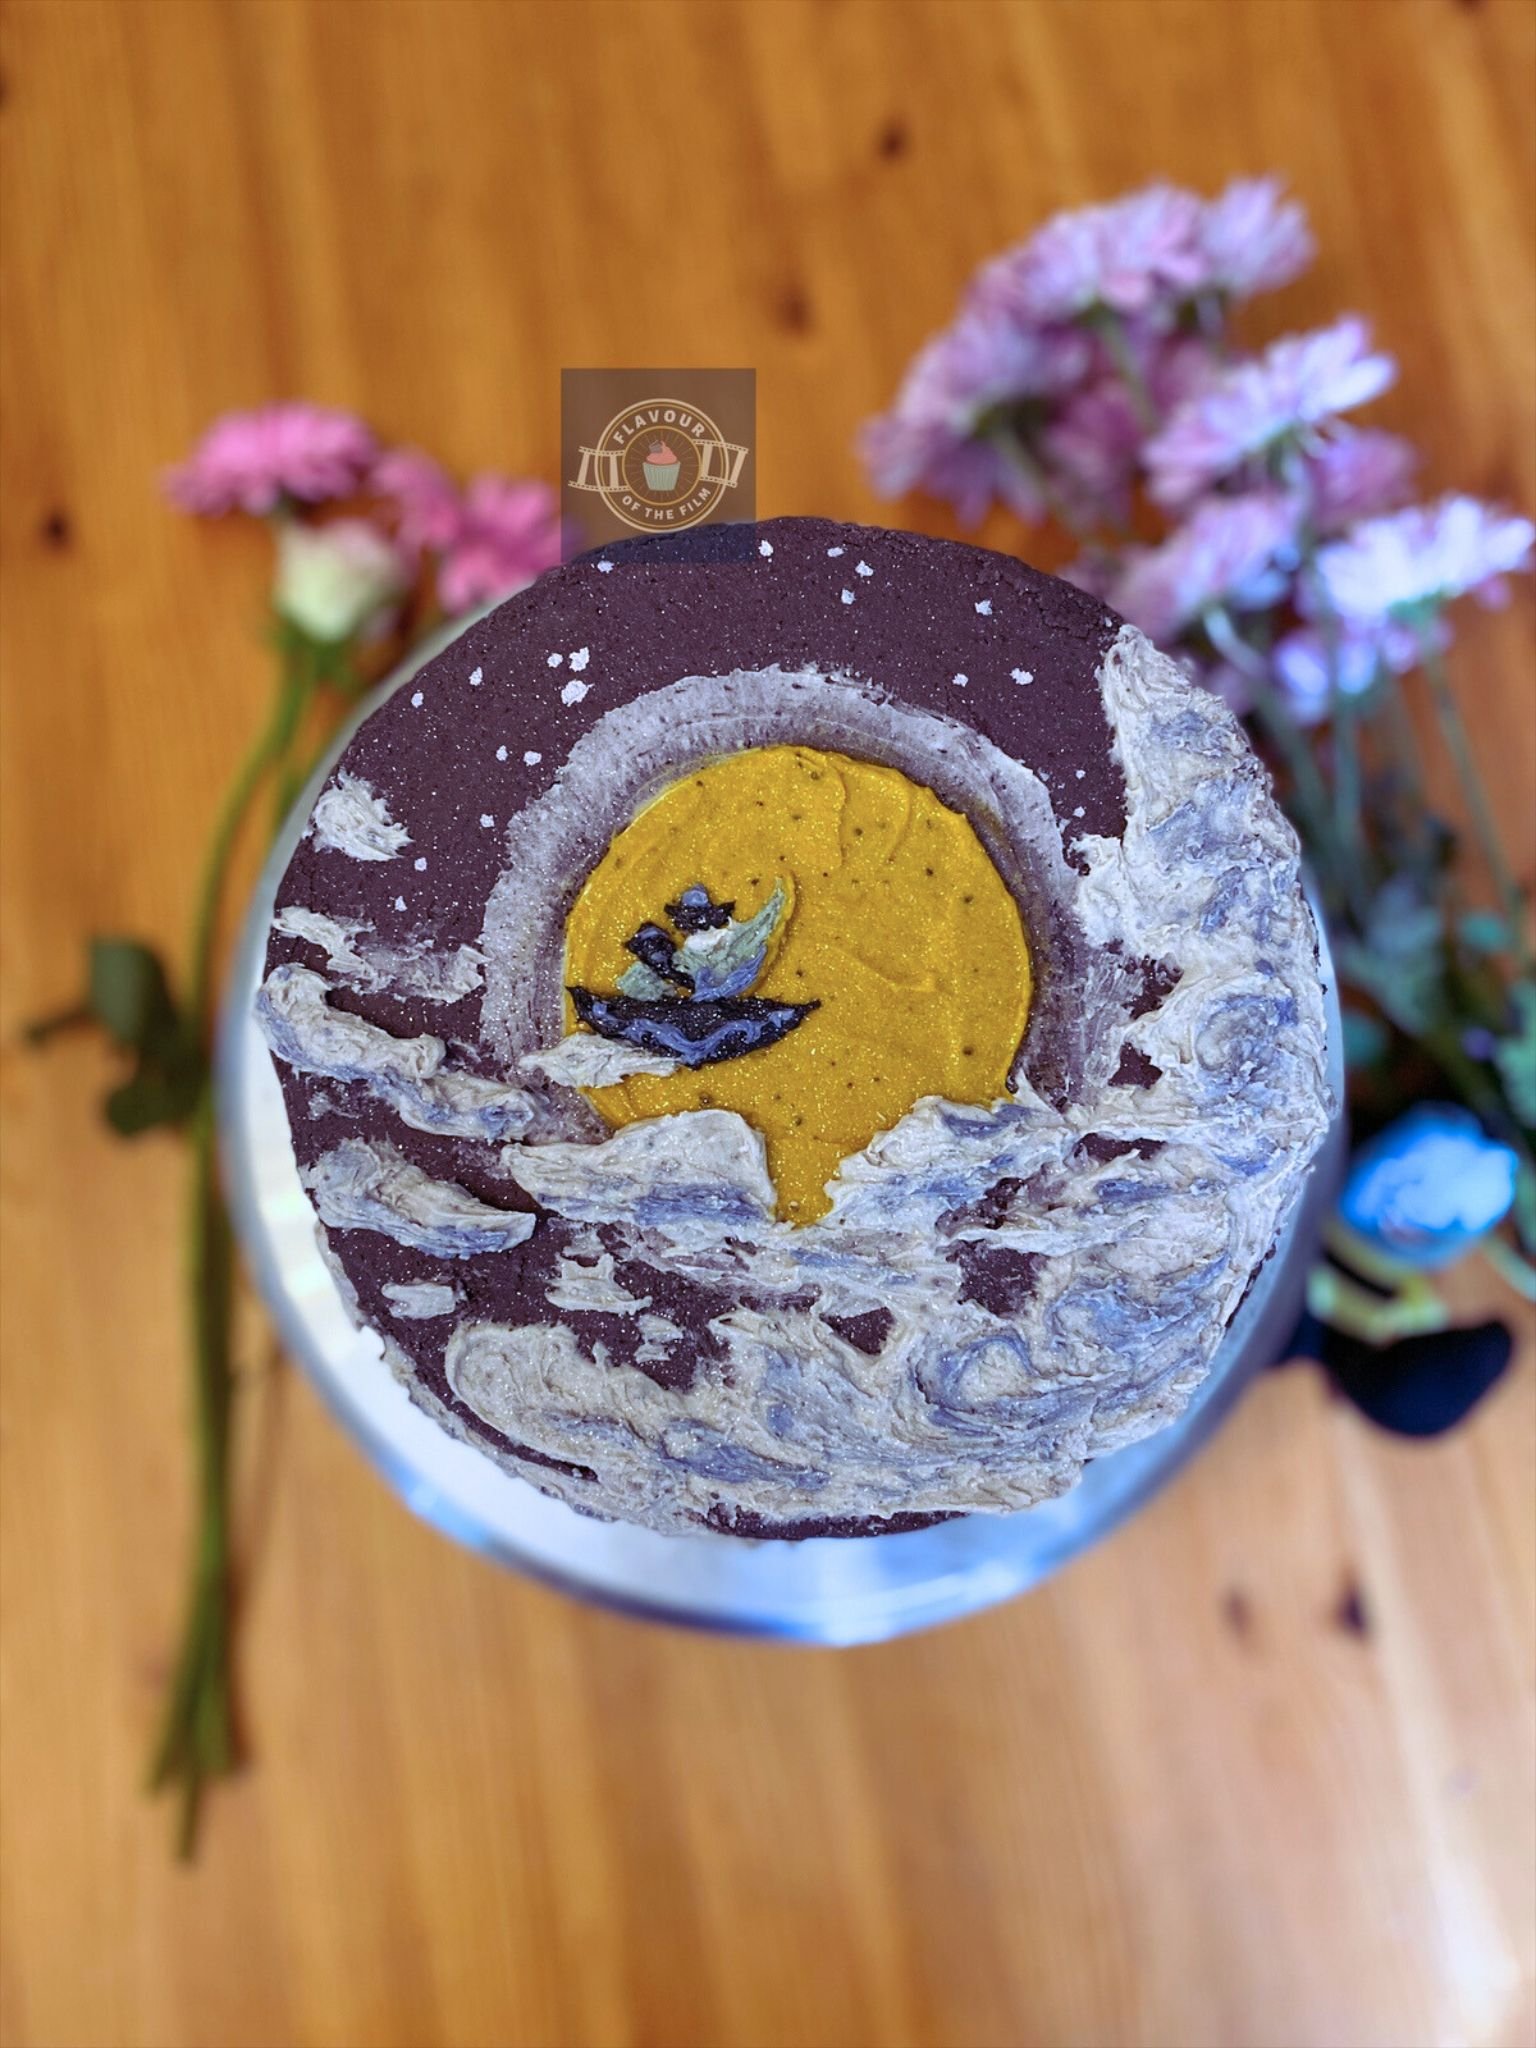
My inspiration for the buttercream was the end shot of the scene centred around the song A Whole New World. Jasmine and Aladdin flying off into the sunset on the magic carpet. Beautiful.
When it came to the colours, I felt like bringing more purple into the ‘sky’ element of the buttercream frosting. This was for two reasons: my favourite colour is purple (it was my birthday cake, after all!) and purple is a core colour in the Aladdin film colour palette.
This is obviously entirely optional, though! You could go for a deep blue, if you are keen to recreate the shot as accurately as possible.
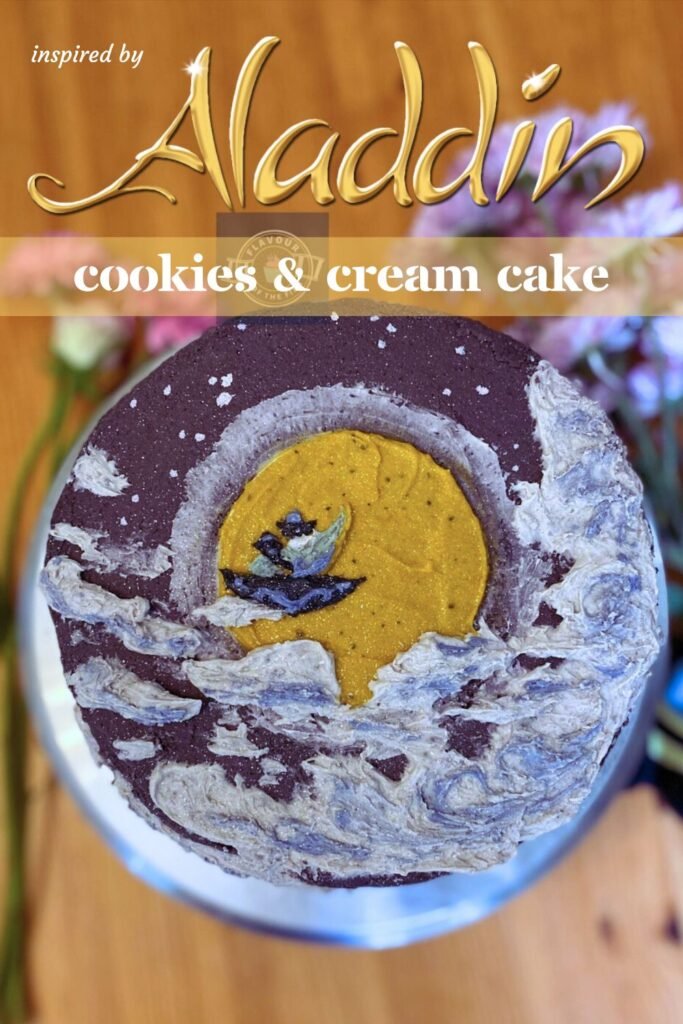
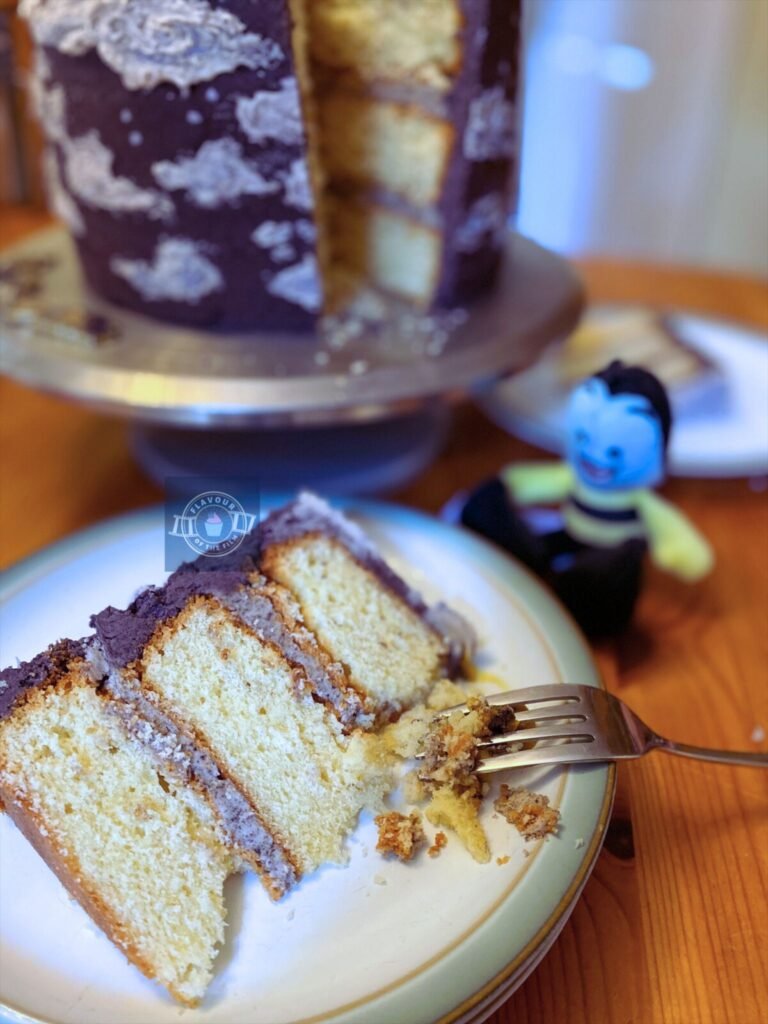
My Aladdin inspired cake is cookies & cream flavour.
That is what I have written in the recipe below. It’s a favourite of mine and is utterly delicious. But, as mentioned above, this is entirely customisable. The sponges can be pretty much whatever flavour you want. So long as the flavouring in the buttercream frosting doesn’t discolour it too much, you can choose whatever you like!
Oreo crumb discolours the buttercream a little, but it’s manageable. If you’re putting something like melted dark chocolate in, that could drastically affect the tint or shade of blue that you end up with, for example.
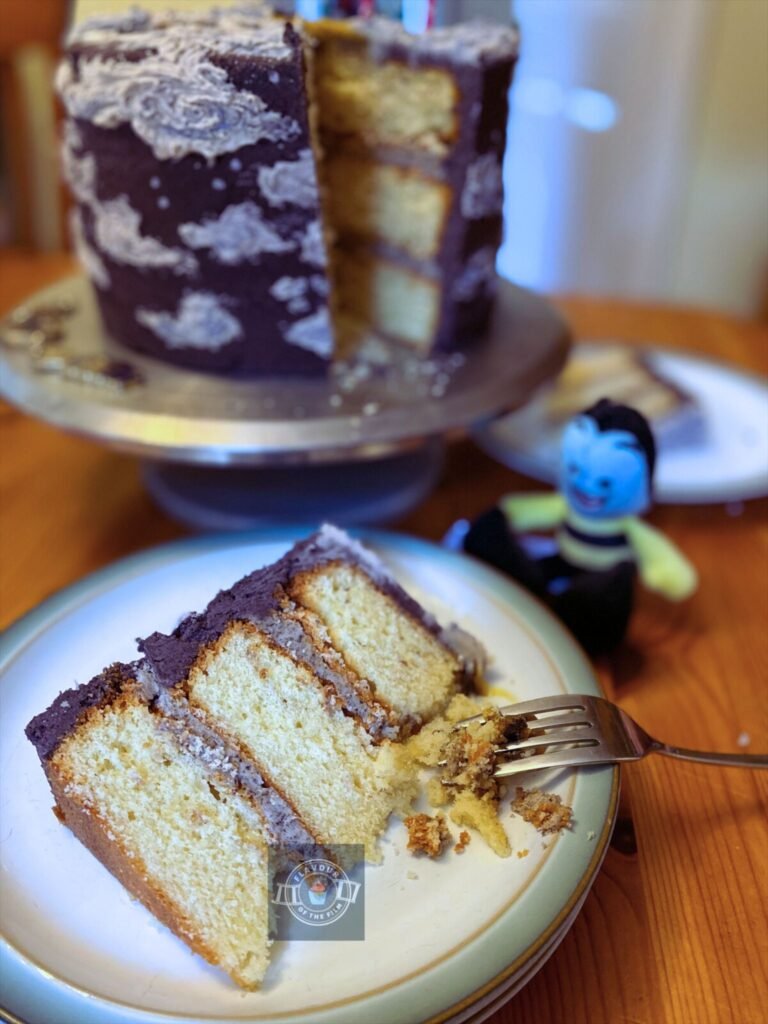
Now, there are multiple ways of how to paint on a cake.
To create that textured painted buttercream look for my Aladdin cake, I used a combination of paint brushes and palette knives.
Different sized paint brushes, an offset palette knife and cocktail sticks, to be precise. Trust me when I say that cocktail sticks are your best friend when creating a painted buttercream cake like this. Whether it’s a simple Aladdin cake or not.
Paint brushes and palette knives make it simple to apply the different coloured buttercream onto the cake, but cocktail sticks allow you to create detail and be a little more precise.
The only way I was able to recreate Aladdin and Jasmine’s silhouettes in buttercream form was by using a few cocktail sticks! It may sound fiddly, but using cocktail sticks makes the whole process a lot easier.
Top Tips
- As usual, avoid overmixing the cake batter to achieve a wonderfully fluffy cake texture once baked.
- If making a standard cake sponge like the one in this recipe (i.e. not chocolate fudge or red velvet), weigh out your eggs in their shells and get as close to 400g as you can. Then, weigh out the rest of your ingredients to the exact weight of your eggs. My eggs weighed 411g, so the rest of my ingredients were measured out to 411g.
- Feel free to add extracts or zests and colours to your sponges to really personalise your simple Aladdin cake. Just avoid adding too much moisture like juice, otherwise it’ll throw the whole cake out of balance.
- The buttercream flavour is also customisable. Just be sure to avoid a flavouring that can drastically alter the colour of the buttercream. Something like melted dark chocolate will likely dull any colour you put into the buttercream after, no matter how strong the food dye!
- I recommend using an offset spatula or palette knife, cocktail sticks, paint brushes, and a revolving cake stand. These tools aren’t essential, but will make the whole process a lot easier and help to get you the end result you’re after.
- There is no right or wrong way to do this! The joy of creating a painted buttercream cake is to make it your own. Art is subjective, so have fun with it!
I loved creating this Aladdin inspired cake for my birthday. It disappeared within days, let me tell you. Now that I’ve created multiple painted buttercream cakes, I’m in it for the long haul. So incredibly satisfying to do. This cake is perfect for any Aladdin fan, whether it be a birthday or a flashy movie night. Enjoy!
Happy baking, happy eating!
The Recipe
Ingredients
Aladdin cake sponges:
- 400g [14 oz] unsalted butter
- 400g [2 cups] caster sugar
- 400g eggs (about 6 – 7 medium)
- 400g [2½ cups] self-raising flour
- 2 tsp vanilla extract
Buttercream:
- 500g [17.75 oz] unsalted butter
- 1kg [6¾ cups + 2 tbsp] icing [confectioners] sugar
- 1 single pack Oreos
- Splash of milk
- Purple or deep blue food colouring oil based
- Yellow food colouring oil based
- White food colouring oil based
- Light blue food colouring oil based
- Black food colouring oil based
- Edible glitter optional
Serves: 12 +
Preparation time: 20 minutes
Baking time: 30 – 40 minutes
Decorating time: 1 hour
Method
Aladdin cake sponges:
- Preheat your oven to 180°C [350°F] or 160°C fan. Grease and line three deep 8 inch round cake tins. Set aside.
- In a large mixing bowl, cream together the butter and sugar until light and fluffy.
- Beat in the eggs, one at a time, until fully incorporated.
- Add in the vanilla and beat in.
- Sieve the flour over the mixture and mix in until you see no visible remnants of flour.
- Divide the mixture evenly into your lined cake tins.
- Bake on the middle shelves for 30 – 35 minutes until baked. The length of time your cakes take to bake may take up to 40 minutes – this is dependent on how hot your oven runs.
- Your cakes will be baked when a cocktail stick or skewer comes out clean when tested; the surface of the cakes bounce back when gently pressed on, and you hear little to no crackling/bubbling sound when you listen to them.
- Once baked, leave to cool in the tins for around 10 minutes before transferring upside down onto a wire rack to cool completely.
Buttercream:
- While your cakes are cooling, prepare your buttercream frosting.
- In a food processor, blitz the entire single pack of Oreos into a fine crumb. Alternatively, place all of the Oreo cookies into a sandwich bag, close the bag and then smash the biscuits into a fine crumb with a rolling pin or similar tool.
- In a large bowl, beat the butter to loosen it. Add ⅓ of the icing sugar in and beat in until smooth. Add the other ⅓ and beat in. Repeat with the final ⅓ of icing sugar.
- Pour the Oreo crumb in and beat in. If using extract or juice instead of Oreos, add it in now and beat in until smooth.
- Add the splash of milk and beat in until smooth and slightly looser. This makes it easier to work with. If using juice in your buttercream, skip this step.
- On a paint palette or in separate small bowls, place 2 heaped tbsp of buttercream in one bowl or onto one section of the paint palette. Add the white food colouring and mix in, adding more as and when needed.
- Place a heaped tbsp of buttercream into a separate bowl or on a different section of the paint palette. Add the light blue food colouring and beat in, adding colour until the desired tint is achieved.
- Repeat step 7 for the yellow food colouring and the black food colouring individually.
Decoration:
- Before adding your chosen base colour to the remainder of the buttercream, spoon some into a piping bag or sandwich bag with the end snipped off. The opening should be around ½ inch in diameter. Skip this step if you prefer to spoon the buttercream onto your cake layers.
- Smudge a small amount of buttercream onto your cake stand/plate/board and place the first layer of cake over it.
- Pipe or spoon a layer of buttercream on the top of this cake sponge. Use a palette or cutlery knife to spread it evenly across the surface.
- Place the next cake layer on top of the bottom and cake and repeat step 3.
- Place the last cake layer on the top.
- Add your chosen colour to the remaining buttercream i.e. purple or deep blue and beat in, adjusting until you have the desired tint or shade of your colour. Add another splash of milk and beat in here if needed.
- Spread some of the buttercream onto your cake in a thin layer all over to create a crumb coat.
- Fill a piping bag with the now purple/blue buttercream and pipe on and around the entire cake, spreading it with a palette knife until relatively smooth. Alternatively, simply use the palette knife to dollop and spread the buttercream all over and around the cake until relatively smooth. This is a textured painted buttercream cake: you don’t need to make it completely smooth!
- Chill the cake for 10 – 15 minutes in the fridge.
- Once chilled, you can finish by painting your design on. Start with the offset spatula to paint the sun with the yellow buttercream you mixed earlier. Use a paint brush to gently dab and swipe the clouds on in the white buttercream. Use a cocktail stick to work swirls of light blue buttercream into the clouds.
- Chill for up to 10 minutes now if working in a warm kitchen.
- Use a few cocktail sticks (one per colour) to dab and shape the black, light blue and white buttercream to shape Aladdin and Jasmine’s silhouettes on the magic carpet. You can also use any extra purple buttercream if you have any left over, too.
- Use a clean cocktail stick to neaten any of the detail.
- Finish with a few sprays of edible glitter and a few white stars dotted on for a hint of magic!
This simple Aladdin cake brings together delicious flavours and an impactful textured painted buttercream cake look. It will last for 4+ days when kept in an airtight container/cake case/cake box. You can protect any exposed cake with aluminium foil, too. The cake sponges can be baked and stored in the freezer (wrapped) for up to 3 months. Enjoy!
The Film
I’ve already mentioned it in previous posts like my Hercules inspired recipe, but I’m saying it again. I was a VHS kid and most of my family collection consisted of classic Disney, with the odd extra like The Prince of Egypt (1998) thrown in.
Despite this impressive collection, Aladdin was always the one I was drawn back to over and over again. To the point that my VHS copy was so worn out that the tape actually unravelled. I worked that poor tape into a state of barely existing.
I’m not entirely sure that I can pinpoint exactly what it was about Aladdin that made me love it so much. The music… the story… the vivid colour palette… the display of a culture that was so different to what I was growing up in… there are a number of theories that I could entertain.
But, at the root of it all, I just loved watching Aladdin because it was a story about true love finding a way.
Two souls finding their way home to one another despite the stark differences in their social and economic statuses. Despite the fact that one soul is living from bread crumb to bread crumb and the other is living (locked up in) a palace of riches and lavish luxury.
In case anyone is in need of a refresh: Aladdin (1992) follows the story of a young street thief who is used by the Sultan’s power-hungry Grand Vizier to carry out the dangerous task of retrieving the genie’s lamp from the Cave of Wonders.
After nearly losing his life during this task, Aladdin discovers the magic of the lamp – and the genie within. Aladdin wishes to become a prince so that he may be “worthy” of Jasmine, the woman he has fallen in love with.
Otherwise known as Princess Jasmine; the woman desperate to escape her palace prison and not marry a man she has not chosen herself, let alone one that she does not love.

Yes, there are absolutely elements of Aladdin that are outdated.
It is based on the original text written by Antoine Galland – a writer who lived in the 17th and 18th centuries, after all. So long as we recognise the outdated elements as exactly that, and choose not to adhere to or encourage them – Jasmine’s lack of power and say in her own life as an example – we can still enjoy this otherwise wonderful film.
The storytellers at Disney recognise this, having made changes to their own original version of the story in their live action adaptation: Aladdin (2019).
Genie is quite possibly one of my favourite Disney characters of all time.
Robin Williams was a master of his craft. I gush about him in my Mrs. Doubtfire cake recipe for good reason.
But, Robin Williams as Genie in Aladdin is next level. Hearing his voice in the role of Genie is like being wrapped up in a comfort blanket.
Alongside Robin Williams were brilliant actors Scott Wienger; Linda Larkin, Frank Welker, Douglas Seele, Jonathan Freeman, Gilbert Gottfried, Charlie Adler, and more.
Responsible for the film’s direction were classic Disney regulars, Ron Clements and John Musker. Alongside them on the writing team were Ted Elliott and Terry Rossio, as well as a whole host of other storytellers.
Disney composing legend Alan Menken was behind the music of Aladdin.
Alan Menken. What a guy. He really has produced some of the most recognisable songs in film history. I’m listening to some of his work as I write this!
What can I say? Disney gives me all the feels.
Recipe Card
Disney’s Aladdin Painted Buttercream Cake
Ingredients
Aladdin cake sponges:
- 400 g [14 oz] unsalted butter
- 400 g [2 cups] caster sugar
- 400 g eggs about 6 – 7 medium
- 400 g [2½ cups] self-raising flour
- 2 tsp vanilla extract
Buttercream:
- 500 g [17.75 oz] unsalted butter
- 1 kg [6¾ cups + 2 tbsp] icing [confectioners] sugar
- 1 single pack Oreos
- Splash of milk
- Purple or deep blue food colouring oil based
- Yellow food colouring oil based
- White food colouring oil based
- Light blue food colouring oil based
- Black food colouring oil based
- Edible glitter optional
Instructions
Aladdin cake sponges:
- Preheat your oven to 180°C [350°F] or 160°C fan. Grease and line three deep 8 inch round cake tins. Set aside.
- In a large mixing bowl, cream together the butter and sugar until light and fluffy.
- Beat in the eggs, one at a time, until fully incorporated.
- Add in the vanilla and beat in.
- Sieve the flour over the mixture and mix in until you see no visible remnants of flour.
- Divide the mixture evenly into your lined cake tins.
- Bake on the middle shelves for 30 – 35 minutes until baked. The length of time your cakes take to bake may take up to 40 minutes – this is dependent on how hot your oven runs.
- Your cakes will be baked when a cocktail stick or skewer comes out clean when tested; the surface of the cakes bounce back when gently pressed on, and you hear little to no crackling/bubbling sound when you listen to them.
- Once baked, leave to cool in the tins for around 10 minutes before transferring upside down onto a wire rack to cool completely.
Buttercream:
- While your cakes are cooling, prepare your buttercream frosting.
- In a food processor, blitz the entire single pack of Oreos into a fine crumb. Alternatively, place all of the Oreo cookies into a sandwich bag, close the bag and then smash the biscuits into a fine crumb with a rolling pin or similar tool.
- In a large bowl, beat the butter to loosen it. Add ⅓ of the icing sugar in and beat in until smooth. Add the other ⅓ and beat in. Repeat with the final ⅓ of icing sugar.
- Pour the Oreo crumb in and beat in. If using extract or juice instead of Oreos, add it in now and beat in until smooth.
- Add the splash of milk and beat in until smooth and slightly looser. This makes it easier to work with. If using juice in your buttercream, skip this step.
- On a paint palette or in separate small bowls, place 2 heaped tbsp of buttercream in one bowl or onto one section of the paint palette. Add the white food colouring and mix in, adding more as and when needed.
- Place a heaped tbsp of buttercream into a separate bowl or on a different section of the paint palette. Add the light blue food colouring and beat in, adding colour until the desired tint is achieved.
- Repeat step 7 for the yellow food colouring and the black food colouring individually.
Decoration:
- Before adding your chosen base colour to the remainder of the buttercream, spoon some into a piping bag or sandwich bag with the end snipped off. The opening should be around ½ inch in diameter. Skip this step if you prefer to spoon the buttercream onto your cake layers.
- Smudge a small amount of buttercream onto your cake stand/plate/board and place the first layer of cake over it.
- Pipe or spoon a layer of buttercream on the top of this cake sponge. Use a palette or cutlery knife to spread it evenly across the surface.
- Place the next cake layer on top of the bottom and cake and repeat step 3.
- Place the last cake layer on the top.
- Add your chosen colour to the remaining buttercream i.e. purple or deep blue and beat in, adjusting until you have the desired tint or shade of your colour. Add another splash of milk and beat in here if needed.
- Spread some of the buttercream onto your cake in a thin layer all over to create a crumb coat.
- Fill a piping bag with the now purple/blue buttercream and pipe on and around the entire cake, spreading it with a palette knife until relatively smooth. Alternatively, simply use the palette knife to dollop and spread the buttercream all over and around the cake until relatively smooth. This is a textured painted buttercream cake: you don’t need to make it completely smooth!
- Chill the cake for 10 – 15 minutes in the fridge.
- Once chilled, you can finish by painting your design on. Start with the offset spatula to paint the sun with the yellow buttercream you mixed earlier. Use a paint brush to gently dab and swipe the clouds on in the white buttercream. Use a cocktail stick to work swirls of light blue buttercream into the clouds.
- Chill for up to 10 minutes now if working in a warm kitchen.
- Use a few cocktail sticks (one per colour) to dab and shape the black, light blue and white buttercream to shape Aladdin and Jasmine’s silhouettes on the magic carpet. You can also use any extra purple buttercream if you have any left over, too.
- Use a clean cocktail stick to neaten any of the detail.
- Finish with a few sprays of edible glitter and a few white stars dotted on for a hint of magic!
Notes
© Flavour of the Film. All content and imagery is copyright protected. Please do not use any of my images or written content without prior permission. If you would like to share any of the recipes or images on Flavour of the Film, please link back to the recipe in question and rewrite it in your own words, crediting Flavour of the Film as the original source.




3 Comments
Comments are closed.