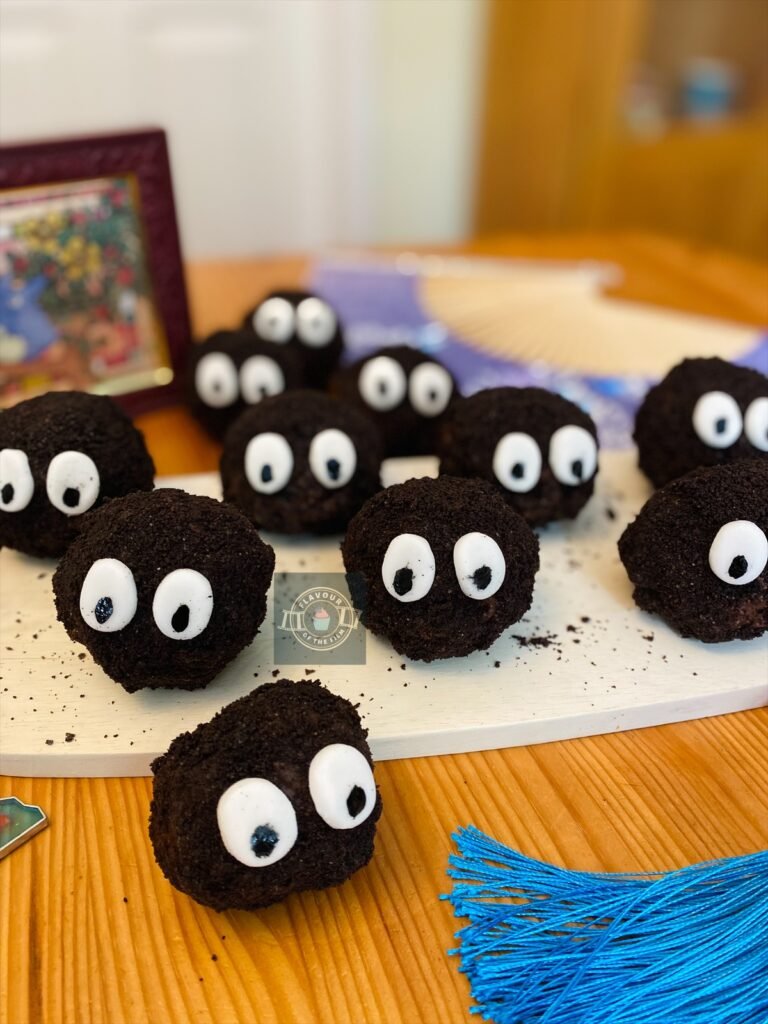
It’s a short and sweet one! Both literally and figuratively. My chocolate covered cookie dough bites are the perfect no-bake movie night snack for a Studio Ghibli fan. Delicious edible cookie dough covered in indulgent chocolate and an Oreo crumb; these moreish little goodies would also make the best addition to any Studio Ghibli themed party! Can you hear the cicadas? Let’s dive in.
Contents
The Bake
I won’t sugar coat it, friends. I just really fancied whipping up a cookie dough based recipe this week. It just works out that I can make these delicious bites of indulgence look like soot sprites!
I love cookies, as you can see from my Percy Jackson and the Olympians blue cookies and my Spider-Man: Into the Spider-Verse triple chocolate cookies. Yet, there is something about edible cookie dough…
There is no particular reason why I picked cookie dough bites and there is certainly no intended link to Studio Ghibli. However, I’m not hung up on this because these chocolate covered cookie dough bites really are SO TASTY.
To make the cookie dough safe for human consumption, you want to make sure to replace the egg with milk.
Lots of recipes call for whole milk to be used, but if I’m honest, I rarely use whole milk. If I have semi-skimmed, I’ll use that. Sometimes I like to use almond milk.
The egg is the binding ingredient in cookies above all else, so as long as your milk binds your cookie dough mixture properly, you should be able to use whatever milk or milk alternative that you prefer.
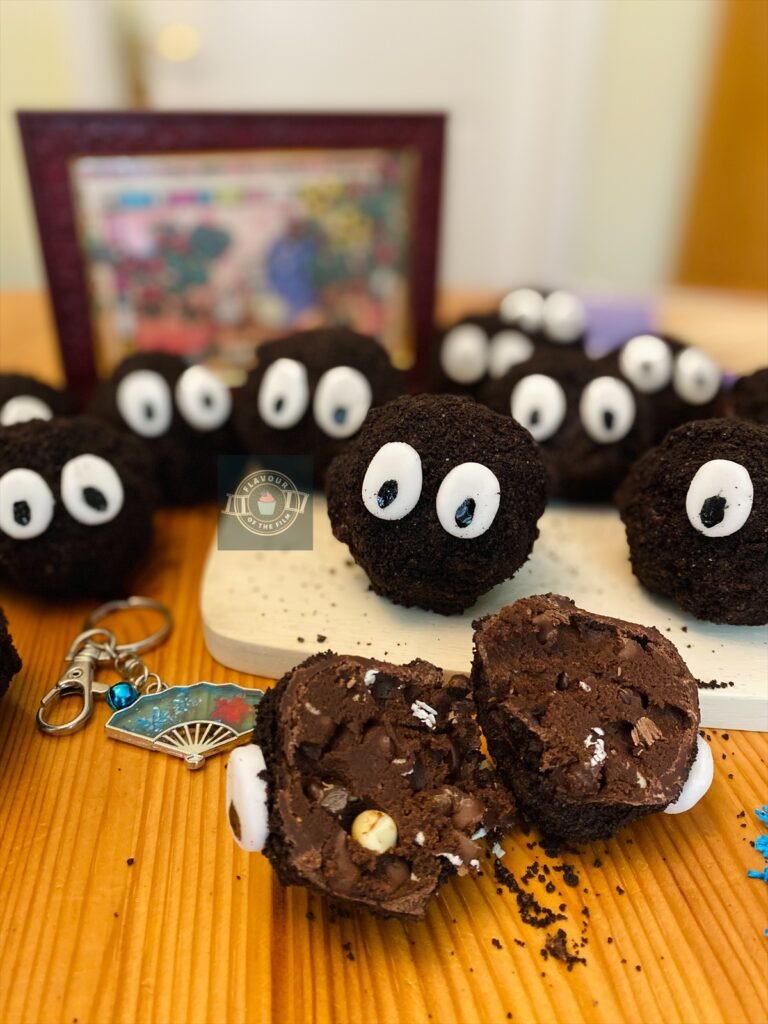
My chocolate covered cookie dough bites are made with triple chocolate cookie dough.
The main reason for this decision was to make it easier to cover the cookie dough and not worry about patchiness. These bites are pretty big if compared to something like truffles, so the risk of missing parts while covering them was higher.
The other reason is because triple chocolate cookie dough is next level delicious. I mean, seriously. The indulgence is out of this world. The perfect movie snack or party treat for the chocolate lovers! Which, I count myself as. Chocolate all day, any day.
The chocolate coating is made with chocolate tempered in the microwave.
This is a lot easier than it sounds, and is the method that I have previously used in recipes like my Forrest Gump box of chocolates and my Jujutsu Kaisen Sakuna ladyfingers.
This is what the Oreo crumb needs to stick to. It’s easiest to coat a few of the cookie dough bites in a row, then roll the first couple of bites that you’ve just coated in the Oreo crumb in the same order. They will have set enough to not smudge, but not enough that the Oreo doesn’t stick.

To create a fuzzy texture for the soot sprite cookie dough bites, I used Oreo crumbs.
Not just any Oreo cookies, though. Oh, no. I used brownie flavoured Oreo cookies.
Again, the level of tastiness makes me a little speechless. But, it was also a practical decision, given the fact that soot sprites are a dark shade all around. The creme part of brownie flavoured Oreo cookies is brown, so it blends in well.
However, I have found that when blitzed, original Oreo cookies still remain pretty dark. So, if it’s preferred or if for some reason you don’t have access to brownie flavoured Oreo cookies, you can use the original flavour instead.
Just avoid the double stuffed Oreo cookies, otherwise the creme may discolour the mixture too much.
Even if the crumb turns out a little paler, the lighter flecks will just give your chocolate covered cookie dough bites some extra texture and varying shades, which is cool!


For extra texture, I added crushed Rice Krispies to the chocolate coating.
This was purely to add extra crunch around the outside and to aid achieving the fuzzy appearance that are associated with Ghibli soot sprites. I just blitzed the Rice Krispies in a food processor as I did with the Oreo cookies, but this is an optional step.
I highly recommend adding the crushed Rice Krispies as they really do provide the most delicious extra crunch around the outside! Alternatively, you could blitz a different sort of cereal if preferred, so long as it’s chocolate like Coco Pops, or a very subtle flavour like Cornflakes.

To finish, I shaped the edible soot sprite eyes out of leftover white sugar paste.
Then, I stuck them on with a dab or two of water. I hand painted the pupils using black food colouring, but you could do the same using melted chocolate if you have any left.
I would suggest using candy eyes that you can buy from most supermarkets – I used these in my Everything Everywhere All at Once bagels recipe – but they’re a little rounder than the eyes of a Ghibli soot sprite.
What can I say? I’m a sucker for detail. But, if this doesn’t bother you that much, you can just as easily use candy eyes instead of sugar paste or fondant. That’s your prerogative, friends.
Top Tips
- If you want to make plain cookie dough instead of triple chocolate, simply replace the cocoa powder with plain flour in equal amounts. So, instead of using 65g cocoa powder, just add 65g more plain flour.
- Make sure to bake the flour as instructed before adding it to your cookie dough mixture. This is an important step to make sure the flour is safe to eat in a no-bake recipe.
- The chocolate you use is completely your choice. However, dark chocolate melts much better than a lot of milk chocolates out there. So, I recommend melting the milk chocolate you are using with a couple of squares of dark chocolate to loosen the entire mixture. It also creates a richer taste without being bitter, so a win all round.
- Make sure to freeze the balls of cookie dough before attempting to coat them. These will make creating your chocolate covered cookie dough bites a lot easier!
- Tempering the chocolate for the coating is much easier than many realise and is so worth doing – it means that your chocolate covered cookie dough bites stay solid at room temperature. Which also means that you don’t have to keep them in the fridge!
- Work fast when applying the Oreo cookie crumb. You want to allow the chocolate coating to set so that it doesn’t immediately come off when you touch it, but not enough that the Oreo crumb doesn’t stick to it. Depending on the temperature of your kitchen, this may take a few seconds to a couple of minutes. Be sure to keep an eye on them!
- The Rice Krispies are completely optional, but they do add a delicious crunch to the exterior of the chocolate covered cookie dough bites. If omitting the Rice Krispies, use 100g less chocolate for the coating.
- If you want to make a double batch, simply double the amounts of all of the ingredients.
These chocolate covered cookie dough bites really are little bites of heaven. They are so easy and so fun to make. A great no-bake addition to any Studio Ghibli movie night or themed party, too. Enjoy!
Happy baking, happy eating!
The Recipe
Ingredients
Cookie dough:
- 315g [1¾ cup + 3 tbsp] plain [all-purpose] flour
- 65g [½ cup + 1 tbsp] cocoa powder
- 220g [7.75 oz] unsalted butter
- 200g [1 cup] light brown sugar
- 80g [¼ cup + 2 tbsp] dark brown sugar
- 65ml [2.5 oz] milk of your choice
- 100g [3.5 oz] dark chocolate chips
- 100g [3.5 oz] milk chocolate chips
- 100g [3.5 oz] white chocolate chips
Chocolate coating:
- 500g [17.75 oz] milk and/or dark chocolate
- 100g – 150g [around 5 large handfuls] Rice Krispies optional
Decoration:
- 154g single pack of Oreo cookies
- White sugar paste or fondant
- Black liquid food colouring optional
Serves: 18 – 20
Preparation time: 20 minutes
Baking time: 5 minutes
Chilling time: 1 hour
Decorating time: 30 minutes
Method
Cookie dough:
- Preheat your oven to 200°C [390°F] or 180°C fan. Line a baking tray with greaseproof paper/baking parchment.
- Weigh out your flour and then pour it onto the lined baking tray, spreading it out as much as possible.
- Bake the flour for 5 minutes to make it safe to consume. Once baked, allow to cool completely on the side. I like to carefully slide the sheet of greaseproof paper with the flour on it directly onto my work surface, so the cold surface cools the flour more quickly.
- While the flour is cooling, prepare the rest of your ingredients. In a large mixing bowl, cream together the butter and both sugars until light and fluffy.
- Pour in the milk and beat in. Don’t worry if it looks a little funky right now.
- Add the cocoa powder and beat in.
- Before adding the flour, use your fingertips to work through it and crush any lumps that have formed. As long as you get the bigger ones, you’re good.
- Pour the flour into the mixture and beat in until a cookie dough has formed. Keep the sheet of greaseproof paper and place it back on the baking tray you used.
- Add in your chocolate chips and fold them through until evenly distributed.
- Shape your cookie dough bites into equal sized balls. The size you choose is up to you – but the bigger they are, the easier they are to decorate. I aimed for a golf ball size.
- Place your shaped cookie dough bites on the lined baking tray and freeze them for 1 hour. They can be left in the freezer for longer, but cover them securely if needing to freeze overnight.
Chocolate coating:
- When the 1 hour of freezing time is nearly up, begin preparing your chocolate coating.
- In a food processor, blitz the entire pack of Oreo cookies. Alternatively, put them into a sandwich bag and close it securely, then smash into crumbs with a rolling pin. Pour into a shallow bowl or onto a plate. Set aside.
- If adding the Rice Krispies or other cereal, repeat step 2 with your chosen cereal.
- In a large heatproof bowl or jug, melt ⅔ of the chocolate for your coating in the microwave in 30 second bursts, stirring in between until completely melted.
- Add the remaining ⅓ of your chocolate and stir in until mostly melted.
- Put the chocolate back into the microwave for a final 10 second burst. Stir your chocolate until completely melted and smooth.
- Fold through the Rice Krispies/cereal crumbs into the chocolate now if doing so.
Final touches:
- Retrieve your cookie dough bites from the freezer.
- Using a spoon and your hand (or a dipping tool if you have one), dip the cookie dough bites into the melted chocolate mixture and completely cover them one at a time. Allow any extra chocolate to drip off, then place the bites back onto the lined tray as you go. Cover 2 – 3 cookie dough bites in chocolate, then pick them back up and roll them in the Oreo crumb in the same order, gently pressing the crumb to the chocolate coating.
- Once all of your cookie dough bites are covered in chocolate and Oreo crumb, leave them on the side to set, or place them in the fridge if it is a warm day.
- On a clean surface, roll out your white sugar paste/fondant to about ¼ inch in thickness. If necessary, sprinkle some icing sugar onto the surface and work the sugar paste/fondant over it to prevent sticking.
- Cut out enough little circles so that each of your cookie dough sprites has a pair of eyes. To do this evenly, I used the wide end of a small piping tip. Gently squeeze the sides of each one to make them more oval-shaped.
- Retrieve your cookie dough bites. Dab some water on the back of one of the sugar paste ovals, then gently press it to the front of one of your cookie dough truffles. Do the same with another to create a pair of eyes, leaving a slight gap between them. Repeat this step until each of your cookie dough sprites has a pair of eyes attached.
- Lastly, either paint on a pupil in each eye using black liquid food colouring, or dab on some melted chocolate to form the pupils instead.
These delectably adorable chocolate covered cookie dough bites make the perfect collection of edible soot sprites. They will stay solid at room temperature but can be kept in an airtight container in the fridge during warmer weather. They can be kept for 1 week, but it is unlikely they won’t be eaten before then! If needing to make the cookie dough ahead, shape into balls then store in an airtight container with greaseproof paper in between them to prevent sticking and freeze for up to 1 month. Do not defrost before covering with chocolate.
The Anime
Every Studio Ghibli fan will know of the soot sprites すすワタリ (Susuwatari). These funny little creatures feature throughout multiple Ghibli films, including My Neighbor Totoro (1988) and Spirited Away (2001).
I mentioned in my My Neighbor Totoro cinnamon bread recipe that I would be creating a recipe inspired by soot sprites at some point. Well, friends, we have reached that point!
What Anime in particular seems to do well is the mystical and magical character that has no dialogue, but that you still end up adoring. Mayazaki’s Ghibli films display a number of these characters, Totoro being one of the most famous.
Soot sprites are no different! Whilst they don’t fit into the main character category, they still make an impact. Enough so for them to be one of the most recognisable images within the world of Anime!
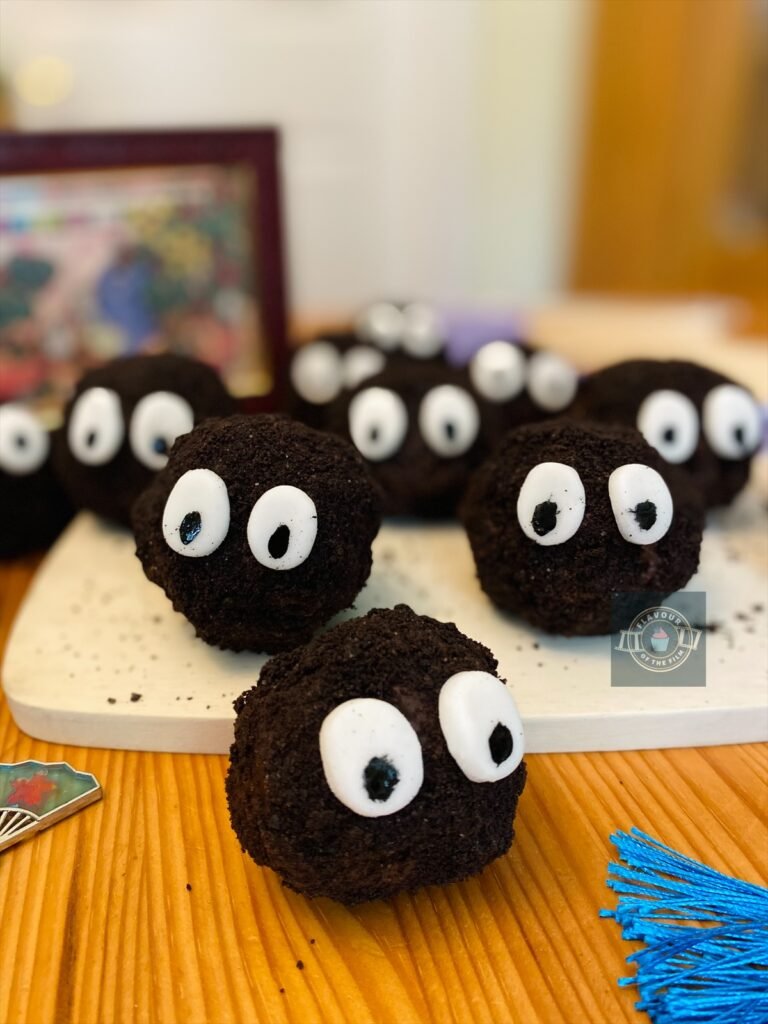

Soot sprites represent an element of a world that is just beyond the human one.
A sense of magic that crosses into the world we are able to visually comprehend, from a world that we feel is there and yet try to deny the existence of.
In My Neighbor Totoro, the soot sprites are first seen by Mei, who is keen to chase and follow them. Her vibrant sense of wonder makes me want to follow the sprites, too!
Spirited Away is another story focusing on the relocation of a young person, except this time, the protagonist finds her way into a spirit world that goes beyond that of adorable forest spirits.
Soot sprites are an identifying image in a Ghibli film, adding to the magic.
It feels right to create a recipe inspired by these fuzzy little guys.

Recipe Card
Chocolate Covered Cookie Dough Bites | Studio Ghibli Soot Sprites
Ingredients
Cookie dough:
- 315 g [1¾ cup + 3 tbsp] plain [all-purpose] flour
- 65 g [½ cup + 1 tbsp] cocoa powder
- 220 g [7.75 oz] unsalted butter
- 200 g [1 cup] light brown sugar
- 80 g [¼ cup + 2 tbsp] dark brown sugar
- 65 ml [2.5 oz] milk of your choice
- 100 g [3.5 oz] dark chocolate chips
- 100 g [3.5 oz] milk chocolate chips
- 100 g [3.5 oz] white chocolate chips
Chocolate coating:
- 500 g [17.75 oz] milk and/or dark chocolate
- 100 g – 150g [around 5 large handfuls] Rice Krispies optional
Decoration:
- 154 g single pack of Oreo cookies
- White sugar paste or fondant
- Black liquid food colouring optional
Instructions
Cookie dough:
- Preheat your oven to 200°C [390°F] or 180°C fan. Line a baking tray with greaseproof paper/baking parchment.
- Weigh out your flour and then pour it onto the lined baking tray, spreading it out as much as possible.
- Bake the flour for 5 minutes to make it safe to consume. Once baked, allow to cool completely on the side. I like to carefully slide the sheet of greaseproof paper with the flour on it directly onto my work surface, so the cold surface cools the flour more quickly.
- While the flour is cooling, prepare the rest of your ingredients. In a large mixing bowl, cream together the butter and both sugars until light and fluffy.
- Pour in the milk and beat in. Don’t worry if it looks a little funky right now.
- Add the cocoa powder and beat in.
- Before adding the flour, use your fingertips to work through it and crush any lumps that have formed. As long as you get the bigger ones, you’re good.
- Pour the flour into the mixture and beat in until a cookie dough has formed. Keep the sheet of greaseproof paper and place it back on the baking tray you used.
- Add in your chocolate chips and fold them through until evenly distributed.
- Shape your cookie dough bites into equal sized balls. The size you choose is up to you – but the bigger they are, the easier they are to decorate. I aimed for a golf ball size.
- Place your shaped cookie dough bites on the lined baking tray and freeze them for 1 hour. They can be left in the freezer for longer, but cover them securely if needing to freeze overnight.
Chocolate coating:
- When the 1 hour of freezing time is nearly up, begin preparing your chocolate coating.
- In a food processor, blitz the entire pack of Oreo cookies. Alternatively, put them into a sandwich bag and close it securely, then smash into crumbs with a rolling pin. Pour into a shallow bowl or onto a plate. Set aside.
- If adding the Rice Krispies or other cereal, repeat step 2 with your chosen cereal.
- In a large heatproof bowl or jug, melt ⅔ of the chocolate for your coating in the microwave in 30 second bursts, stirring in between until completely melted.
- Add the remaining ⅓ of your chocolate and stir in until mostly melted.
- Put the chocolate back into the microwave for a final 10 second burst. Stir your chocolate until completely melted and smooth.
- Fold through the Rice Krispies/cereal crumbs into the chocolate now if doing so.
Final touches:
- Retrieve your cookie dough bites from the freezer.
- Using a spoon and your hand (or a dipping tool if you have one), dip the cookie dough bites into the melted chocolate mixture and completely cover them one at a time. Allow any extra chocolate to drip off, then place the bites back onto the lined tray as you go. Cover 2 – 3 cookie dough bites in chocolate, then pick them back up and roll them in the Oreo crumb in the same order, gently pressing the crumb to the chocolate coating.
- Once all of your cookie dough bites are covered in chocolate and Oreo crumb, leave them on the side to set, or place them in the fridge if it is a warm day.
- On a clean surface, roll out your white sugar paste/fondant to about ¼ inch in thickness. If necessary, sprinkle some icing sugar onto the surface and work the sugar paste/fondant over it to prevent sticking.
- Cut out enough little circles so that each of your cookie dough sprites has a pair of eyes. To do this evenly, I used the wide end of a small piping tip. Gently squeeze the sides of each one to make them more oval-shaped.
- Retrieve your cookie dough bites. Dab some water on the back of one of the sugar paste ovals, then gently press it to the front of one of your cookie dough truffles. Do the same with another to create a pair of eyes, leaving a slight gap between them. Repeat this step until each of your cookie dough sprites has a pair of eyes attached.
- Lastly, either paint on a pupil in each eye using black liquid food colouring, or dab on some melted chocolate to form the pupils instead.
Notes
© Flavour of the Film. All content and imagery is copyright protected. Please do not use any of my images or written content without prior permission. If you would like to share any of the recipes or images on Flavour of the Film, please link back to the recipe in question and rewrite it in your own words, crediting Flavour of the Film as the original source.






6 Comments
Comments are closed.