
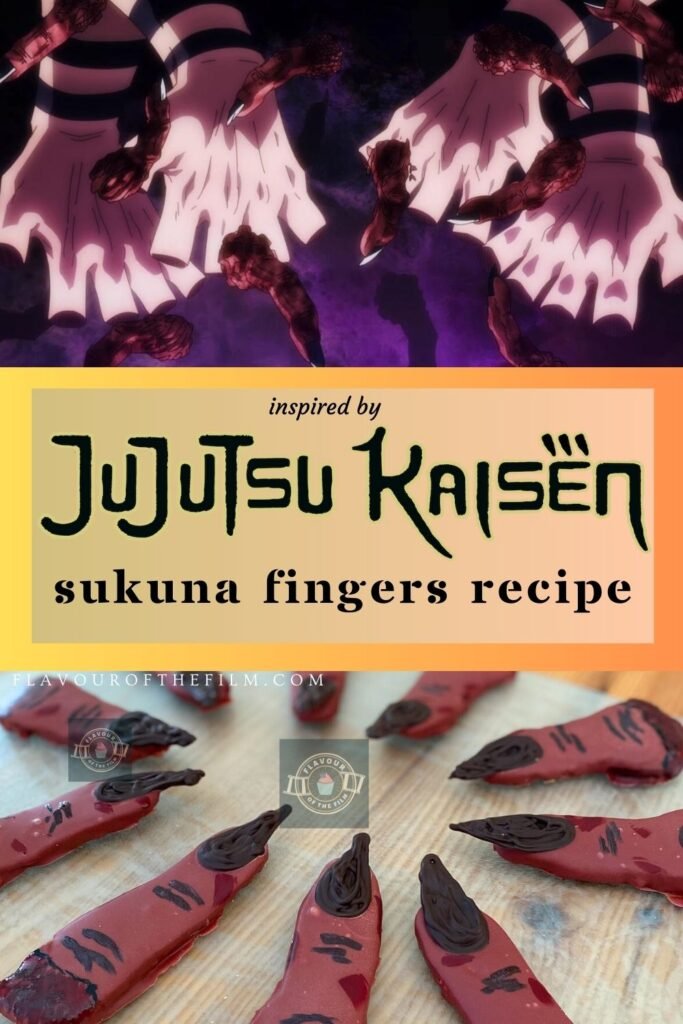
やったよ! Yes, friends. It’s a new Anime inspired recipe! In honour of the second season of Jujutsu Kaisen starting its run, I figured I’d whip up a little something that every JJK fan can make as a viewing snack. My Jujutsu Kaisen Sukuna fingers make a smashing viewing treat. Let’s find your technique.
Contents
The Bake
When I was at the drawing board, coming up with ideas for a JJK bake, I had this one particularly inspired thought that equally thrilled and repulsed me. Based on my reaction, I knew I had to go with it.
Seeing as Yuuji swallows a demon finger, I thought… why not make a delicious snack shaped like disgusting Jujutsu Kaisen Sukuna fingers? Plenty appetising, right?


his is definitely a recipe that only JJK fans would understand and feel drawn to.
You’ve got to know the show to understand why you’re making treats that look as disgusting as these.
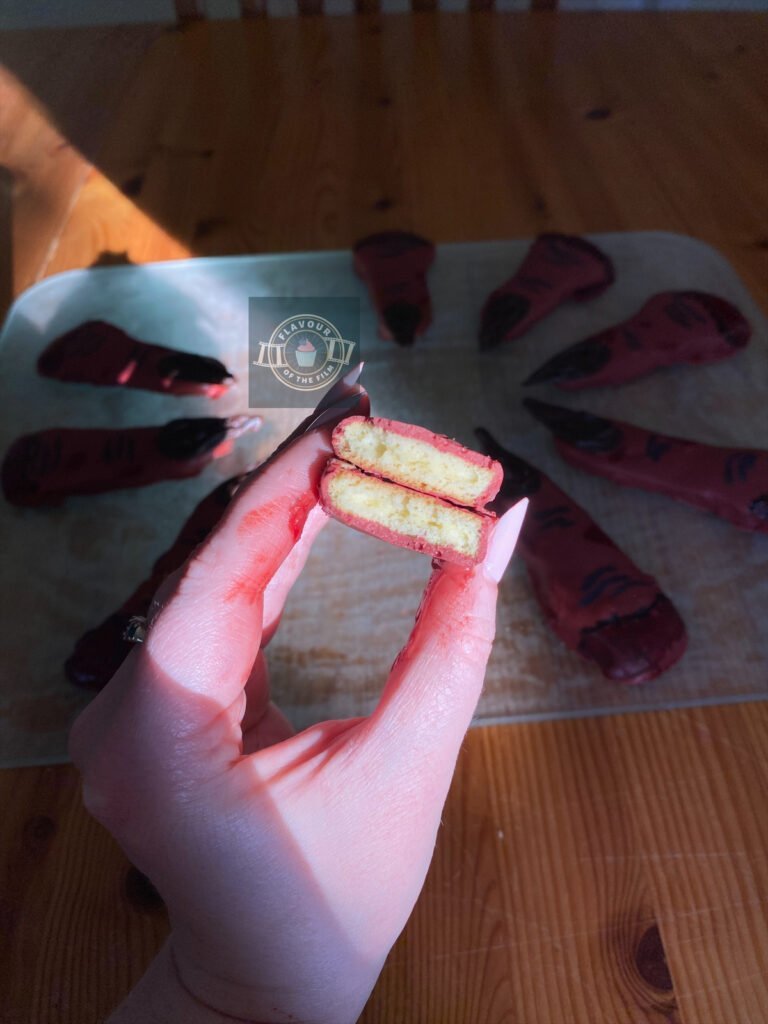
Once I’d decided on the demon finger vibe, my brain immediately linked to an age-old treat that usually comes with tea or coffee at a posh hotel or in a British trifle: ladyfingers.
Ladyfingers are light and delicate and certainly moreish.
In terms of texture, they’re a sort of cross between biscuit and cake as they’re both crunchy like a biscuit in parts and soft like a cake sponge in others. Usually, they are served as they are: uncovered and with a subtle sweet flavour. That wasn’t going to do here on Flavour of the Film.
After baking the ladyfingers and shaping them a little more sharply using a small kitchen knife, I tempered white chocolate and added the food colouring. I then dipped the ladyfingers in to completely cover them.
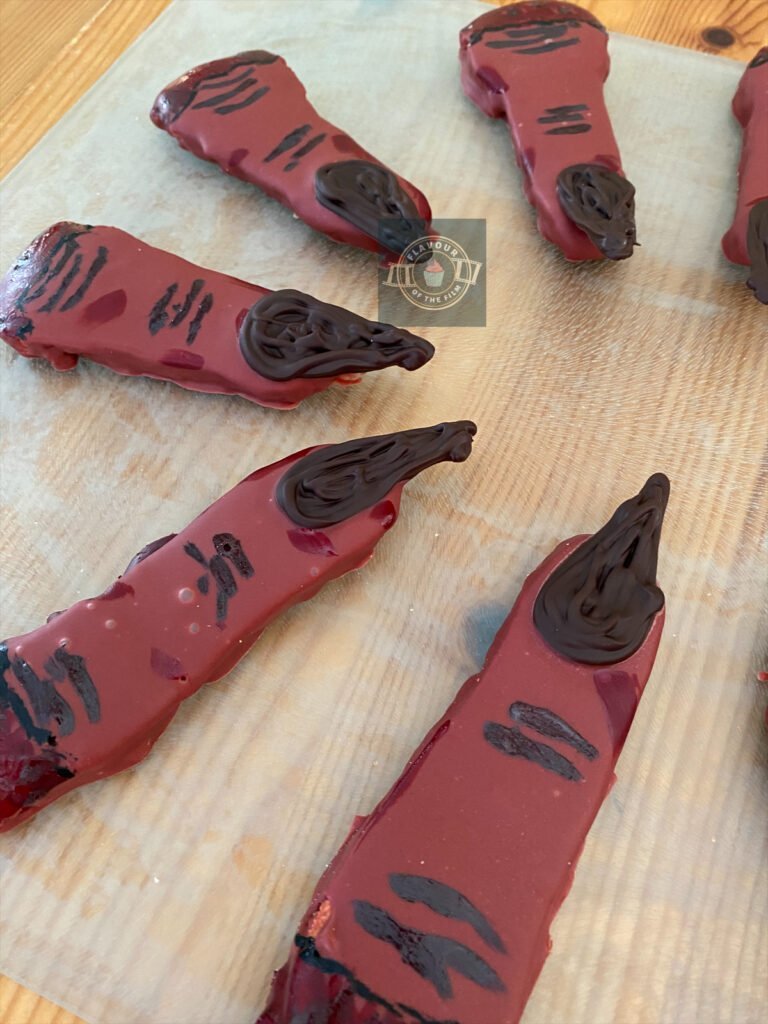
After all, the Jujutsu Kaisen Sukuna fingers that Yuuji swallows are a nasty dull pink colour.
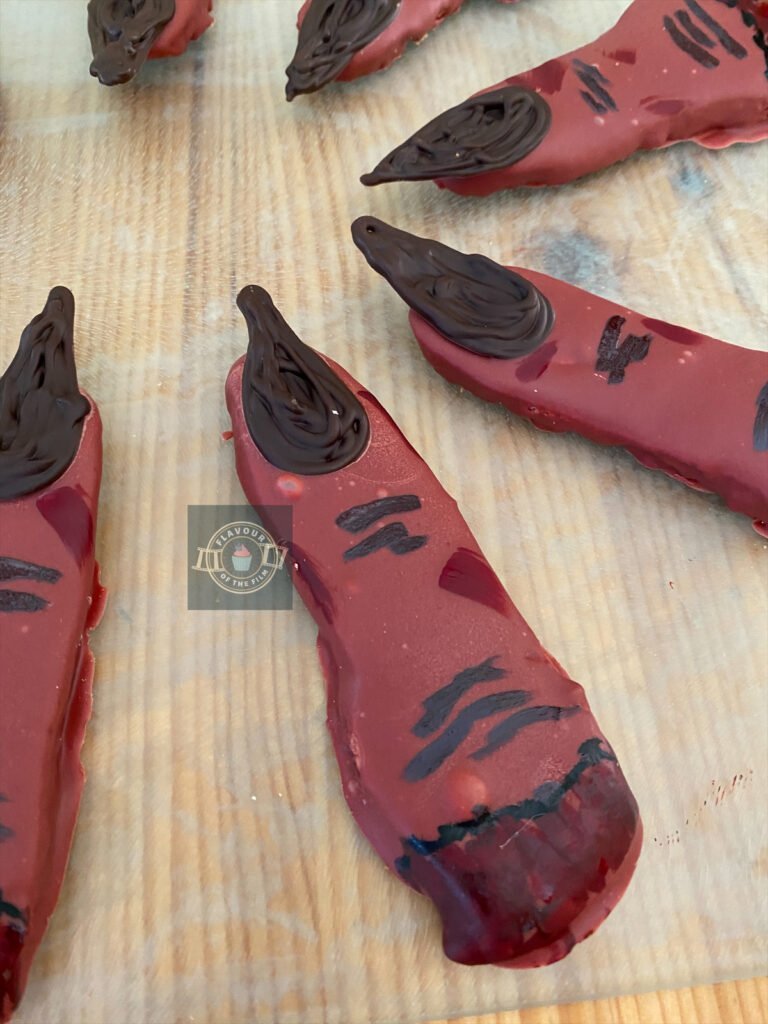
It also looks as if each finger has been ripped off so there is a fleshy end to them. To achieve this, I used a small paintbrush to paint on areas of red and black etc. It gave them a kind of cartoon vibe which I love.
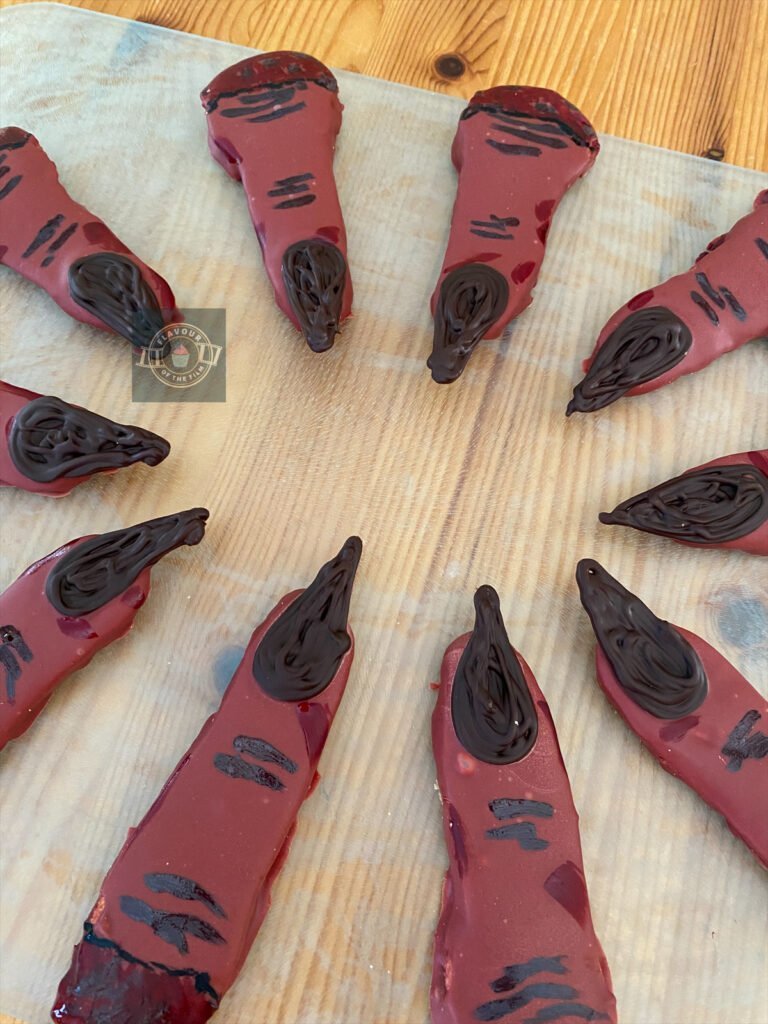
The other element to my Jujutsu Kaisen Sukuna fingers are the long black nails.
To make these, I tempered dark chocolate and piped it into shape on baking trays. I’d made sure they were set in time for when I was covering the fingers. Doing it in this order meant that I could attach the nails straight to the white chocolate covering over the fingers and that would act as a ‘glue’.
It sounds like a lot of time spent tempering chocolate but it doesn’t actually take that long when you follow the instructions!
I go into a bit more detail in my Avatar: The Last Airbender cupcake recipe, but it basically boils down to melting the chocolate up to a high enough temperature then taking it off the heat, seeding in the remaining solid chocolate to cool it back down again, then putting it back onto the heat to warm it through again.
Doing this changes the chemical structure of the chocolate and allows it to stay set at room temperature.
It’s important to do this otherwise you risk all of the chocolate elements in this bake just melting as soon as you get the trays out of the fridge. There’s an even higher likelihood of this happening as it’s July!
You can temper chocolate in the microwave, so I’ve written this recipe with that method in mind.
It’s effective so long as you stir the chocolate in between each burst in the microwave to prevent sugars catching and burning.
If you prefer to temper the chocolate in a bain marie (bowl set over water on heat), you can find clear instructions in my Avatar: The Last Airbender cupcake recipe, where I note specific temperatures needed.
When it came to the flavour of these Jujutsu Kaisen cookie Sukuna fingers, I steered away from the usual vanilla and went for coconut.
Purely because I adore coconut, but also because I love coconut and chocolate together.
Any kind of chocolate and coconut is a win for me. However, the flavour is completely up to you.
You can stick with the vanilla, go for coconut or even switch it out for a citrus flavour like lemon. Lemon and white chocolate… YUM.
Top Tips
- Whatever flavour you choose, make it easy for yourself and use an extract. Adding juice or more liquid to this recipe will alter the structure of the biscuits which would not be ideal.
- Don’t panic when your biscuits come out of the oven a little ballooned. You can trim them to shape a little. Although, Sukuna’s fingers are kinda thick…
- Always fold the mixture gently, it will help maintain a soft texture once baked.
- The chocolate will stay solid at room temperature when tempered, but you can chill it in between decorating stages to make the process easier. This is especially true in hot weather!
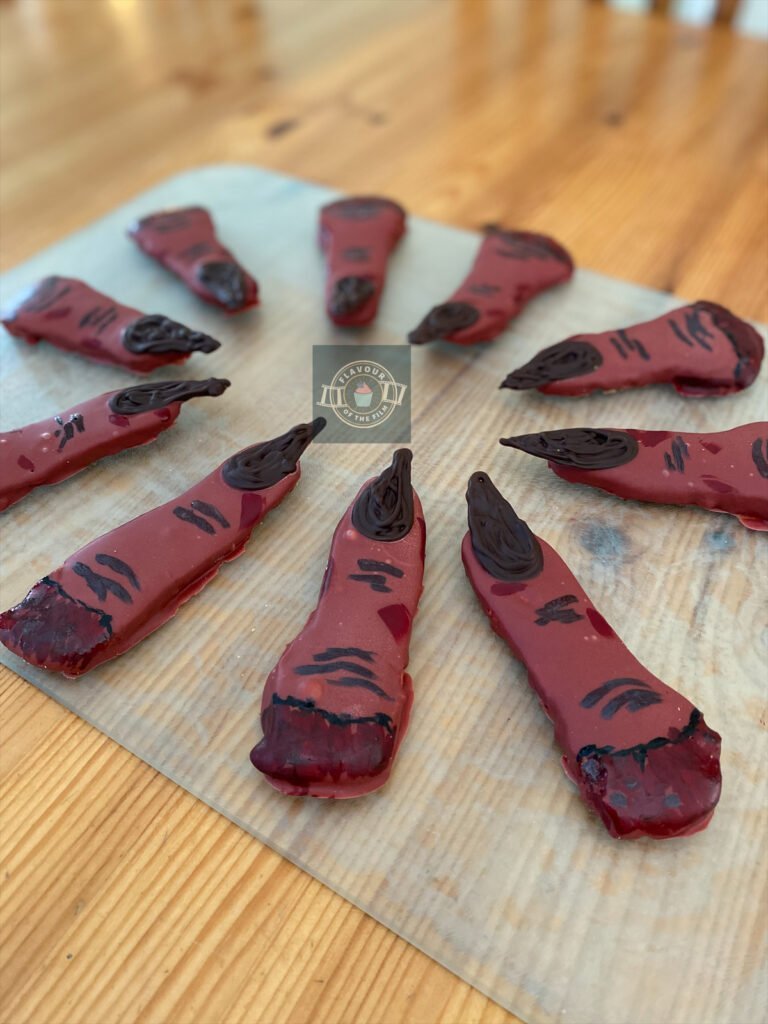
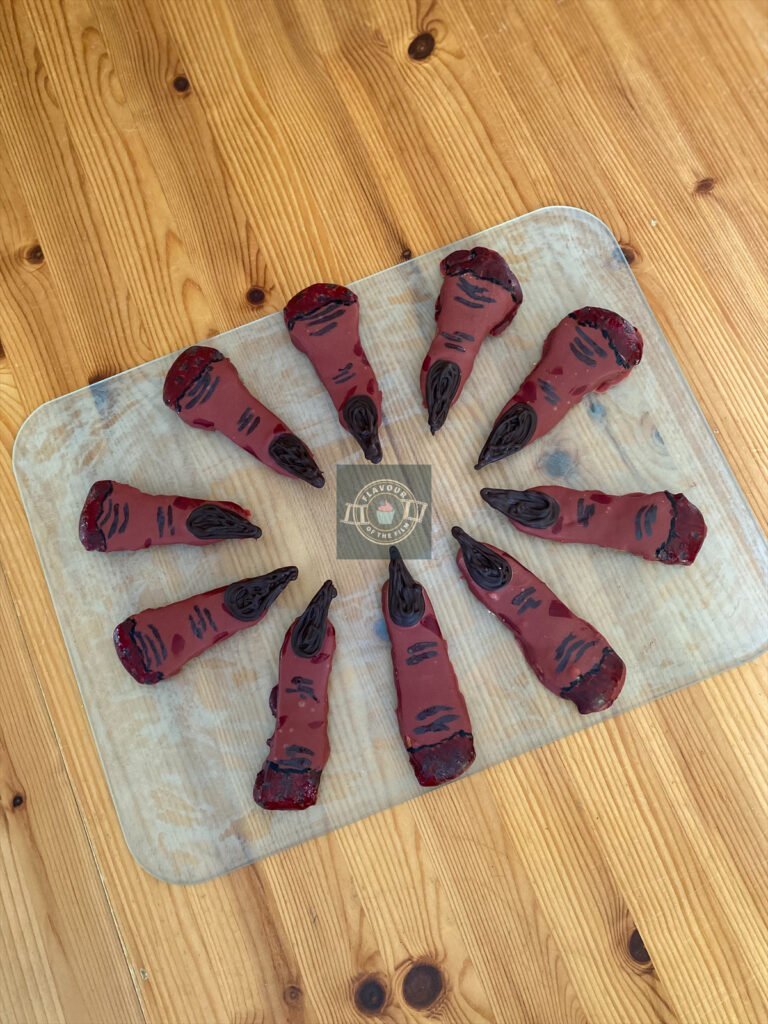
- Go as gross as you want when it comes to the decoration. Season 2 of Jujutsu Kaisen has really shown us just how gross these fingers are.
These Jujutsu Kaisen edible Sukuna fingers look vile but are so delicious, I can’t exaggerate it enough. They are such a juxtaposition but they work so well as a viewing snack for any Jujutsu Kaisen fan! They are also super easy to whip up. I hope you enjoy making these demon ladyfingers and I hope season two is a hit for you.
Happy baking, happy eating!
The Recipe
Ingredients
Jujutsu Kaisen Sukuna fingers:
- 4 medium eggs
- 120g [¾ cup] caster sugar
- 1 tsp extract of your choice i.e. vanilla (I used coconut)
- Pinch of salt
- 120g [¾ cup + 3 tbsp] plain [all-purpose] flour
Decoration:
- 300g [10.5 oz] white chocolate (chopped or in chips)
- Red food colouring
- Pink food colouring
- Black food colouring
- Grey food colouring optional
- 75g [2.75 oz] high quality dark chocolate (I used 75%)
Serves: 20 +
Preparation time: 30 minutes
Baking time: 12 – 15 minutes
Chilling time: 20 minutes
Decorating time: 1 hour
Method
Jujutsu Kaisen Sukuna fingers:
- Line and grease 3 baking trays with baking parchment/greaseproof paper.
- Preheat your oven to 190°C [380°F] or 180°C fan.
- Separate your eggs into two large bowls: yolks in one and whites in another.
- Whisk the egg yolks with half of the sugar and the extract you are using until pale and creamy.
- Using an electric hand whisk or standing mixer with a whisk attachment, whisk the egg whites into stiff peaks. Add the salt whilst whisking.
- Gradually add the other half of the sugar into the egg whites whilst whisking. Make sure to do this slowly as if making meringue. This is what achieves that ladyfinger texture!
- Fold the egg white mixture into the yolk mixture gently until well combined.
- Sieve the flour over the combined egg mixture and fold in well – until you see no lumps of flour.
- Pipe the mixture onto the trays using a piping bag or sandwich bag with a thick end cut off. They will spread in the oven to bear that in mind when deciding how wide to make the hole in your piping bag! Pipe them in rows of 2 with 4 across, until all of your mixture is used up. Make sure to make the bottom end of each one a little wider.
- Bake for 12 – 15 minutes until slightly risen and golden.
- Leave them on the trays to cool fully – it doesn’t take long!
- Once the ladyfingers are cool, use a small knife to gently trim and shape them to be a little sharper looking. They will come out of the oven pretty rounded so don’t be afraid to shape them a little!
Chocolate nails:
- Start making the nails. Prepare another baking tray by lining it with baking parchment/greaseproof paper. Set aside.
- In a large microwave-safe bowl, add in ⅔ of the dark chocolate and melt in 20 seconds bursts. Be sure to stir well in between each burst!
- Once fully melted, add the remaining dark chocolate and stir in until melted. Put back in the microwave for 10 seconds and stir again.
- Pour the dark chocolate into a piping bag or sandwich bag with a very small end cut off. You want it thin like a pencil to help with accuracy.
- Pipe as many nails onto the baking tray as you can. Aim for a sort of long tear shape. Go over each one to make them as thick as possible – it reduces the risk of any breaking!
- Once all of the chocolate has been used up, place the nails in the fridge to set.
- Next, make the white chocolate covering.
Chocolate covering:
- In a large microwave-safe bowl, place ⅔ of the white chocolate in and melt in the microwave in 20 seconds bursts. Be sure to stir well in between each burst!
- Once fully melted, add the remaining white chocolate into the bowl and stir until nearly completely melted. Put back in the microwave for another 10 seconds and stir again.
- Add the pink and red food colourings a little at a time until you reach an accurate colour. Stir in with a slight dash of black food colouring to make it dull.
- Using a fork or palette knife, dip each ladyfinger into the white chocolate and cover well. They do NOT need to be perfect: they need to look disgusting!
- Place back onto the baking trays. Work fast to make sure the chocolate doesn’t set in the bowl. If it starts to set, put it back in the microwave for 10 seconds and stir well.
- Retrieve the nails from the fridge and lay a nail over the top end of each finger. Make sure to secure the round part of the nail onto the white chocolate by pressing down gently.
- Place the now manicured fingers in the fridge to set fully.
Final touches:
- Once set, paint the fleshy ends in red and grey and black using a small paintbrush. Add details like blood and finger creases using a deeper shade of the red and grey (mix red and a tiny bit of black or grey to change the shade).
- Place back in the fridge to set again.
- Enjoy whilst watching the latest season of Jujutsu Kaisen!
These disgusting yet delectable Jujutsu Kaisen Sukuna fingers will last around 4 days (if they last that long!). The chocolate should stay set at room temperature but if it is particularly warm, keep them in the fridge. These ladyfingers make a great sweet treat for any JJK themed party or viewing session. Enjoy!
The Anime
I first got hooked onto Jujutsu Kaisen about a year after the first season aired so I was a little late to the party (better late than never, though). It was at this point that I was sort of absorbing as much Japanese culture as I could – Anime in particular – because I missed living in Japan so much. Plus, it was 2021. I need to say no more.
Jujutsu Kaisen is one of MAPPA’s many Anime productions.The first season aired in 2020 and was an instant hit.

Based on the manga of the same name by Akutami Gege, Jujutsu Kaisen follows the story of Itadori Yuuji: an ordinary high school student with an affinity for the unusual.
After he and his friends get wrapped up in something beyond them, Yuuji finds himself swallowing a demon finger – a cursed talisman – in order to save his friends from impending danger. The demon finger curses Yuuji as well, giving him immeasurable power.
Yuuji joins the secret school of a shaman. He begins to learn how to defeat demons from Jujutsu sorcerers and goes on a journey to find the remaining demon fingers, in order to eventually exorcise the curse over him.
Let me tell you, this show is a WILD ride.
If you’ve seen it, you’ll know what I mean. If you haven’t but it’s on the list – you’ll soon understand!
As with a lot of Anime, Jujutsu Kaisen takes you on an emotional rollercoaster unlike Western television. SO good.
You best believe I was at the cinema ready for the film when it came out, too. I’m so excited that the second season is airing! Bring it on.
What I love most about Jujutsu Kaisen is how each character stands out from the rest.
They are all so unique and bring such different (yet necessary) qualities to the group and the overall story. It’s easy to get invested in each and every one of them.
Plus, the fight scenes are super cool. Like, SUPER DUPER cool.
If you haven’t hopped on the Jujutsu Kaisen bandwagon, now’s the time. If you’re already on it, I hope you love season two. Exciting times, friends. Exciting times. Just don’t get so into it that you swallow a demon finger. Well, actually…
Recipe Card

Coconut and White Chocolate Ladyfingers | Jujutsu Kaisen
Ingredients
Jujutsu Kaisen Sukuna fingers:
- 4 medium eggs
- 120 g [¾ cup] caster sugar
- 1 tsp extract of your choice i.e. vanilla I used coconut
- Pinch of salt
- 120 g [¾ cup + 3 tbsp] plain [all-purpose] flour
Decoration:
- 300 g [1½ cups + 3 tbsp] white chocolate chopped or in chips
- Red food colouring
- Pink food colouring
- Black food colouring
- Grey food colouring optional
- 75 g [¼ cup + 3 tbsp] high quality dark chocolate I used 75%
Instructions
- Line and grease 3 baking trays with baking parchment/greaseproof paper.
- Preheat your oven to 190°C [380°F] or 180°C fan.
- Separate your eggs into two large bowls: yolks in one and whites in another.
- Whisk the egg yolks with half of the sugar and the extract you are using until pale and creamy.
- Using an electric hand whisk or standing mixer with a whisk attachment, whisk the egg whites into stiff peaks. Add the salt whilst whisking.
- Gradually add the other half of the sugar into the egg whites whilst whisking. Make sure to do this slowly as if making meringue. This is what achieves that ladyfinger texture!
- Fold the egg white mixture into the yolk mixture gently until well combined.
- Sieve the flour over the combined egg mixture and fold in well – until you see no lumps of flour.
- Pipe the mixture onto the trays using a piping bag or sandwich bag with a thick end cut off. They will spread in the oven to bear that in mind when deciding how wide to make the hole in your piping bag! Pipe them in rows of 2 with 4 across, until all of your mixture is used up. Make sure to make the bottom end of each one a little wider.
- Bake for 12 – 15 minutes until slightly risen and golden.
- Leave them on the trays to cool fully – it doesn’t take long!
- Once the ladyfingers are cool, use a small knife to gently trim and shape them to be a little sharper looking. They will come out of the oven pretty rounded so don’t be afraid to shape them a little!
- Start making the nails. Prepare another baking tray by lining it with baking parchment/greaseproof paper. Set aside.
- In a large microwave-safe bowl, add in ⅔ of the dark chocolate and melt in 20 seconds bursts. Be sure to stir well in between each burst!
- Once fully melted, add the remaining dark chocolate and stir in until melted. Put back in the microwave for 10 seconds and stir again.
- Pour the dark chocolate into a piping bag or sandwich bag with a very small end cut off. You want it thin like a pencil to help with accuracy.
- Pipe as many nails onto the baking tray as you can. Aim for a sort of long tear shape. Go over each one to make them as thick as possible – it reduces the risk of any breaking!
- Once all of the chocolate has been used up, place the nails in the fridge to set.
- Next, make the white chocolate covering.
- In a large microwave-safe bowl, place ⅔ of the white chocolate in and melt in the microwave in 20 seconds bursts. Be sure to stir well in between each burst!
- Once fully melted, add the remaining white chocolate into the bowl and stir until nearly completely melted. Put back in the microwave for another 10 seconds and stir again.
- Add the pink and red food colourings a little at a time until you reach an accurate colour. Stir in with a slight dash of black food colouring to make it dull.
- Using a fork or palette knife, dip each ladyfinger into the white chocolate and cover well. They do NOT need to be perfect: they need to look disgusting!
- Place back onto the baking trays. Work fast to make sure the chocolate doesn’t set in the bowl. If it starts to set, put it back in the microwave for 10 seconds and stir well.
- Retrieve the nails from the fridge and lay a nail over the top end of each finger. Make sure to secure the round part of the nail onto the white chocolate by pressing down gently.
- Place the now manicured fingers in the fridge to set fully.
- Once set, paint the fleshy ends in red and grey and black using a small paintbrush. Add details like blood and finger creases using a deeper shade of the red and grey (mix red and a tiny bit of black or grey to change the shade).
- Place back in the fridge to set again.
- Enjoy whilst watching the latest season of Jujutsu Kaisen!
Notes
© Flavour of the Film. All content and imagery is copyright protected. Please do not use any of my images or written content without prior permission. If you would like to share any of the recipes or images on Flavour of the Film, please link back to the recipe in question and rewrite it in your own words, crediting Flavour of the Film as the original source.


2 Comments
Comments are closed.