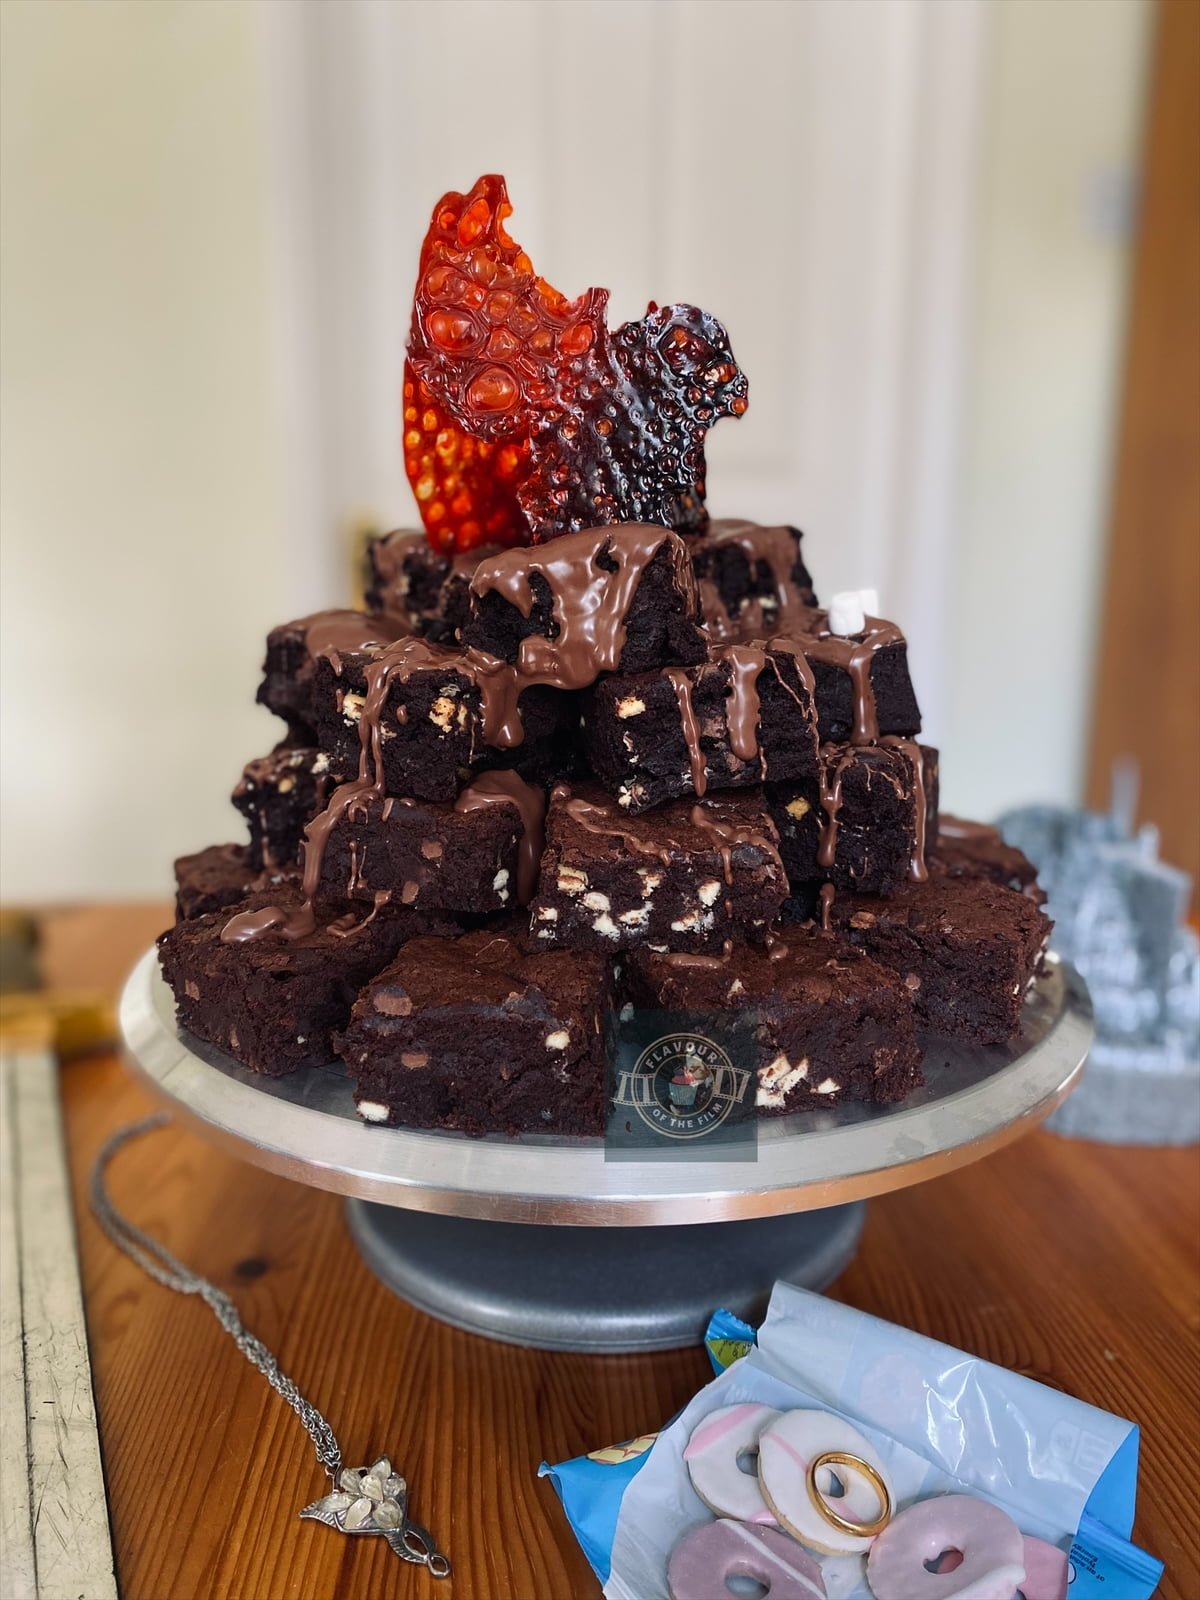
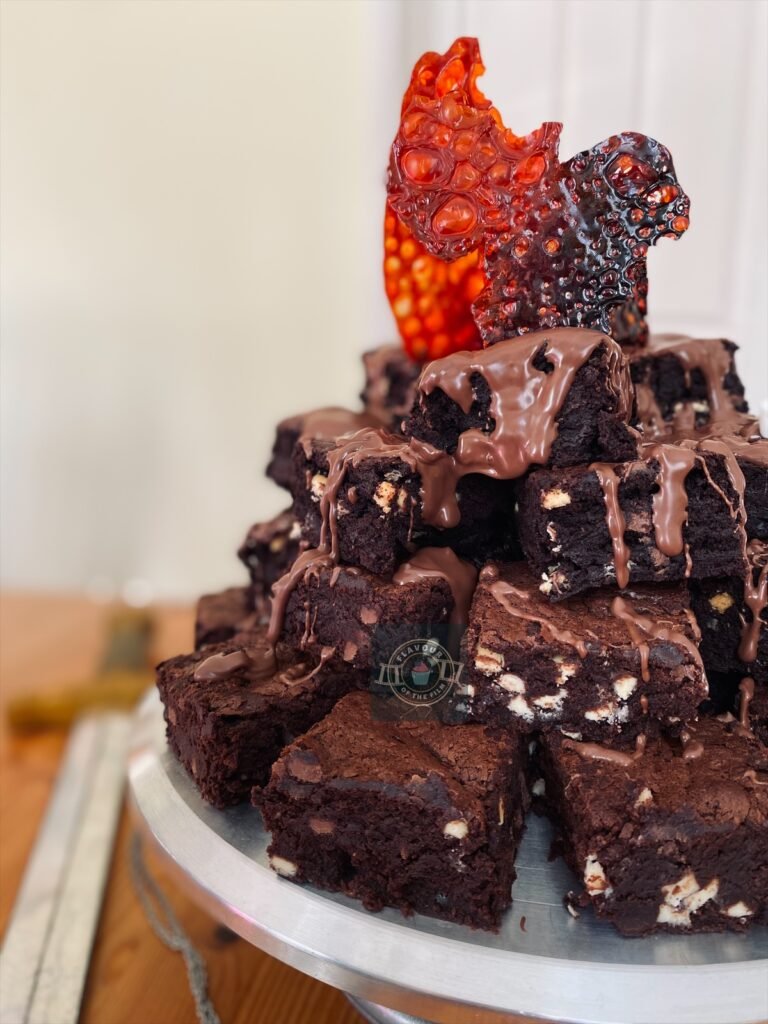
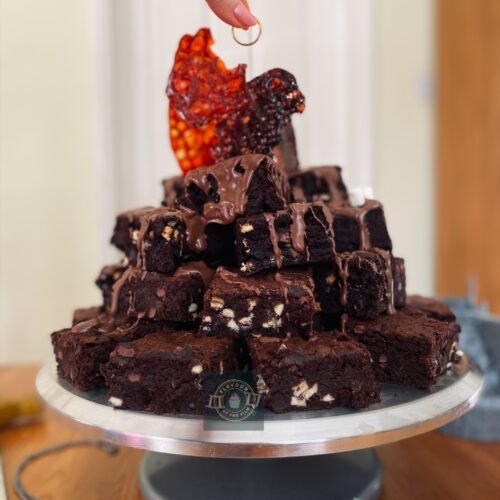
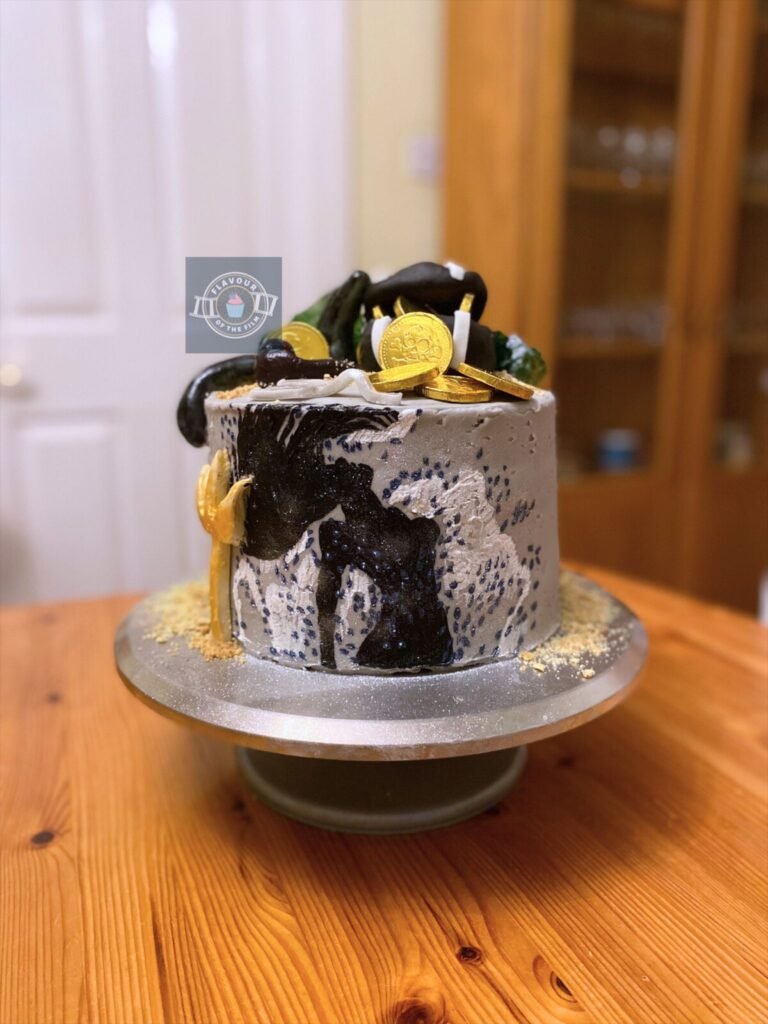
You can’t beat a great brownie. There is only one thing that makes a great brownie better… thirty-two of them stacked in tower formation, topped with melted chocolate and liquid glucose erupting ‘lava’. That’s right, friends. My Mount Doom brownie tower is the perfect treat for any The Lord of the Rings themed party or movie night. It’s finale time, friends. Let’s head into battle.
Contents
The Bake
Three hours and twenty-one minutes of glorious fantasy cinema. Beautiful stuff, even if I felt like I needed some lembas bread to keep me going through all of the events that take place during Return of the King.
For my Return of the King inspired bake, I wanted to conjure up something that would be perfect for both a LOTR themed party, as well as a chill movie night in.
Brownies are always a win, in my opinion. Whatever form they come in. See my Wednesday brownie slab and my Arthur Christmas brownie slippers for further proof.


But, a brownie tower is where we can really take things up to the next level.
It feeds plenty of people and it also looks EPIC. What makes a brownie stack like this great is that it can cater for a lot or a little. Plus, it makes an excellent replacement as a brownie birthday tower for those who aren’t super keen on birthday cake, but still want something special to help celebrate.
I want to say right off the bat that this recipe is so easy to adapt.
You can half the ingredients to make a smaller batch, or double up for a big party. OR you can stick to the recipe I’ve created to avoid any extra maths work. Brownies will last a few days and can be warmed up to breathe some life back into them, so it’s really no stress if you want to make the full thirty-two but don’t know if you’ll eat them all.

They can also be frozen once baked and cooled. Plus, sharing is caring. Make a loved one smile with a brownie.
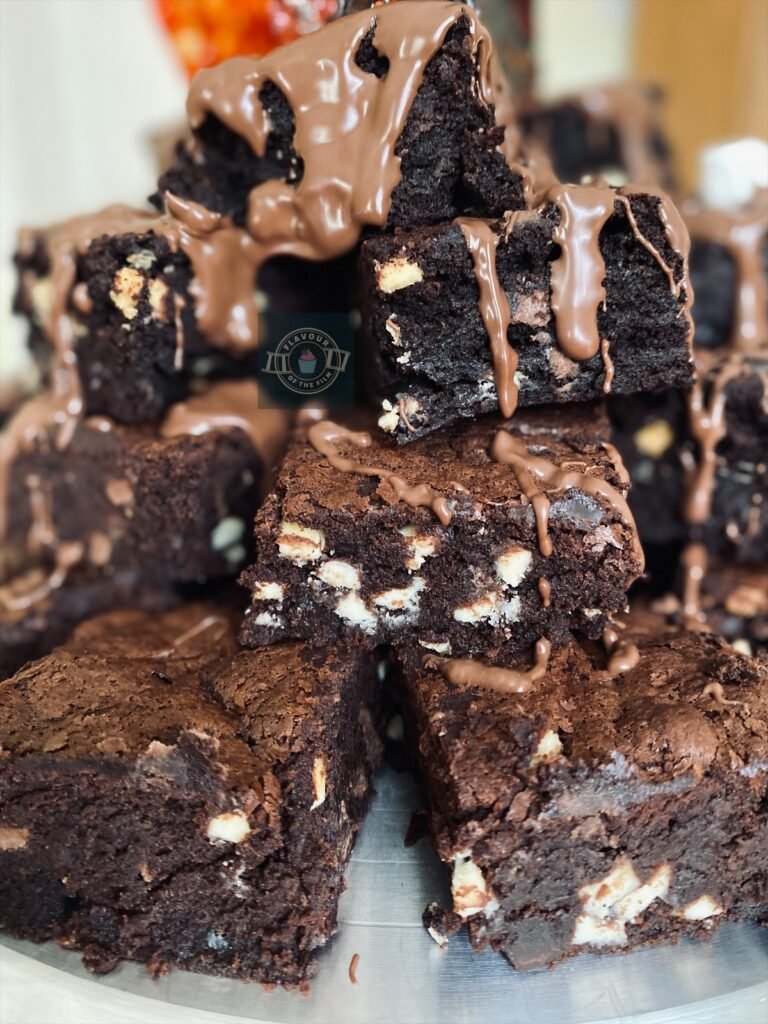
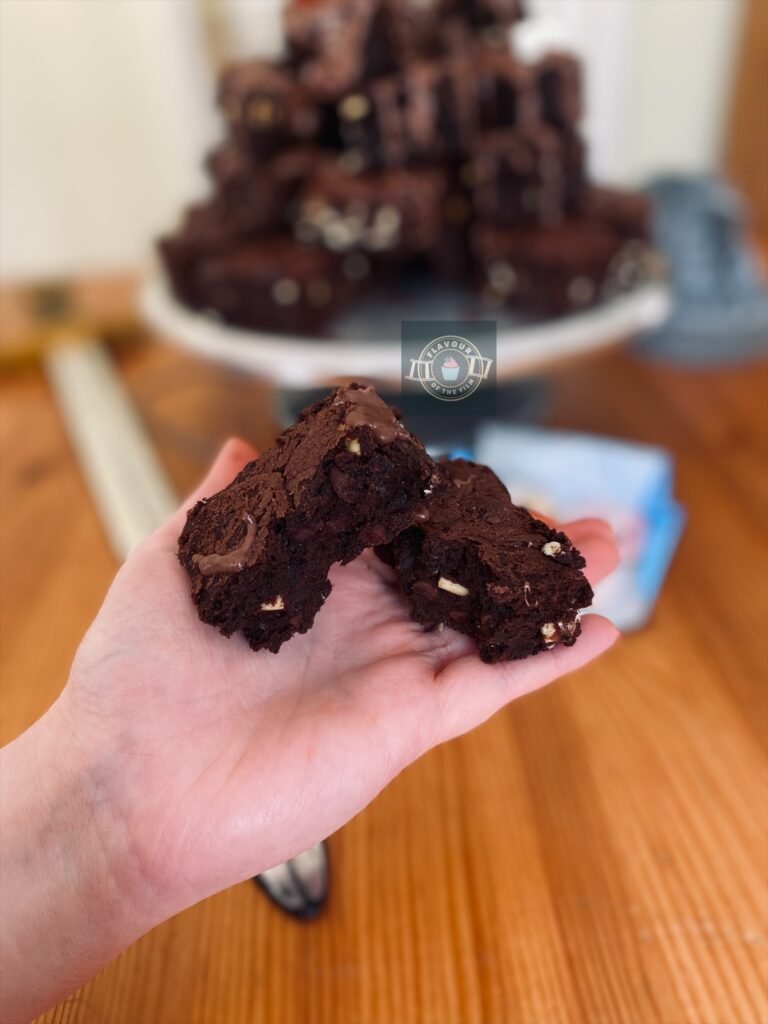
My base brownie recipe is adapted from a BBC Good Foods one, mostly because I like the specific method used and find that it produces a delicious gooey brownie.
I chose to create a brownie tower because I wanted Mount Doom to be the focus of my recipe.
Brownies are so easy to make and a brownies tower is just a crowd pleaser, especially when you build it up into the shape of the most prominent element in Mordor.
Mount Doom is the goal destination for the fellowship, especially Frodo and Sam. It’s where the One Ring was forged, so it’s where the One Ring needs to be destroyed.
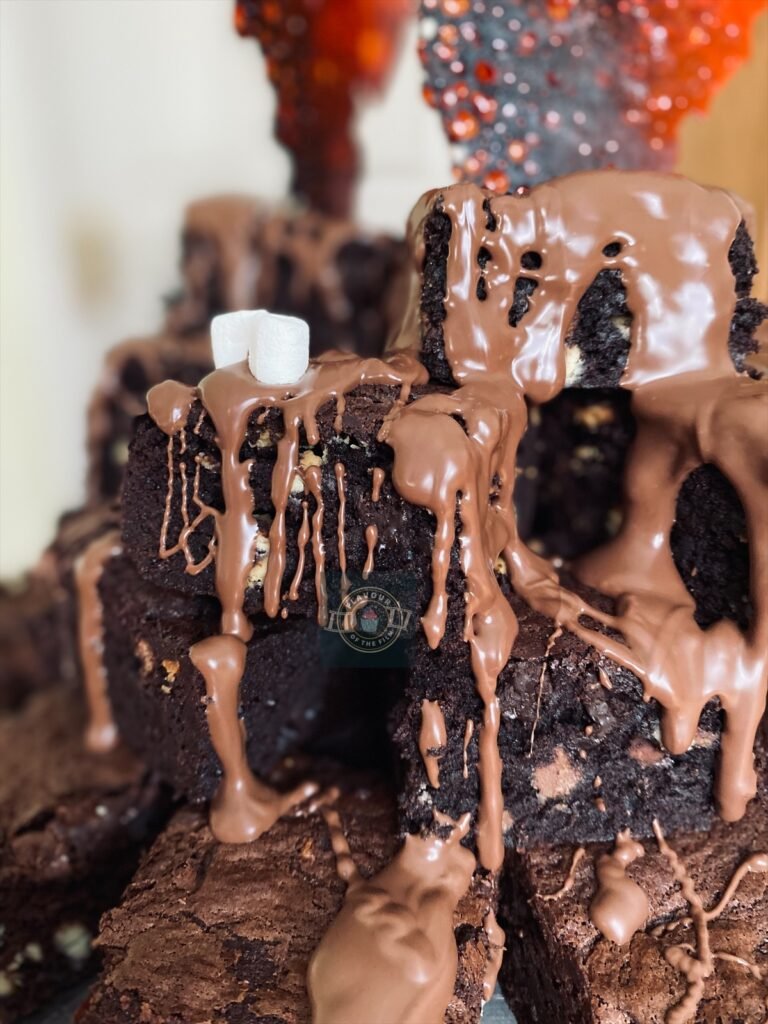
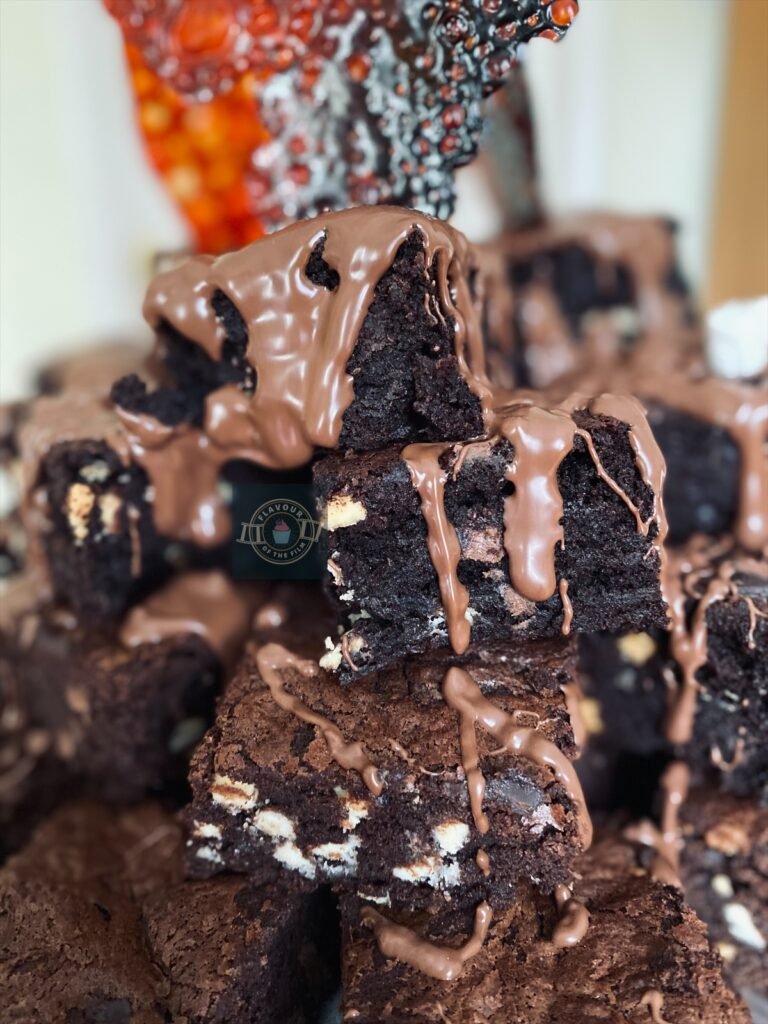
Once you’ve built your brownie tower, you’ll cover it in melted chocolate for effect (and deliciousness).
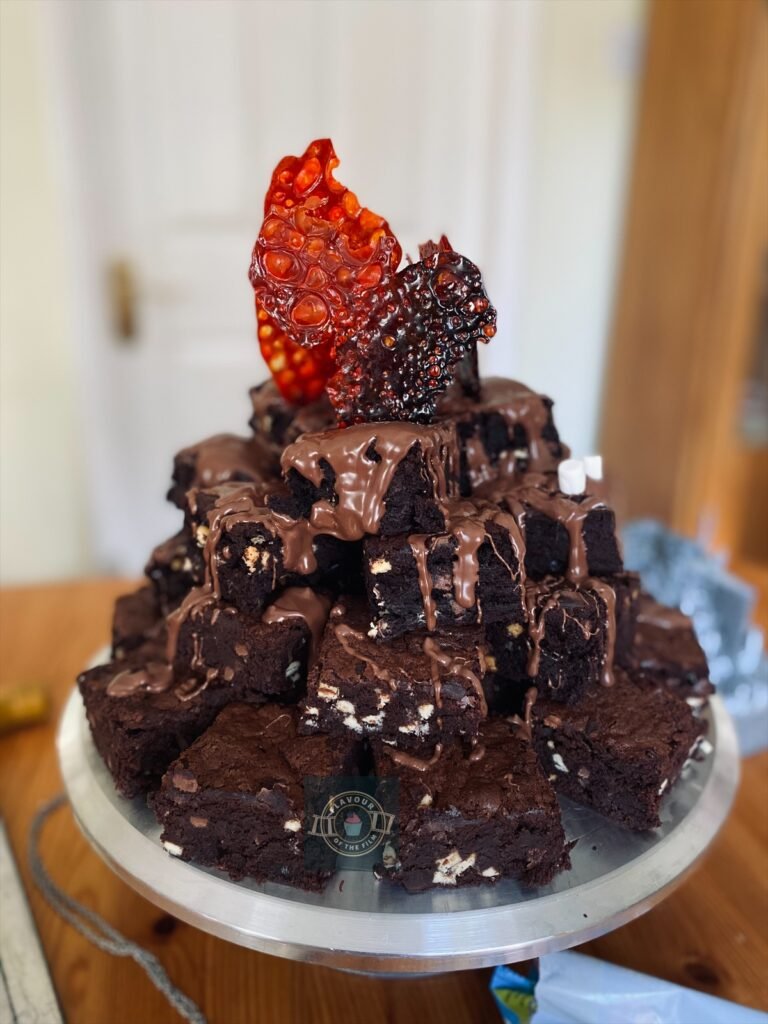
Then to finish, it’s liquid glucose with food dye to represent lava erupting from Mount Doom. The effect is pretty epic. It adds an hour onto the baking process, but it’s worth it in my opinion. I used this method in my The Little Mermaid cake and my Grogu cake for the brilliant effect it provides.
You can use melted boiled sweets for a quicker method – they only need to melt for around 10 minutes in the oven – but I’ve noticed that they aren’t the easiest thing to find in the shop. Most colourful boiled sweets on the shelves are cough drops… Liquid glucose can be found at most supermarkets in the baking aisle.
My brother had the idea to use a couple of mini marshmallows to represent Frodo and Sam on the side of Mount Doom, and I was more than happy to indulge in such an idea. This is entirely optional though. They are the only non-veggie friendly element, but if you can find vegetarian or vegan mini marshmallows, have at it.
If you have Lego versions of the characters, definitely use them instead!
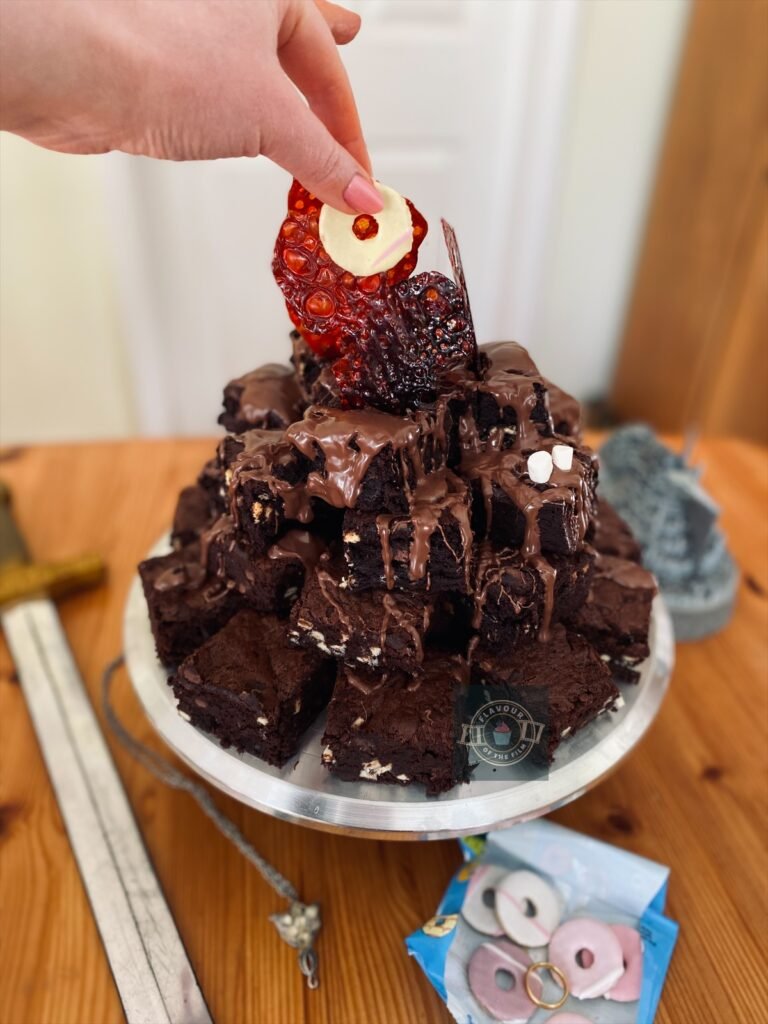
Lastly, as I wanted to bring the One Ring into my tower of brownies in some way – destroying it is the point of the journey after all – I opted for an interactive activity.
I gathered some mini Party Rings and handed out the yellow ones to my family. They could then pretend that they each had the One Ring, and in throwing their mini Party Ring biscuit into the top of my brownie tower Mount Doom, were destroying the One Ring for the good of Middle Earth.
Now, this just makes the whole concept even more fun, so definitely get involved when you make this brownie tower.
Party Rings are a classic biscuit found at kids’ parties. They also just happened to be a fun and shape-appropriate option. You could make your own versions of the One Ring if you wanted, or you can use something else shop-bought that you feel would work. Whatever works for you, friends.
Top Tips
- Make sure to use dark chocolate in your brownie mix. At least 75% cocoa content is ideal. It doesn’t make the brownies bitter at all, it just makes them that much more indulgent and chocolatey.
- I made my brownie mixes in halves at the same time rather than the entire batch altogether due to the sizes of my mixing bowls not being big enough to hold the entire batch.
- I used 85% dark chocolate in one half of my batch and 90% dark chocolate in the other: doing this made different shades of brownies which added varying tones in my brownies tower. It’s not essential to do this, but it is cool.
- The better quality your cocoa powder, the better your brownies will be.
- Be patient with the mix when you’re folding all of your ingredients in together. You want to avoid knocking as much air out as possible so that you achieve that incredibly gooey sort of brownie.
- The chocolate going on the top doesn’t need to be tempered unless you want it to be solid at room temperature. If that’s the case, see my The Nightmare Before Christmas recipe for instructions on how to properly temper chocolate.
- You can half the recipe for a smaller version of Mount Doom or even double it if you’re organising a bigger LOTR themed party.
- Feel free to change up the types of chocolate you put in the brownie: I love a triple chocolate vibe but this is entirely your choice. Just be sure to stick to a similar weight so that you don’t change the ratio too much.
- I used mini marshmallows to represent Frodo and Sam, but you can use Lego versions of the characters if you have them. Just don’t let anyone eat them by accident.
This epic Mount Doom inspired tower of brownies really is perfect for a The Lord of the Rings themed party or movie night. Despite its appearance, the brownie tower really doesn’t take ages to make. Adapt it to suit your needs, friends. You can whip this up in no time and be ready for a truly epic movie night or party. Enjoy!
Happy baking, happy eating!
The Recipe
Ingredients
Brownie tower:
- 400g [14 oz] unsalted butter
- 400g [14 oz] dark chocolate at least 75% cocoa content
- 250g [1¼ cups] caster sugar
- 300g [1½ cups] light brown sugar
- 6 large or 5 medium eggs
- 200g [1¼ cups] plain [all-purpose] flour
- 100g [¾ cup + 2 tbsp] cocoa powder
- 200g [7 oz] dark chocolate chips/chunks
- 200g [7 oz] milk chocolate chips/chunks
- 200g [7 oz] white chocolate chips/chunks
Decoration:
- Liquid glucose
- Red food liquid food colouring
- Orange liquid food colouring
- OR around 20 orange and red boiled sweets instead of the above
- 200g – 300g [7 oz – 10.5 oz] chocolate of your choice
- 2 mini marshmallows optional
- Mini Party Rings or similar optional
Serves: 32
Preparation time: 30 minutes
Baking time: 25 – 35 minutes + 1 hour for ‘lava’
Decorating time: 30 minutes
Method
Brownie tower:
- Preheat your oven to 180°C [350°F] or 160°C fan. Grease and line two 9 inch square tins with baking paper/greaseproof parchment. Set aside.
- Complete the following steps either as one whole batch, or in two half sized batches in separate bowls at the same time.
- Melt the dark chocolate and butter together. Do this either in a bain marie (bowl set over a pot of simmering water) or in 30 second to 1 minute bursts in the microwave, stirring in between bursts.
- Once completely melted and smooth, leave the chocolate and butter mix to the side to cool to room temperature.
- In a large mixing bowl, whisk together the eggs and both sugars on a medium to high speed. Do this until the mixture has doubled in size and is pale and frothy like a mousse. This mixture will be ready when you see a trail of mixture falling from your whisk for a few seconds after lifting it out of the bowl.
- When your chocolate and butter mix has cooled, combine it with the eggs and sugar mixture. Avoid pouring from a height as you could knock the air out of the eggs.
- Gently fold the eggs and sugar into the chocolate and butter mix, turning the mixture in and over itself until smooth and an even colour is achieved. Be patient here so that you don’t knock out any of the air from the egg mixture.
- Sieve the flour and cocoa powder over the mixture and fold in gently and until fully incorporated.
- Add your chosen chocolate chunks/chips and fold in gently until well distributed.
- Pour the mixture halves into each of your lined tins, or split the entire batch into equal halves and pour into the lined tins as evenly as you can.
- Bake in the oven for 25 – 35 minutes, until the surface of the brownies looks ‘dry’ and a skewer or cocktail stick comes out mostly clean (a few crumbs is good). Avoid baking for long unless absolutely necessary as you risk creating cakey brownies rather than gooey.
- Once baked, leave in the tins to cool for around 10 minutes, then place in the fridge to set firmly.
‘Lava’ shards:
- If using boiled sweets, simply line a baking tray with baking parchment and place your unwrapped boiled sweets in wonky vertical lines on the tray. Bake for up to 10 minutes or until melted at the same temperature that your brownies baked at.
- Once melted, use a sharp knife to drag some of the melted sweets up along the top to create a ‘splash’ impression. Leave to cool and harden on the tray.
- If using liquid glucose, turn the oven down to 180°C [350°F] or 160°C fan.
- Line a baking tray with baking parchment/greaseproof paper.
- Squeeze a few blobs of liquid glucose onto the lined tray. Put a few drops of both red and orange food colouring into the blobs.
- Baking in the oven for up to 1 hour, until caramelised and bubbly. Avoid opening the oven door during this time as you risk popping the bubbles.
- Leave to cool and harden on the tray.
Brownie tower construction:
- Once your brownies are completely cool and firm, retrieve the tins from the fridge. Gently lift the brownies out of the tins and peel the paper away. Cut each square into 16 pieces (cut 4 along, 4 down). Repeat with the other square so that you have 32 brownies in total.
- Prepare a cake board/cake stand or large plate/serving board.
- Begin by placing around 10 – 12 brownies as your Mount Doom base, then build up from there, using less brownies on each layer to form a rough pyramid.
Decoration:
- In a large glass jug, melt your chosen chocolate down in 30 second bursts in the microwave, stirring in between. Once completely melted, pour the chocolate in layers over and down your brownie tower to create the ‘molten lava’.
- Using a sharp knife, carefully make shallow incisions into the brownies at the top of your tower for your ‘lava’ to sit in.
- Gently lift your ‘lava’ shards from the tray and place them in the top brownies on your Mount Doom brownie tower.
- Finish with your mini marshmallows (or Lego characters) by placing them on the side of Mount Doom.
This Mount Doom brownie tower is an epic addition to your LOTR themed party or movie night. I recommend NOT eating the liquid glucose if you have used it. It’s for decoration purposes only. The brownies will last for around 4+ days and can be warmed up in the microwave for 20 seconds. The brownies can also be frozen for up to 2 months. Enjoy!
The Film
I mentioned in my The Lord of the Rings: The Fellowship of the Ring mirror glaze cake recipe that this series of films brought in oodles of award nominations back in the early 2000s. Return of the King – the last instalment of this trilogy – won eleven Oscars just on its own.
ELEVEN.
All so well deserved. This finale is a genuine cinematic masterpiece. It’s still regarded as one of the greatest films of all time over twenty years later.
My local cinema was showing Return of the King again last year in honour of its twentieth anniversary, so naturally I attended a screening. I was too young to see it in the cinemas when it was initially released in 2003, so I was thrilled that I had the opportunity to see it on the big screen as an adult.
Majestic is the word for it, friends. Just MAJESTIC.
As Flavour of the Film is spoiler-free, I want to keep discussion of the story as minimal as possible in this post. SO much happens in Return of the King, and whilst it’s been out for over two decades, I don’t want to risk ruining any of it for anyone reading!
I will say that everything is wrapped up in such a satisfying (and oftentimes emotional) way in Return of the King, to the point that it makes you feel completely overwhelmed with sympathy and love and sentimentality for the characters.
At least, that’s how it makes me feel. Still to this day.
Middle Earth is such a vast fantasy world and the Lord of the Rings: The Return of the King displays that so well.
Everything brings you into Middle Earth in a way that lots of other films don’t. It’s a feast for the eyes; a film that is difficult to tear your attention away from.
It truly is the perfect finale to an exquisite fantasy trilogy.
I can’t gush about it enough, if I’m honest. I just think it’s a beautifully crafted film, and that’s exactly what you want from the end of a well-loved film series.
An epic finale to sign it all off.
On the writing team were the talent also responsible for the previous two instalments: Fran Walsh, Philippa Boyens and Peter Jackson.
Peter Jackson, of course, also led the charge as director to complete the set.
As far as the cast goes (and it goes pretty far), there were a number of new additions. The bigger the film, the bigger the cast. That battle sequence in itself is monumental.
Fun fact: New Line Cinema tried to shut down the production due to time and cost restrictions, but Peter Jackson carried on anyway. Legend. Thank goodness he did!
Okay, the cast. Alongside returning actors in established character roles, the likes of Lawrence Makoare; Sarah McLeod, John Bach, Ali Astin, Martin Csokas, Bernard Hill, Ian Hughes, Bruce Hopkins, Paul Norell, Harry Sinclair and SO many more joined the already extensive cast of performers.
I also want to note here that although I can’t name every single crew member, they ALL deserve recognition for their wonderful efforts on The Lord of the Rings.
Never undervalue a film crew: they are what makes the film what it is.
Finally, seeing as the music score for the The Lord of the Rings trilogy is one of my all time favourites, I have to pay respects to the musical genius that is Howard Shore. Majestic music for a majestic film. It’s only right.
Recipe Card
Brownie Tower | The Lord of the Rings: The Return of the King
Ingredients
Brownie tower:
- 400 g [14 oz] unsalted butter
- 400 g [14 oz] dark chocolate at least 75% cocoa content
- 250 g [1¼ cups] caster sugar
- 300 g [1½ cups] light brown sugar
- 6 large or 5 medium eggs
- 200 g [1¼ cups] plain [all-purpose] flour
- 100 g [¾ cup + 2 tbsp] cocoa powder
- 200 g [7 oz] dark chocolate chips/chunks
- 200 g [7 oz] milk chocolate chips/chunks
- 200 g [7 oz] white chocolate chips/chunks
Decoration:
- Liquid glucose
- Red food liquid food colouring
- Orange liquid food colouring
- OR around 20 orange and red boiled sweets instead of the above
- 200 g – 300g [7 oz – 10.5 oz] chocolate of your choice
- 2 mini marshmallows optional
- Mini Party Rings or similar optional
Instructions
Brownie tower:
- Preheat your oven to 180°C [350°F] or 160°C fan. Grease and line two 9 inch square tins with baking paper/greaseproof parchment. Set aside.
- Complete the following steps either as one whole batch, or in two half sized batches in separate bowls at the same time.
- Melt the dark chocolate and butter together. Do this either in a bain marie (bowl set over a pot of simmering water) or in 30 second to 1 minute bursts in the microwave, stirring in between bursts.
- Once completely melted and smooth, leave the chocolate and butter mix to the side to cool to room temperature.
- In a large mixing bowl, whisk together the eggs and both sugars on a medium to high speed. Do this until the mixture has doubled in size and is pale and frothy like a mousse. This mixture will be ready when you see a trail of mixture falling from your whisk for a few seconds after lifting it out of the bowl.
- When your chocolate and butter mix has cooled, combine it with the eggs and sugar mixture. Avoid pouring from a height as you could knock the air out of the eggs.
- Gently fold the eggs and sugar into the chocolate and butter mix, turning the mixture in and over itself until smooth and an even colour is achieved. Be patient here so that you don’t knock out any of the air from the egg mixture.
- Sieve the flour and cocoa powder over the mixture and fold in gently and until fully incorporated.
- Add your chosen chocolate chunks/chips and fold in gently until well distributed.
- Pour the mixture halves into each of your lined tins, or split the entire batch into equal halves and pour into the lined tins as evenly as you can.
- Bake in the oven for 25 – 35 minutes, until the surface of the brownies looks ‘dry’ and a skewer or cocktail stick comes out mostly clean (a few crumbs is good). Avoid baking for long unless absolutely necessary as you risk creating cakey brownies rather than gooey.
- Once baked, leave in the tins to cool for around 10 minutes, then place in the fridge to set firmly.
‘Lava’ shards:
- If using boiled sweets, simply line a baking tray with baking parchment and place your unwrapped boiled sweets in wonky vertical lines on the tray. Bake for up to 10 minutes or until melted at the same temperature that your brownies baked at.
- Once melted, use a sharp knife to drag some of the melted sweets up along the top to create a ‘splash’ impression. Leave to cool and harden on the tray.
- If using liquid glucose, turn the oven down to 180°C [350°F] or 160°C fan.
- Line a baking tray with baking parchment/greaseproof paper.
- Squeeze a few blobs of liquid glucose onto the lined tray. Put a few drops of both red and orange food colouring into the blobs.
- Baking in the oven for up to 1 hour, until caramelised and bubbly. Avoid opening the oven door during this time as you risk popping the bubbles.
- Leave to cool and harden on the tray.
Brownie tower construction:
- Once your brownies are completely cool and firm, retrieve the tins from the fridge. Gently lift the brownies out of the tins and peel the paper away. Cut each square into 16 pieces (cut 4 along, 4 down). Repeat with the other square so that you have 32 brownies in total.
- Prepare a cake board/cake stand or large plate/serving board.
- Begin by placing around 10 – 12 brownies as your Mount Doom base, then build up from there, using less brownies on each layer to form a rough pyramid.
Decoration:
- In a large glass jug, melt your chosen chocolate down in 30 second bursts in the microwave, stirring in between. Once completely melted, pour the chocolate in layers over and down your brownie tower to create the ‘molten lava’.
- Using a sharp knife, carefully make shallow incisions into the brownies at the top of your tower for your ‘lava’ to sit in.
- Gently lift your ‘lava’ shards from the tray and place them in the top brownies on your Mount Doom brownie tower.
- Finish with your mini marshmallows (or Lego characters) by placing them on the side of Mount Doom.
Notes
© Flavour of the Film. All content and imagery is copyright protected. Please do not use any of my images or written content without prior permission. If you would like to share any of the recipes or images on Flavour of the Film, please link back to the recipe in question and rewrite it in your own words, crediting Flavour of the Film as the original source.

3 Comments
Comments are closed.