こんにちは (konnichiwa) to my first Anime recipe for Flavour of the Film! I’m so excited to start growing my Anime recipe collection so I thought I’d start with a true CLASSIC. My My Neighbor Totoro iced cinnamon bread is a comforting treat for any Totoro fan. Let’s head into the forest.
Contents
The Bake
As Totoro is the title character, I wanted to make him the feature of the bake. He’s big and soft and cuddly, so what better baked good to make him out of than bread? A sweet bread, at that. I love the cinnamon in sweet treats, especially things like iced cinnamon buns and cinnamon swirls, so that’s where the inspiration for the flavour and the decoration stemmed from.
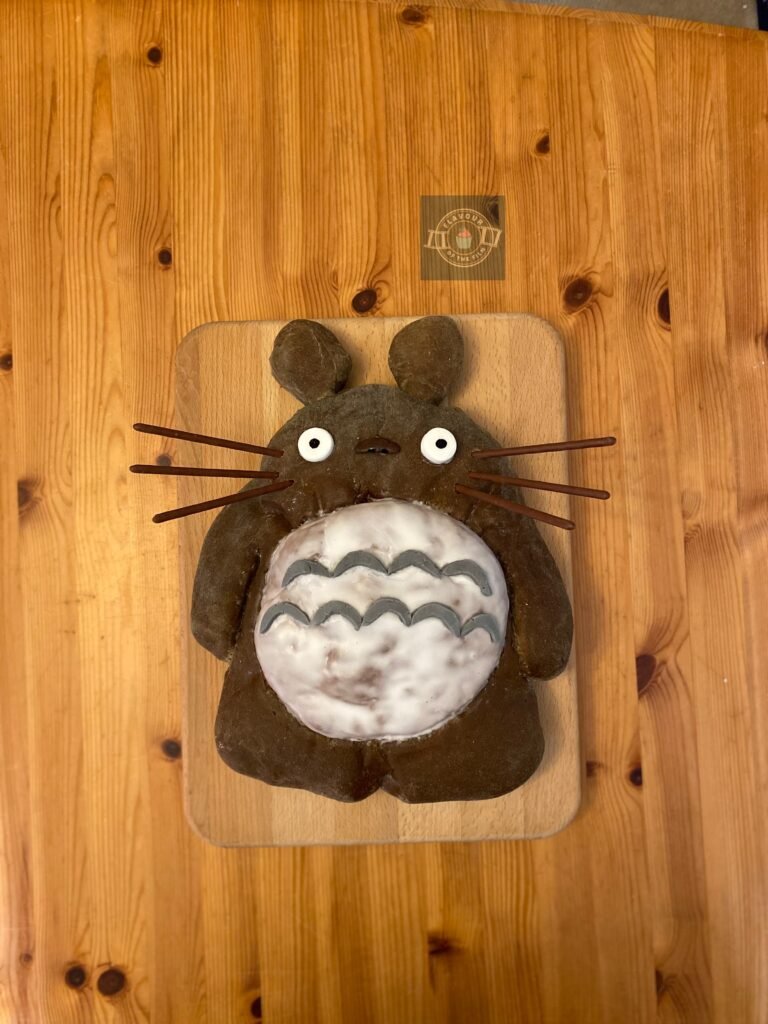
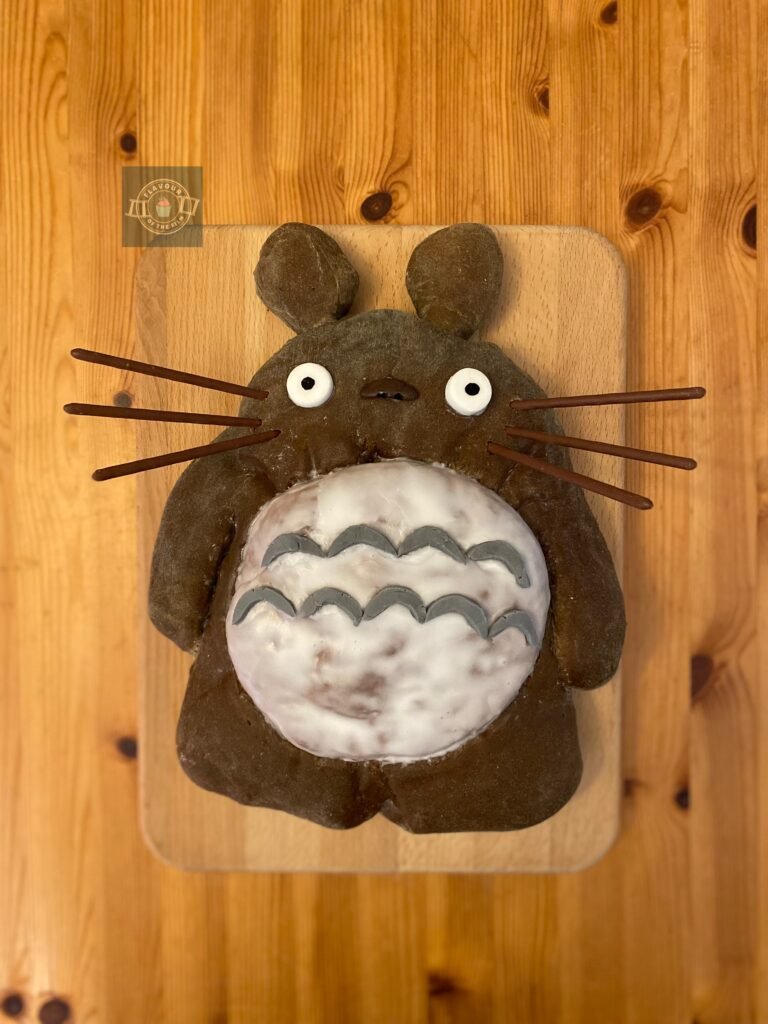
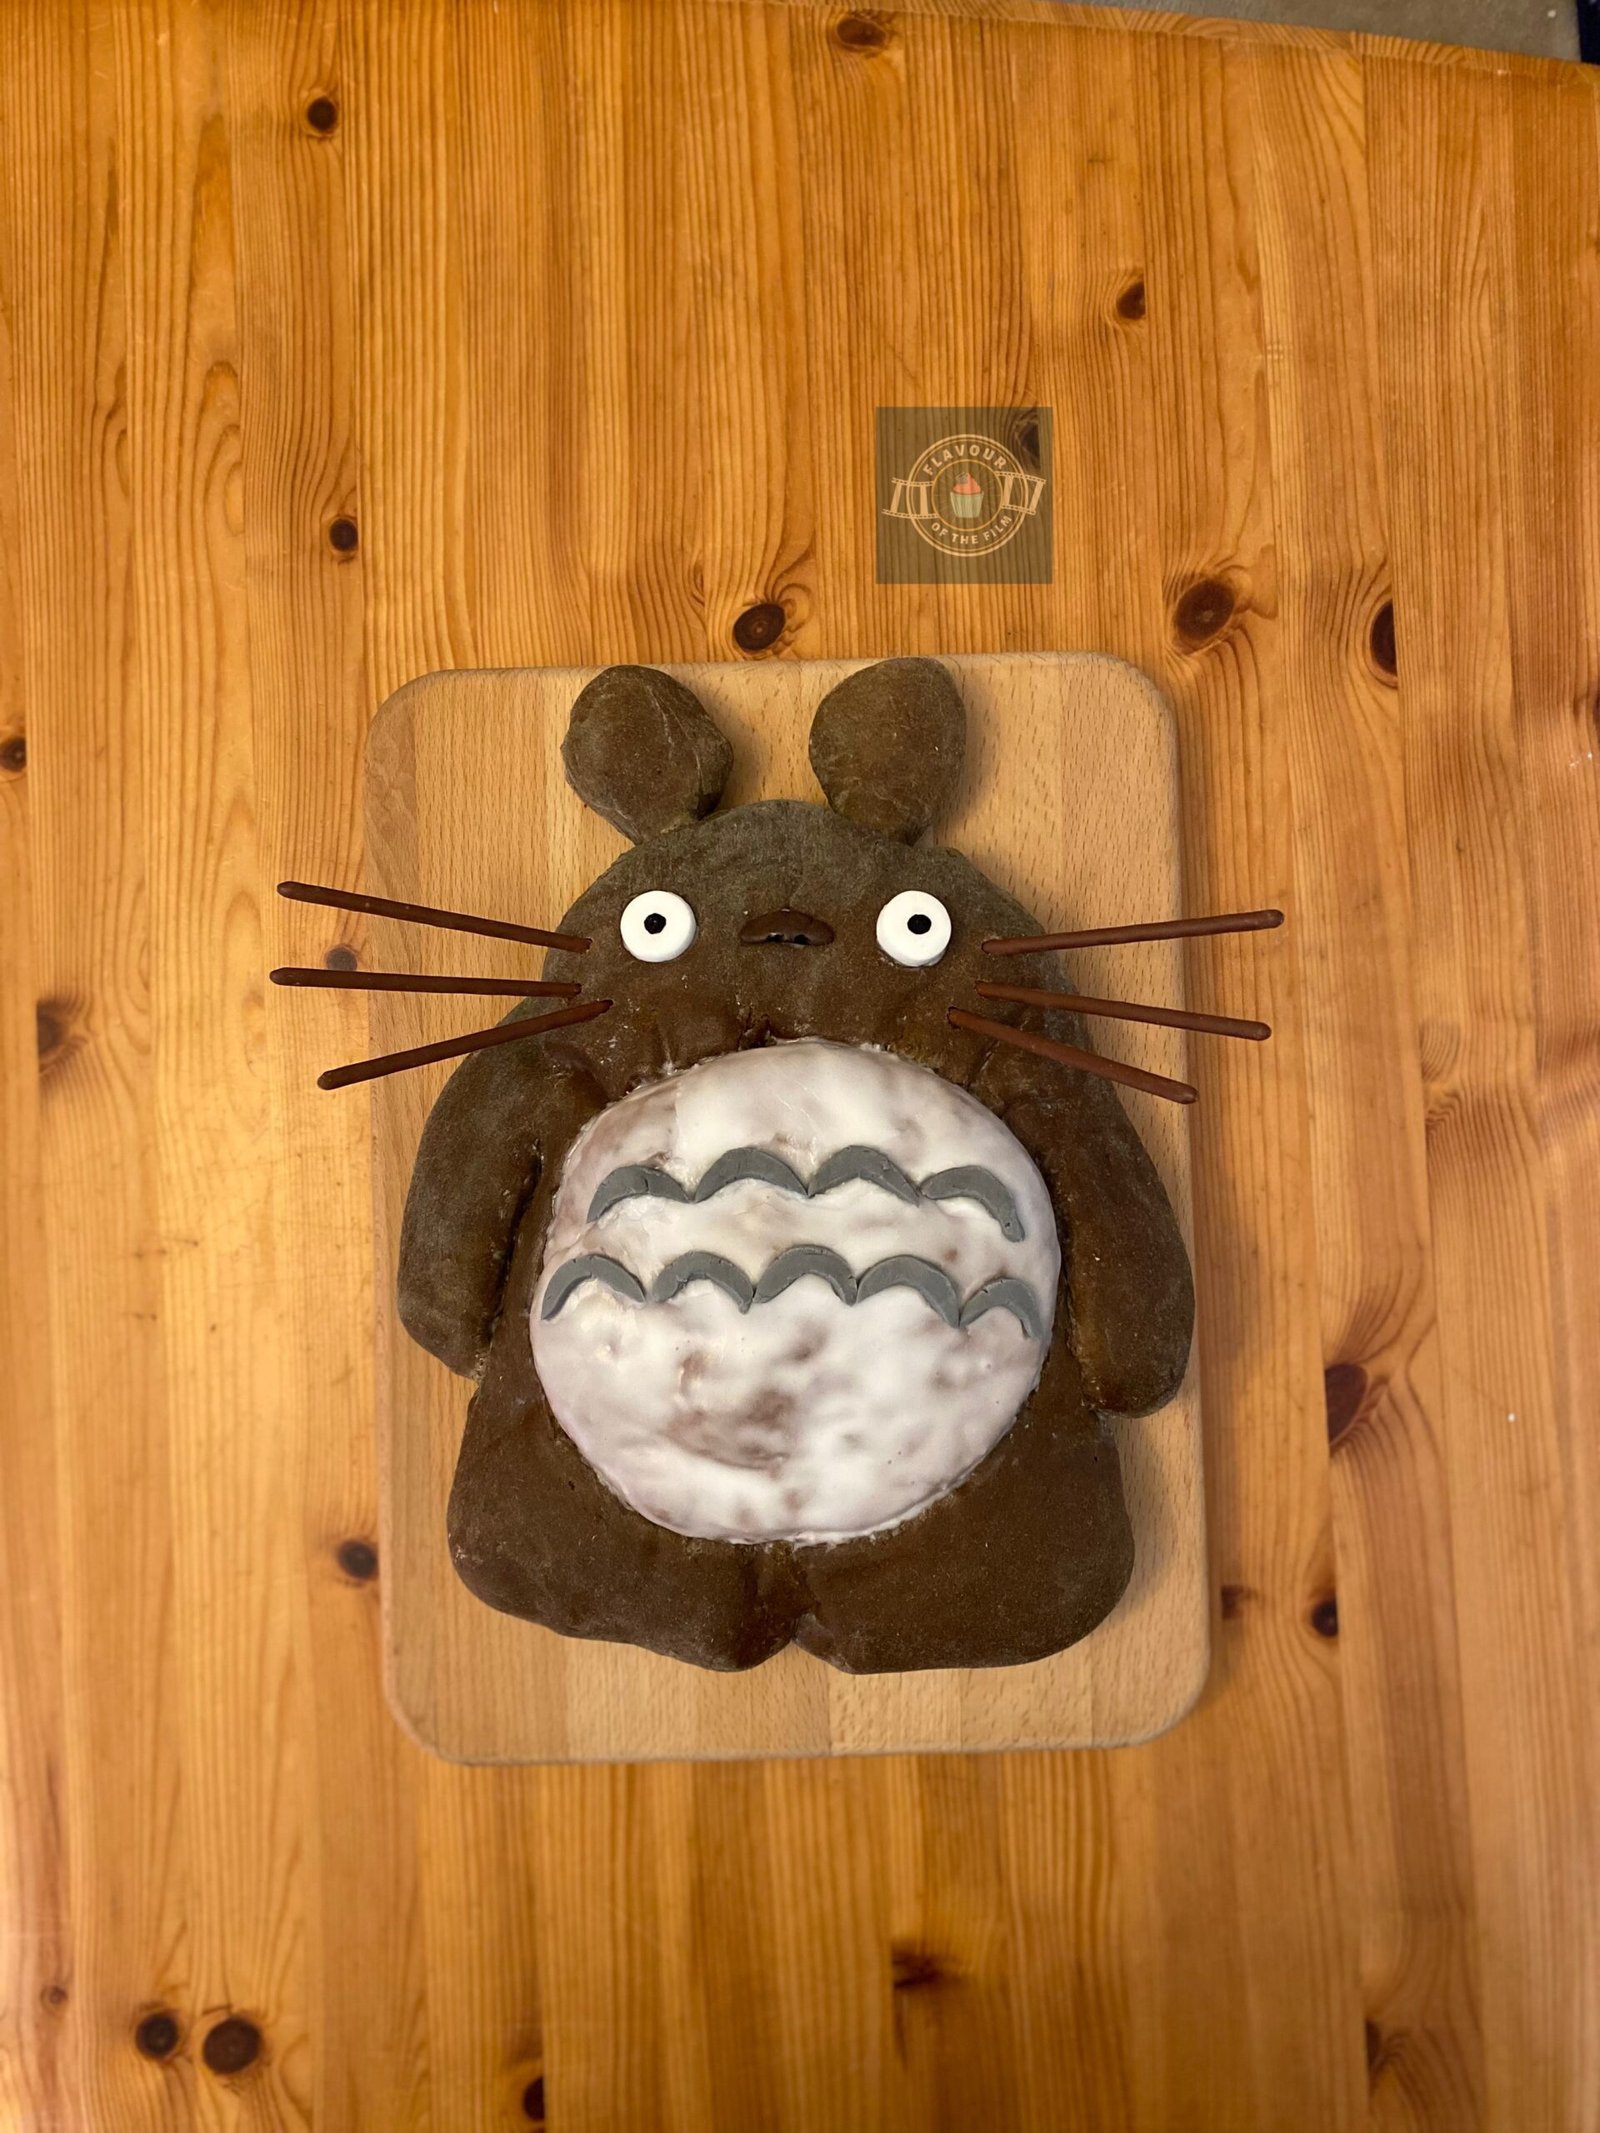
This My Neighbor Totoro iced cinnamon bread is essentially a huge Totoro shaped iced cinnamon bun.
Cinnamon is such a warming, earthy flavour and works amazingly well in sweet bakes. That’s why I chose it for this particular themed bake. A warm flavour for a warm film! I like a strong flavour of cinnamon when it’s called for so I added four teaspoons of the spice into my bread.
Even with four teaspoons, it’s still quite a delicate flavour so you could add a couple more if desired. If you prefer more of a hint of cinnamon, then I’d recommend just three teaspoons for this bread.
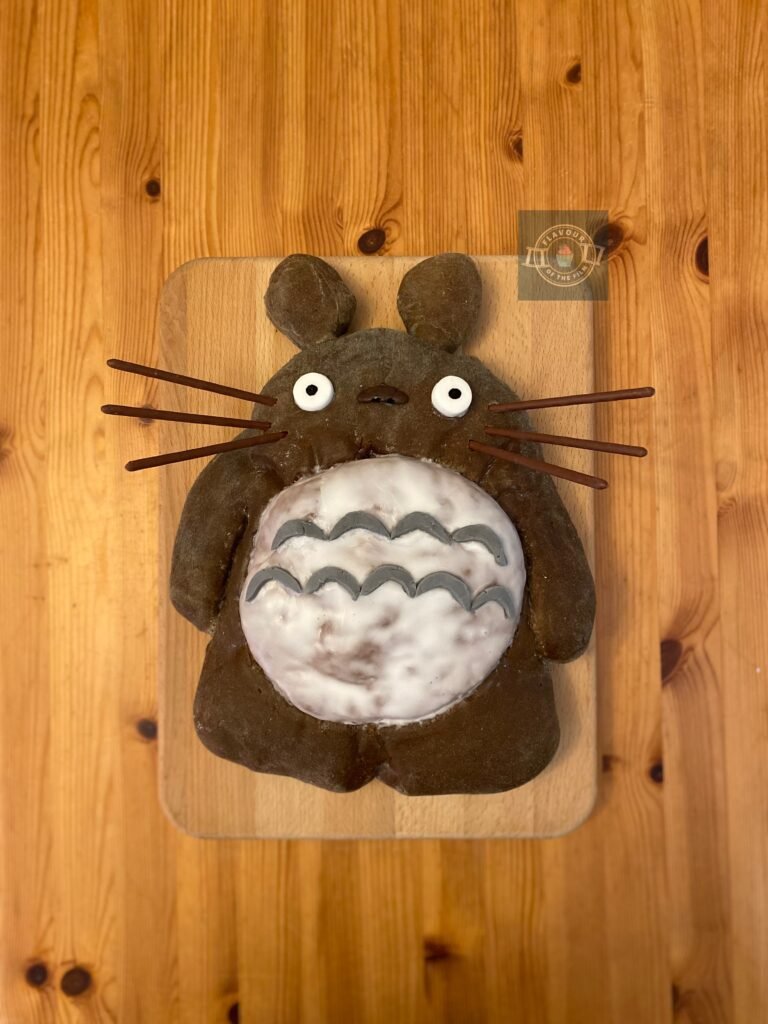
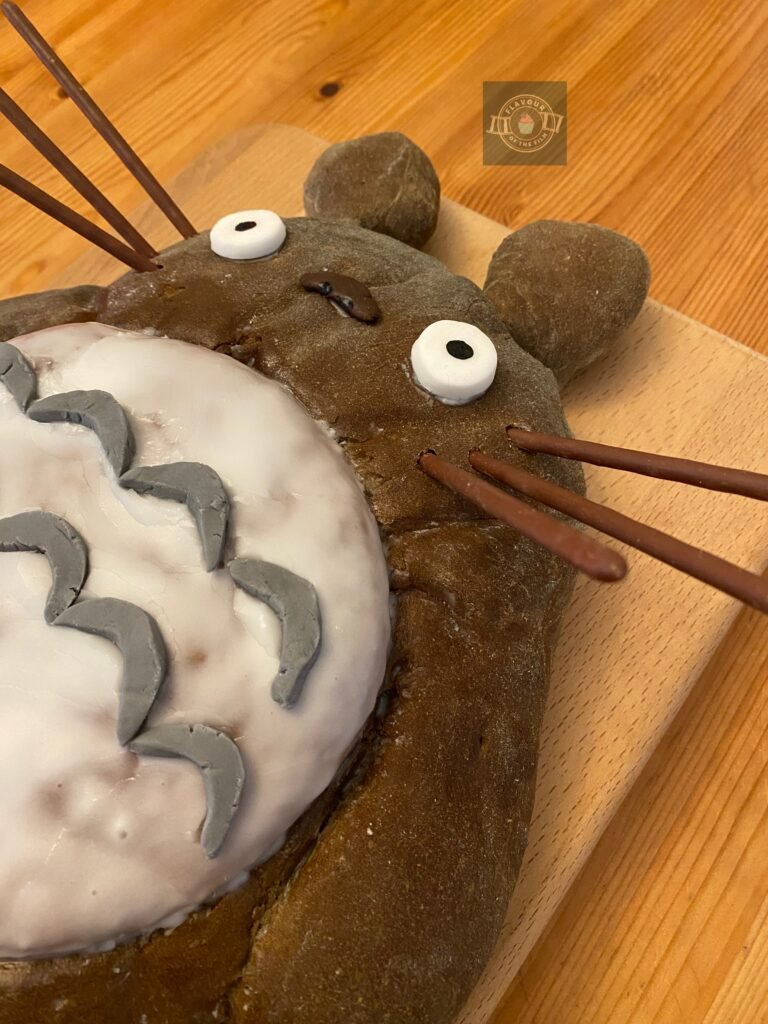
As far as his overall look goes, I chose to recreate the way he looks during the iconic bus stop scene.
His face is relaxed and relatively emotionless during this scene, which made it the easiest to recreate. Had I chosen to base his look on one of his more animated (if you’ll pardon the pun) scenes, I would likely have recreated him either asleep or with a huge grin on his face.
These would have been fine, just a little less recognisable. With that being said, you are more than welcome to change his face to represent another moment in the film! A sleeping Totoro bread would be pretty adorable.
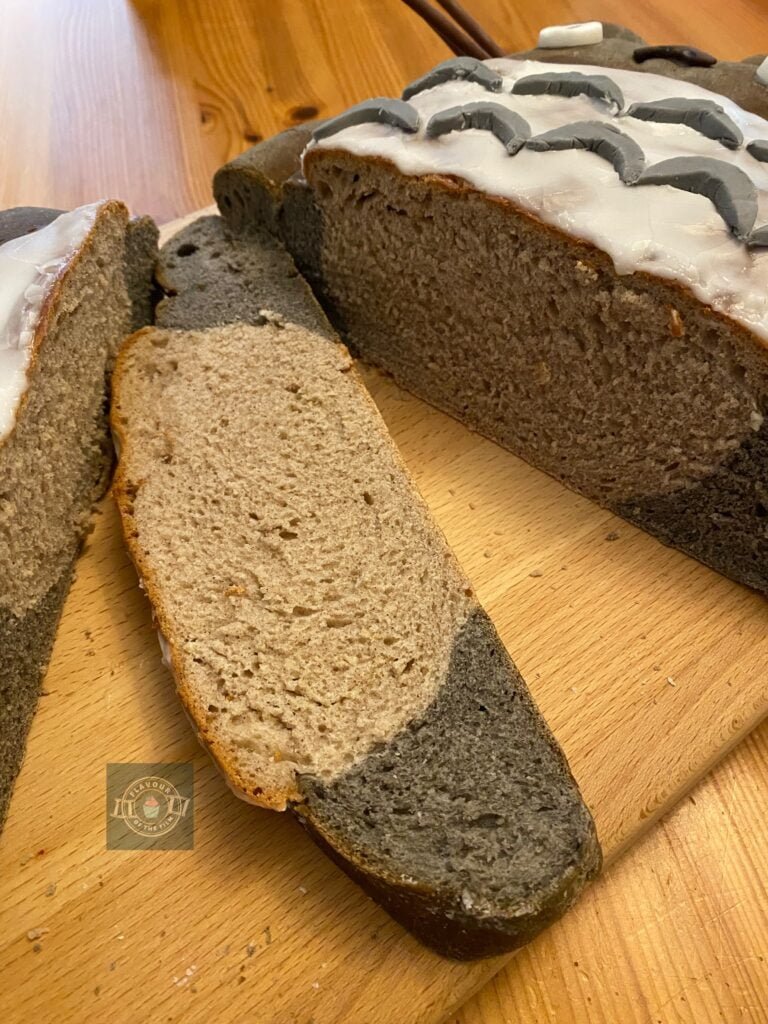
I used a very tiny amount of good quality black food colouring in the larger dough for Totoro’s fur but as the bread is cinnamon, the look of it changed colour during the baking process. This isn’t an issue in terms of aesthetic as it’s bread, and doesn’t need to be exact.
It just makes it more exciting when you cut into it and see the grey inside and know that it’s representing Totoro’s grey fur!
I made two doughs for this recipe – both the same flavour, just different sizes as the larger one needed food colouring added to it. The smaller one is Totoro’s belly, which has no food colouring and is what you use to fill in the hole you create to make his belly. Essentially, the bread is made up of two parts put together.
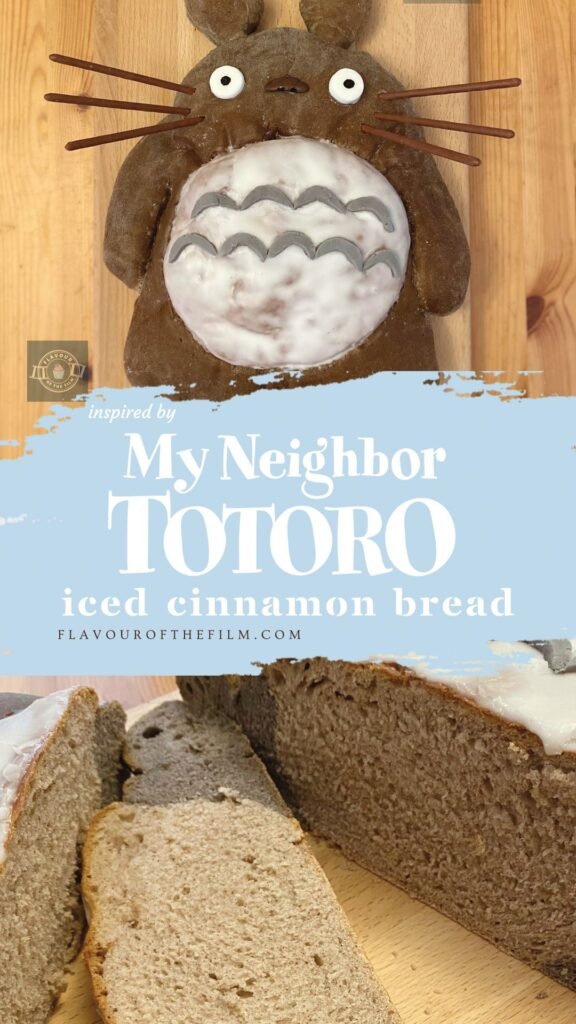
For the decoration, his belly is covered in royal icing.
Simply mix the required amount with a tiny splash of water. You’ll want to be careful doing this because the more water you add, the runnier the icing and the more mess it’ll make when you try to cover Totoro’s belly. Even with a teaspoon of water added to seven tablespoons of royal icing sugar, I still had to control the flow and tidy up around the edges.
As a result, my recommended amount is less for this recipe than I used. That way you can use a cocktail stick or small spoon to smooth the icing up to the edges without making too much of a mess.
If you do end up making a bit more mess than you wanted, you can wipe it away with a piece of kitchen towel/paper dampened with warm water. If you need to, clean up as soon as possible to avoid the icing setting and then ripping the bread when you try to clean it off.
Royal icing sugar is great because it hardens enough so that it is set but is still soft when you eat it. Try not to replace it with anything else other than regular icing sugar as you won’t achieve the desired effect.
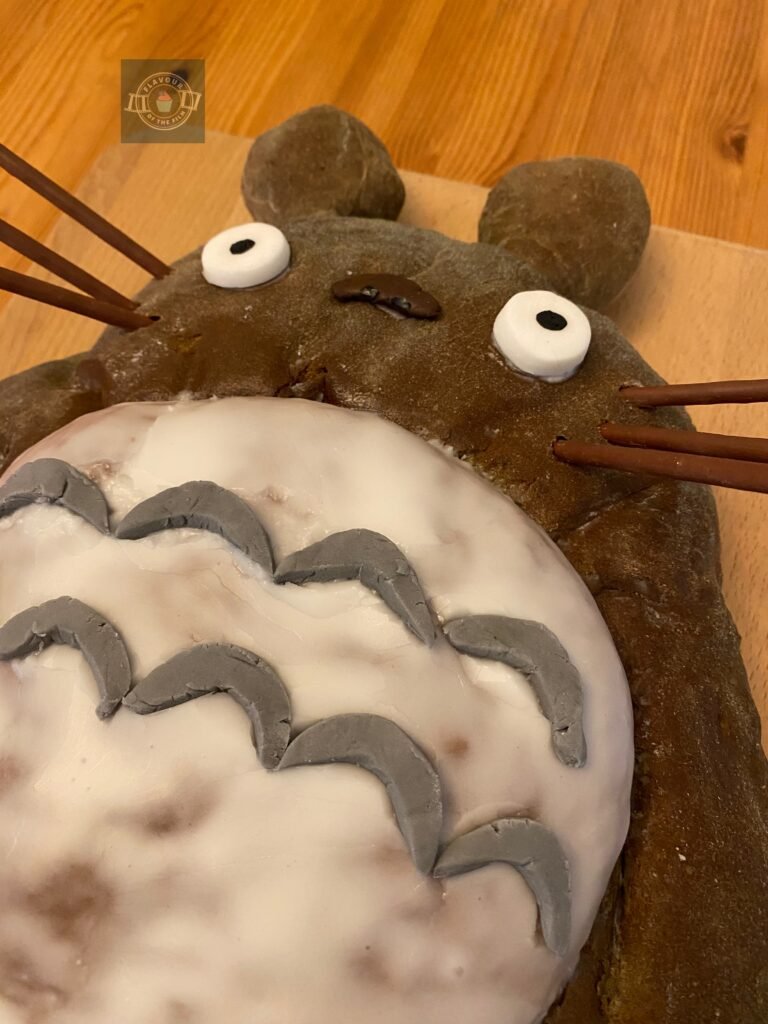
For the details like his eyes, nose and belly pattern, I used fondant icing that I had leftover from other bakes.
As the surface of his body turned brown in the oven, I wanted to match his nose to that, so I used a dark brown fondant. You could use modelling chocolate as an alternative. His eyes are also fondant icing – I used the wide end of a piping nozzle to cut out the shapes and then painted the pupils with black food colouring using the end of a chopstick.
For his belly pattern, I used leftover grey fondant icing so that there was at least a hint of grey on the outside of the bread.
As for his whiskers, I used one of my favourite Japanese snacks: Pocky. For those that don’t know, Pocky are sticks of biscuit covered nearly entirely with chocolate. I ate pretty much a box a day whilst I was living in Japan and still get them whenever I can.
They are the perfect thickness for Totoro’s whiskers and felt more appropriate than the other options I was considering, seeing as they are Japanese snacks.
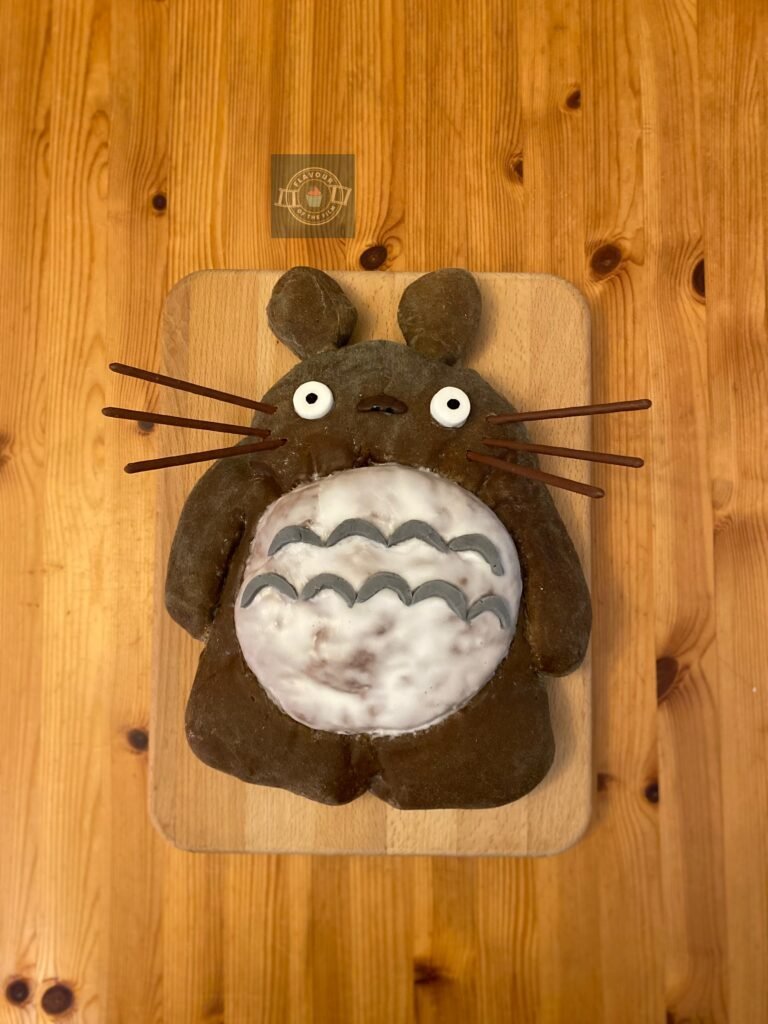
Pocky come in lots of different delicious flavours, but I kept it classic by using the pure milk chocolate ones.
If you are struggling to find any in your local area, you can use a product that is similar. Dark, thin and sweet is what you’re aiming for. Mikado is a similar product that can be found in most U.K. supermarkets. Matchmakers would also work, though they are more chocolate than anything so are more prone to breakage or melting.
Top Tips
- Try not to over work the dough. You’ll know the gluten is well developed when you do the window pane test, or when the dough is springy and shiny. It will also no longer be tacky to touch.
- Have fun moulding the dough into shape! A little stretching and tucking is all it needs. Bread dough is very pliable.
- Go easy on the cinnamon. It can be a strong flavour if you add too much.
- The icing will be quite runny so add a little at a time when icing your bread loaf.
There you have it, friends. My first Anime-inspired bake! This My Neighbor Totoro iced cinnamon bread is so sweet, so warming and so deliciously soft. It’s the perfect sweet snack for a viewing of My Neighbor Totoro. I hope you enjoy making it and truly savour the taste.
Happy baking, happy eating!
The Recipe
Ingredients
My Neighbor Totoro iced cinnamon bread dough:
- 500g [3 cups + 2 tbsp] strong white bread flour
- 2 tsp salt
- 7g (1 sachet) fast action dried yeast
- 3 tbsp caster sugar
- 3 – 5 tsp cinnamon
- 300ml [10.5 oz] warm water
- 3 tbsp olive oil
- Grey or black food colouring
Belly dough:
- 250g [1½ cups + 1 tbsp] strong white bread flour
- 1 tsp salt
- 3.5g (½ sachet) of fast action dried yeast
- 1½ tbsp caster sugar
- 1 – 3 tsp cinnamon
- 150ml [5.2 oz] warm water
- 1½ tbsp olive oil
Decoration:
- White fondant icing
- Black food colouring
- Grey fondant icing
- Dark brown fondant icing
- 4 tbsp royal icing [or confectioners] sugar
- A small splash of water
- Pocky or similar product
Serves: 12+
Preparation time: 25 minutes
Proving time: 1 hour 30 minutes
Baking time: 30 minutes
Decorating time: 20 minutes
Method
My Neighbor Totoro iced cinnamon bread body dough:
- Start with the largest dough. Sieve the flour into a large mixing bowl. Add the salt to one side and the yeast to the other side. Do not let the salt and yeast touch yet.
- Add the sugar and cinnamon and mix gently with a wooden spoon until well distributed.
- Make a well in the centre of your ingredients and add the oil, water and food colouring. Add a little food colouring to begin with, especially if using black, as you will be able to add more later if necessary.
- Mix it all together until a rough dough has formed.
- If kneading by hand, pour the dough out onto a clean and floured surface and knead for around 10 minutes. If more colour is needed, add it during this process and the colour will distribute well while you knead. Remember that the colour will develop over time so avoid adding too much. If kneading in a standing mixer with a dough hook, knead for around 5 minutes on a medium speed.
- Your dough will be ready when it is smooth and elastic-like and passes the window pane test. If a small piece of it stretches between your fingers enough to allow light through before ripping, it is ready. If it rips straight away, knead for a few minutes more and check again.
- Place your dough in a large lightly oiled bowl and cover with a tea towel/cling film/beeswax paper and set aside while you make the dough for Totoro’s belly.
Belly dough:
- To make the belly, repeat steps 1 to 7 with the ingredients and measurements for the belly dough listed above. Remember to leave out the food colouring.
- Leave both doughs to rise for an hour until doubled in size. You can leave the doughs on your kitchen side if it’s warm or place in the airing cupboard or low temperature oven if it’s cold out.
- Once the doughs are doubled in size, prepare a large rectangular baking tray and line it with greaseproof paper/baking parchment.
- Tip the individual doughs out onto a clean and floured surface, keeping them separate. Knock the air out of each one gently and begin shaping Totoro!
Shaping:
- Rip two small pieces off of the grey dough for his ears and set aside while you shape his body.
- To shape his body simply roll the dough out with a rolling pin and stretch it gently to get the long rounded shape. Place it on the baking tray you prepared earlier, making sure the tray is portrait so that the entire length of his body is supported by the tray.
- Section off his arms by ripping some dough on each side slightly away from the body and rounding them off before pushing them back towards his body. Shape his feet with slight points.
- Shape his ears like thin arrow heads and place the ends under his head, pinching the dough together to secure them.
- Poke a finger into the centre of his belly and begin shaping a round hole – stretching the dough out with your fingers. Make this as large as possible and adjust the rest of him to accommodate the belly dough.
- Place the belly dough into the gap. It doesn’t matter if the dough spills over the gap – Totoro is mostly belly anyway!
- Set aside and leave to rise for another 30 minutes.
Baking:
- After 20 minutes, preheat your oven to 200°C [345°F] or 180°C fan.
- After 30 minutes, bake the bread for 30 minutes. The colour will change to a brown shade but that is normal – the inside will be grey and cream as per the doughs! Tap on the bread, especially the bottom, to check you hear a hollow sound. Then you’ll know it’s baked through.
- Leave to cool on the tray for 10 or so minutes before transferring to a wire rack to cool completely.
- Once completely cool, you can decorate.
Decoration:
- Mix together the royal icing sugar and water until you have a very thick consistency.
- Pour the icing mix over the centre of his belly and use a cocktail stick or small spoon to push it gently to the edges. Leave a gap around the edge as the icing will likely naturally run down itself.
- If any icing pours over the edges and onto the body, gently clean away with a damp piece of kitchen towel/paper. The icing will be thin over his belly – this is part of the reason why this dough had no food colouring added to it. This part can be messy so be patient and be kind to yourself!
- While the icing is setting on his belly, cut out your fondant features. Use any leftover icing mix as glue to attach his eyes and nose to the bread. Paint the pupils and nostrils with black food colouring. I used the end of a chopstick to do this.
- Very gently press the fondant belly pattern pieces (9 of them) into the icing on the belly of your bread – 4 on the top and 5 below them.
- Push Pocky (or whatever you are using) into the sides of the face for his whiskers: 3 on each side. Push in the biscuit side first, right up until the chocolate starts.
- Smile at your Totoro bread creation!
This gorgeously soft and warming My Neighbor Totoro iced cinnamon bread is best eaten on the day but will remain soft for 3 days in an airtight container. Enjoy!
The Anime
Tonari no Totoro a.k.a My Neighbor Totoro (1988) is an iconic Japanese Anime film from the wondrous world of Studio Ghibli. It’s an incredibly endearing story about two young girls who move to the country to be with their mother.
Once settled in, they begin exploring their surroundings and find themselves going on magical adventures with the forest spirits that reside nearby.
One of those forest spirits happens to be the joyous giant, Totoro. A large, grey, furry creature with an adorable demeanour and a huge grin when he shows it. He’s certainly the kind of creature I would have wanted to meet exploring the outdoors as a child.
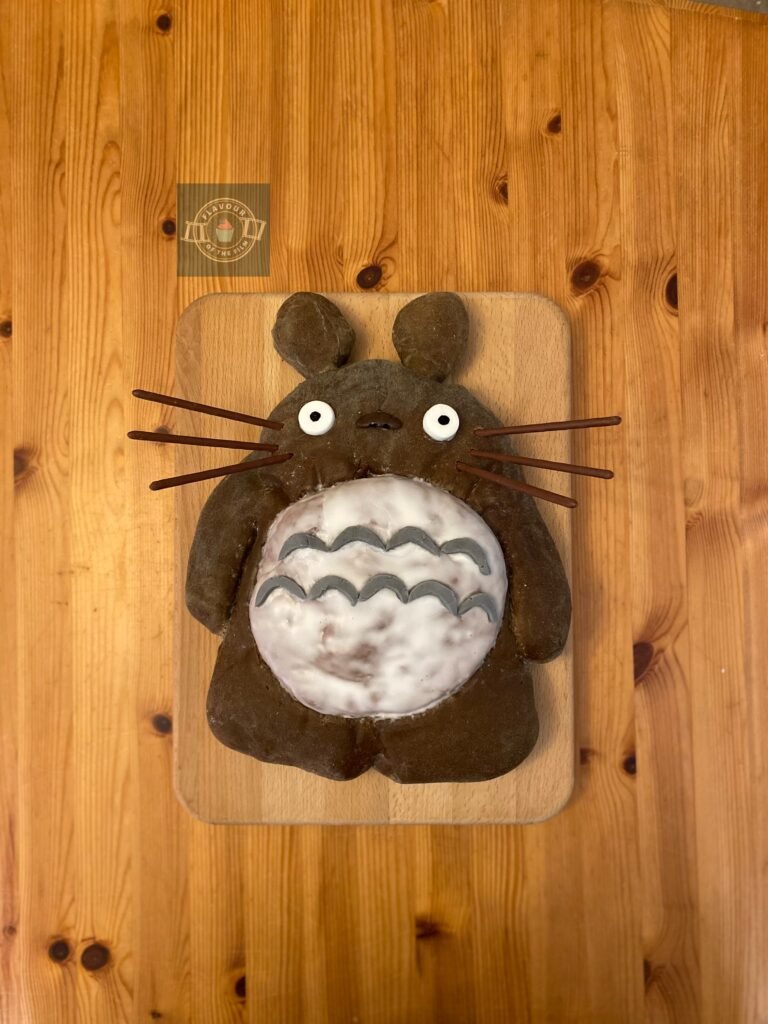
Scratch that, I’d love to meet Totoro at any point in my life!
Written and directed by Hayao Miyazaki, My Neighbor Totoro is a timeless film and a wholesome Anime movie that I will recommend to anyone looking to expand their movie-watching horizons. Studio Ghibli is a great starting point for those starting out watching Anime, but this studio’s films are genuinely just warm.
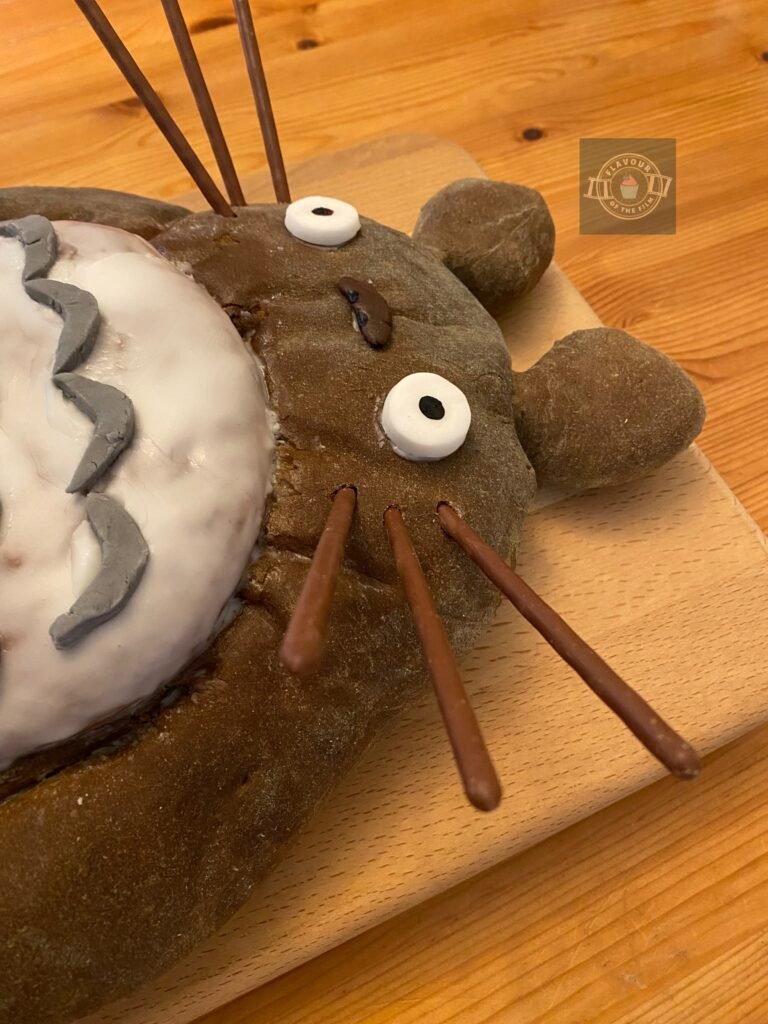
Fuzzy feeling, cosy evening in. That’s the vibe. They make great viewing whatever the motivation.
This film features the wonderful voices of Noriko Hidaka as Satsuki; Chika Sakamoto as Mei, Hitoshi Takagi as Totoro, Tanie Kitabayashi as Granny, Toshiyuki Amagasa as Kanta, Hiroki Maruyama as Kanta’s Mother, Masashi Hirose as Kanta’s father, Shigesato Itoi as Tatsuo Kusakabe and Sumi Shimamoto as Yasuko Kusakabe among others.
I don’t know what it is about listening to Japanese actors in Anime, but I feel so relaxed. Especially when it’s Studio Ghibli.
The sheer beauty of this film makes me feel completely at peace. Anime works are, more often than not, beautiful to look at. The talent and skill it takes to create Anime films and Anime series is a whole different level. Each frame is like a painting.
Subtitled or dubbed, Anime productions like My Neighbor Totoro are works of art.
Here’s a question for my fellow Anime fans: are you a subbed viewer or a dubbed viewer?
No judgement, just curiosity. I’m definitely a subbed viewer, but I’ll definitely watch an Anime dubbed if it works better (as is the case with Full Metal Alchemist: Brotherhood, in my opinion).
I reckon I’ll create a recipe based on the すすワタリ (Susuwatari), a.k.a Sootsprites, of My Neighbor Totoro and Spirited Away as well. They’re so cute and magical looking, how could I not?
2024 Update: you can find my Sootsprite cookie dough bites recipe here!
Recipe Card

My Neighbor Totoro Iced Cinnamon Bread
Ingredients
Body dough:
- 500 g [3 cups + 2 tbsp] strong white bread flour
- 2 tsp salt
- 7 g 1 sachet fast action dried yeast
- 3 tbsp caster sugar
- 3 – 5 tsp cinnamon
- 300 ml [10.5 oz] warm water
- 3 tbsp olive oil
- Grey or black food colouring
Belly dough:
- 250 g [1½ cups + 1 tbsp] strong white bread flour
- 1 tsp salt
- 3.5 g ½ sachet of fast action dried yeast
- 1½ tbsp caster sugar
- 1 – 3 tsp cinnamon
- 150 ml [5.2 oz] warm water
- 1½ tbsp olive oil
Decoration:
- White fondant icing
- Black food colouring
- Grey fondant icing
- Dark brown fondant icing
- 4 tbsp royal icing [or confectioners] sugar
- A small splash of water
- Pocky or similar product
Instructions
- Start with the largest dough. Sieve the flour into a large mixing bowl. Add the salt to one side and the yeast to the other side. Do not let the salt and yeast touch yet.
- Add the sugar and cinnamon and mix gently with a wooden spoon until well distributed.
- Make a well in the centre of your ingredients and add the oil, water and food colouring. Add a little food colouring to begin with, especially if using black, as you will be able to add more later if necessary.
- Mix it all together until a rough dough has formed.
- If kneading by hand, pour the dough out onto a clean and floured surface and knead for around 10 minutes. If more colour is needed, add it during this process and the colour will distribute well while you need. Remember that the colour will develop over time so avoid adding too much. If kneading in a standing mixer with a dough hook, knead for around 5 minutes on a medium speed.
- Your dough will be ready when it is smooth and elastic-like and passes the window pane test. If a small piece of it stretches between your fingers enough to allow light through before ripping, it is ready. If it rips straight away, knead for a few minutes more and check again.
- Place your dough in a large lightly oiled bowl and cover with a tea towel/cling film/beeswax paper and set aside while you make the dough for Totoro’s belly.
- To make the belly, repeat steps 1 to 7 with the ingredients and measurements for the belly dough listed above. Remember to leave out the food colouring.
- Leave both doughs to rise for an hour until doubled in size. You can leave the doughs on your kitchen side if it’s warm or place in the airing cupboard or low temperature oven if it’s cold out.
- Once the doughs are doubled in size, prepare a large rectangular baking tray and line it with greaseproof paper/baking parchment.
- Tip the individual doughs out onto a clean and floured surface, keeping them separate. Knock the air out of each one gently and begin shaping Totoro!
- Rip two small pieces off of the grey dough for his ears and set aside while you shape his body.
- To shape his body simply roll the dough out with a rolling pin and stretch it gently to get the long rounded shape. Place it on the baking tray you prepared earlier, making sure the tray is portrait so that the entire length of his body is supported by the tray.
- Section off his arms by ripping some dough on each side slightly away from the body and rounding them off before pushing them back towards his body. Shape his feet with slight points.
- Shape his ears like thin arrow heads and place the ends under his head, pinching the dough together to secure them.
- Poke a finger into the centre of his belly and begin shaping a round hole – stretching the dough out with your fingers. Make this as large as possible and adjust the rest of him to accommodate the belly dough.
- Place the belly dough into the gap. It doesn’t matter if the dough spills over the gap – Totoro is mostly belly anyway!
- Set aside and leave to rise for another 30 minutes. After 20 minutes, preheat your oven to 200°C [345°F] or 180°C fan.
- After 30 minutes, bake the bread for 30 minutes. The colour will change to a brown shade but that is normal – the inside will be grey and cream as per the doughs! Tap on the bread, especially the bottom, to check you hear a hollow sound. Then you’ll know it’s baked through.
- Leave to cool on the tray for 10 or so minutes before transferring to a wire rack to cool completely.
- Once completely cool, you can decorate.
- Mix together the royal icing sugar and water until you have a very thick consistency.
- Pour the icing mix over the centre of his belly and use a cocktail stick or small spoon to push it gently to the edges. Leave a gap around the edge as the icing will likely naturally run down itself.
- If any icing pours over the edges and onto the body, gently clean away with a damp piece of kitchen towel/paper. The icing will be thin over his belly – this is part of the reason why this dough had no food colouring added to it. This part can be messy so be patient and be kind to yourself!
- While the icing is setting on his belly, cut out your fondant features. Use any leftover icing mix as glue to attach his eyes and nose to the bread. Paint the pupils and nostrils with black food colouring. I used the end of a chopstick to do this.
- Very gently press the fondant belly pattern pieces (9 of them) into the icing on the belly of your bread – 4 on the top and 5 below them.
- Push Pocky (or whatever you are using) into the sides of the face for his whiskers: 3 on each side. Push in the biscuit side first, right up until the chocolate starts.
- Smile at your Totoro bread creation!
Notes
© Flavour of the Film. All content and imagery is copyright protected. Please do not use any of my images or written content without prior permission. If you would like to share any of the recipes or images on Flavour of the Film, please link back to the recipe in question and rewrite it in your own words, crediting Flavour of the Film as the original source.



4 Comments
Comments are closed.