Coconut and White Chocolate Ladyfingers | Jujutsu Kaisen
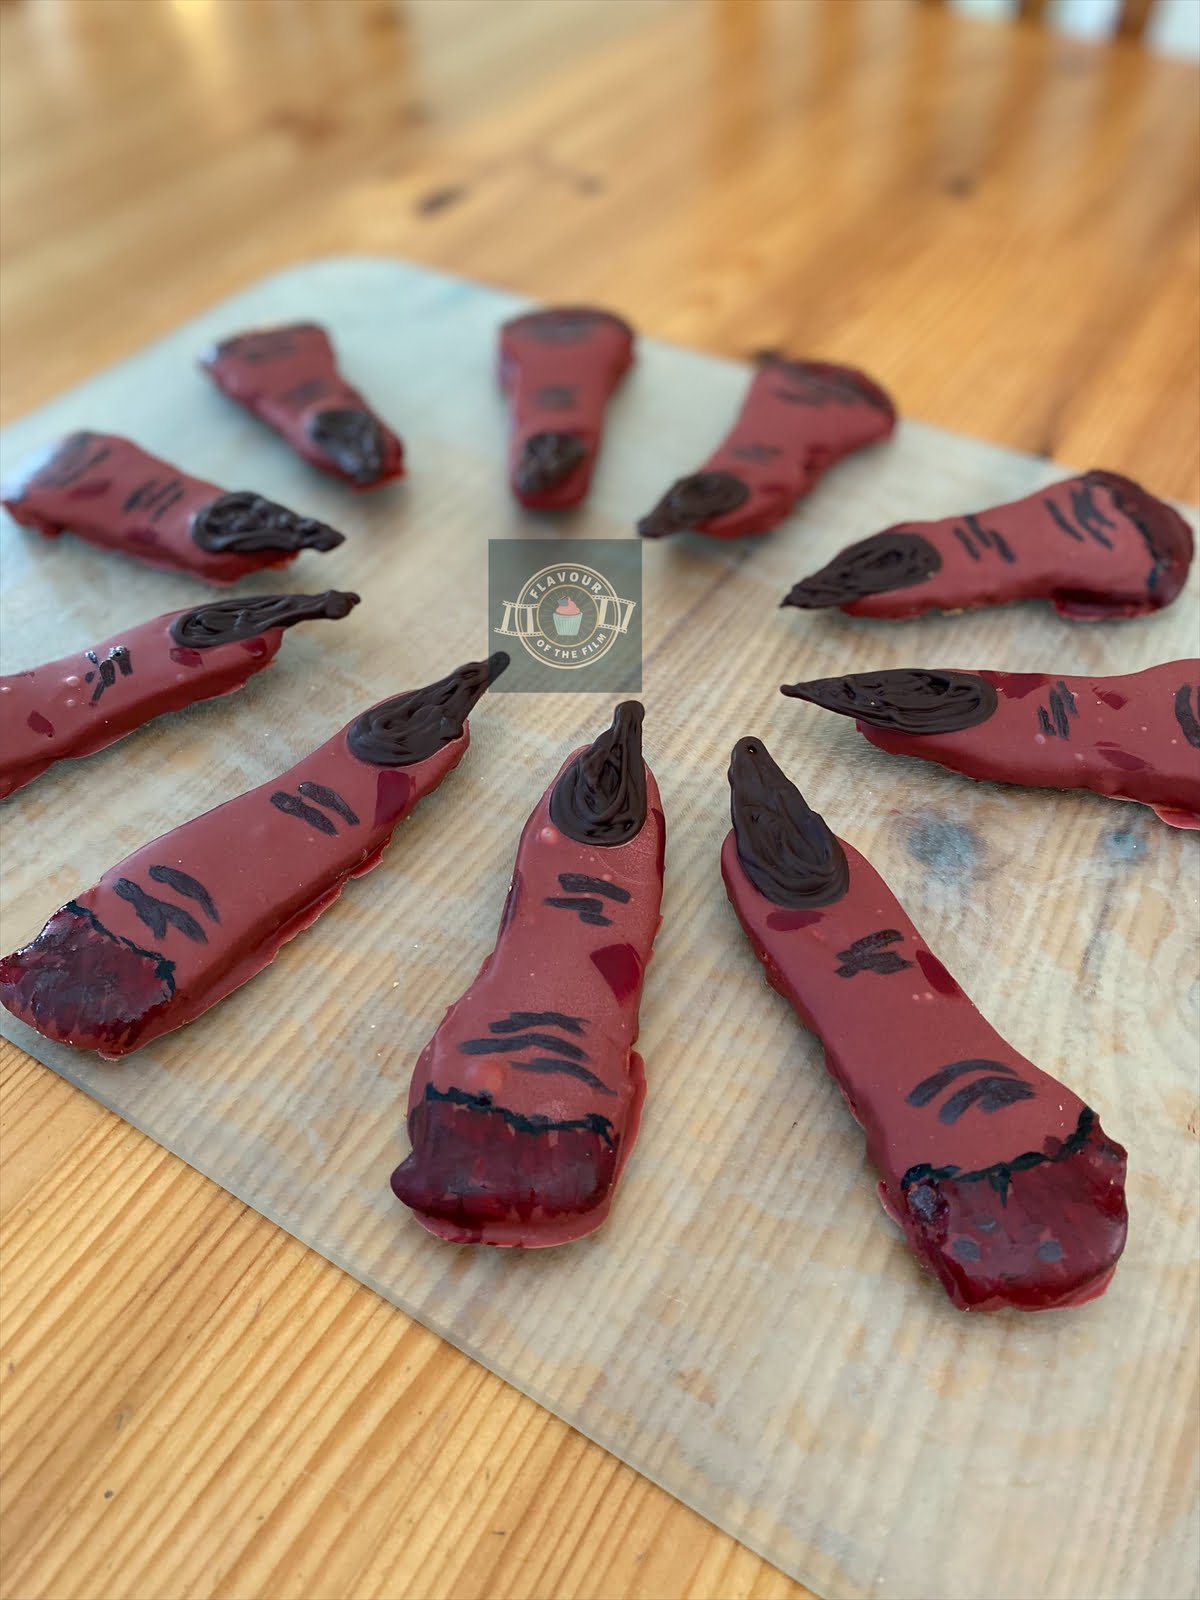
Delicate coconut flavoured ladyfingers covered white chocolate, shaped and painted in the image of demon fingers, celebrating Jujutsu Kaisen.
Ingredients
Jujutsu Kaisen Sukuna fingers:
- 4 medium eggs
- 120 g [¾ cup] caster sugar
- 1 tsp extract of your choice i.e. vanilla I used coconut
- Pinch of salt
- 120 g [¾ cup + 3 tbsp] plain [all-purpose] flour
Decoration:
- 300 g [1½ cups + 3 tbsp] white chocolate chopped or in chips
- Red food colouring
- Pink food colouring
- Black food colouring
- Grey food colouring optional
- 75 g [¼ cup + 3 tbsp] high quality dark chocolate I used 75%
Instructions
- Line and grease 3 baking trays with baking parchment/greaseproof paper.
- Preheat your oven to 190°C [380°F] or 180°C fan.
- Separate your eggs into two large bowls: yolks in one and whites in another.
- Whisk the egg yolks with half of the sugar and the extract you are using until pale and creamy.
- Using an electric hand whisk or standing mixer with a whisk attachment, whisk the egg whites into stiff peaks. Add the salt whilst whisking.
- Gradually add the other half of the sugar into the egg whites whilst whisking. Make sure to do this slowly as if making meringue. This is what achieves that ladyfinger texture!
- Fold the egg white mixture into the yolk mixture gently until well combined.
- Sieve the flour over the combined egg mixture and fold in well – until you see no lumps of flour.
- Pipe the mixture onto the trays using a piping bag or sandwich bag with a thick end cut off. They will spread in the oven to bear that in mind when deciding how wide to make the hole in your piping bag! Pipe them in rows of 2 with 4 across, until all of your mixture is used up. Make sure to make the bottom end of each one a little wider.
- Bake for 12 – 15 minutes until slightly risen and golden.
- Leave them on the trays to cool fully – it doesn’t take long!
- Once the ladyfingers are cool, use a small knife to gently trim and shape them to be a little sharper looking. They will come out of the oven pretty rounded so don’t be afraid to shape them a little!
- Start making the nails. Prepare another baking tray by lining it with baking parchment/greaseproof paper. Set aside.
- In a large microwave-safe bowl, add in ⅔ of the dark chocolate and melt in 20 seconds bursts. Be sure to stir well in between each burst!
- Once fully melted, add the remaining dark chocolate and stir in until melted. Put back in the microwave for 10 seconds and stir again.
- Pour the dark chocolate into a piping bag or sandwich bag with a very small end cut off. You want it thin like a pencil to help with accuracy.
- Pipe as many nails onto the baking tray as you can. Aim for a sort of long tear shape. Go over each one to make them as thick as possible – it reduces the risk of any breaking!
- Once all of the chocolate has been used up, place the nails in the fridge to set.
- Next, make the white chocolate covering.
- In a large microwave-safe bowl, place ⅔ of the white chocolate in and melt in the microwave in 20 seconds bursts. Be sure to stir well in between each burst!
- Once fully melted, add the remaining white chocolate into the bowl and stir until nearly completely melted. Put back in the microwave for another 10 seconds and stir again.
- Add the pink and red food colourings a little at a time until you reach an accurate colour. Stir in with a slight dash of black food colouring to make it dull.
- Using a fork or palette knife, dip each ladyfinger into the white chocolate and cover well. They do NOT need to be perfect: they need to look disgusting!
- Place back onto the baking trays. Work fast to make sure the chocolate doesn’t set in the bowl. If it starts to set, put it back in the microwave for 10 seconds and stir well.
- Retrieve the nails from the fridge and lay a nail over the top end of each finger. Make sure to secure the round part of the nail onto the white chocolate by pressing down gently.
- Place the now manicured fingers in the fridge to set fully.
- Once set, paint the fleshy ends in red and grey and black using a small paintbrush. Add details like blood and finger creases using a deeper shade of the red and grey (mix red and a tiny bit of black or grey to change the shade).
- Place back in the fridge to set again.
- Enjoy whilst watching the latest season of Jujutsu Kaisen!
Notes
These disgusting yet delectable Jujutsu Kaisen Sukuna fingers will last around 4 days (if they last that long!). The chocolate should stay set at room temperature but if it is particularly warm, keep them in the fridge. Enjoy!