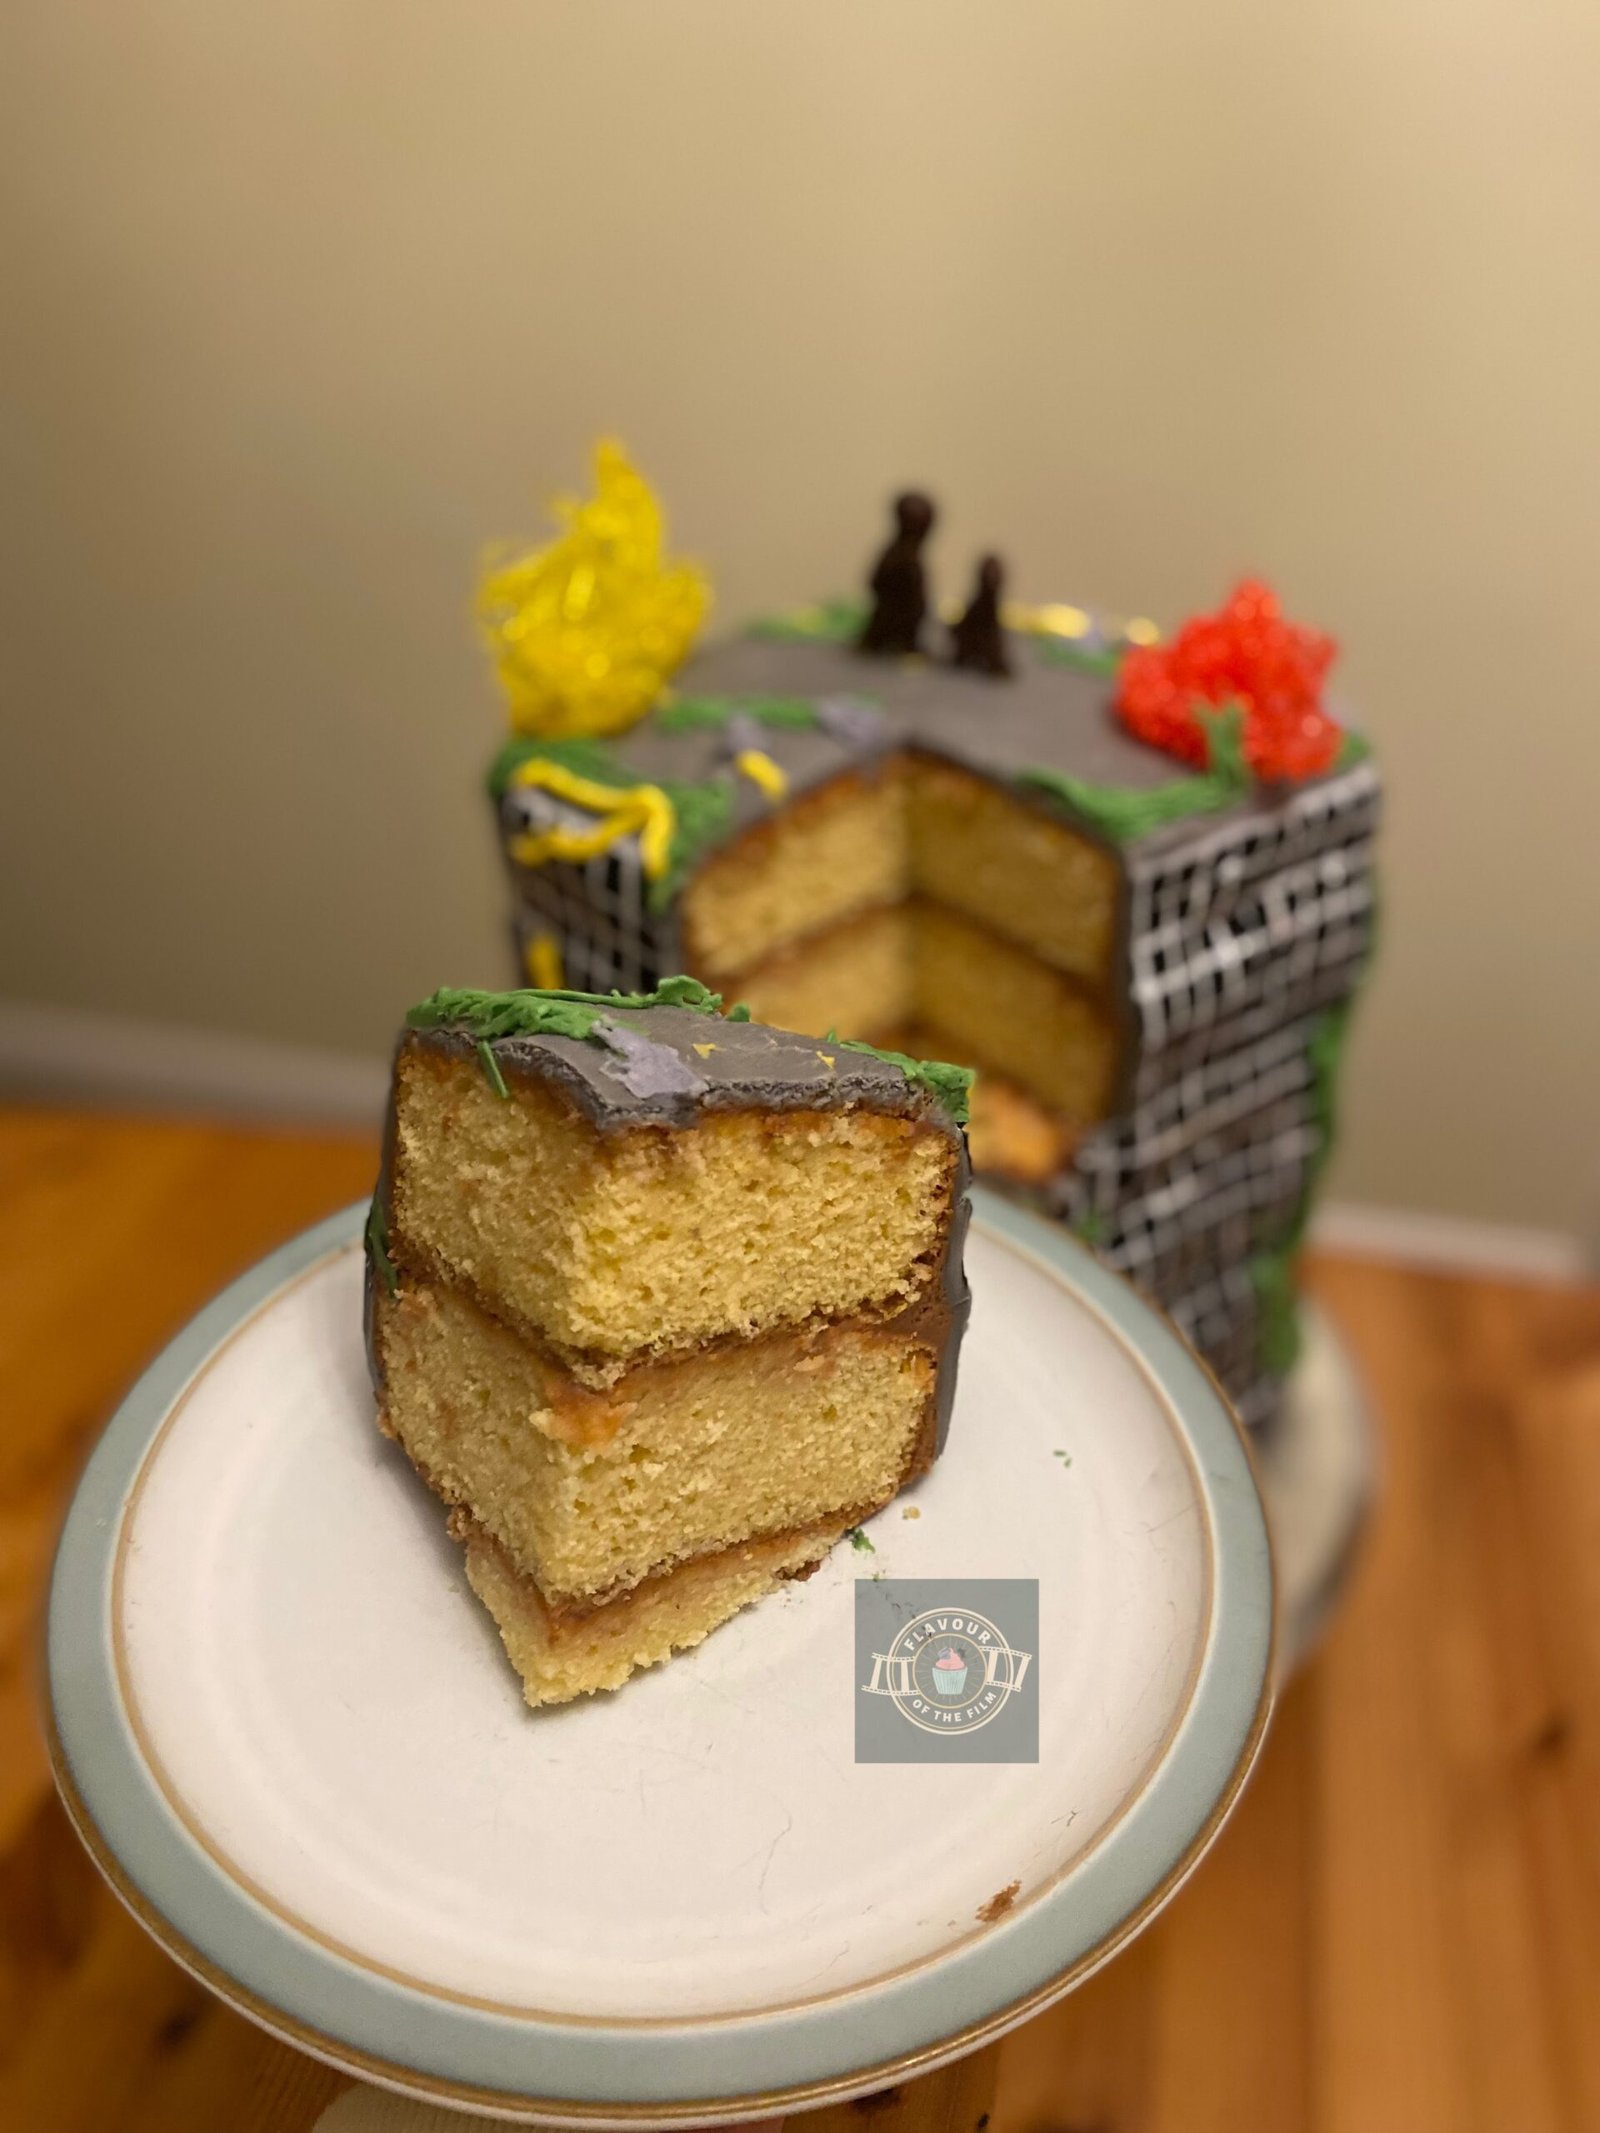
The Last of Us Cake
Scarily tasty cake flavoured with blood orange, dark chocolate and spiced rum decorated like a dystopian skyscraper, celebrating The Last of Us.
Ingredients
The Last of Us cake:
- 1200 g [42.25] unsalted butter
- 1200 g [5¾ cups + 3 tbsp] caster sugar
- 1200 g [7¼ cups + 3 tbsp] self-raising flour
- 1200 g or around 16 large eggs as close as you can get to this weight
- Zest of 2 blood oranges
Syrup:
- 160 ml [5.6 oz] spiced dark rum
- Juice of 2 blood oranges
- 160 g [¾ cup +1 tbsp] caster sugar
Buttercream:
- 350 g [12.25 oz] unsalted butter
- 800 g [5½ cups] icing [confectioners] sugar
- 100 g [½ cup + 1 tbsp] dark chocolate 85% or higher
Finishing decorations:
- 1.5 kg [3.3 lbs] grey fondant icing
- White food colouring or edible paint
- Black food colouring or edible paint
- 125 g [around ½ cup] red ready-tempered isomalt
- 125 g [around ½ cup] yellow ready-tempered isomalt
- 100 g [3.5 oz] unsalted butter
- 250 g [1½ cup + 3 tbsp] icing sugar
- Purple food colouring
- Yellow food colouring
- Green food colouring
- A palmful of brown/black fondant icing/sugar paste or modelling chocolate
Instructions
- Preheat your oven to 180°C [325°F] or 160°C fan and grease and line three 20 x 20 x 20 deep square cake tins with greaseproof paper/baking parchment.
- Weigh out half of the eggs – the nearest you can get to 600g.
- Beat together half of the sugar and half of the butter for your cake batter. Do this until pale, light and fluffy.
- Add the eggs in one at a time and beat until smooth.
- Add the flour and zest and mix in just until combined. Be careful not to overmix.
- Split the batter evenly among the three tins and bake for 35 – 40 minutes. Your cakes will be golden and risen, a cocktail stick will come out clean from the centre of each cake and they will not be making any crackling or bubbling sounds when you listen to them.
- Leave the cakes in the tins while you make the syrup.
- Pour half of the sugar, half of the rum and half of the blood orange juice into a small pot and bring it to a simmer. Stir regularly so that the sugar dissolves and the alcohol cooks out. The syrup will be ready when it has thickened a little but is still runny enough to pour.
- Prick your sponges with a cocktail stick or fork and spoon the syrup in even amounts over the sponges.
- Leave to sink in for a few minutes before transferring the sponges out of the tins and onto a cooling rack to cool completely.
- While your first three sponges are cooling, make the second batch of batter.
- Grease and line your tins again.
- Repeat steps 2 to 10 for the second three sponges.
- While your second batch of sponges are cooling, make the chocolate buttercream.
- Beat together the butter and sugar until light, pale and fluffy.
- Melt down the dark chocolate in a microwave safe bowl in 20 second bursts, stirring in between to prevent the chocolate from burning.
- Add the chocolate and beat until nice and smooth. If the buttercream seems a little stiff, add some water or milk 1 tbsp at a time until it is slightly looser. You don’t want to risk ripping the cake while you build it – the sponges are very soft!
- When all of your sponges are cool, begin building your skyscraper.
- Spread a little buttercream on your cake stand/board/plate and place the first sponge over it.
- Spread a layer of buttercream over the sponge. Place the next one over and repeat.
- Repeat this process until all six sponges are stacked in a tower. Choose the flattest one for the top layer.
- Cover the entire tower of sponges in the rest of your buttercream and smooth it as much as possible.
- If carving pieces of the cake, do so now, and spread buttercream in the gaps. Do not carve any cake from too low down in the cake otherwise you put the stability of the cake at risk.
- Roll out your grey fondant in pieces and cover the cake with it. Don’t worry too much about getting it straight or measuring for precision: you want the cake to look derelict!
- Using the white food colouring/edible paint, paint the frames of the skyscraper windows. I did all of the vertical lines first and then the horizontal ones, leaving the corners completely grey. If you need a ruler, use one! Otherwise, paint it by eye as I did.
- Paint some black shading in the carved out areas if applicable.
- Leave to dry while you make the ‘fungus’.
- Beat together the butter and icing [confectioners] sugar. Split into three bowls and add each food colouring. Mix in.
- Choose your different piping tips or simply snip off the ends of three different piping bags in different sizes.
- Add each coloured buttercream to its own piping bag.
- Pipe the different colours on your cake in a way that makes it look like it’s growing out and through the cake building, i.e. piping from the bottom up.
- Once finished with the piping, prepare the isomalt.
- Pour the isomalt in a microwave safe bowl (one colour per bowl) and melt in the microwave until completely melted. Do not stir as a utensil will likely get stuck in the isomalt. This will be VERY hot so do NOT touch the isomalt or the bowl without oven gloves.
- Fill a large glass jug with really cold water.
- Wait until the isomalt has stopped bubbling and pour straight into the cold water, allowing the isomalt to pile on top of itself and crystalise. Watch the magic happen!
- Allow to cool for a moment. Remove the isomalt from the water with your hand and place on a plate.
- Repeat until you have used all of your isomalt. Don’t worry if any of it breaks, you can still use it in interesting ways!
- Place your isomalt sculptures on and around your cake – I stuck some of mine in the carved out areas and the bigger sculptures on the top of the cake.
- For the final element, sculpt your Joel and Ellie silhouettes and place them on the roof of your cake. Use any leftover buttercream to glue the feet down if needed.
- Marvel at your masterpiece.
Notes
This gorgeously tasty The Last of Us cake will last for around 4 days in an airtight container or covered in tin foil. Enjoy!