Pixar Onward Birthday Cake
Velvety soft enchanted velvet cake with American buttercream 'painted' on and sculpted modelling chocolate features, celebrating Disney Pixar's Onward.
Ingredients
'Buttermilk’:
- 375 ml [14 oz] milk of your choice I used whole milk
- 2 tbsp fresh lemon juice about ½ a lemon or white vinegar
Cake:
- 185 g [6.5 oz] unsalted butter
- 400 g [2 cups] caster sugar
- 4 large or 5 medium eggs
- Oil based food colouring of your choice I used sky blue optional
- 2 tsp vanilla extract
- 50 g [¼ cup + 3 tbsp] cocoa powder
- 450 g [2¾ cups + 1 tbsp] plain flour
- 1.5 tsp bicarbonate of soda [baking soda]
- 3 tsp white wine vinegar
Decoration:
- 250 g [8.75 oz] unsalted butter
- 550 g [3¾ cups] icing [confectioners] sugar
- 2 tbsp cocoa powder
- Milk of your choice I used whole
- Purple food colouring oil based
- Violet food colouring oil based
- Rose pink food colouring oil based
- Black food colouring oil based
- White food colouring oil based
- Sky blue food colouring oil based
- 75 g milk modelling chocolate
- 150 g white modelling chocolate
- Red and orange boiled sweets [hard candies]
Instructions
- Make your ‘buttermilk’. Measure out your milk and set aside for a few minutes to bring to room temperature.
- Preheat your oven to 180°C [350°F] or 160°C fan. Grease and line three 8-inch cake tins and set aside.
- When the milk is roughly room temperature, mix in the lemon juice or white vinegar in the milk and leave for 10 or so minutes.
- In a large bowl, cream together the sugar and butter until light and fluffy.
- Beat in the eggs, one at a time, until combined.
- In a small bowl, mix together the cocoa powder, food colouring and vanilla extract and mix until a thick paste has formed. You’ll likely need to add milk to bring the ingredients together – do so if needed. I used whole milk but you can use any milk of your choice.
- Add this cocoa powder paste to your sugar, butter and eggs and beat in until smooth and an even colour.
- Pour in the buttermilk and beat in until smooth. Add the flour and mix again until fully combined.
- In a small bowl, mix together the bicarbonate of soda and white wine vinegar. Watch it fizz then add to your cake mixture and mix in.
- Split evenly between the cake tins and bake for 30 – 35 minutes. The sponges will be ready when a cocktail stick or skewer comes out clean, the surface bounces back when pressed on gently and there is barely any or no crackling/bubbling sound at all when you listen to them.
- Leave to cool in the tins for around 10 minutes and then transfer to a wire rack to cool completely.
- Keep the oven on and place the two boiled sweets [hard candies] on a lined baking tray. Place under the heat for a couple of minutes until softened but not completely melted.
- Using two small spoons, work the melted sweets and shape as much as possible. Do not touch them with your hands – the hot sugar will burn your skin.
- Once they are cooler, you may mould into the shape of the Phoenix gem with your fingers. Set aside.
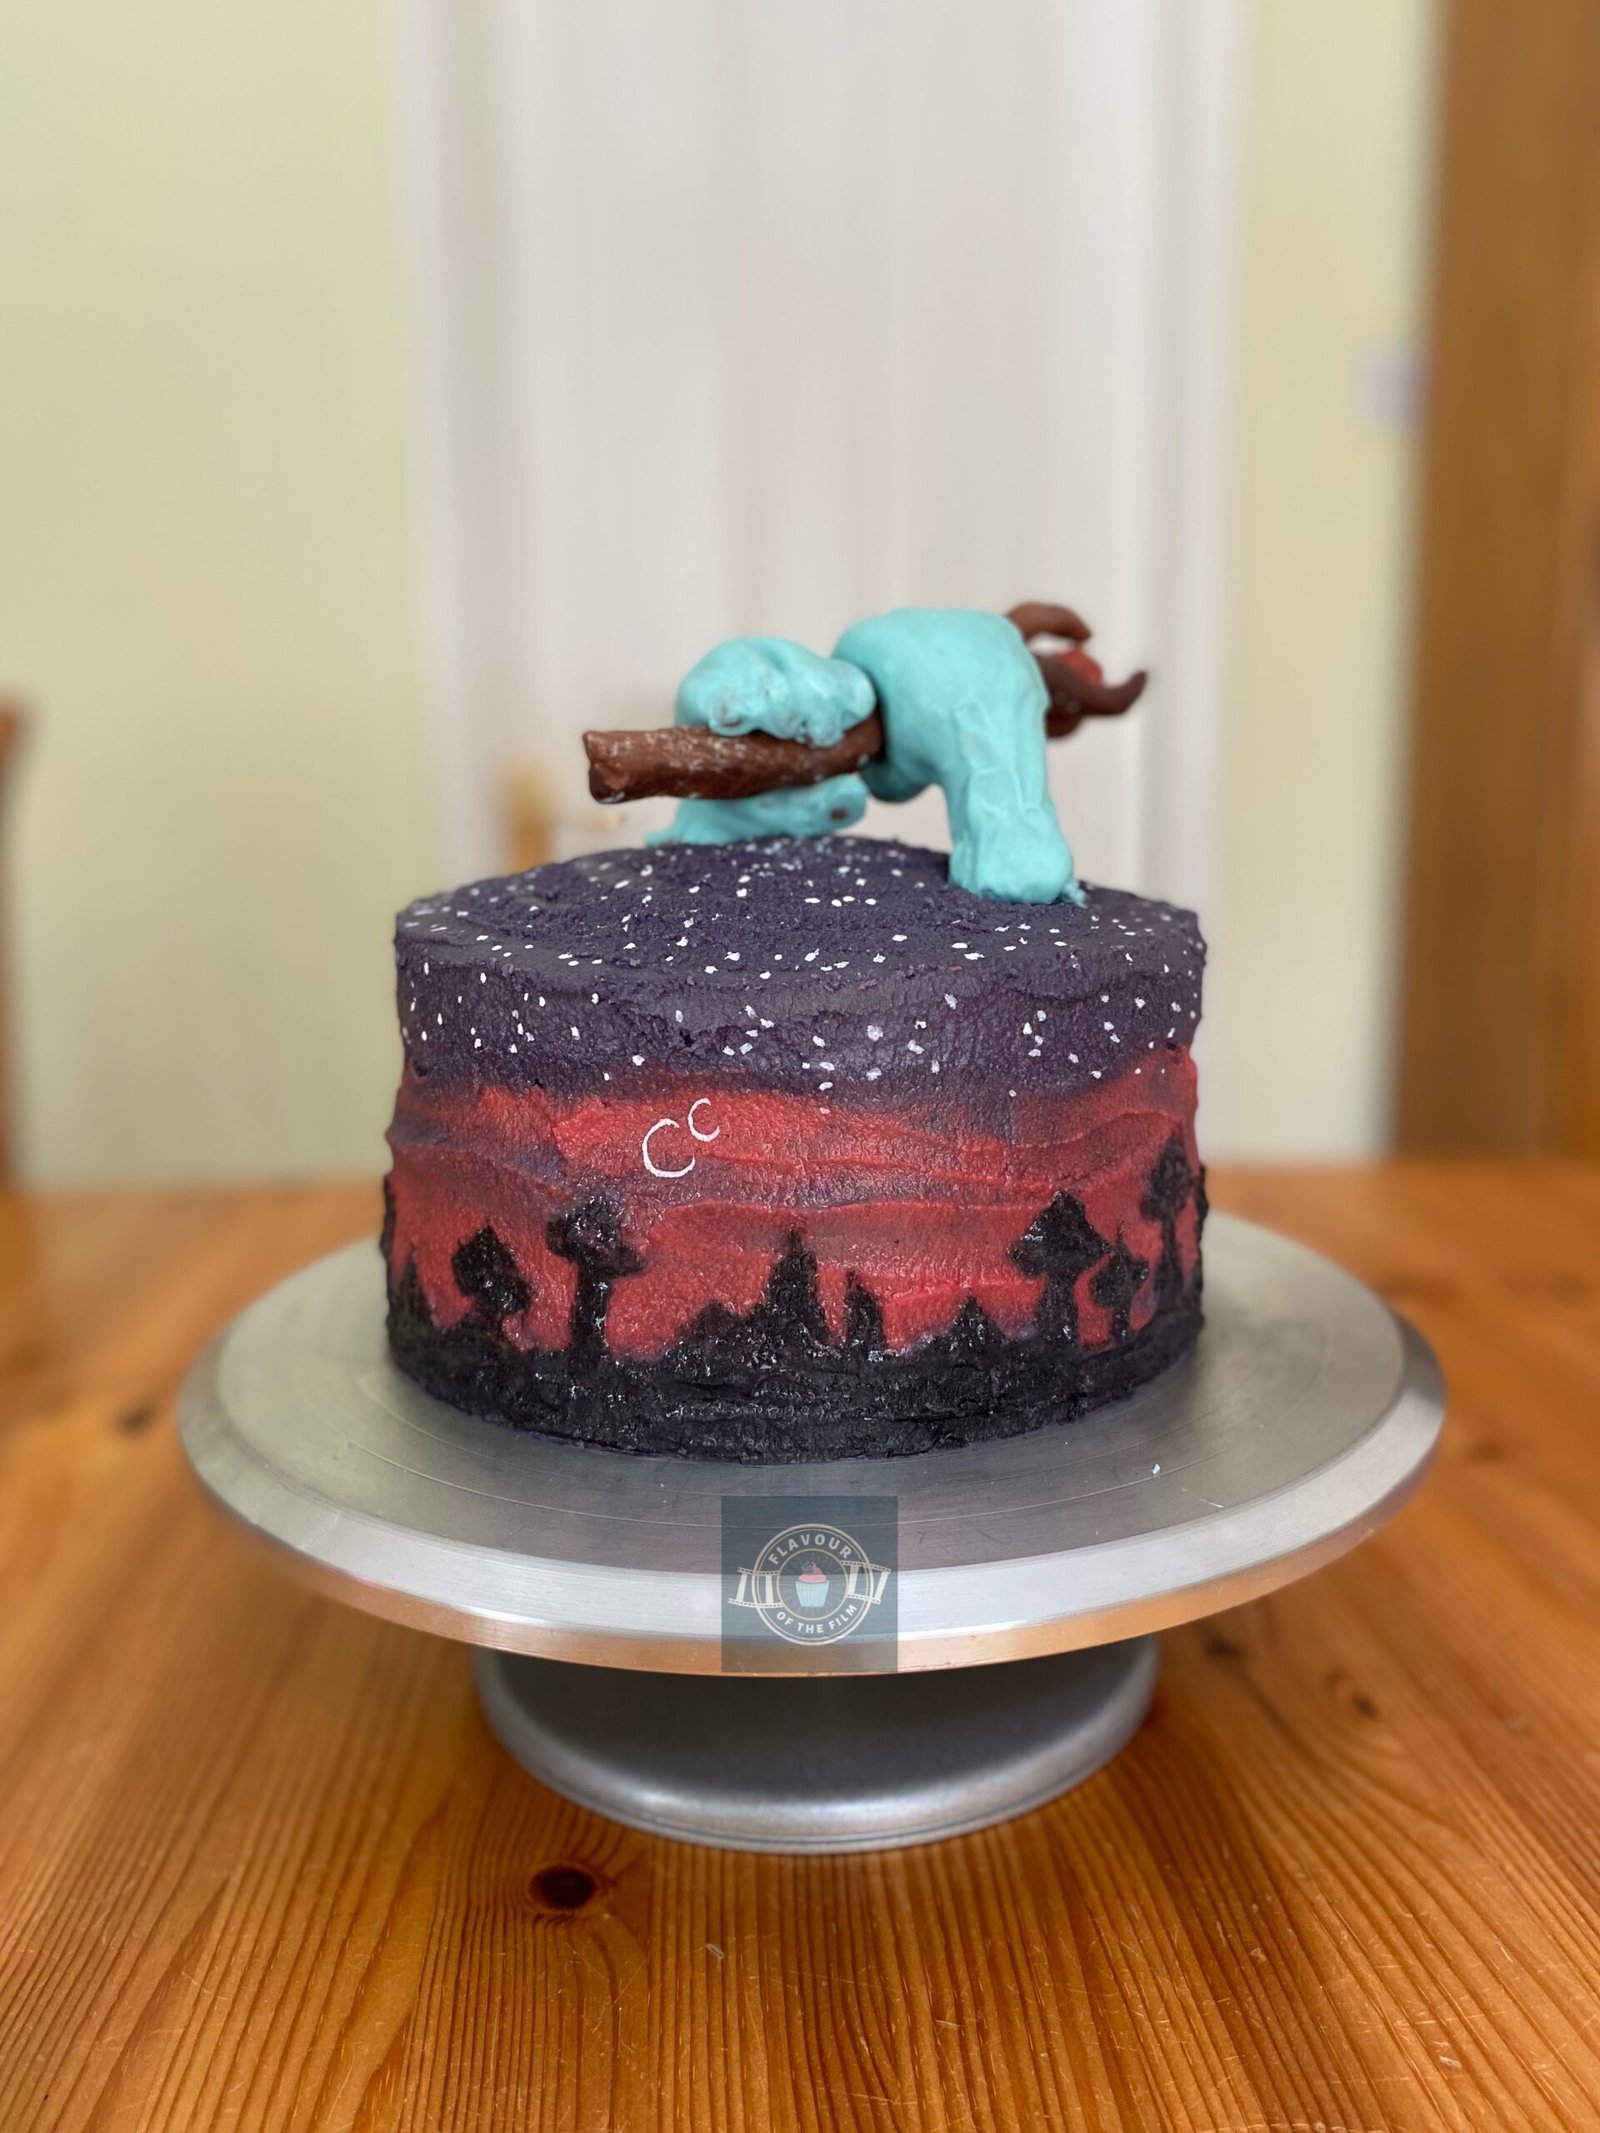
- While your sponges are cooling, make your cake topper elements. Work with the modelling chocolate to soften it – knead a little if needed. Shape the milk chocolate into a staff with three twisted prongs. Lay on a lined baking tray or plate and put into the fridge straight away.
- Shape the white chocolate into two gripping hands – shape them gently around the staff as a guide but only when the staff has hardened enough not to melt.
- Be sure to give the hands wrists and fingers – detail is key. Give the wrists flat ends so that they sit in/on the cake more evenly.
- Place the hands in the fridge with the staff.
- Make your buttercream. Beat the butter to loosen it and then beat in the sugar, ½ at a time. Add a splash of milk to soften if needed.
- Add the cocoa powder and beat in until light and fluffy. It needs to be soft enough to paint but firm enough to hold when spread over the cake.
- Put some into a smaller bowl, add the dark purple food colouring and beat in. Place some in another small bowl, add the rose pink food colouring and beat in. Keep the remaining buttercream in the large bowl colour free – this should be the largest amount of buttercream you have.
- Once your cakes are fully cool, begin to build your cake. Place one sponge on a cake stand/board/plate. Spread 2 heaped tbsp of the colour free buttercream over the top. Place the next sponge on top and repeat. Place the last sponge on the top.
- Add the violet food colouring to the large bowl and beat in. Spread a thin layer of this around your entire cake to create a crumb coat.
- Place your cake in the fridge to chill.
- Retrieve your modelling chocolate elements and paint the hands with the sky blue food colouring. Do this with either an airbrush if you have one or a regular small paintbrush. Place back in the fridge once done.
- Get your cake from the fridge. Spread a layer of dark purple buttercream over the top of the cake, then around the top edge. Spread over more violet buttercream across the midsection and bottom of the cake.
- Place back in the fridge for a few minutes.
- Once set again, retrieve your cake from the fridge. Using a small palette knife, paint on your pink buttercream and smooth to create a wispy sunset look. Place back in the fridge for a few moments.
- Add the black food colouring to your remaining buttercream and beat in until you achieve the deep shade needed.
- Get your cake back out and, using a small palette knife and the black buttercream, paint on your mountainous New Mushroomton skyline around the bottom of your cake. Try to keep this within and below the pink areas of your cake.
- Using a thin paintbrush and the white food colouring, paint on two moons beside each other. Using either the paintbrush or a chopstick, paint the stars across the top of your cake in white food colouring. If you know any constellations, paint them on!
- Place your cake back in the fridge until the entire thing is set and firm.
- Once the buttercream is set, attach the hands to the top of the cake using a cocktail stick – one stick in the bottom of each hand and secure into the cake.
- Gently press the Phoenix gem you made earlier into the centre of the end of the staff so that the three prongs are twisted around it.
- Slide the staff into the grip of the hands slowly. The hands should be able to hold the staff without other support.
- Marvel at your work of art!
Notes
This magical and enchanting Pixar Onward birthday cake will last for around 4 days if covered with a cake dome or aluminium foil (do not wrap this before the buttercream is fully set and dry!). You can keep it in the fridge overnight to make sure it remains fully set. The modelling chocolate will remain in shape at room temperature so it doesn’t need to be kept in the fridge for any longer than that. Enjoy!