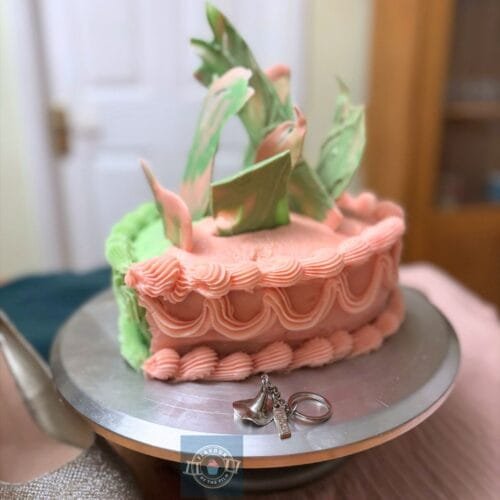
Easy Wicked Birthday Cake
Easy and customisable Wicked birthday cake that brings a touch of the wonderful and whimsical to any Wicked inspired birthday party.
Equipment
- 2 heart shaped cake tins 8 inches in size
Ingredients
Wicked birthday cake layers:
- 300 g unsalted butter room temperature or slightly softened
- 300 g [1½ cups] caster sugar
- 300 g eggs [about 4 large] room temperature
- 300 g [1¾ cups + 2 tbsp] self-raising flour
- 1 tsp orange extract
- ½ tsp high strength natural peach flavouring
Decoration:
- 400 g [10.5 oz] unsalted butter room temperature or slightly softened
- 800 g [5½ cups] icing [confectioners] sugar
- 2 - 3 tbsp evaporated milk optional - can be swapped for any milk
- Baby pink food colouring
- Green food colouring
- 150 g [5.25 oz] white chocolate
Instructions
- Wicked birthday cake sponges:
- Preheat your oven to 180°C [350°F] or 160°C fan. Grease and line the bases of two 8 inch heart shaped cake tins with baking parchment or greaseproof paper. Set aside.
- In a large mixing bowl, cream together the butter and sugar until light and fluffy.
- Add the eggs, beating them in one at a time until fully incorporated.
- Spoon in the orange and peach extracts and beat in.
- Sift in the flour and beat in just until you can no longer see any flour. Be mindful not to over mix here.
- Divide the mixture equally into your two lined tins and bake on the middle shelf for 25 - 30 minutes or until well risen and baked through. A cocktail stick or skewer should come out clean when tested, the surfaces of your sponges should spring back when gently pressed on and you should hear little to no crackling/bubbling sound when you listen to your sponges.
- Once baked, leave the sponges in their tins for 10 or so minutes before transferring upside down to a wire rack to cool completely.
- Chocolate shards:
- While your sponges are cooling, make your cake toppers. Line a baking tray with parchment paper. Set aside.
- Prepare two heatproof bowls. Divide the white chocolate into two halves. Add ⅔ of the first half to one bowl. Add ⅔ of the other half to the other bowl.
- Melt the first half in the microwave in 20 second bursts, stirring in between until completely melted. Once melted, seed in the last ⅓ of the chocolate for this bowl and stir until mostly or completely melted. Add the pink food colouring and stir in. Place the bowl back in the microwave and heat for 10 seconds.
- Repeat step 3 for the other bowl of chocolate, adding green food colouring instead of pink to it.
- Spoon the melted chocolate in random places in the centre of the baking parchment on your tray.
- Using a palette knife or cutlery knife, spread the chocolate into one layer, being careful not to over mix the colours. The idea is to swirl the colours together, but not so much that they blend completely into one!
- Place in the fridge to set faster.
- Buttercream:
- To make the buttercream, beat the butter in a large mixing bowl to loosen it. Add half of the icing sugar and beat in until light and fluffy. Add the other half of the icing sugar and beat in. Spoon in the evaporated milk and beat until the mixture is light and smooth.
- Split the mixture in half so that you have two large bowls of buttercream. Add the green food colouring to one bowl and the pink to the other - start with a little and build on the colour, adding as necessary. Beat each one individually so that you have a bowl of green buttercream and a bowl of pink buttercream.
- When your sponges are completely cool, it’s time to decorate!
- Spoon a dash of one of the buttercreams onto a cake board/stand/plate and place your first sponge layer on top of it.
- Thinly pipe a green line slightly off centre (more towards the left) and a pink one right next to it, more to the right. This will guide your halves. Spread some of the pink buttercream on the pink half and do the same with the green, smoothing down the lines of buttercream into their own halves as neatly as you can. Dip your palette knife in hot water (allow excess water to drip off) and smooth the buttercream with this to help.
- Top with the last sponge layer and pipe the two lines, making sure to pipe all the way down the top and bottom of the heart to make this easier. Create a crumb coat using the two buttercreams, keeping the green on one half and the pink on the other. Chill in the fridge while you make your cake toppers.
- Decoration:
- Retrieve your cake from the fridge. Add more buttercream - either by piping or spatula - and smooth over the half you are working on first. Do the same with the other half so that you end up with a fully covered green side and a fully covered pink half.
- Using an open star piping tip, pipe around the top and bottom edges of the cake first. Start with one side, then be sure to clean your piping tip and use a fresh piping bag and pipe on the other half. Check the Top Tips section above for a technique tip.
- Repeat this process with the remainder of your decoration, using a leaf piping tip or other tip of your choice. Just be sure to practise with them on a plate before using them for your cake if needed.
- To finish, break the chocolate into shards and push them into the top of your cake.
Notes
This magical, whimsical Wicked inspired birthday cake is best enjoyed on the day, but will remain delicious for around 4+ days if stored in an airtight container/cake case/cake stand. It makes a very elegant cake fit for any Wicked themed birthday party. Enjoy!