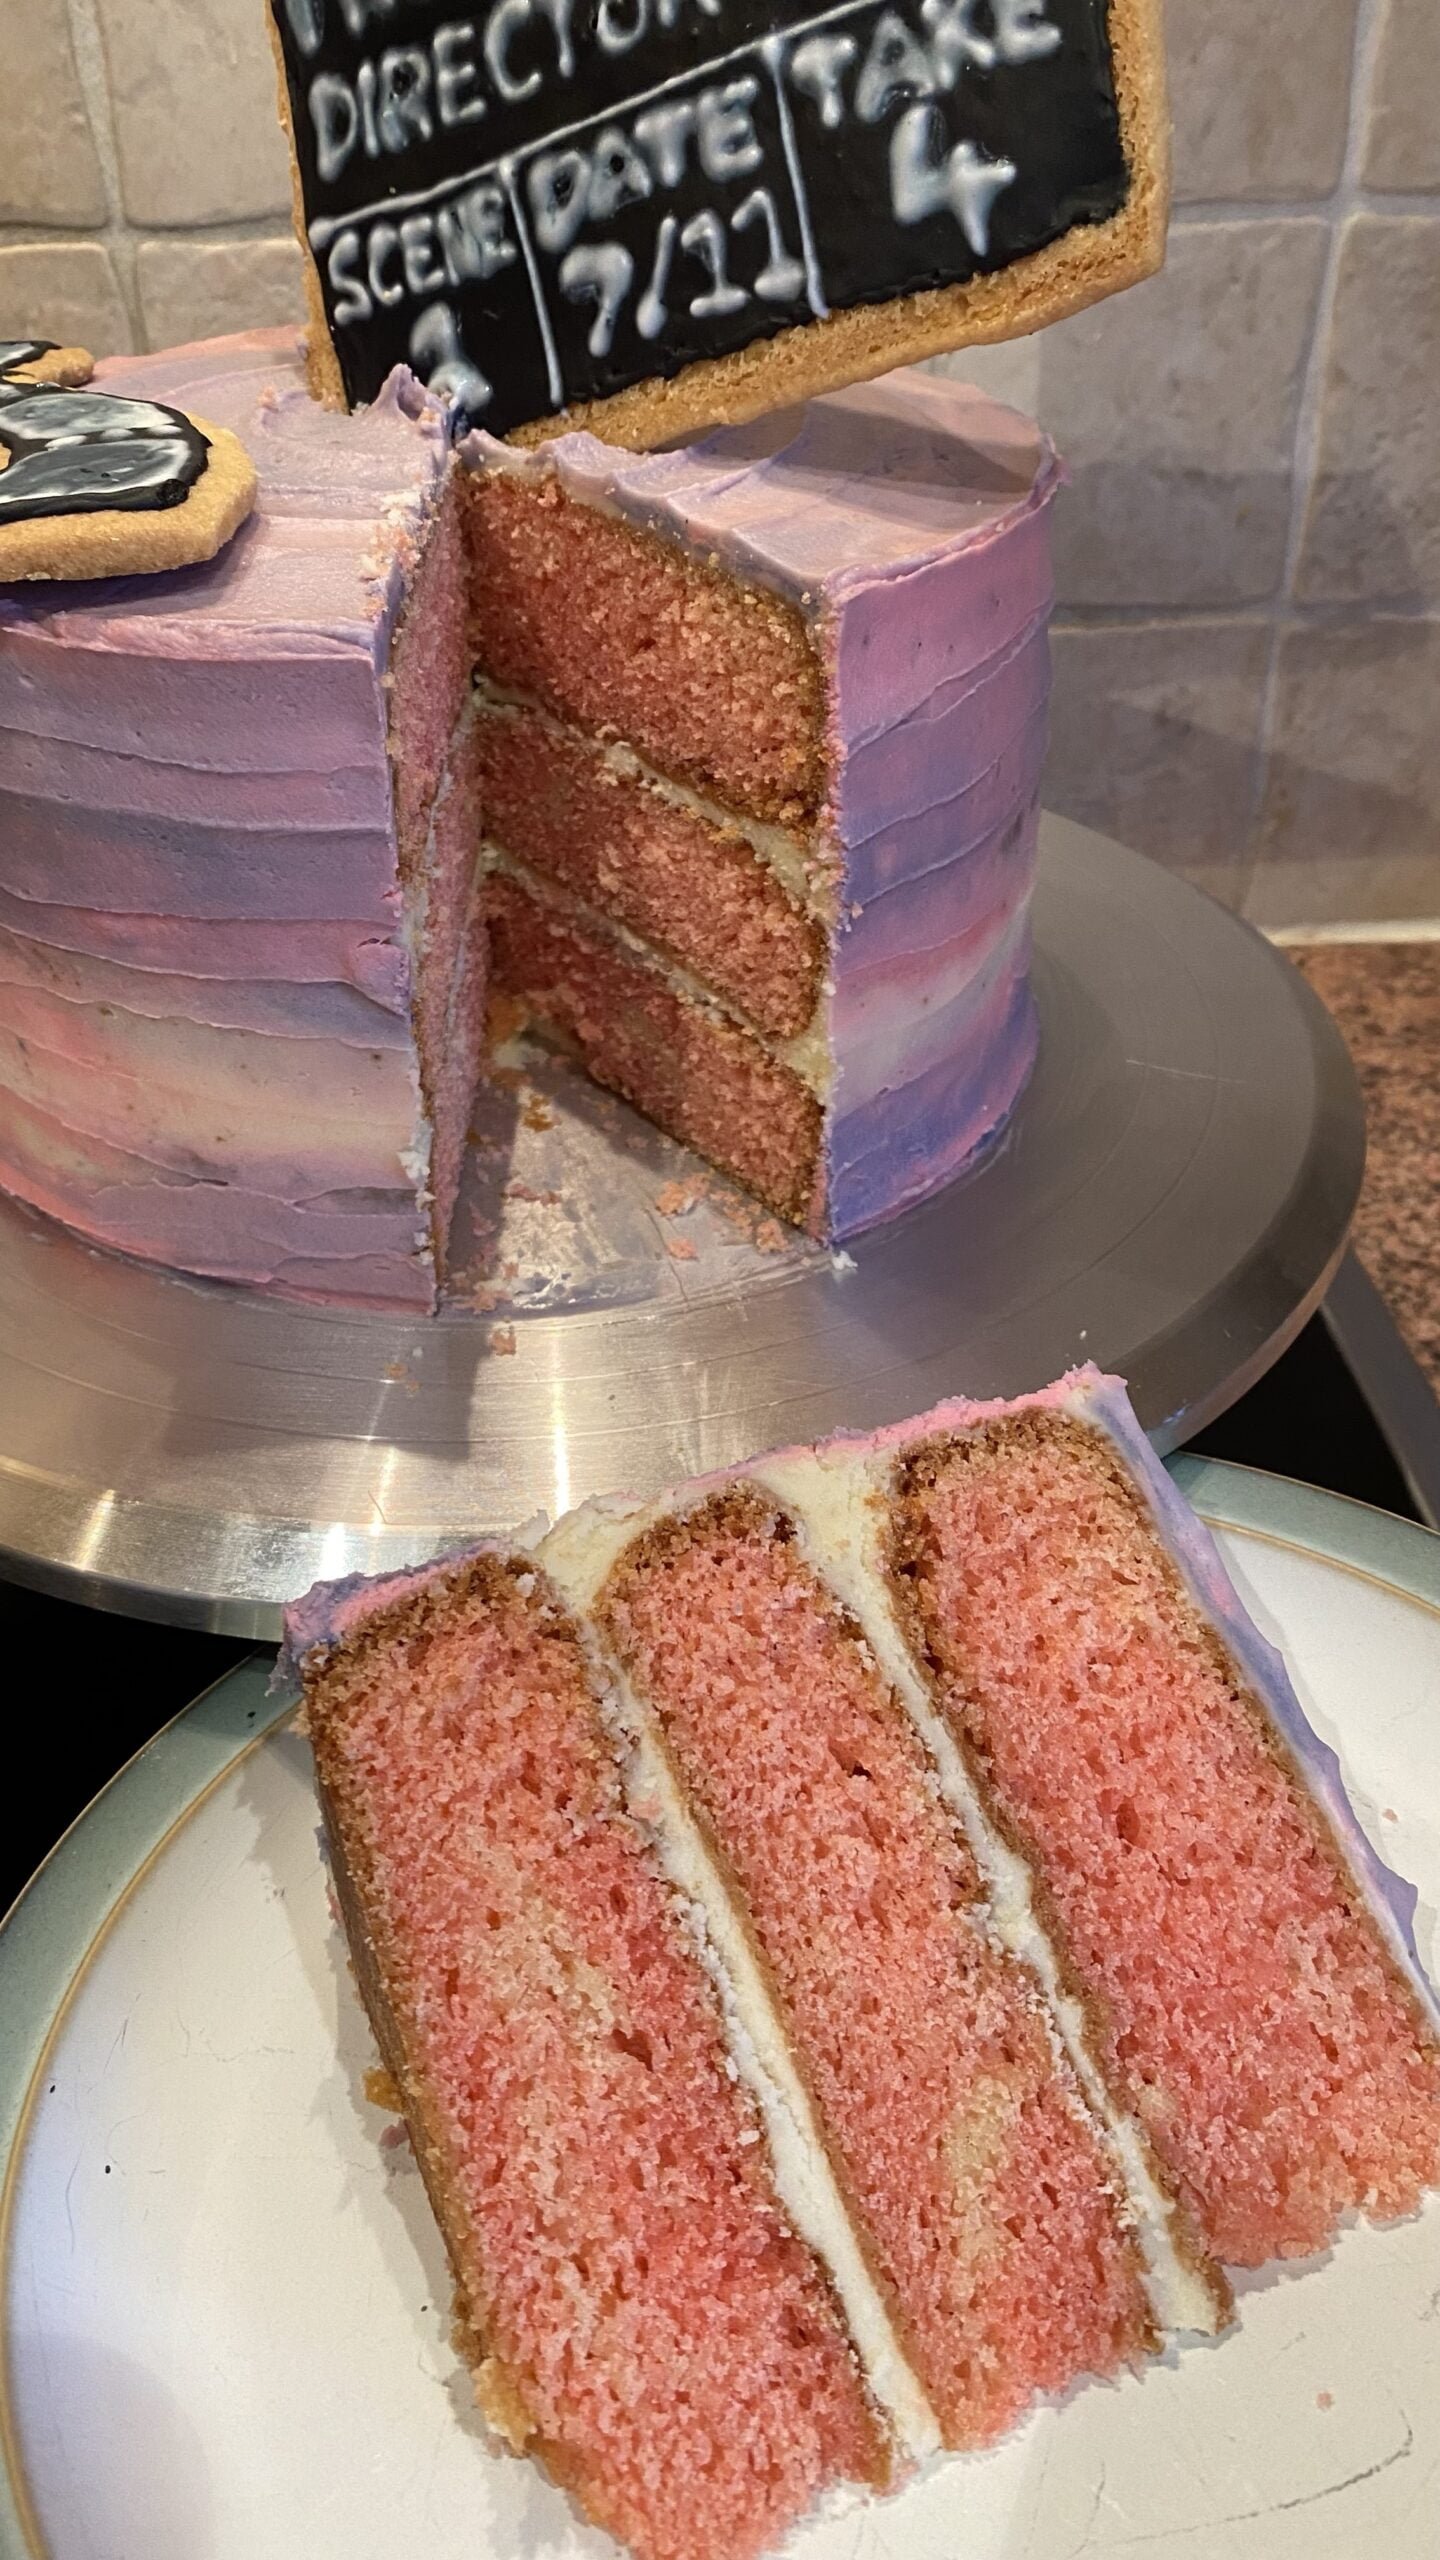
Clapperboard Cake | Flavour of the Film
A delicious vanilla sponge clapperboard cake with shortbread decorations and American buttercream.
Ingredients
Shortbread decorations:
- 100 g [3.5 oz] unsalted butter room temperature
- 50 g [¼ cup] caster sugar
- 150 g [¾ cups + 3 tbsp] plain flour [all-purpose flour]
OR
Gingerbread decorations:
- 185 g [1 cup + 2 tbsp] plain flour [all-purpose flour]
- 60 g [2 oz] unsalted butter very cold and cubed
- 85 g [¼ cup + 3 tbsp] light brown sugar
- ½ tsp bicarbonate of soda
- 1½ tsp ground ginger
- 2½ tbsp golden syrup
- 1 medium egg
Royal icing:
- 6 tbsp royal icing sugar
- 1 tbsp water
- ¼ tsp black food colouring
- In a separate bowl:
- 3-5 tbsp royal icing sugar
- ½ tbsp water
- White food colouring
Clapperboard cake:
- 400 g [2½ cups] self-raising flour
- 400 g [14 oz] unsalted butter room temperature
- 400 g [2 cups] caster sugar
- 400 g eggs about 8 medium eggs or 6 large eggs
- 2 tsp baking powder
- 4 tbsp whole milk
- ¼ tsp rose pink food colouring or your chosen colour
Decoration:
- 650 g [4¼ cups + 3 tbsp] icing [confectioners] sugar
- 300 g [10.5 oz] unsalted butter room temperature
- 2-4 tbsp whole milk
- Dash of three different food colourings adjust to preference
Instructions
For the shortbread:
- To make the shortbread, beat the butter to loosen it a little. Beat in the sugar until soft and fluffy. Add the flour and mix until a dough is formed.
- Roll your dough out until around 1-2 cm thick. It is important to have a sturdy biscuit for this recipe so don’t be afraid to make slightly thicker biscuits. This shortbread will bake well even when thick so long as you bake it for a little longer.
- Cut out your clapperboard and film cells and any other shapes you like if you have dough left.
- Carefully transfer your shapes onto a tray lined with baking parchment.
- Chill in the fridge for 30 minutes. Do not skip this step or you may end up with very flat, shapeless biscuits!
If making gingerbread:
- First preheat your oven to 190°C [370°F] or 180°C fan and set aside a baking tray with baking parchment over it.
- In a bowl, mix together the flour, ginger and bicarbonate of soda until combined. Add your cold butter and rub into the flour mix with your fingers until you reach a breadcrumb-like consistency. If you have a food processor then simply process everything in it until you reach the breadcrumb-like texture!
- Add the sugar and mix. Then, add the egg and golden syrup and beat together into a nice dough.
- Tip out onto a clean, floured surface and knead briefly. Roll the dough out until around 1cm thick. Cut out your gingerbread in the shape of your clapperboard: mine measured at around 15cm across and 13cm down but the size is completely your choice!
- Use the rest of your dough to make the film cells and any other shapes you fancy. It is better to roll out slightly thicker than you expect and bake for a little longer because it means for a sturdier biscuit.
- Carefully transfer your shapes onto the baking parchment on your trays and bake for 12-15 minutes. Keep an eye on them after 12 minutes – you want them to be baked and sturdy but not over done. If they don’t look ready after 15 minutes, just keep watching them until they are a lovely golden, gingery colour. Baking times can often depend on how hot your oven runs so just go with it.
Clapperboard cake:
- Whilst your shortbread is chilling, make your cake mix. First, grease and line three 20cm (8inch) tins and set aside. Preheat your oven to 180°C [350°F] or 160 fan.
- Beat the butter to loosen it and then beat in the sugar until light and fluffy.
- Add your eggs a couple at a time, beating in between. Add your milk and beat again.
- Beat in your flour and baking powder until combined but be careful not to overmix it.
- Add your food colouring and beat again until the colour is fully incorporated.
- Divvy up your cake mix into your three greased tins.
- First, take your shortbread out of your fridge and bake for 12-15 minutes. Keep an eye on them after 12 minutes as it depends on your chosen thickness for these biscuits, as well as how hot your oven runs. You want these biscuits to have a gorgeous golden brown colour when done.
- Leave to cool on your tray for at least 15 minutes and then transfer to a wire rack to cool completely.
- Bake your sponges (at the same temperature) for 28-35 minutes. If a skewer or cocktail stick comes out clean when you check your sponges, and the sponges themselves spring back when you lightly press your finger down on their tops, they are done. Another way to check is to listen to them: if they are making a bubbling sort of sound then they aren’t quite done yet! If they don’t “say” anything to you then they are ready.
- Take out your sponges and leave to cool in their tins for at least 10 minutes before transferring to a wire rack to cool completely.
Decoration:
- When your biscuits are completely cool, make your royal icing. Simply mix the royal icing sugar and water together until you have a thick but usable consistency. Add in the black food colouring (this will thicken it up slightly as well) and mix until combined.
- Spoon your colouring into a piping bag with a very tiny hole at the end. No need for a piping tip – just snip the end of your piping back off so that you have a very small hole.
- Pipe the outline of your clapperboard and film cells first. Simply follow the shape of your biscuit, leaving a small gap from the edge. If you go too close to the edge, you risk the icing spilling over.
- Do any further outlines you need if you have any extra shapes.
- “Flood” the outline you have just made by filling the shape in with your royal icing. You don’t need to cover every square inch of your shape’s middle – simply use a cocktail stick to help spread the icing you have flooded, pushing it gently to the outline and filling all of your gaps.
- Place your iced biscuits in the fridge for at least 4-5 hours, or overnight if possible, especially if you are piping the writing on rather than painting it.
- When your sponges are completely cool, make the buttercream for your cake.
- Beat the sugar to loosen it, then add in icing [confectioners] sugar a bit at a time, beating in between.
- Add in your milk 1 tbsp at a time until you get a nice fluffy, soft consistency. You may not need all of the milk, depending on the temperature of your kitchen.
- Dash a small amount of your buttercream onto your cake stand/board and place your first sponge on the top of it. Spread some buttercream over this sponge, then place the second one on top. Repeat for the third.
- Spread some of your buttercream over and around the entire cake, filling in the gaps between the sponges and creating a crumb coat (a coating of buttercream that is thin enough that you can still see the cake through it).
- Place your cake in the fridge.
- Separate the rest of your buttercream into different bowls and add your chosen food colouring into each one, mixing each one well.
- Get your cake from the fridge and spread patches of your different coloured buttercream all around and on top of your cake.
- Boil some water and pour it into a tall jug.
- Using a palette knife, smooth over your buttercream. This is most easy to do when you are holding the knife in a fist with your thumb at the bottom of the handle and you are rotating your cake stand around, holding the palette knife still and at a slight angle (edge leaning into the cake as if you are collecting the buttercream as you move the cake around).
- Use your boiled water to warm the palette knife and clean it in between rotating the cake. This allows for a smoother finish.
- If you are aiming for a finish similar to mine AKA more oil painting than flawless finish, hold your palette knife horizontally and press the tip of it into the buttercream gently, rotating your cake around, leaving a sort of trail in the buttercream. Move the tip of the knife up each time you reach the beginning point to cover the whole cake. Repeat on the top.
- Place your cake back in the fridge.
- When your biscuits are completely set, finish the decoration.
- For the white icing, mix the royal icing sugar and water together and add the white food colouring.
- If piping, transfer to another piping bag with a very small tip cut off at the end and pipe your writing. Get personal and creative with this part!
- If painting, skip the royal icing and simply mix a splash of vodka with some white food colouring and use a very thin brush to paint on your writing/detail.
- Once finished, place back in the fridge.
- When everything is cooled and set, make an incision in the top of your cake and sit your biscuit clapperboard into it. If you have baked shortbread, take extra care!
- Place the rest of your biscuits on and around your cake. You can use buttercream or royal icing as glue or even edible glue if you have any. Otherwise, stand/sit/lay your biscuits in any fashion you like!
- Cut and serve. Enjoy!
Notes
This clapperboard cake will last for about 3 or 4 days in an airtight container, but is at its peak when first finished. The buttercream will help to keep the cake from drying out but it is best not to leave it in the fridge uncovered for days at a time. Enjoy!